Advertisement
Quick Links
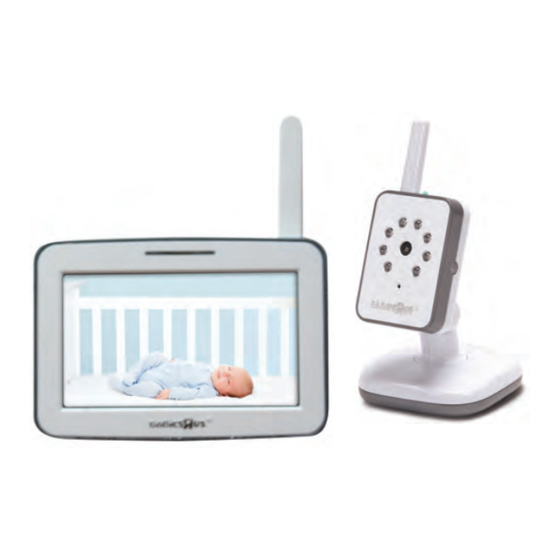
5" Color Flatscreen
Video Monitor
User Guide
5F62313
• Please read the following instructions and safety warnings
before you install the Video Monitor.
• Please retain these instructions for future reference
• Tool needed: Phillips Head Screwdriver (not included).
• Additional camera(s) (sold separately).
• For use with children from birth and up.
Features & Components
Monitor
I
A
C
E
B
F
J
D
G
A
Power ON Indicator/
G
Zoom Control Button & Enter
Sound Level Indicator
H
Video ON/OFF Button
B
5 inch Video Screen
I
Antenna
C
Power ON/OFF & Menu Button
J
Speaker
Rechargeable
D
AC Adapter Jack
K
Stand
Battery
E
Volume +/- Buttons & Menu Up/Down
L
Battery
F
Brightness +/- Buttons
Compartment
& Menu Left/Right
(for rechargeable
battery)
Security Clips (6)
Wall Anchor
Screw
AC Adapters (2)
Important Safety Warnings
WARNING!
Strangulation Hazard - Children have STRANGLED
in cords. Keep this cord out of the reach of children
(more than 3 feet (0.9 m) away).
To prevent cord entanglement and strangulations:
• Do not place the Camera or AC adaptor cord within reach
of children.
• Do not place the Camera or AC adaptor cord in, or attach it to,
a crib or playpen.
• Always fasten the AC adaptor cord of the Camera on the wall
with the security clips provided.
• Never use extension cords with AC adaptors.
Use only AC adaptors provided.
Important Safety Instructions:
• Adult assembly is required. Keep small parts away from
child's reach.
• This product is not a toy. Do not allow children to play with it.
• This Video Monitor is not a substitute for responsible
adult supervision.
• Test the Video Monitor and all its functions so that you are familiar
with it prior to actual use.
• When the power adaptor is plugged into an electrical outlet,
do not touch the exposed end.
Camera
H
M
M
Antenna
N
Nighttime Infrared LED Lights
N
O
Camera Lens
O
P
Microphone
P
L
K
Q
Power ON Indicator
R
Pair Button
S
Power ON/OFF Switch
T
AC Adapter Jack
U
Wall Mount Notch
V
Room Darkening
U
Automatic Sensor
Monitor Menu Icons
Important Safety Warnings
Signal Level (5 Levels)
Camera Selected (can pair up to 4 cameras,
additional cameras sold separately)
Battery Level or Charging Status (5 Levels)
Night Vision Mode (Video changes to Black and White)
Camera Scanning
(scan up to 4 Cameras with each scan duration of 10 seconds)
Volume Level Control (8 Levels)
Brightness Level Control (8 Levels)
Zoom Level Control (1x, 2x)
Important guidelines for installing your Video Monitor
The Monitor and Camera use a 2.4 GHz radio frequency to synchronize
to each other. The range for this frequency may be affected by environmental
conditions in your home such as; walls, floors, ceilings, Wi-Fi routers, microwave
ovens, cordless phones, Bluetooth devices, home computers, among other
electronic devices. It is recommended to keep your Monitor away from
Q
these types of devices at least 5 feet. If the signal is weak, try moving the
Monitor and/or Camera to different positions in the rooms.
R
Getting Started
S
Camera:
1 Connect Camera to AC outlet.
T
2 To turn ON, slide the ON/OFF switch to the ON position.
The Power ON Indicator will illuminate green.
3 To turn OFF, slide the ON/OFF switch to the OFF position.
Monitor:
1 Battery Installation: Install the rechargeable battery included.
2 Connect Monitor to AC outlet.
V
3 To turn ON, press and hold the Power ON/OFF button for 3 seconds until
"Hello" screen disappears.
4 Now that the Monitor and Camera are turned on, video captured by
the Camera will appear on the video screen.
5 To turn OFF, press and hold the Power ON/OFF button for 3 seconds until
the "Goodbye" screen disappears.
IMPORTANT: The Camera and Monitor are already paired; in the event that the
connection is lost you will need to pair the Camera to the Monitor.
To pair, follow the steps provided under "Using Video Monitor" section.
Battery Installation & Use
BATTERY WARNING!
• ONLY use the rechargeable battery* provided.
• ALWAYS keep battery away from children.
• Clean battery and product contact prior to battery installation.
• Do not short-circuit supply terminals.
• ALWAYS remove battery if you do not intend to use the
product for an extended period of time. Battery left in the
unit may leak and cause damage.
• Risk of explosion if battery is replaced by an incorrect type.
Discard leaky batteries immediately to avoid skin burns
or other personal injury. Discard batteries properly according
to local regulations.
• Change battery when unit no longer functions properly.
• Recharge battery only under adult supervision.
CAUTION:
• Risk of explosion if battery is replaced by incorrect type.
* To order a new rechargeable battery pack, visit WWW.BABIESRUS.COM.
Instructions continued on reverse side.
Set-up of your Camera
Once you have successfully established a connection between the Camera and
Monitor, it is time to determine a safe location to place the Camera.
IMPORTANT: Never place Camera or cords within 3 feet (0.9 m) of children's reach.
Determine a safe location for the Camera that will provide the best view of
your baby. Place the Camera on a flat surface, such as a dresser, bureau,
or shelf or wall mount it using the supplies provided. If you choose to wall
mount the Camera, ALWAYS use the security clips provided to secure the
cord to the wall.
Place the Camera and cords more than 3 feet (0.9m) away from your child
Place the Camera and cords more than 3 feet (0.9m) away from your child
Advertisement

Related Manuals for Babies R' Us 5F62313

Summary of Contents for Babies R' Us 5F62313
-
Page 1: Battery Warning
• This product is not a toy. Do not allow children to play with it. • This Video Monitor is not a substitute for responsible User Guide 5F62313 • Risk of explosion if battery is replaced by incorrect type. adult supervision. -
Page 2: Menu Options
Using your Video Monitor Troubleshooting No video display on screen • Are the Monitor and Camera plugged in to a working electrical outlet? Night Vision Mode Volume – Make certain any light switches that control power to the wall outlet are ON. The Camera features eight Infrared LEDs around the lens designed to capture To adjust volume, press up (+) or down (-).