Advertisement
CAB INSTALLATION INSTRUCTIONS
JOHN DEERE 4000 SERIES (4500/4600/4700)
(4510/4610/4710) (4120/4320/4520/4720)
HARD SIDED CAB ENCLOSURE (p/n: 1JD4120AS)
SOFT SIDED CAB ENCLOSURE (p/n: 1JD4120SS)
The contents of this envelope are the property of the owner.
Be sure to leave with the owner when installation is complete.
This Curtis Cab is designed and
manufactured for use only as reasonable
weather protection. This cab is not appli-
cable, Nor should the cab be considered as protection against
roll over, collision or other accidents that may result. This cab is
NOT a R.O.P.S. cab. Extreme care should be taken when operat-
ing and by qualified, experienced operators only
CABS/BLADES/ SPREADERS/ACCESSORIES
Exposure to Carbon Monoxide can Cause
illness, serious injury or death. Never
operate vehicle if suspicious of Carbon
Monoxide. Inspect exhaust system for leaks monthly. Leaks can
result from loose connections, corrosion, cracks or other damage
to the exhaust manifold. If leaks are found, repair or replace
.
exhaust system. Do not use vehicle until repair or replacement is
complete.
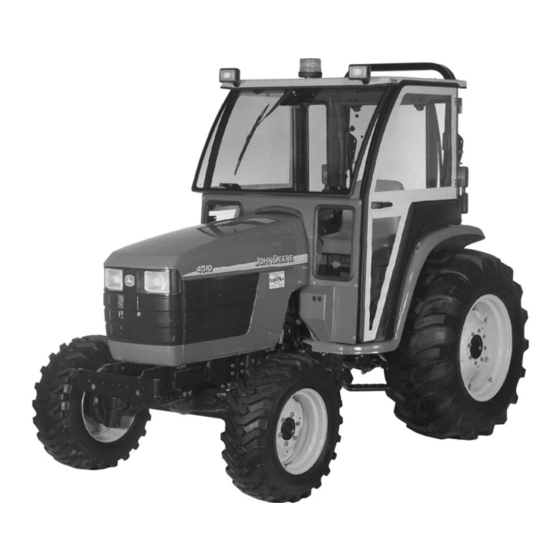
Note: 4510 shown with soft sided
cab and optional work lights and
optional strobe light.
ADDED
WEIGHT
Curtis Cabs, blades and general accessories
add additional weight to the base vehicle. All
Curtis accessory weights are listed in product
brochures. Deduct the accessories total weight
from the vehicles rated capacity and never
exceed the vehicles rated capacity including
driver and passenger.
Rev. T, p. 1 of 11
p/n: IM-1JD4120
Advertisement
Table of Contents

Summary of Contents for Curtis JOHN DEERE 4500
- Page 1 NOT a R.O.P.S. cab. Extreme care should be taken when operat- to the exhaust manifold. If leaks are found, repair or replace Curtis accessory weights are listed in product exhaust system. Do not use vehicle until repair or replacement is ing and by qualified, experienced operators only brochures.
-
Page 2: Design Concept
DESIGN CONCEPT Curtis Cabs feature an assembly of parts designed for your vehicle which require adjustment and alignment of components to accommodate vehicle variations and provide proper weather protection. For accurate installation, proper operation, and years of satisfaction, please read and understand the installation instructions. -
Page 3: Rear Panel Assembly
1. VEHICLE PREP. 1.1 Remove both grab handles (one per side) (see fig. 1.1). 1.2 Remove, and discard the outer bolt and nut in each floorboard (see fig. 1.1). 1.3 Remove, and save two (2) plastic pins (per side) holding the floor mat down (see fig. - Page 4 3. FRONT COWL For the 10 Series models (ref.: 4510, 4610, and 4710): Pre-assemble the cowl and the cowl insert using a total of four bolts (5/16-18 x 3/4” long), eight steel washers, four nylon washers, and four locknuts. Note: fig. 3.1 shows the cowl insert and which four holes to bolt up initially (bolt location “A”).
-
Page 5: Side Frames
3. FRONT COWL (cont’d.) For all models, place the cowl assembly onto the tractor with the flap of bulb rubber extended inward towards the passenger’s compartment as shown in fig. 3.4. 4. SIDE FRAMES Remove doors from side frames (for easier handling) by unlatching and slid- ing up and off the hinge pins.. - Page 6 6. WINDSHIELD (continued) To close, grasp the windshield bottom edge and lift slightly while pushing closed. Fully close latches. Align sides of windshield with side frames and tighten hinges. HINGES ARE PLASTIC COMPONENTS. DO NOT OVER TIGHTEN. TORQUE TO 7 FT./LBS. MAX. threaded inserts here 7.
- Page 7 8. REAR WINDOW (continued) 3/4” spacer Install rear window using same procedure as windshield. Once aligned and tightened, open window and install gas springs to ball studs provided. Re- lease latches from latch mounts and open window all the way in order to snap the gas springs onto the ball studs.
-
Page 8: Finishing Touches
11. REAR CURTAIN (soft sided only) 11.1 Install rear curtain by snapping to the inside back vertical edge of the roof. (see fig. 11.1) 11.2 (NOTE: adhesive backed velcro should be applied to a clean, dry surface at room temperature.) Apply self adhesive hook velcro, as needed, along the rear legs and rear panel. -
Page 9: Important Notice
Care and Maintenance Instructions * Check and tighten hardware after 40 hours of operation. Periodically inspect and tighten hardware for the remainder of the unit’s life. * Wash the painted surfaces of the unit with commercial automotive cleaning products. * Clean windows with glass cleaner. * Vinyl components should be washed with a mild solution of warm soapy water. - Page 10 J.D. 4000 SERIES HARD SIDED CAB PARTS LIST (p/n: 1JD4120AS) ROOF WINDSHIELD QTY. REAR WINDOW QTY. QTY. JD4510-02 JD4510-01 JD4510-03 YELLOW SEAM BULB HINGES SEAM BULB REFLECTORS GAS SHOCK MOUNTS (FACE OUT) HINGES HEADLINER 5/8" PLUGS SIDE 5/8" BULB 1/4" GRIP SIDE LOGO BULB...
- Page 11 J.D. 4000 SERIES SOFT SIDED CAB PARTS LIST (p/n: 1JD4120SS) ROOF WINDSHIELD REAR CURTAIN QTY. QTY. QTY. JD4510-02 JD4510-01A JD4510-13 YELLOW REFLECTORS SEAM BULB SNAPS HINGES HEADLINER 5/8" SIDE LOGO BULB TRIM-LOK 1/4" GRIP 3 SIDES LATCHES REAR FILLER QTY. JD4510-16 FRONT LEGS QTY.

