Table of Contents
Advertisement
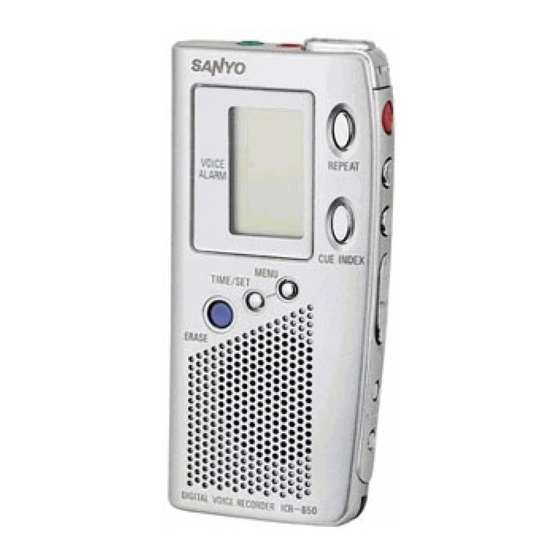
INSTRUCTION MANUAL
Digital Voice Recorder
SANYO'S HELP-LINE
Call the toll-free number below if you have any difficulties operating this
product.
1-877-999-1840 (Weekdays 8:00 AM - 5:00 PM, Pacific Time)
LlNEA DE CONSULTA SANYO
Llame gratis al número indicado a continuación si tiene dificultades al
utilizar este producto.
1-877-999-1840 (días laborables de 8:00 AM a 5:00 PM, hora del Pacífico)
1AD6P1P1429--A
ICR-B50, Issue Number 2, Printed in China
ICR-B50
ENGLISH
ESPAÑOL
Advertisement
Table of Contents

Related Manuals for Sanyo ICR-B50


Summary of Contents for Sanyo ICR-B50
- Page 1 LlNEA DE CONSULTA SANYO Llame gratis al número indicado a continuación si tiene dificultades al utilizar este producto. 1-877-999-1840 (días laborables de 8:00 AM a 5:00 PM, hora del Pacífico) 1AD6P1P1429--A ICR-B50, Issue Number 2, Printed in China ICR-B50 ENGLISH ESPAÑOL...
-
Page 2: Table Of Contents
ENGLISH CONTENTS ACCESSORIES ... 2 PRECAUTIONS ... 2 CONTROLS ... 3 POWER SUPPLY ... 4 BEFORE OPERATION ... 5 SELECTING THE MENU MODE ... 7 RECORDING ... 9 PLAYBACK ... 12 ERASING ... 15 VOICE ALARM TIMER ... 17 PC (Personal Computer) CONNECTION ... 18 CLEANING THE CABINET ... -
Page 3: Accessories
3. Press the reset switch (back of the unit) using a small ball-point pen, etc. (Fig. 1) 4. Resume operation. Important Information: Because its products are subject to continuous improvement, SANYO re- serves the rights to modify product designs and specifications without notice and without incurring any obligation. Parallel port adaptor x 1... -
Page 4: Controls
CONTROLS 1 2 3 1. Earphone jack (EAR) 2. External microphone jack (MIC) 3. Built-in microphone (MIC) 4. Record button (m)/Pause 5. Repeat button (REPEAT) 6. Stop button (n) - ON/OFF button 7. Play button (a)/Pause 8. Cue index button (CUE INDEX) 9. -
Page 5: Power Supply
FOR DETAILED INFORMATION, CONTACT YOUR LOCAL COUNTY SOLID WASTE AUTHORITY. AC adaptor Connect the AC adaptor (SANYO Model No. 3CV-120US, not supplied) to the EXT DC 3V jack. (The batteries are automatically disconnected.) • The center pin of the EXT DC 3V jack is positive (+). -
Page 6: Before Operation
BEFORE OPERATION Earphone Connect an earphone (8 ohms, cord length less than 2 meters (6 feet, 6 inches), not supplied) to the EAR jack. (The speaker is automatically dis- connected.) Note: Be sure to reduce the volume before connecting or disconnecting the earphone. - Page 7 Adjusting the date and time 1. Press the MENU button repeatedly until the date and time display ap- pears. 2. Press the TIME/SET button. The year display blinks. 3. Press the c or d button repeatedly to select the year. 4.
-
Page 8: Selecting The Menu Mode
SELECTING THE MENU MODE 1. Press the MENU button repeatedly to select the desired menu mode. Each time the button is pressed, the display changes as follows: FOLDER v EDIT v AUTO PAUSE v Date and time v VAS v REC v BEEP v ERASE GUARD v 12/24 v Original display returns 2. - Page 9 Date and time (See “Adjusting the date and time”.) VAS (Voice activated system): Selecting VAS mode VAS OFF wv VAS ON VAS OFF: To start and stop recording manually VAS ON: Recording begins when the unit picks up sound, and stops after the sound stops.
-
Page 10: Recording
RECORDING 1. Press the n button to turn the power on. 2. Set the REC MODE switch (back of the unit) to select the desired recording mode. DIC (Dictating): “ CONF (Conference): “ LECT (Lecture): “ Note: If an external microphone (not supplied) is connected, the recording mode cannot be changed. - Page 11 • If the CUE INDEX button is pressed during re- cording, an index mark is made (INDEX number appears briefly) and recording continues. (Up to 16 index marks, for each file, can be made. Index marks cannot be deleted individually.) File number Each time a recording is made, a file number is automatically placed in the memory at the beginning of the recording.
- Page 12 Insertion recording To insert into a file (Previous recorded material will remain.) 1. Select the “INSERT” edit mode. “INSERT” appears on the display. (See “SELECTING THE MENU MODE”.) 2. Locate the desired point during playback, then press the a button to pause.
-
Page 13: Playback
PLAYBACK 1. Set the PLAY SPEED switch (back of the unit) to SLOW, STD, or FAST. SLOW: Slow-speed playback STD: Standard-speed playback FAST: Fast-speed playback 2. Select the desired folder name. (See “SELECTING THE MENU MODE”.) 3. Press the a button. Folder name Current file number •... - Page 14 Auto pause When the end of the file is reached during playback, “AUTO” and “PAUSE” appear in turn. The unit pauses automatically for the preset auto pause time. After the set time elapses, the next file playback begins. Press the a button during auto pause to return to the normal pause mode. File skip Press the c or d button to skip to the desired file.
- Page 15 Time display Press the TIME/SET button repeatedly during recording, playback and stop mode. The display changes as follows. In recording mode Recording time mode, Current file number/Total file number, Remain- ing recording time v Current time v Original display returns. Example of remaining recording time: Recording time mode...
-
Page 16: Erasing
ERASING Important Note: Before erasing, make sure that the battery indicator is full. Preparations 1. Press the MENU button to select “FOLDER”. 2. Press the TIME/SET button. The folder name blinks. 3. Press the c or d button to select the folder to be erased, then press the TIME/SET button. - Page 17 Partial erasing (A-B erasing) 1. Press the c or d button to select the file number. 2. Press the a button to start playback. 3. Press the a button again to pause at the starting point you want to erase (point A). 4.
-
Page 18: Voice Alarm Timer
VOICE ALARM TIMER 1. Press the n button to turn the power on. 2. Select the sub-menu “ALARM” of “FOLDER”. (See “SELECTING THE MENU MODE”.) “FOLDER ALARM” appears. 3. Press the n button to return to the original display mode. 4. -
Page 19: Pc (Personal Computer) Connection
PC (Personal Computer) CONNECTION Important Note: Your PC must run the Windows98 operating system with parallel port. Windows is a registered trademark of Microsoft Corporation. Playing back/Editing a data file recorded with your PC Digital voice recordings can be transferred to the PC for playback or editing. Before you start, install the “PC Memo Scriber”... - Page 20 Operation 1. Connect the unit to the PC using the Parallel port Adapter as shown in Fig. 17. DIGITAL I/O jack 2. Press the n button to turn on the power. 3. Operate your PC. (Follow the instructions on the CD-ROM.) When the “PC Memo Scriber”...
- Page 21 2) Select [Sanyo ICR-B50 Wavefile] in the [Input Device] field. 3) Click [Add/Modify] or [Add User]. The “ViaVoice User Wizard” screen appears. 4) Select “First Voice Model [Sanyo ICR-B50 Wavefile]” in the “Voice Model” field. Select “[Sanyo ICR-B50 Wavefile]” in the “Device” field.
- Page 22 6. Speak into the unit to record your voice. Notes on enrolling (Fig. 18) It is important to place the unit in a proper position to achieve maximum recognition precision during the transcription process. • Place the unit 5 to 8 cm (2 to 3 inches) away from your mouth. •...
- Page 23 Important Note: When you attempt to transcribe a data file of the ICR-B50, be sure to enroll by using the ICR-B50. If you enroll data by using the headset supplied with ViaVoice, an extremely low recognition rate results. Note: IBM ViaVoice Millennium must be used.
-
Page 24: Cleaning The Cabinet
CLEANING THE CABINET Clean the outside of the unit with a clean soft cloth, moistened with lukewarm water. Do not use benzene, thinner or alcohol since they will mar the finish of the surfaces. -
Page 25: Troubleshooting Guide
TROUBLESHOOTING GUIDE SYMPTOM POSSIBLE CAUSE CORRECTIVE ACCTION The unit does not operate. The batteries are discharged or not installed. Insert two new “AAA” batteries. “ ” appears. The batteries are discharged. Insert two new “AAA” batteries. “HOLD” appears when the operation button is pressed. Hold function is set. -
Page 26: User License Agreement
THIS USER LICENSE AGREEMENT (“this Agreement”) shall serve as a legally binding instrument between you (as “Licensee”, whether an individual or a corporation, regardless) and SANYO Technosound Co., Ltd. (“Licen- sor”) concerning the Licensee’s use of a single SANYO SOFTWARE PRODUCT (“the Software”) under the terms and conditions set forth herein. - Page 27 1. Grant of License. Licensor shall grant Licensee a non-exclusive, non- sublicensable, non-transferable license for the use of the Software under the terms and conditions set forth herein: • System Software Licensee may use the Software only in a single computer or on a computer network (“the Computer”, including without limitation, worksta- tion, terminal, and/or other digital or electronic device) in binary execut- able form.
- Page 28 purposes or otherwise any and all technical information (the “Technical Information”) provided by Licensee to Licensor, provided, however, that Licensor shall ensure that the identity of the Licensee shall remain undisclosed in the Licensor’s use of all such Technical Information. 3.
- Page 29 5. DISCLAIMER OF WARRANTY: THE SOFTWARE IS DEEMED ACCEPTED BY LICENSEE UPON IT’S USE BY LICENSEE. THE SOFTWARE IS PROVIDED TO LICENSEE AS IS, WITHOUT WARRANTY OF ANY KIND. TO THE MAXIMUM EXTENT PERMIT- TED BY APPLICABLE LAW. LICENSOR FURTHER DISCLAIMS ALL WARRANTIES, INCLUDING WITHOUT LIMITATION, ANY IMPLIED WARRANTIES OF MERCHANTABILITY, FITNESS FOR A PARTICU- LAR PURPOSE, AND NON INFRINGEMENT.
- Page 30 6. Indemnification: Licensor will not have any liability to Licensee for, and Licensee will defend and hold Licensor harmless against, any claim, expense, judg- ment, liability, or loss (including attorneys’ fees and expert witnesses’ expenses) based on Licensee’s use of any content of the Software, arising from any intellectual property claim (including patent, trademark, copyright, or trade secret infringement), any right of publicity or privacy claim, or any defamation or unfair competition claim.
-
Page 31: Fcc Information
DC: DC 3V (2 “AAA” batteries) Loudspeaker 8 ohms (1.1" Dia.) Tested To Comply With FCC Standards : ICR-B50 : Sanyo : SANYO FISHER COMPANY : 21605 Plummer Street Chatsworth, California 91311 : (818) 998-7322 Output terminal EAR: 8 ohms (1/8" Dia.) Dimensions Approx.1.8"... -
Page 32: Warranty (For Usa)
SANYO SERVICE PLUS LIMITTED DICTATION PRODUCTS ONLY In order to obtain factory warranty service for Sanyo Dictation Products, call the toll-free number below. The unit must be packed in the original carton or a well-padded sturdy carton in order to avoid shipping damage. - Page 33 Subject to the OBLIGATIONS above and EXCLUSIONS below, SANYO FISHER COMPANY (SFC) warrants this SANYO Dictation product against defects in materials and workmanship for the periods of LABOR and PARTS specified below. SFC will, at its option, within two business days after its receipt of any dictation product that fails to conform to this warranty at SFC’s...
- Page 34 THE DURATION OF ANY WARRANTIES WHICH MAY BE IMPLIED BY LAW (INCLUDING THE WARRANTIES OF MERCHANTABILITY AND FIT- NESS) IS LIMITED TO THE TERM OF THIS WARRANTY. IN NO EVENT SHALL SFC BE LIABLE FOR SPECIAL, INCIDENTAL OR CONSEQUEN- TIAL DAMAGES ARISING FROM OWNERSHIP OR USE OF THIS PROD- UCT, OR FOR ANY DELAY IN THE PERFORMANCE OF ITS OBLIGA- TIONS UNDER THIS WARRANTY DUE TO CAUSES BEYOND ITS CON- TROL.
-
Page 35: Warranty (For Canada)
SANYO CANADA INC.’S RESPONSIBILITY During the warranty period, SANYO Canada Inc. will repair, or at our option, replace a Sanyo Dicta Recorder product which shows evidence of a manufacturing defect in materials or workmanship. - Page 36 NANCE necessary in respect of the product. WARRANTY BECOMES VOID This warranty becomes void if the product’s serial numbers are altered or removed or if any repair to the product is made other than by SANYO Canada Inc. or by an authorized Sanyo Service Depot. LIMITATIONS (a) SANYO Canada Inc.
- Page 37 HOW TO OBTAIN WARRANTY SERVICE Please contact the Sanyo Authorized Dealer from whom the product was purchased, or contact us directly at: SANYO Canada Inc. 300 Applewood Crescent Concord, Ontario L4K 5C7 (905) 760-9944 1-800-263-2244 http://www.sanyocanada.com SDR 00/06 (R9) For your protection in the event of theft or loss of this product, please fill in the information below for your own personal records.