
Related Manuals for Sanyo DVC-2500


Summary of Contents for Sanyo DVC-2500
- Page 1 INSTRUCTION MANUAL DVD Player + Video Cassette Recorder Lecteur DVD + Magnétoscope à cassette DVC-2500 English Français i n d ex...
-
Page 2: Safety Precautions
Safety Precautions WARNING RISK OF ELECTRIC SHOCK DO NOT OPEN WARNING: WARNING: CAUTION: ATTENTION: WARNING: NOTE TO CABLE/TV INSTALLER: CAUTION: CAUTION: FCC WARNING: REGULATORY INFORMATION: FCC Part 15 NOTES ON COPYRIGHTS: SERIAL NUMBER:... -
Page 3: Important Safety Instructions
IMPORTANT SAFETY INSTRUCTIONS CAUTION: PLEASE READ AND OBSERVE ALL WARNINGS AND INSTRUCTIONS IN THIS OWNER’S MANUAL AND THOSE MARKED ON THE UNIT. RETAIN THIS BOOKLET FOR FUTURE REFERENCE. DO NOT REMOVE THE CABINET COVER, OR YOU MAY BE EXPOSED TO DANGEROUS VOLTAGE. REFER SERVICING TO QUALIFIED SERVICE PERSONNEL ONLY. -
Page 4: Important Safety Instructions
IMPORTANT SAFETY INSTRUCTIONS (Continued) 18. Accessories 19. Damage Requiring Service 20. Servicing 21. Replacement parts 22. Safety Check 23. Disc Tray 24. Burden 25. Connecting 26. Sound Volume 27. Sound Distortion 28. Earphone 29. Laser Beam 30. Disc... -
Page 5: Table Of Contents
Table of Contents Introduction Safety Precautions ......2 IMPORTANT SAFETY INSTRUCTIONS..3-4 Table of Contents . -
Page 6: Before Use
Before Use Playable Discs Notes Notes on DVDs Regional code of the DVD+VCR and DVDs Note on DTS-encoded CDs Disc-related terms Title (DVD only) Chapter (DVD only) Track (audio CD only) Remote control battery installation Caution Remote Control Operation Range Distance: Angle: IMPORTANT NOTE:... -
Page 7: Before Use
Before Use (Continued) Precautions Handling the unit When shipping the unit When setting up the unit To keep the surface clean Cleaning the unit To clean the cabinet To obtain a clear picture Notes on Discs Handling discs Storing discs Cleaning discs About Symbols About the... -
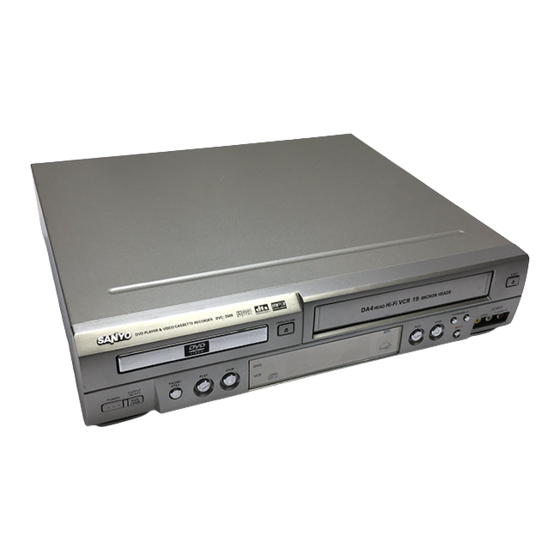
Page 8: Front Panel
Front Panel Disc Tray (DVD deck) EJECT(Z Z ) CHANNEL (v v /V V ) Cassette Compartment (VCR deck) Remote Sensor Display window OPEN/CLOSE (Z Z ) PLAY (B B ) DVD/VCR indicator STOP (x x ) STOP (x x ) REC (z z ) PLAY (B B ) PAUSE/STILL(X X ) -
Page 9: Display Window
Display Window HI-FI PROG. TITLE CHP/TRK TIMER PROG. TITLE CHP/TRK TIMER SP LP EP HI-FI... -
Page 10: Remote Control
Remote Control DVD/VCR select button POWER TV/VCR DISPLAY, CLK/CNT b B v V (left/right/up/down) CH/TRK v V SETUP, MENU TITLE PAUSE/STEP (X X ) STOP (x x ) REC (z z ) 0-9 numerical buttons AUDIO SUBTITLE MARKER SEARCH REPEAT RANDOM, Ad JUMP A-B, SP/EP OPEN/CLOSE, EJECT (Z Z ) -
Page 11: Rear Panel
Rear Panel DVD/VHS OUT (VIDEO/AUDIO (Left/Right)) VHS IN LINE 1 (VIDEO IN/AUDIO IN (Left/Right)) AC Power Cord COMPONENT VIDEO OUT (Y Pb Pr) (DVD OUT) ANTENNA INPUT RF OUT(DVD/VHS OUT) S-VIDEO OUT (DVD OUT) VIDEO OUT (DVD OUT) Do not touch the inner pins of the jacks on the rear panel. -
Page 12: Connections
Connections Tips Connecting to optional equipment Caution Connecting Antenna/Cable TV to DVD+VCR Antenna Antenna Flat Wire (300 ohm) 300/75 ohm Adaptor (Not supplied) Rear of DVD+VCR Without Cable Box With Cable Box To view or record CATV channel Notes Cable TV Wall Jack Rear of DVD+VCR Back Panel of... -
Page 13: Basic Tv Connections
Connections (Continued) Basic TV Connections RF coaxial connection Note How to set the DVD+VCR’s RF output channel Audio/Video connection (A1) Note Rear of TV VIDEO ANTENNA AUDIO INPUT INPUT INPUT Rear of DVD+VCR Optional, Preferred TV Connections Notes For using S-VIDEO OUT or COMPONENT VIDEO OUT jack, set the “TV Output Select”... - Page 14 Connections (Continued) Optional, Preferred TV Connections Note (A2) (A1) Connecting to an amplifier equipped with two channel analog stereo or Dolby Surround (A1, A2) Connecting to an amplifier equipped with two channel digital stereo (PCM) or to an Audio/Video receiver equipped with a multi-channel decoder (Dolby Digital™, MPEG 2, or DTS) Digital Audio Output Digital Multi-channel sound...
-
Page 15: Before Operation - Vcr Part
Before Operation - VCR Part On-Screen Display (OSD) ❶ ❷ ❸ ❹ PLAY HI-FI CH 4 STEREO JUL 5 , FRI 2:15 PM ❻ ❼ ❶ TAPE SPEED DISPLAY ❷ FUNCTION DISPLAY ❸ HI-FI DISPLAY ❹ CHANNEL DISPLAY ❺ STEREO/SAP DISPLAY ❻... -
Page 16: Setting The Vcr Setup Menu
Before Operation - VCR Part (Continued) Setting the VCR Setup Menu Press MENU and the MAIN menu will appear. Press v v /V V to select the VCR SETUP menu, then press SELECT/ENTER. SET CLOCK TIMER RECORD CHANNEL SETUP VCR SETUP SELECT ENTER TO EXIT PRESS... - Page 17 Before Operation - VCR Part (Continued) Setting the Clock Things to know before starting JANUARY 1, 2002, 12:00 AM Auto Clock Set Press MENU and the MAIN menu will appear. Press v v /V V to choose the SET CLOCK menu. Press SELECT/ENTER and the SET CLOCK menu will appear.
-
Page 18: Before Operation - Dvd Part
Before Operation - DVD Part General Explanation On-Screen Display On-screen display operation Press DISPLAY during playback. Use v v /V V to select an option. Use b b /B B to change the setting of an option. Options 0:16:57 1 ENG 6 CH NORM. -
Page 19: General Operation
Before Operation - DVD Part (Continued) Initial Settings General Operation Press SETUP. Original Disc Audio Disc Subtitle English Disc Menu French Rating German Spanish Password TV Aspect Italian Menu Language Chinese TV Output Select Polish Digital Audio Output Hungarian 5.1 Speaker Setup Russian Other —... -
Page 20: Sound
Before Operation - DVD Part (Continued) Sound Digital Audio Output DOLBY DIGITAL/PCM: Stream/PCM: PCM: DOLBY Disc Audio DIGITAL Disc Subtitle Stream/PCM Disc Menu Rating Password TV Aspect Menu Language TV Output Select Digital Audio Output 5.1 Speaker Setup Others Others Dynamic Range Control (DRC) /PCM Vocal... -
Page 21: Parental Control
Before Operation - DVD Part (Continued) Parental Control Rating Disc Audio Disc Subtitle Disc Menu Rating Password TV Aspect Menu Language TV Output Select Digital Audio Output Unlock 5.1 Speaker Setup Others Select Rating on the Setup menu using v v /V V buttons. -
Page 22: Operation With Tape
Operation with tape Normal Playback Preparation: Insert a prerecorded video cassette. Press PLAY (H H ) once. TV/VCR Press STOP (x x ) to stop playback. Tracking Control Auto Tracking Manual Tracking CH/TRK (v v /V V ) CHANNEL (v v V V ) Special Effect Playbacks Special effects playback notes Search... -
Page 23: Normal Recording
Operation with tape (Continued) Normal Recording Preparation: Insert a video cassette that the safety tab intact. Select the desired channel by using CH/TRK (v v /V V ). INPUT Set the desired recording speed (SP or EP) by pressing SP/EP. Set the MTS mode as desired (See page 16, 26). - Page 24 Operation with tape (Continued) Use V V to choose the SPEED option. 1 1 0 0 Use b b /B B to choose the desired recording speed (AUTO, SP or EP). Use V V to choose the REPEAT option. 1 1 1 1 Use b b /B B to choose the desired repeat (ONCE, WEEKLY, or DAILY).
-
Page 25: Instant Timer Recording
Operation with tape (Continued) Instant Timer Recording (One-Touch Record) Preparation: Insert a video cassette with the safety tab intact. Select the desired channel by using CH/TRK (v v /V V ) or number (0-9). Set the desired recording speed (SP or EP) by pressing SP/EP. - Page 26 Operation with tape (Continued) VHS Hi-Fi Stereo System/ MTS Broadcast Playback with Hi-Fi Stereo Audio Sound Set the AUDIO MODE option to HI-FI on the VCR SETUP menu . SCREEN DISPLAY: LANGUAGE: AUDIO MODE: BROADCAST TYPE: AUDIO OUTPUT: SELECT ADJUST TO EXIT PRESS Set the AUDIO OUTPUT option to STEREO position.
-
Page 27: Operation With Tape
Operation with tape (Continued) Tape Counter Memory Feature Real-Time Counter CLK/CNT CLK/CNT 2:15 AM M 0:05:25 CLOCK COUNTER Counter Memory Function Begin recording or playing a tape. Press CLK/CNT repeatedly to display the real- time counter appears on the TV screen. At the point that you want locate later, reset the real-time counter to “M 0:00:00”... -
Page 28: Operation With Dvd And Audio Cd
Operation with DVD and Audio CD Playing DVD and Audio CD Playback Setup Press OPEN/CLOSE (Z Z ) to open the disc tray. Load your chosen disc in the tray, with the label facing up. Press OPEN/CLOSE (Z Z ) to close the tray. If a menu screen is displayed b B v V Notes... -
Page 29: Still Picture And Frame-By-Frame Playback
Operation with DVD and Audio CD (Continued) General Features (continued) Still Picture and Frame-by-frame playback DVD Video Discs Audio CDs Search Random Karaoke DVD Tips Note Repeat CHAPT TITLE TRACK DVD Video Discs - Repeat Chapter/Title/Off Audio CDs - Repeat Track/All/Off Repeat A-B >... -
Page 30: Time Search
Operation with DVD and Audio CD (Continued) General Features (Continued) Time Search 0:16:57 v v V V Zoom b B v V Notes Marker Search - : - - : - - To Recall a Marked Scene Maker Picture 1 Maker Picture 4 b B v V... -
Page 31: Checking The Contents Of Dvd Video Discs: Menus
Operation with DVD and Audio CD (Continued) Special DVD Features Checking the contents of DVD Video discs: Menus b B v V Title Menu Disc Menu Camera Angle Subtitles 1 ENG Note Programmed Playback with Audio CD Insert an audio CD and close the tray. Press PROGRAM during playback or in the stop mode. -
Page 32: Operation With Mp3 Discs
Operation with MP3 Discs Notes on MP3 Discs About MP3 MP3 disc compatibility with this DVD+VCR is limited as follows: Playing MP3 Discs Insert an MP3 disc and close the tray. Program ABCD MP3-1 MP3-2 MP3-3 MP3-4 MP3-5 MP3-6 MP3-7 MP3-8 MP3-9 MP3 menu... -
Page 33: Programmed Playback With Mp3 Discs
Operation with MP3 Discs (Continued) Programmed Playback with MP3 Discs Follow steps 2 - 3 of Playing MP3 Discs on page Press PROGRAM to list the selected track on the MP3 Program list. Program MP3-1 TRACK_2 TRACK_7 TRACK_1 TRACK_6 TRACK_2 TRACK_9 TRACK_3 TRACK_4... -
Page 34: Troubleshooting
Troubleshooting Symptom Cause Correction... -
Page 35: Troubleshooting
Troubleshooting (Continued) Symptom Cause Correction Moisture Condensation... -
Page 36: Language Code List
Language Code List Code Language Code Language Code Language Code Language... -
Page 37: Specifications
Specifications General Inputs Outputs VCR Specifications DVD Specifications Accessory:...