Advertisement
Table of Contents
- 1 Table of Contents
- 2 Top and Front View
- 3 Control Buttons (Rear)
- 4 Installing the USB Power Cable
- 5 Charging the Built-In Battery
- 6 Power On/Off the Picnic Speaker
- 7 Bluetooth Audio Streaming
- 8 Using the USB Port
- 9 Using the TF Card Slots
- 10 Listening to the Radio
- 11 Using the AUX Input
- Download this manual
Advertisement
Table of Contents

Related Manuals for Sylvania SP672


Summary of Contents for Sylvania SP672
- Page 1 Wireless Speaker SP672...
-
Page 2: Table Of Contents
Top and Front View ..................4 Control Buttons (Rear) ................5 Installing the USB Power Cable..............6 Charging the Built-in Battery ..............6 Power On/Off the Picnic Speaker .............. 7 Bluetooth Audio Streaming................. 8 Using the USB Port ..................9 Using the TF Card Slots ................9 Listening to the Radio .................10 Using the AUX Input ...................11... - Page 3 WARNINGS AND PRECAUTIONS WARNING: To reduce the risk of fire or electric shock, do not expose this apparatus to rain or moisture. CAUTION: Use of any controls or adjustments or performance of procedures other than those herein specified may result in hazardous radiation exposure. WARNING: Changes or modifications to this unit not expressly approved by the party responsible for compliance could void the user’...
- Page 4 IMPORTANT SAFETY INSTRUCTIONS manufacture , or sold with the apparatus. Special note:...
- Page 5 PRODUCT FEATURES Bluetooth technology: V3.0 Bluetooth transmission range: 10M Aluminum carry handle Stereo sound output: 3W x 2 (max.) USB & TF card support direct music play FM radio 3.5mm auxiliary input (stereo mini jack) Built-in Lithium-ion rechargeable battery Power rating: DC 5V / 1.0A (via Micro-USB port) PACKAGE CONTENTS Please make sure that the items shown below are included in the package.
-
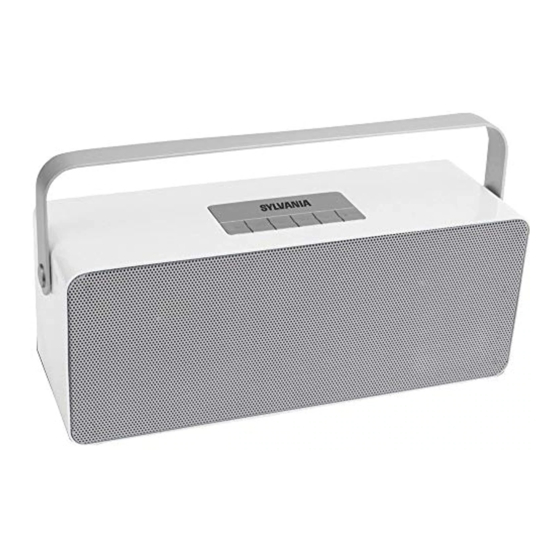
Page 6: Top And Front View
DEVICE OVERVIEW Top & Front View Carry Handle Right Speaker Left Speaker... -
Page 7: Control Buttons (Rear)
Control Buttons (Rear) Decreases volume. Starts / pauses playback. Increases volume. Changes modes between Bluetooth and AUX-in. Skips to previous tracks. Skips to next tracks. Notes: The USB port will only fit in one direction, do not force in as this would damage it. -
Page 8: Installing The Usb Power Cable
GETTING STARTED 1.0A Notes: Before moving or installing this product, make sure the Power switch of the unit is in OFF position. Disconnect the USB cable from the speaker when unused for long periods of time. Notes: When the speaker is working with the built-in battery and it prompts that the battery is low, please connect the USB cable to charge it immediately, or stop using it and power it off to avoid malfunction. -
Page 9: Power On/Off The Picnic Speaker
OPERATING THE SPEAKER Power On/ Off the Speaker Set the Power switch in ON position to power on the speaker, and the LED working mode indicator turns blue in Bluetooth mode, or green in other modes. Set the Power switch in OFF position to power off the speaker. The LED power indicator turns off. -
Page 10: Bluetooth Audio Streaming
flashes when waiting for connection. Turn on the Bluetooth function on the Bluetooth device, search for devices and select “SP672 ” to connect. If a Passkey is requested, enter “0000.” When the Bluetooth connection has been established, the blue LED indicator stops flashing. -
Page 11: Using The Usb Port
Using the USB Port The speaker has a USB port for you to insert a compatible USB drive and directly play stored WMA / MP3 audio contents. Make sure the speaker is power on. 2. Insert your USB drive into the USB port on the back panel of the speaker. Press Mode button to select USB mode. -
Page 12: Listening To The Radio
Listening to the Radio The speaker features FM radio function. Make sure the speaker is power on. Inserted the 3.5mm audio cable (supplied) to work as FM antenna. 3. Press the Mode button on the top of the speaker repeatedly to select FM Radio mode. -
Page 13: Using The Aux Input
Using the AUX input The Bluetooth Speaker has an AUX input (Line In) at its back, for you to use a 3.5mm stereo audio cable to connect it to other audio player. Connect one end of the 3.5mm stereo audio cable (supplied) to the AUX jack at the back of the speaker, and the other end to your audio player, smart phone etc. - Page 14 PRODUCT SPECIFICATIONS Output Power 3W x 2 Max. Speaker Units 2 x 3" Sensitivity >60db Frequency Range 40Hz-20KHz <0.1% (@1W) Distortion >60db Dimensions W255 × D85 × H140 mm Power Input DC 5V/1.0A, via Micro-USB port Rechargeable Lithium-ion battery Capacity: 3.6V/1800aAH Built-in Battery: Charging time: 4 hours Play time: 5 hours max.
- Page 15 Warning Statement This equipment has been tested and found to comply with the limits for a Class B digital device, pursuant to part 15 of the FCC Rules. These limits are designed to provide reasonable protection against harmful interference in a residential installation.