Table of Contents
Advertisement
Advertisement
Table of Contents

Related Manuals for Sangean SANGEAN ATS-808A


Summary of Contents for Sangean SANGEAN ATS-808A
- Page 2 FEATURES Continuous Tuning permits reception of more stations than ever before without any break on LW, MW or SW bands. Fast response, Three Color LCD indicates station frequency in large easy- to- read numbers, including dual time, Memory location, signal strength and battery life.
-
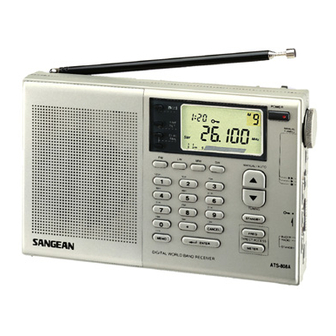
Page 3: Control Locations
CONTROL LOCATIONS 1. Telescopic antenna 2. Sleep Timer 3. Time Set 4. Dual Time Button 5. Dual Time Set 6. LCD Display 7. Power On/Off Button 8. Rotary Tuning Knob 9. Manual Tuning/Auto Scan Buttons [ ] 10. Standby Button 11. - Page 4 2 3 . 9 K H z / 1 0 K H z S t e p S w i t c h 2 4 . H i g h / L o w To n e S w i t c h 2 5 .
-
Page 5: Choosing A Power Supply
CHOOSING A POWER SUPPLY You can operate the receiver using: Six Alkaline AA Batteries. Household AC [With optional AC adaptor] 12 Volt DC Automobile Battery [With optional DC adaptor] USING BATTERIES 1. Press latch marked OPEN on both battery ompartment covers in he direction of the arrow and lift off cover. - Page 6 USING HOUSE CURRENT [AC] The receive may be power by AC current using the AC adaptor (not included). Insert the small barrel shaped plug into the jack on the side of the radio marked DC IN 6V .Plug the other end of the adaptor into a standard household outlet.
-
Page 7: Preliminary Settings
PRELIMINARY SETTINGS SETTING THE CLOCK The time is displayed in the 24 hour mode since most shortwave stations operate according to Greenwich Mean Time. This is the standard that is used throughout the world. The clock will start when 4 AA batteries are installed. - Page 8 4. Now press button marked ENTER . Display shows hours and minutes.
-
Page 9: Setting Dual Time
SETTING DUAL TIME A second time zone can be programmed into this unit such as your home time if you are traveling, or Greenwich Mean Time for instant access to short-wave broadcasts or the local time where ever you may be. 1. - Page 10 5. Now press button marked "ENTER", Display shows hours and minutes. 6. By pressing the lower "DUAL TIME" button now, the LCD display will once again show the clock time. 7. To verify "DUAL TIME", press the upper "DUAL TIME" button to display your "OTHER"...
-
Page 11: Band Selection
BAND SELECTION There are four band selector buttons located just beneath the LCD display. BAND FREQUENCY RANGE 1. Turn radio on by pressing "POWER" button. Display will show last band and frequency selected. 2. By pressing any one of the four band selector buttons the display shows the band selected and a random frequency within that band. -
Page 12: Tuning Mode
TUNING MODE ADJUSTING THE ANTENNA Locate the band you want to listen to in the following chart and adjust the antenna as indicated. FREQUENCY BAND BAND RANGE 520-1710 Khz 150-519 Khz 87.5-108 Mhz 1.711e~29.999 Mhz ANTENNA TYPES ANTENNA TYPES ILLUSTRATION INTERNAL Rotate radio for best reception... -
Page 13: Direct Tuning
You may select any frequency using four different turning methods: Direct turning Manual Tuning Scan Turning Memory Tuning DIRECT TUNING You may "KEY IN" a specific band (120m, 49m,16m) by pressing the appropriate button. The exact station is then selected by pressing the buttons corresponding to the station frequency. - Page 14 4. Press the button marked ENTER within twelve seconds. The frequency and band will now show up in the display. The SIGNAL STRENGTH will also show. NOTE: Be sure to press the decimal point [ ] in100.70MHz, otherwise the display will show SW , [10.070 MHz] automatically.
-
Page 15: Manual Tuning
MANUAL TUNING To select a station you do not know the frequency of, use the MANUAL TUNING ] [V] buttons or the ROTARY TUNING control on the side of the radio. 1. Press the POWER button to turn on radio. 2. - Page 16 NOTE When you repeatedly press the [ ] or [V] buttons, the frequencies change in increments FM : 50 KHz (or 100 KHz) LW : 9 KHz MW : 9 KHz or 10 KHz SW : 5 Khz 4. Adjust the VOLUME and TONE controls as you like.
-
Page 17: Scan Tuning
SCAN TUNING Use scan tuning to quickly locate a station or to monitor several stations within a specific band. 1. Turn on radio by pressing POWER button. 2. Select a band. 3. Adjust antenna or radio position de- pending on selected band. POWER MANUL/AUTO TUNIGN... - Page 18 4. Press and hold the ( ) or (V) buttons for at least a half second or more and the radio will scan all the frequencies in that band, and will stop automatically each time it lands on an active station.
-
Page 19: Memory Tuning
MEMORY TUNING You may store up to eighteen different frequencies on the SW/FM bands and up to nine different frequencies on each of the other bands for instant selection of your favorite stations. Storing a Frequency 1. Press POWER button to turn on radio 2. -
Page 20: Recalling A Frequency
RECALLING A FREQUENCY 1. Press POWER button to turn on radio. 2. Select a band in which a station is stored that you want to recall. 3. Press any of the NUMBERED buttons for a desired station and the radio will instantly tune to it and display that frequency and the MEMORY position number. -
Page 21: Clock Radio Operation
CLOCK RADIO OPERATION With this receiver you can fall asleep to your favorite station by pressing the SLEEP button, or wake you to the morning news, or an alarm buzzer. Make the following settings with the POWER off! Setting the Alarm 1. -
Page 22: Setting The Sleep Timer
4. To verify STANDBY button again. Press STANDBY once more and the clock returns to the current time. 5. You may select radio or buzzer alarm to wake you by setting STANDBY: BUZZER/RADIO selector switch on the side of the radio. 6. -
Page 23: Miscellaneous Controls
MISCELLANEOUS CONTROLS In addition to standard tuning methods described previously, use the following controls for special operations. AM SENSITIVITY: DISTANCE/ LOCAL SELECTTIVITY SWITCH This switch adjusts the receiver's sensitivity. When you listen to a strong station and the signal is slightly distorted, set the switch to the LOCAL position for best reception. - Page 24 LOCK SWITCH USE Using the LOCK switch prevents unauthorized operation of the radio and will also prevent the station you are listening to from being changed. When the LOCK switch is moved to its up the POWER button ant TUNING controls are completely disabled.
-
Page 25: Care And Maintenance
CAR E AN D MAINTENANCE Thi s receiver is an exampl e of superior design and craftsmanship . The following suggestionswill help you care for the receiver so tha t you can enjoy it for years Keep the product dry. I f it does get wet, wipe it dry immediatel y . - Page 26 Wipe the product with a dampened cloth occasionally to keep it looking new. Do not use harsh chemicals, cleaning solvents, or strong detergents to cleam to product. Use only fresh batteries of the recommend- ed size and type.Always remove old or weak batteries.
-
Page 27: Specifications
SPECIFICATIONS Semi conductors: Circuit: AM (LW, MW, SW) Frequency range: Antennas: LW/MW built-in Ferrite bar Antenna Telescopic Antenna or External Antenna (not included) Telescopic Antenna Output: Nominal 440 mW at 10% T.H.D. Jacks: 1. DC jack for external power (6V) 2. -
Page 28: Station Log
Power sources: 1. For Power when not playing radio 2. For Power to play radio: Dimension: 196(L) x 125(H) x 36(T) mm Weight: 600 g Accessories: Stereo earphones, Carrying pouch. STATION LOG For those of you who would like to log your favorite stations, a convenient card is provided with your receiver which is simply inserted under the folding stand on the...