Advertisement
Quick Links
EN USER INSTRUCTIONS
This set includes 2 walkie-talkie units: these are communication devices which
operate on mobile radio frequencies. They come with 1/4/7(option) channels as well
as a back-lit LCD screen, enabling you to communicate over several kilometres
free-of-charge (up to 3 km in open areas)
NOTE: Please read these user instructions carefully before using the equipment and
retain for future consultation!
SPECIFIC RECOMMENDATIONS
·If you carry any kind of personal medical device, consult a doctor before use.
·To avoid the risk of burns, do not use the device if the aerial is damaged in any
way.
·Do not use the device in a potentially explosive setting(e.g. around petrol pumps,
on the lower deck of a boat or around a fuel storage installation or chemical
products)
EN~Instructions for use
Walkie Talkie
Advertisement

Related Manuals for Baofeng BF-T3


Summary of Contents for Baofeng BF-T3
- Page 1 Walkie Talkie ...
- Page 2 ·If travelling in a car or by bike, stop before using the device. Switch off the device if on an aero plane or in a hospital. ·Never use the device in close proximity to a radio to avoid interference. ·Remove the batteries if the device is not in use for an extended period of time. Never mix used and new batteries.
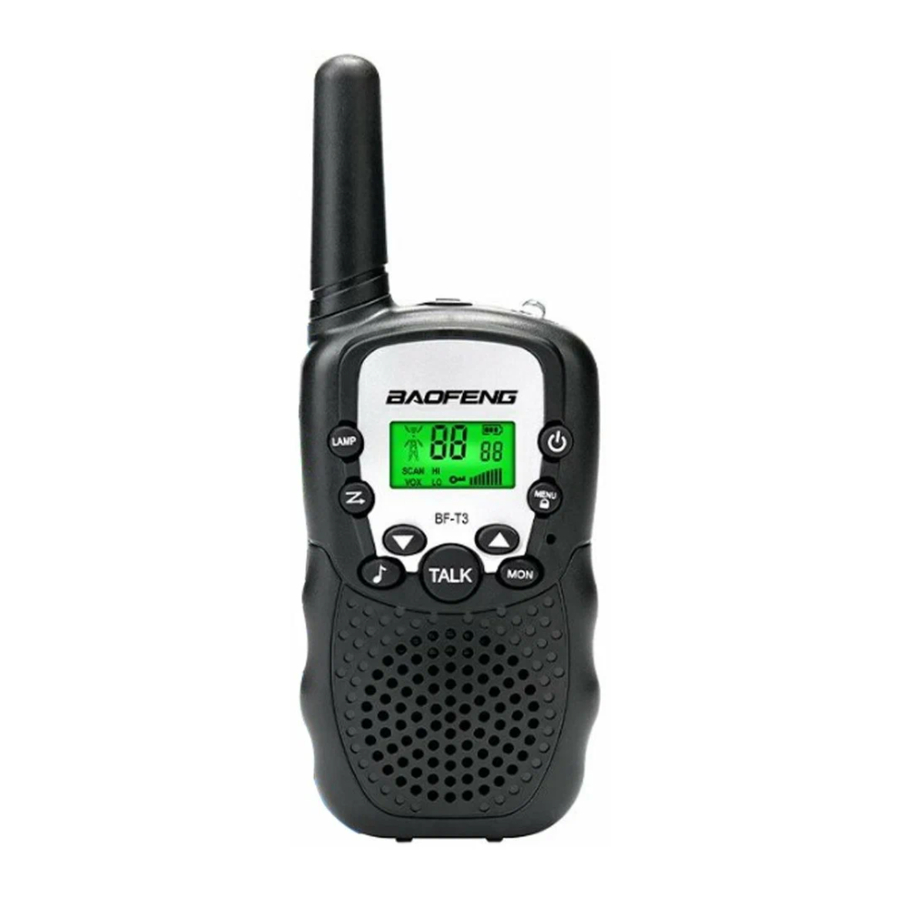
- Page 3 1.Antenna 2.RX icon -Displayed when receiving TX icon -Displayed when transmitting 3.Volume level indicator 4.Adjust or button Up(▲) 5.Continued reception(MON) 6.On/off button( 7.Adjust or button Down(▼) 8.Earphone socket 9.Loud speaker 10.Microphone 11.Menu: Enter the menu settings 12.Call button(CALL)
- Page 4 13.Keypad lock indicator 14.Battery level indicator 15.Push to talk(TALK) button 16.VOX indication 17.Scanning indication 18.Channel/Menu item indication 19.CTCSS/Menu option-value 20.Lamp Button 21.Scan Button 22.Lamp 23.Belt attachment clip 24.Belt attachment 25.Batteries(not supplied) 26.Battery compartment BEFORE USE(Pic 02) To insert batteries into the devices, first remove the belt attachment: lift the attachment clip (23) and press the belt attachment up wards (24).
- Page 5 4. Receiving/transmitting communications: The devices are in ‘Reception’ mode when lit up,i.e. they are ready to receive a call or sound transmitted on the activated frequency. ·When you press the Call tone button(12),the device switches to ‘Transmission’ mode. You are then transmitting a sound signal to the other device. ·...
- Page 6 8. Monitor You can use the monitor feature to check for weaker signals in the current channel. ·Press the MON-button to activate channel monitoring. ·Press the MON-button to stop channel monitoring. Note: During channel monitoring the receiver circuit in the Radio’s will not listen to CTCSS codes.
- Page 7 When a button is pressed, the unit will beep briefly. To set the key-tone. ·Press the MENU-button(11) five times. will be displayed. ·Press ▲ to enable( ) or ▼ disable the Key Tones( TALK ·Press the -button(15) to confirm your selection and return to the standby mode. 13.
- Page 8 The connector is located on the upper side of the unit (8). Insert the earpiece plug into the connector (2,5mm jack). The small button on the earpiece has the same function as the TALK-button (15) on the unit When you use the TALK-button (15) from the Earpiece, you must also use the microphone from the earpiece to talk into.
- Page 9 certified to the FCC that it does not exceed the exposure limit established by the FCC, Tests for each product are performed in positions and locations as required by the FCC. For body worn operation, this device has been tested and meets the FCC RF exposure guidelines when used with an accessory designated for this product or when used with an accessory that Contains no metal.