Table of Contents
Advertisement
Advertisement
Table of Contents

Related Manuals for Alcatel Tetra


Summary of Contents for Alcatel Tetra
-
Page 2: Table Of Contents
Table of Contents Your device............1 Keys and connectors ..........1 Getting started ............4 Home screen ............5 Text input ............13 Using onscreen keyboard ........13 Google keyboard ........... 13 Text editing .............14 AT&T Services .............15 AT&T services............15 4 Call and Contacts..........16 Call ................ - Page 3 Gallery ..............47 Others ..............49 Other applications ..........49 10 Google applications .........50 10.1 Play Store ..............50 10.2 Chrome ..............50 10.3 Gmail ................. 51 10.4 Maps ................. 53 10.5 YouTube ..............53 10.6 Drive ................. 53 10.7 Duo ................54 10.8 Play Music ...............
- Page 4 12 Software update ..........69 13 Accessories ............69 14 Safety information ...........70 15 General information ........80 16 Warranty .............83 17 Troubleshooting ..........85 This device meets applicable national SAR limits of 1.6 W/kg. SAR values can be found on page 76 of this user guide. When carrying the device or using it while worn on your body, either www.sar-tick.com use an approved accessory such as a holster...
-
Page 5: Your Device
Your device ........Keys and connectors ......Camera Proximity/Light Sensor USB port Headset port LED Indicator Volume keys Power/Lock key Touch screen Recent apps Back key Home key... - Page 6 Camera Volume Power/Lock Recent apps • Touch to open a card view of applications you've worked with recently. Home • While on any application or screen, touch to return to the Home screen. • Long press to open Google now. Back • Touch to go back to the previous screen, or to close a dialog box, options menu, the notification panel, etc.
- Page 7 Power/Lock • Press: Lock the screen/Light up the screen. • Press and hold: Show the pop-up menu to select from Power off/Restart/Airplane mode. • Press and hold the Power key for at least 8 seconds to power off or hold it longer to reboot. • Press the Power key and Volume down key to capture a screenshot.
-
Page 8: Getting Started
Getting started ........1.2.1 Set-up Inserting or removing the Nano/microSD card A Nano card is required to make phone calls and use cellular networks. If you have a Nano card, insert it before setting up the phone. Do not attempt to insert other SIM types like mini or micro-SIM cards, as you may damage your phone. -
Page 9: Home Screen
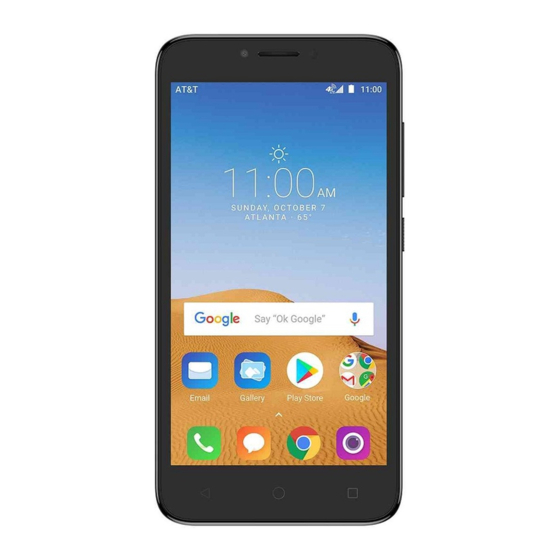
1.2.3 Power off your phone To turn your phone off, hold down the Power key until the phone options appear, then select Power off. Home screen .......... You can bring all your favorite icons (applications, shortcuts, folders and widgets) to your Home screen for quick access. Touch the Home key to switch to Home screen. - Page 10 1.3.1 Using the touchscreen Touch To access an application, touch it with your finger. Long press Long press the Home screen to access WALLPAPERS / WIDGETS screen. Drag Place your finger on any item to drag it to another location. Slide/Swipe Slide the screen to scroll up and down the applications, images, web pages…...
- Page 11 Pinch/Spread Place your fingers of one hand on the screen surface and draw them apart or together to scale an element on the screen. Rotate Automatically change the screen orientation from portrait to landscape by turning the device sideways to have a better view.
- Page 12 Touch to clear all event–based notifications (other ongoing notifications will remain) Quick settings panel Touch to open the Quick settings panel, where you may enable or disable functions or change modes by touching the icons. Touch to access Settings, where you can set more items.
- Page 13 1.3.3 Search bar The device provides a Search function which can be used to locate information within applications, the device or the web. Search by text • Touch the Search bar from the Home screen. • Enter the text/phrase you want to search for. • Touch on the keyboard if you want to search on the web.
- Page 14 To create a screen unlock pattern • Swipe up on the Home screen and select Settings, then touch Security & location/Screen lock/Pattern. • Draw your own pattern. To lock device screen Press the Power key once to lock the screen. To unlock device screen Press the Power key once to light up the screen, slide to draw the unlock pattern you have created or enter your PIN or...
- Page 15 1.3.5 Personalize your Home screen You can long press a folder, an application or a widget to activate the Move mode, and drag the item to your preferred Home screen. Reposition Long press the item to be repositioned to activate the Move mode, drag the item to the desired position and then release.
- Page 16 Touch one thumbnail and slide it right/left or touch to close the application. 1.3.7 Volume adjustment Using volume key Press Volume key to adjust the volume. To activate the Vibrate mode, press the Volume down key until the device vibrates. Using Settings menu on application list to enter Settings, then Touch the settings icon...
-
Page 17: Text Input
Text input ........Using onscreen keyboard ....Onscreen Keyboard settings Touch the Application tab from the Home screen, select Settings > System > Language & input, choose a keyboard under Keyboard & inputs. Google keyboard ........Touch to enter Touch to switch voice input. -
Page 18: Text Editing
Text editing ..........You can edit the text you have entered. • Long press or double-tap within the text you would like to edit. • Drag the tabs to change the high-lighted selection. • The following options will show: CUT, COPY, SHARE, SELECT ALL, SHARE. -
Page 19: At&T Services
AT&T Services ......AT&T services ......... DriveMode: Silence notifications, set an auto- reply so people will know you are driving, and more. myAT&T: Manage your account, track your usage, review and pay your bill, and update your data plan service. AT&T Visual Voicemail:Review and manage your voicemail from your phone. -
Page 20: Call And Contacts
Call and Contacts ....... Call ............ 4.1.1 Making a call You can launch a call by using Call. Touch the icon on the Home screen to access the Call application. Slide to access RECENT and CONTACTS. Touch to display keyboard. - Page 21 Display the suggested number(s). Long press to access voicemail. Enter the desired number from the keyboard and touch place the call or select a contact from CONTACTS or RECENT by sliding or touching tabs, then touch to make the call. The number you entered can be saved to Contacts by and then touching Create new contact.
- Page 22 4.1.2 Answering or rejecting a call When you receive a call, you can touch ANSWER to answer the call, or touch the incoming call and then: • Slide the icon up to answer; • Slide the icon up to reject; • Select the to reject the call by sending a preset message.
- Page 23 If you receive a voicemail, a voicemail icon appears on the Status bar. Open the Notification panel and touch New voicemail. 4.1.4 During a call To adjust the volume during a call, press the Volume up/down key. Touch to end the current call. Touch to activate the speaker during the current call.
- Page 24 Touch to add a call. To avoid accidental operation of the touchscreen during a call, the screen will be locked automatically when you put the cellphone close to your ear; and it will be unlocked when the cellphone is taken away from your ear.
- Page 25 Dial pad tones: Turn on the switch to enable playing tones when using the dial pad. Call settings • Fixed Dialing Numbers Fixed dialing number (FDN) is a SIM service mode, where outgoing calls are restricted to a set of phone numbers. These numbers are added to the FDN list.
- Page 26 Accessibility • TTY mode TTY mode enables people who are deaf, hard of hearing, or speech-impaired to use the telephone to communicate. After connecting the phone and TTY devices that includes a keyboard and a text display mechanism, calls are linked to a relay service, which converts incoming speech to text and converts outgoing text to a spoken voice.
-
Page 27: Contacts
Contacts ..........Contacts app enables quick and easy access to the people you want to reach. You can view and create contacts on your device and synchronize these with your Gmail contacts or other applications. 4.2.1 Consult your contacts Touch to search in Contacts. Touch to open Quick Contact panel. - Page 28 Touch the Menu icon to display the contacts list option menu. Following actions are enabled: Group: Touch to add and manage contact group. Contacts to display: Choose contacts to display. Settings • My info Touch to create my local profile. • Accounts Touch to edit the users and accounts information.
- Page 29 Touch to save. Touch to select a picture for the contact. Touch to unfold the other predefined labels of this category. When finished, touch to save. To exit without saving, you can touch Back and select Discard. Add to/remove from Favorites To add a contact to Favorites, you can touch a contact to view details then touch (the star will turn...
- Page 30 To send a message to a contact, touch the contact to enter the detail screen, then touch the icon on the right side of the number. 4.2.5 Contacts importing, exporting and sharing This device enables you to import or export contacts between phone storage, SIM card, and SD card storage.
- Page 31 4.2.7 Turn on/off the auto-sync In the Accounts screen, touch and mark the Auto-sync data checkbox. When activated, all changes to information on the phone or online will be automatically synchronized with each other.
-
Page 32: Message
Message ........You can create, edit and receive SMS and MMS with this phone. To send a message, Swipe up from the Home screen then select Messaging. 5.2.1 Write a message On the message list screen, touch the new message icon to write text/multimedia messages. - Page 33 5.2.2 Sending a text message Enter the mobile phone number of the recipient in the To bar or touch to add recipients from contacts. Touch the Send message bar to enter the text of the message. Touch the icon to insert emoticons. When finished, touch to send the text message.
- Page 34 5.2.4 Manage messages When receiving a message, an icon will appear on the status bar as a notification. Drag down the status bar to open the Notification panel, touch the new message to open and read it. You can also access the Messaging application and touch the message to open it.
- Page 35 • Multimedia message limit Touch to set the maximum number of multimedia messages to be saved per conversation. Notifications • Notifications Select to display message notifications in the status bar. • Select ringtone Touch to select a ringtone as a new message notification tone.
- Page 36 Multimedia message (MMS) settings • Group messaging Touch to enable use MMS to send a single message when there are multiple recipients. • Auto-retrieve Mark the checkbox to retrieve messages automatically. • Creation mode Touch to select MMS creation mode. • Maximum message size Select to input the maximum message size.
-
Page 37: Calendar & Alarm Clock & Calculator
Calendar & Alarm clock & Calculator ........Calendar ......... Use Calendar to keep track of important meetings, appointments, etc. Multimode view To change your Calendar view, touch the icon besides the month title to open the month view, or touch and select Schedule, Day, 3-Day, Week or Month to open different views. -
Page 38: Clock
To create new events You can add new events from any Calendar view except Year. • Touch the icon then select Event to access to access new event edit screen. • Fill in all required information for this new event. If it is a whole-day event, you can select ALL DAY. - Page 39 • Time Touch numbers to set the time for your alarm. • Repeat Mark the checkbox of Repeat and then select the days you want your alarm to go off. • Ringtone Select an alarm ringtone. • Vibrate Mark the checkbox to activate/deactivate vibration. • Label Touch to set a name for the alarm.
- Page 40 • Alarm volume Touch to set alarm volume. • Gradually increase volume Touch to set up a time, and then the volume of alarm ringtone will increase gradually after seconds you set up. • Volume buttons Preset volume up/down buttons’ behaviors when alarm sounds: Snooze, Dismiss, or Do nothing.
- Page 41 6.2.3 Countdown From the Clock screen, touch to enter the Countdown screen. Touch the digits to set the countdown time. Type the time in hour, minute and second number sequence. Touch to start the countdown. Pause/play Delete Add a countdown 6.2.4 Timer From the Time screen, touch...
-
Page 42: Calculator
Calculator ........To solve mathematical problems with Calculator, swipe up from the Home screen, then touch Calculator. There are two panels available: Basic calculation and Scientific calculation. To switch between panels, select one of the following two ways: • Swipe the basic calculation screen to the left to open the scientific calculation. -
Page 43: Getting Connected
Getting connected ....To connect to the internet with this device, you can use 3G/4G networks or Wi-Fi, whichever is most convenient. Connecting to the Internet ....7.1.1 3G/4G To activate/deactivate Data roaming When roaming, you can decide to connect/disconnect to a data service. - Page 44 To activate notification when a new network is detected When Wi-Fi is on and the network notification is activated, the Wi-Fi icon will appear on the status bar whenever the device detects an available wireless network within range. The following steps activate the notification function when Wi-Fi is on: • Swipe up on the Home screen and touch Settings.
-
Page 45: Connecting To Bluetooth Devices
2. Touch FORGET to confirm. You are recommended to use alcatel Bluetooth headsets, which have been tested and proved compatible with your phone. You can go to www.alcatel-mobile.com for more information about the alcatel... -
Page 46: Connecting To A Computer
Connecting to a computer ....With a USB cable, you can transfer media files and other files between microSD card/internal storage and computer. To connect/disconnect your device to/from the computer: • Use the USB cable that came with your device to connect the device to a USB port on your computer. -
Page 47: Connecting To Virtual Private Networks
• Then following the instructions on your device to share your device’s internet connection with other devices. Connecting to virtual private networks ..........Virtual private networks (VPNs) allow you to connect to the resources inside a secured local network from outside that network. - Page 48 To edit/delete a VPN To edit a VPN: • Swipe up on the Home screen and touch Settings. • Touch Network & internet/VPN. and touch Edit • VPNs you have added are listed; touch profile. • After finished, touch Save. To delete • Touch and touch Delete profile.
-
Page 49: Multimedia Applications
Multimedia applications ... Camera ..........Your mobile phone is fitted with a camera for taking photos and videos. Before using the camera, make sure that you remove the protective lens cover to avoid it affecting your picture quality. To take a photo or video, touch from the Home screen and then touch Camera. - Page 50 To take a photo The screen acts as the viewfinder. First, position the object or landscape in the viewfinder, touch the screen to focus if necessary and touch to capture. The photo will be automatically saved. You can also long press to take burst shots.
-
Page 51: Gallery
• Time-lapse Capture a series of photos and convert them into a sped up time-lapse video. Settings • Grid Turn on to enable grid view. It divides the screen into equal parts and helps you take better photos by making it simple to align elements, such as the horizon or buildings, to the lines in the grid. - Page 52 Touch to access more options, such as Select items, Slideshow, etc.. Scroll up to view more pictures and videos. Touch to setup display of albums. Touch to create album. Scroll up to view more albums.
-
Page 53: Others
To view a picture/play a video Pictures and videos are displayed by moments and albums in Gallery. • All pictures and videos are divided by moments, and by albums. Touch an album to view pictures and videos spread on the screen. • Touch the picture/video directly to view or play. -
Page 54: Google Applications
Google applications ....Google apps are preinstalled on your phone to improve work efficiency and help you enjoy life. This manual briefly introduces these apps. For detailed features and user guides, refer to related websites or the introduction provided in the apps. You are recommended to register with a Google account to enjoy all the functions. -
Page 55: Gmail
Delete all contents During web page surfing, touch for settings or more options. 10.3 Gmail ............As the Google’s web-based email service, Gmail is configured when you first set up your phone. Gmail on your phone can be automatically synchronized with your Gmail account on the web. - Page 56 To create and send emails 1 Touch from the Inbox screen. 2 Enter the recipient(s)’s email address in To field. 3 If necessary, touch the Add Cc/Bcc menu icon to add a copy or a blind copy to the message. 4 Enter the subject and the content of the message.
-
Page 57: Maps
• Reply all Touch and select Reply all to send a message to all people in a mail loop. • Forward Touch and select Forward to forward the received mail to other people. 10.4 Maps ............Google Maps offers satellite imagery, street maps, 360° panoramic views of streets, real-time traffic conditions, and route planning for traveling by foot, car, or public transportation. -
Page 58: Duo
10.7 Duo ............Google Duo is a video chat mobile app, it allows users to use phone numbers to easily call people from their contact list. The app will automatically control the video quality by sensing the network connectivity. 10.8 Play Music.......... -
Page 59: Settings
Settings ........ To access this function, swipe up from Home screen and then touch the Settings icon. 11.1 Network & internet ........ 11.1.1 Wi-Fi Using Wi-Fi you can now to surf the Internet without using your SIM card whenever you are in range of a wireless network. The only thing you have to do is to enter the Wi-Fi screen and configure an access point to connect your device to the wireless network. - Page 60 11.1.3 Data usage Touch you can view settings related to your cellular networks. Select Cellular data usage > > Set data limit and then type in the desired amount under Data Limit to set cellular data limit. Your cellular data connection will be disabled when the specified limit is reached.
-
Page 61: Connected Devices
11.1.6 Airplane mode to turn on Airplane mode to Touch the switch simultaneously disable all wireless connections including Wi-Fi, Bluetooth and more. 11.2 Connected devices ....... 11.2.1 Bluetooth Bluetooth allows your device to exchange data (videos, images, music, etc.) in a small range with another Bluetooth supported device (phone, computer, printer, headset, car kit, etc.). -
Page 62: Smart Manager
You can also view the battery usage data since your last full charge. The screen also shows your battery status and how long it can still be used before your next charge. Touch one category, then you can learn its specific power consumption. 11.5 Smart Manager ........ -
Page 63: Storage
• Sound Set volume for media, ringtone, and alarms. • Also vibrate for calls Switch the toggle to enable vibration for incoming calls. • Do not disturb preferences Touch to set how calls and notifications interrupt whatever you are doing on your phone. • Phone ringtone Touch to set your incoming call ringtone. -
Page 64: Security & Location
11.9 Security & location ........ 11.9.1 Security Function shortcuts Touch to customize the application shortcuts displayed on your lock screen. Screen lock Touch to set your screen unlock method. For example, you can unlock your phone by sliding the screen, entering a password, or drawing a pattern, etc Touch for further setting of screen lock. - Page 65 Encryption & credentials Encrypt phone You can encrypt your accounts, settings, download apps and their data, media and other files by touching Encrypt device. Storage type Show storage type. Trusted credentials Touch to display trusted CA certificates. User credentials Touch to check and manage stored credentials. Install from SD card Touch to install encrypted certificates from SD card.
-
Page 66: Users & Accounts
11.9.2 Location Touch the switch to enable the use of information from Wi-Fi and cellular networks to determine your approximate location, for use in Google Maps, when you search, and so on. When you select this option, you’re asked whether you give consent to share your location anonymously with Google’s location service. - Page 67 Switch access Switch access allow you to control your device using configurable key combination. You can move focus to clickable items and select them. Touch the switch icon to turn on/off the function. Touch SETTINGS to get more options. Talkback Touch to turn on/off to activate/deactivate talkback function.
-
Page 68: Google
Touch & hold delay Touch to adjust the duration of touch and hold delay. This function enables your phone to differ touch and touch & hold, which may avoid incorrect operations. Mono audio Touch the to enable/disable combine channels when playing audio. - Page 69 Google voice typing Google voice typing is free speech-to-text capabilities which can let you input words by talking instead of typing by hand. Tap the microphone icon on the on-screen keyboard to start Voice Typing. Physical keyboard Show virtual keyboard Touch the switch to enable virtual keyboard on screen while physical keyboard is active.
- Page 70 11.13.2 Gestures Jump to camera Touch the switch to active jump to camera. 11.13.3 Date & time Use Date & Time settings to customize your preferences for how date and time are displayed. Automatic date & time Touch to choose use network-provided time, GPS-provided time or off.
- Page 71 11.13.4 Backup Turn on the switch to back up your device’s settings and other application data to Google Servers, with your Google account. If you replace your device, the settings and data you’ve backed up are restored onto the new device for the first time you sign in with your Google account.
- Page 72 11.13.7 Regulatory & Safety Touch to check regulatory and safety information, such as IMEI, CU reference, Bluetooth declaration ID, etc.. 11.13.8 About phone This contains information about things ranging from Status, Legal information, Model number, Android version, Android security patch level, Baseband version, Kernel version, Build number to those listed below: Status This contains the status of the Battery status, Battery level, My...
-
Page 73: Software Update
Software update ......To access Software update, open Settings>System >AT&T Software Updates. Touch Check for Updates, and the device will search for the latest software. Software update requires Wi-Fi networks. If there is a software update available but you haven’t connect Wi-Fi, touch CONTINUE to connect to Wi-Fi network, the software will download automatically when Wi-Fi connected. -
Page 74: Safety Information
Safety information ....We recommend that you read this chapter carefully before using your device. The manufacturer disclaims any liability for damage, which may result as a consequence of improper use or use contrary to the instructions contained herein. • TRAFFIC SAFETY Given that studies show that using a device while driving a vehicle constitutes a real risk, even when the hands-free kit is used (car kit, headset...), drivers are requested to refrain from... - Page 75 Switch the device off when you are near gas or flammable liquids. Strictly obey all signs and instructions posted in a fuel depot, petrol station, or chemical plant, or in any potentially explosive atmosphere. When the device is switched on, it should be kept at least 15 cm from any medical device such as a pacemaker, a hearing aid, or insulin pump, etc.
- Page 76 Only use batteries, battery chargers, and accessories which are recommended by TCL Communication Ltd. and its affiliates and are compatible with your device model. TCL Communication Ltd. and its affiliates disclaim any liability for damage caused by the use of other chargers or batteries. Remember to make back-up copies or keep a written record of all important information stored in your device.
- Page 77 Do not disassemble or open, crush, bend or deform, puncture, or shred. Do not modify or remanufacture, attempt to insert foreign objects into the battery, immerse or expose to water or other liquids, expose to fire, explosion, or other hazard. Only use the battery with a charging system that has been qualified with the system per CTIA Certification Requirements for Battery System Compliance to IEEE 1725.
- Page 78 CAUTION: RISK OF EXPLOSION IF BATTERY IS REPLACED BY AN INCORRECT TYPE. DISPOSE OF USED BATTERIES ACCORDING TO THE INSTRUCTIONS. • CHARGERS Main powered chargers will operate within the temperature range of: 32°F to 113°F. The chargers designed for your device meet with the standard for safety of information technology equipment and office equipment use.
- Page 79 This device has been tested and found to comply with the limits for a Class B digital pursuant to Part 15 of the FCC Rules. These limits are designed to provide reasonable protection against harmful interference in a residential installation. This equipment generates, uses, and can radiate radio frequency energy and, if not installed and used in accordance with the instructions, may cause harmful interference to radio...
- Page 80 During SAR testing, this is set to transmit at its highest certified power level in all tested frequency bands, and placed in positions that simulate RF exposure in usage near the body with the separation of 10 mm. Although the SAR is determined at the highest certified power level, the actual SAR level of the device while operating can be well below the maximum value.
- Page 81 SAR compliance for body operation is based on a separation distance of 10 mm between the device and the human body. During use, the actual SAR values for this device are usually well below the values stated above. This is because, for purposes of system efficiency and to minimize interference on the network, the operating power of your device is automatically decreased when full power is not needed.
- Page 82 Please note by using the device some of your personal data may be shared with the main device. It is under your responsibility to protect your own personal data, not to share with it with any unauthorized devices or third party devices connected to yours.
- Page 83 Bluetooth SIG, Inc. and any use of such marks by TCL Communication Ltd. and its affiliates is under license. Other trademarks and trade names are those of their respective owners. Alcatel 5041C Bluetooth Declaration ID 038401 The Wi-Fi Logo is a certification mark of the Wi-Fi Alliance.
-
Page 84: General Information
General information ....• Internet address: https://us.alcatelmobile.com https://ca.alcatelmobile.com • Facebook: https://www.facebook.com/alcatelmobileus https://www.facebook.com/alcatelmobileca • Call support: U.S.A.: 855-368-0829 Canada: 855-844-6058 • Email support: U.S.A.: https://us.alcatelmobile.com/contact Canada: https://ca.alcatelmobile.com/ contact • Manufacturer: TCL Communication Ltd. 5/F, Building 22E, 22 Science Park East Avenue, Hong Kong Science Park, Shatin, NT, Hong Kong An electronic version of this user guide is available in English and other languages according to availability on our website:... - Page 85 Disclaimer There may be certain differences between the user manual description and the device’s operation, depending on the software release of your device or specific operator services. TCL Communication Ltd. shall not be held legally responsible for such differences, if any, nor for their potential consequences, which responsibility shall be borne by the operator exclusively.
- Page 86 The availability of the applications may vary depending on the countries and the operators where the device is used; in no event shall the list of possible applications and software provided with the devices be considered as an undertaking from TCL Communication Ltd.; it shall remain merely as information for the purchaser.
-
Page 87: Warranty
Warranty ........Your device is warranted against any defect or malfunctioning which may occur in conditions of normal use during the warranty period of twelve (12) months from the date of purchase as shown on your original invoice. Batteries and accessories sold with your device are also warranted against any defect which may occur during the first six (6) months from the date of purchase as shown on your... - Page 88 Electronic Recycling (Within USA Only): For more information on Electronic Recycling, please: 1) Visit Alcatel Electronic Recycling Program website us.alcatelmobile.com/accessibility-compliance/ electronic-recycling-program/, or 2) Call Alcatel US Customer Support at 1-855-368-0829.
-
Page 89: Troubleshooting
Troubleshooting ......Before contacting the service center, you are advised to follow the instructions below: • You are advised to fully charge ( ) the battery for optimal operation. • Avoid storing large amounts of data in your device as this may affect its performance. - Page 90 • Check the battery charge level. • My device cannot charge properly • Make sure that your battery is not completely discharged; if the battery power is empty for a long time, it may take around 20 minutes to display the battery charger indicator on the screen.
- Page 91 I am unable to use the features described in the manual • Check with your operator to make sure that your subscription includes this service. I am unable to add a contact in my contacts • Make sure that your SIM card contacts are not full; delete some files or save the files in the device contacts (i.e.
- Page 92 How to make your battery last longer • Make sure you follow the complete charge time (minimum 2.5 hours). • After a partial charge, the battery level indicator may not be exact. Wait for at least 20 minutes after removing the charger to obtain an exact indication.
- Page 93 To download the complete user manual and learn more about your phone, visit alcatelonetouch.us...