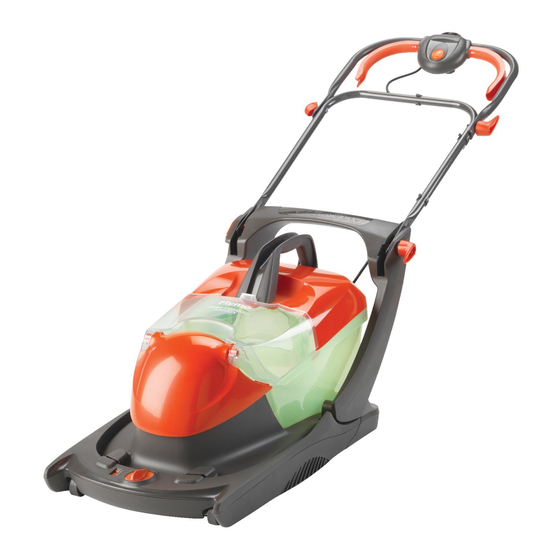
Summary of Contents for Flymo Glider Compact 330 VC
- Page 1 Operator's manual Operator's Manual English Please read the operatorsmanual carefully and make sure you understand the instructions before using the machine.
-
Page 2: Table Of Contents
Contents Service / Warranty Service..............16 Introduction Warranty..............16 Language.............. 3 Consumable............16 Introduction............3 Product liability............ 16 Intended use............3 Product overview...........4 Safety Symbols on the product.........5 General safety instructions........5 Additional safety instructions.........7 Assembly Before you do assembly........8 To assemble the bumper and the lower handle..8 To assemble the middle handle...... -
Page 3: Introduction
Intended use provided and the resulting The FLYMO Electric Lawnmower is used to cut lawn dangers have been in private domestic gardens and allotments. understood, by children aged The product is not intended for long term use. -
Page 4: Product Overview
Product overview 1. Push button 11. Grass box chute 2. Wing knob 12. Grass box lid 3. Cable hook knob 13. Grass box cover 4. Cable hook pin 14. Grass box handle 5. Bolt 15. Upper handle 6. Washer (2 x) 16. -
Page 5: Safety
General safety instructions Ordinary PCP (60245 IEC 57) Connectors - Important Electrical safety • Flymo connectors are suitable for use with 2 core cable only. Under no circumstances should these WARNING! connectors be used for earthed products. • Electric shock ! •... - Page 6 There is an electric shock hazard if a cut off plug is inserted into a 13 amp socket. Operation 1. No earth required. Flymo products are double 1. Operate the machine only in daylight or in good insulated to EN60335 and under no artificial light.
-
Page 7: Additional Safety Instructions
Maintenance and storage Stop the engine, disconnect the mains and examine the cable for damage or ageing before you wind the 1. Keep all nuts, bolts, and screws tight to be sure cable for storage. Do not repair a damaged cable, the machine is in safe working condition. -
Page 8: Assembly
Assembly Before you do assembly WARNING! • Risk of physical injury! • Cut injury when the blade turns or the product starts accidentally. • Wait for the blade to stop, disconnect 5. Slide the bumper (17) completely on the mower the product from the mains and use body (10) until the parts are in touch. -
Page 9: To Assemble The Upper Handle
To assemble the grass box 2. Push the push button (1) on the left side in the handles. 3. Push the cable hook pin (4) on the right side in the handles. 4. Put the 2 R-clips (8) along the grooves on the push button and the cable hook pin. -
Page 10: To Assemble The Grass Box Lid
To assemble the grass box lid 1. Put the grass box lid (12) in the mower body (10). 4. Push the grass box handle (14) into the grass box cover (13) until the connections click. Operation Before you do operation To start the mower WARNING! WARNING! -
Page 11: To Adjust The Cutting Height
To adjust the cutting height 8. Remove the grass box of the product by the handle (14). The cutting height can be adjusted from 12 to 32 mm 9. Empty the grass box. in 4 positions. To use the mower without the grass For larger areas of grass where grass collection is not required you can use the product without the grass box. -
Page 12: Maintenance
Maintenance Before you do maintenance 1 24 WARNING! • Risk of physical injury! • Cut injury when the blade turns or the product starts accidentally. • Wait for the blade to stop, disconnect Use gloves. the product from the mains and use 1. -
Page 13: Troubleshooting
• FLYMO replacement blade reference no. FLY070. Part no. 5898064-90. 1. Let the blade replace by the FLYMO Service or a specialist dealer authorised by FLYMO . 1. Remove the 2 R-clips (8) of the handle locks on both sides. -
Page 14: Repairs
Cutting height is too low. Raise the cutting height. Repairs FLYMO servicing departments or specialist dealers approved by FLYMO . For other malfunctions speak to the FLYMO servicing department. Repairs must only be done by Technical data Electric Lawnmower Unit Value (Art. -
Page 15: Ec Declaration Of Conformity
Description of the product: Electric Lawnmower Product type: Glider Compact 330 VC ; Glider Compact 330 VCX Article number: 9670907-01 ; 9670908-01 EC-Directives: 2006/42/EC; 2014/30/EC; 2000/14/EC; 2011/65/EC Harmonised EN: EN ISO 12100;... -
Page 16: Service / Warranty
FLYMO parts or approved parts, and, if the repairs were not done by a FLYMO Service Centre or an approved specialist. - Page 17 17 - 001 -...
- Page 18 17 - 001 -...
- Page 19 17 - 001 -...
- Page 20 www.husqvarna.com Original instructions VC330-20.960.01/1217...


