Table of Contents
Advertisement
Available languages
Available languages
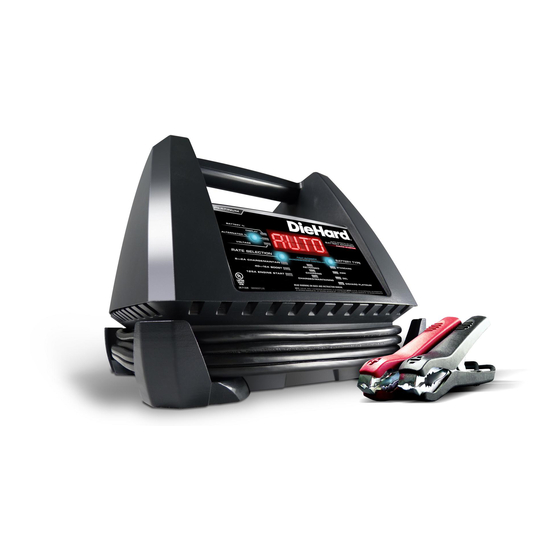
OPERATOR'S MANUAL / MANUAL DEL USUARIO
6V/12V Battery Charger
& Engine Starter
Cargador de baterías
6V / 12V y arrancador
CAUTION:
Read and follow all safety
rules and operating instructions
before every use of this product.
SAVE THESE INSTRUCTIONS.
Sears Brands Management Corporation, Hoffman Estates, IL 60179 U.S.A.
Model / Modelo:
28.71328
Lea y siga todas las reglas
de seguridad e instrucciones de uso
antes de cada uso de este producto.
GUARDE ESTAS INSTRUCCIONES.
ATENCIÓN:
0099001445-01
Advertisement
Table of Contents

Related Manuals for DieHard 28.71328


Summary of Contents for DieHard 28.71328
- Page 1 OPERATOR’S MANUAL / MANUAL DEL USUARIO 6V/12V Battery Charger & Engine Starter Cargador de baterías 6V / 12V y arrancador Model / Modelo: 28.71328 CAUTION: ATENCIÓN: Read and follow all safety Lea y siga todas las reglas rules and operating instructions de seguridad e instrucciones de uso before every use of this product.
- Page 2 FOR CUSTOMER ASSISTANCE OR REPLACEMENT PARTS, CALL 1-800-SEARS-64 (1-800-732-7764) TOLL-FREE FROM 7 AM TO 5 PM CT, MONDAY-FRIDAY. GARANTÍA LIMITADA DIEHARD ® DURANTE TRES AÑOS desde la fecha de venta, este producto está garantizado contra defectos de materiales o mano de obra cuando se opera de acuerdo a las instrucciones provistas.
-
Page 3: Table Of Contents
CONTENTS IMPORTANT SAFETY INSTRUCTIONS ..................4 PERSONAL SAFETY PRECAUTIONS ..................4 PREPARING TO CHARGE ......................5 CHARGER LOCATION ......................... 5 DC CONNECTION PRECAUTIONS ..................... 5 FOLLOW THESE STEPS WHEN BATTERY IS INSTALLED IN VEHICLE ........5 FOLLOW THESE STEPS WHEN BATTERY IS OUTSIDE VEHICLE ........... 6 GROUNDING AND AC POWER CORD CONNECTIONS ............ -
Page 4: Important Safety Instructions
1. IMPORTANT SAFETY INSTRUCTIONS SAVE THESE INSTRUCTIONS. 1.1 SAVE THESE INSTRUCTIONS – 1.8 Do not disassemble charger; take it to This manual contains important safety a qualified serviceman when service or and operating instructions. repair is required. Incorrect reassembly may result in a risk of electric shock or fire. 1.2 Do not expose the charger to rain or snow. -
Page 5: Preparing To Charge
3. PREPARING TO CHARGE 3.1 If necessary to remove battery from battery without removable cell caps, such vehicle to charge, always remove as valve regulated lead acid batteries, grounded terminal from battery first. Make carefully follow manufacturer’s recharging sure all accessories in the vehicle are off, instructions. -
Page 6: Follow These Steps When Battery Is Outside Vehicle
7. FOLLOW THESE STEPS WHEN BATTERY IS OUTSIDE VEHICLE A SPARK NEAR THE BATTERY MAY connect NEGATIVE (BLACK) charger clip CAUSE A BATTERY EXPLOSION. TO to free end of cable. REDUCE THE RISK OF A SPARK NEAR 7.5 Do not face battery when making final THE BATTERY: connection. -
Page 7: Operating Instructions
NOTE: See Operating Instructions for a • DieHard Platinum – Select this option complete description of the charger modes. only if your battery is a DieHard Platinum battery. 11. OPERATING INSTRUCTIONS WARNING: A spark near battery may CHARGING A BATTERY IN THE VEHICLE cause an explosion. - Page 8 1. Place battery in a well-ventilated area. MAINTAINING A BATTERY 2. Clean the battery terminals. The 28.71328 maintains 6 and 12 volt 3. Connect the battery, following the batteries, keeping them at full charge. precautions listed in sections 6 and 7.
- Page 9 BATTERY CHARGING TIMES Use the following table to determine the time it will take to bring a battery to full charge. Ah – Ampere Hours CCA – Cold Cranking Amps RC – Reserve Capacity MO – Maintain Only CHARGE RATE/ CHARGING TIME BATTERY SIZE/RATING 2 AMP...
-
Page 10: Display Messages
(by pressing the RATE SELECTION or BATTERY TYPE button), the charging process will restart. 12. DISPLAY MESSAGES DIEHARD – Scrolls twice upon startup. CHARGING 6V – XX% (Yellow/orange CHARGING LED lit) – Plugged into the CONNECT CLAMPS (VOLTAGE LED lit) –... -
Page 11: Maintenance And Care
(Yellow/orange CHARGING LED flashing) – keep the battery at full charge. Circumstances that could cause an Abort LIFE DEMANDS DIEHARD – Charging situation during charging: is complete and clamps have been • The battery is severely sulfated or has a disconnected. - Page 12 PROBLEM POSSIBLE CAUSE REASON/SOLUTION Digital Display reads LOW The alternator output is 13.2 Have the electrical system when testing the alternator. volts or less. checked by a qualified technician. Digital Display reads HIGH The alternator output is 14.6 Have the electrical system when testing the alternator.
-
Page 13: Before Returning For Repairs
15. BEFORE RETURNING FOR REPAIRS • When a charging problem arises, make • When an UNKNOWN OPERATING certain that the battery is capable of PROBLEM arises, please read the accepting a normal charge. Double check complete manual and call the customer all connections, the AC outlet for a full service number for information. -
Page 14: Instrucciones Importantes De Seguridad
1. INSTRUCCIONES IMPORTANTES DE SEGURIDAD GUARDE ESTAS INSTRUCCIONES. 1.1 GUARDE ESTAS INSTRUCCIONES – 1.8 No desarme el cargador; hágalo revisar Este manual contiene instrucciones por una persona capacitada que efectúe operativas y de seguridad de importancia. reparaciones cuando necesite servicio de mantenimiento o una reparación. -
Page 15: Preparación Para La Carga
2.8 Utilice este cargador solamente para provocar chispas o un cortocircuito en la batería o en cualquier otra pieza eléctrica cargar baterías de PLOMO-ÁCIDO, GEL que podría provocar una explosión. y AGM-recargables con recomienda usar capacidad de la batería de 24Ah (6V) y 2.7 No utilice elementos personales de 44-75Ah (12V). -
Page 16: Siga Estos Pasos Cuando La Batería Esté Colocada En El Vehículo
6. SIGA ESTOS PASOS CUANDO LA BATERÍA ESTÉ COLOCADA EN EL VEHÍCULO UNA CHISPA PROVOCADA CERCA batería al borne POSITIVO (POS, P, +) sin DE LA BATERÍA PUEDE CAUSAR LA descarga a tierra de la batería. Conecte EXPLOSIÓN DE LA BATERÍA. PARA el gancho NEGATIVO (NEGRO) al chasis REDUCIR EL RIESGO DE PROVOCAR del vehículo o al bloque motor alejado... -
Page 17: Conexiones A Tierra Y Energía De Ca
8. CONEXIONES A TIERRA Y ENERGÍA DE CA Este cargador de batería está destinado a USO DE UN CABLE DE EXTENSIÓN un uso en un circuito con tensión nominal El uso de una extensión no se de 120 V. El enchufe se debe conectar recomienda. -
Page 18: Instrucciones De Operación
Este tipo de baterías está diseñado para prematuro como resultado. suministrar rápidas ráfagas de energía (tales • DieHard Platinum – Seleccione esta como los arranques de motores) y poseen opción sólo si la batería es una batería un mayor recuento en placa. Las placas Platinum DieHard. - Page 19 WARNING CLAMPS 5. Cuando se inicia el cargador, la REVERSED, desenchufe el cargador pantalla mostrará DIEHARD. de la toma de corriente, invierta las conexiones de la batería y luego conecte 6. Seleccione el tipo de batería y la el cargador de nuevo.
- Page 20 MANTENIENDO UNA BATERÍA las instrucciones que figuran en la secciónes 6 y 7. El 28.71328 carga y mantiene las baterías de 6 y 12 voltios, mantenerlos a carga 2. Con el cargador enchufado y conectado completa. a la batería y chasis, pulse el botón de RATE SELECTION hasta que se NOTA: La tecnología de modo de...
-
Page 21: Muestra De Mensajes
6<>2A y el tipo de batería Gel. 12. MUESTRA DE MENSAJES DIEHARD – Pergaminos dos veces WARNING CLAMPS REVERSED en el arranque. (Rojo REVERSED LED intermitente) –... -
Page 22: Mantenimiento Y Cuidado
12V descargada. batería a plena carga. FULLY CHARGED AUTO MAINTAINING LIFE DEMANDS DIEHARD – La carga (Verde CHARGED / MAINTAINING LED se completa y las pinzas que se haya sólido) – Conectada a la toma de CA y desconectado. - Page 23 PROBLEMA CAUSA POSIBLE SOLUCIÓN Las pinzas de la Este cargador está equipado No hay problema; es una batería no hacen corto con un auto-rectificador. Este condición normal. al juntarse una con no permitirá paso de corriente si otra. las pinzas de la batería no están conectadas en forma correcta.
-
Page 24: Antes De Devolver A Reparaciones
PROBLEMA CAUSA POSIBLE SOLUCIÓN Ciclo reducido o sin No hay electricidad en el Verifique la posible presencia de inicio al arrancar el tomacorriente. fusibles abiertos o disyuntores motor. que suministren energía al tomacorriente de CA. Cable de CA o alargador suelto. Verifique la posible pérdida del enchufe perteneciente a los cables de alimentación o al alargador.