Table of Contents
Advertisement
Advertisement
Table of Contents

Related Manuals for Samsung yePP YP-K3


Summary of Contents for Samsung yePP YP-K3
- Page 1 YP-K3...
-
Page 2: For Your Safety
For Your Safety WARNING Product Use Improper use can result in explosion, fire or electric shock. Do not disassemble, repair or modify this player on your own. Do not get the player wet or drop it in water. If the player gets wet, do not switch it on. - Page 3 Avoid malfunction Always use the accessories provided by or approved by Samsung. Do not spray water on the player. Never clean the player with chemical substances such as benzene or thinner, as it may cause fire, electric shock or deteriorate the surface.
-
Page 4: Table Of Contents
Battery Charger Safety ...13 Charging the battery ...14 Basic Use...15 Chapter 2. Loading Your Desired File Loading Your Desired File Installing Samsung Media Studio ...18 Connecting to your PC...19 Adding Files/Folders in Samsung Media Studio...20 Transferring Files to the Player with Samsung Media Studio...22... - Page 5 Chapter 4. Setting Settings ...49 Setting Display ...49 Setting Time ...51 Setting Language...53 Setting the System ...54 Chapter 5. Troubleshooting Troubleshooting ...56 Chapter 6. Appendix Menu Tree ...58 Product Specifications ...59...
-
Page 6: Product Features
Product Features Compact & Slim It is designed to look compact and slim for the appearance. Touchpad You can tap on the touch pad to navigate through the menus. Easy & Simple Menu Structure Easy to use with a simple menu structure. Longer Play Time and Shorter Downloading! A fully charged battery can play up to 25... -
Page 7: Basic Information
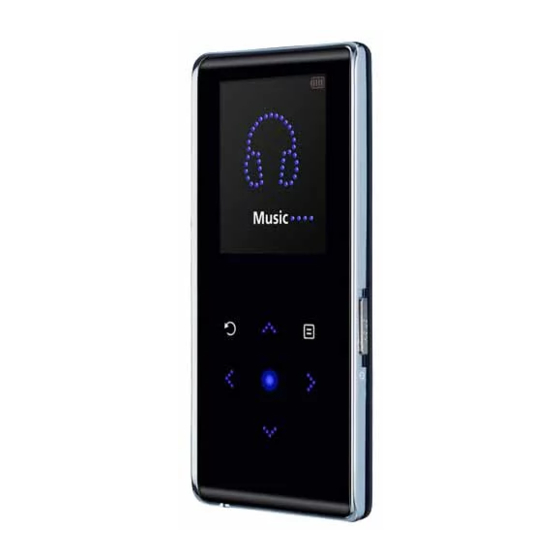
Basic Information Components Checking the Accessories Player Earphones Charger USB Cable Installation CD Neckstrape and Carring case Design of accessories is subject to change for the purpose of improvement, without notice. - Page 8 Basic Information Components Front, Right Side All buttons are 'Light-touch' buttons. Screen Display Menu Button Back Button Button Play/Pause & Select Button (Continued) Power & Hold Switch...
- Page 9 Bottom/Rear [Bottom] Earphone Connection √ Bottom Connection Port Earphone Jack [Rear] Reset Hole Earphones...
-
Page 10: Screen Display Information
Basic Information Screen Display Information Music Play Mode Display Graphic Equalizer Music Information Play Status Bar Current Music Number/ Total Number Display The screen pictures are for illustration purposes only. The actual screen may differ. NOTE Normal 1.Life is cool √... -
Page 11: Button Functions
Basic Information Button Functions Buttons Slide and hold in the opposite direction of the arrow to turn the power on/off. Slide in the arrow direction to lock the buttons. Long tap to move to the main menu. Short tap to move to the previous screen. Moving up, down, left and right and Function Selection. - Page 12 Basic Information Button Functions Tap on touch screen with your fingertip. Do not use any sharp object other than your fingers to operate the touch screen. Otherwise, touch screen may be damaged. CAUTION Do not tap on the touch screen if your fingers are not clean. Do not tap on the touch screen with your gloves on.
-
Page 13: Battery Charger Safety
Basic Information Battery Charger Safety RISK OF ELECTRIC SHOCK. DO NOT OPEN The uninsulated parts inside the charger could cause electric shock. For your safety, do not open the case of the charger. Read this User Manual to prevent any problems that may occur while using the charger. -
Page 14: Charging The Battery
Basic Information Charging the battery A charger is supplied with your player. Plug the charger into a wall outlet. Charging time : approx. 4 hr. To avoid the risk of fire, do not charge longer than 12 hours. Do not plug several devices into the same outlet. CAUTION Do not use a charger that is defective. -
Page 15: Basic Use
Basic Information Basic Use Turning the Power On & Off Turning the Power On Normal Slide and hold the [ HOLD of the arrow. Power is turned on. Turning the Power Off 1.Life is cool Slide and hold the [ HOLD √... -
Page 16: Volume Control
Basic Information Basic Use Volume Control Tap [ Normal 1.Life is cool √ √ 00:02:20 002/020 Lock Function In Hold mode, all buttons are disabled. This function is useful Normal when you are walking or jogging. 1.Life is cool √ √ 00:02:20 002/020 (Continued) You will see a volume control icon. -
Page 17: Reset Function
Reset Function If a player malfunction occurs, you can re-initialize the system by pressing the Reset hole. Press the Reset hole at the rear of the Reset hole player with a pointed object such as a safety clip. The system will be initialized. Your settings and files will not be affected. -
Page 18: Loading Your Desired File
Loading Your Desired File Installing Samsung Media Studio Install the program on PCs running Windows 2000 or Windows XP after logging on with the Administrator account. Please refer to the PC user manual on how to log on with the Administrator CAUTION account. -
Page 19: Connecting To Your Pc
Loading Your Desired File Connecting to your PC Before you start! Use the USB Cable provided when connecting the player to your PC. Connect the USB cable to the USB port ( Connect the other end of the USB cable to the USB Connection Port on the bottom of the player. -
Page 20: Adding Files/Folders In Samsung Media Studio
Loading Your Desired File Adding Files/Folders in Samsung Media Studio Media Studio enables you to select and organize files and folders in preparation for transfer to your player. Please refer to Help for more information on how to use Media Studio. -
Page 21: To Add Folders
Connect the player to your PC. Before you start! Media Studio must be installed on your PC. Media Studio will automatically start when the player is connected to your PC. If the program does not start automatically, double-click the Media Studio Click the desired file icon on the left side. -
Page 22: Transferring Files To The Player With Samsung Media Studio
Loading Your Desired File Transferring Files to the Player with Samsung Media Studio Perform the following steps to transfer files from your PC to the player. Music recognition technology and related data are provided by Gracenote and Gracenote CDDB NOTE CDDB is a registered trademark of Gracenote. - Page 23 Connect the player to your PC. Before you start! Media Studio must be installed on your PC. Media Studio will automatically start when the player is connected to your PC. If the program does not start automatically, double-click the Media Studio Click the desired file icon on the left side.
-
Page 24: Using As A Removable Disk
Using as a Removable Disk Before you start! The file transfer message will appear during file download or upload. Disconnecting the USB cable while the message is displayed may cause malfunction of the player. CAUTION The order of music files displayed in Windows Explorer may differ from the play order on your device. If you transfer a DRM file(charged file) to the removable disk, the file will not be played. -
Page 25: Disconnecting From Your Pc
Disconnecting from your PC Do not disconnect the player from the PC during file transfer. This may cause damage to data and the player. CAUTION You cannot remove the player while files within the player are being played on your PC. Please retry after playback is finished. -
Page 26: Listening To Music
Listening to Music Listening to Music Before you start! Connect the earphones, then turn on the player, and check the battery. Music The music files compatible with the player are MP3, WMA and Ogg. MP1 or MP2 files which only have a changed extension to MP3 may not play on the player. NOTE Press and hold [ Tap [... - Page 27 File Browser MUSIC PICTURES PLAYLIST TEXT If you select the <PICTURES> or <TEXT> folder in the <File Browser>, only those music files trans- ferred into the <PICTURES> or <TEXT> folder are displayed. NOTE Tap [ ] to select <MUSIC> folder, and then tap [ The music files for the selected folder will appear.
- Page 28 Listening to Music Listening to Music To Pause Tap [ ] while the music is playing. The music playback will be paused. Tap [ ] again. The music will play from the point where it stopped. Power is automatically turned off when none of the buttons have been tapped for a preset period of time (Default: 1 minute) in the pause mode.
- Page 29 To Play from the beginning of the current track Tap [ ] after 3 seconds of play. The current track starts playing from the beginning. To play the previous/next track Tap [ ] within 3 seconds of play. The previous track will start playing. Tap [ The next track will start playing.
-
Page 30: Creating A Playlist Using Samsung Media Studio
Listening to Music Creating a Playlist Using Samsung Media Studio A playlist is a list of your favorite songs. Click <My Album> on the top of Media Studio. The <My Album> window appears. Click <New Album> on the bottom. The Creation window appears. - Page 31 Before you start! Connect the player to your PC. Adding Music files to a Playlist Exporting a Playlist to your Player Using Media Studio Click <My PC> on the top of Media Studio. The <My PC> window appears. Click <My Album> in the right corner of the window.
-
Page 32: To Play A Playlist
Listening to Music To Play a Playlist For more information, see pages 30~31 to see how to create and transfer playlists Before you start! to your player. Music Now Playing File Browser Playlists Press and hold [ ] to move to the main menu. Tap [ ] to select <Music>... -
Page 33: Using The Music Option Menu
Listening to Music Using the Music Option Menu To select the sound effect Different sound effects can be selected that enable you to enhance the music you are listening to. Normal Tap [ The music option menu appears. Tap [ Sound Effect The sound effect menu appears. - Page 34 Listening to Music Using the Music Option Menu EQ Setting You can adjust individual frequencies to adjust the sound to your preference. Classical Jazz Ballad Club R&B Dance 3D & BASS During playback of an ogg Q10 file, the <Sound Effect> mode will be deactivated. NOTE Tap [ ] to select <User>...
- Page 35 To select the graphic EQ display Normal Tap [ The music option menu appears. Tap [ Sound Effect The graphic equalizer menu appears. Graphic EQ Play Mode Tap [ <On>: The graphic equalizer will be displayed on the screen. <Off>: The graphic equalizer will not be displayed on the screen. ] while listening to music.
- Page 36 Listening to Music Using the Music Option Menu To select the play mode Normal Sound Effect Graphic EQ Play Mode Tap [ ] while listening to music. The music option menu appears. Tap [ ] to select <Play Mode> and then tap [ The play mode menu appears.
-
Page 37: Listening To Fm Radio
Listening to FM Radio Listening to FM Radio Before you start! Connect the earphones, then turn on the player, and check the battery. FM Radio Always connect your earphones to the player when searching or setting frequencies. The earphones are used as antennas to receive FM radio reception. -
Page 38: To Switch To Manual Mode
Listening to FM Radio Listening to FM Radio To switch to Manual mode Select this mode if you want to manually search through the FM band one frequency at a time. Preset Mode Go to Manual .. Delete Preset Auto Preset Preset List FM Sensitivity To switch to Preset Mode... -
Page 39: To Automatically Search For Frequencies
To automatically search for frequencies Manual Mode Press and hold [ The broadcast station frequency nearest from the point the button is released will be searched. To manually search for frequencies Manual Mode Tap [ Moves to next frequency whenever the button is tapped. ] in <Manual Mode>. -
Page 40: Setting Fm Presets
Listening to FM Radio Setting FM Presets To automatically set Presets Manual Mode Go to Preset .. Add Preset Auto Preset FM Sensitivity Using <Auto Preset> deletes all previous presets. NOTE To cancel during setting Tap [ ] to cancel during auto scanning. The auto preset setting is canceled and frequencies set up to then are stored. - Page 41 To manually set Presets Tap [ Manual Mode Tap [ Go to Preset .. Add Preset Tap [ Auto Preset The selected frequency will be added to the preset list. A maximum of FM Sensitivity 30 preset numbers are added to the list in sequential order. To set a preset for other frequencies, follow 1-3 steps above.
-
Page 42: To Delete Presets
Listening to FM Radio To Delete Presets Delete Preset 89.1MHz 89.2MHz 89.3MHz 89.4MHz Tap [ ] in <Preset Mode>. Tap [ ] to select <Delete Preset> and then tap [ The preset frequencies will appear. Tap [ ] to select the preset frequency you want to delete and then tap [ The confirmation window will appear. -
Page 43: Setting Fm Radio
Listening to FM Radio Setting FM Radio To set FM Sensitivity Manual Mode Tap [ Go to Preset .. Tap [ Add Preset Auto Preset The FM Sensitivity menu appears. FM Sensitivity Tap [ You can select from <High>, <Middle> and <Low>. The higher FM sensitivity is, the more frequencies that can be received. -
Page 44: Photo Viewing
Photo Viewing Photo Viewing Before you start! See pages 22-23 to transfer Photo files to your player. Photo You will see thumbnail photos if the appropriate NOTE information is included in the file. For a file with no information, you will instead. -
Page 45: Using The Photo Option Menu
Photo Viewing Using the Photo Option Menu To listen to music while viewing your photo You can listen to the song that you last played while viewing your photo. Tap [ Tap [ Music Off>. Background Mu.. Add to Screen S.. Zoom played while viewing your photo. - Page 46 Photo Viewing Using the Photo Option Menu Photo Enlarging Background Mu.. Add to Screen S.. Zoom Tap [ ] while viewing a photo. The photo option menu appears. Tap [ ] to select <Zoom> and then tap [ The Zoom Setting menu appears. Tap [ ] to select the desired scale factor and then tap [ You can select either <100%>...
-
Page 47: Text Viewing
Text Viewing You can read a novel or see the manuscript text of a news story or soap Text Viewing opera while listening to music. See pages 22-23 to transfer text files to your player. Before you start! Turn on the player, and check the battery. Select a preferred language in the Language menu. -
Page 48: Using Text Menu
Text Viewing Using Text menu To listen to music while viewing your text You can listen to the song that you last played while viewing your text. interview Background Mu Text Viewer Ty.. To set the text viewer type interview Background M.. -
Page 49: Settings
Settings Setting Display Press and hold [ Tap [ The Settings menu appears. Settings Tap [ Settings Display The Display menu appears. Time Language System Use the [ Button Operation Tap [ ] to move up or down in the list. NOTE Tap [ ] to select and confirm your settings. - Page 50 Settings Setting Display <Font Type> : You can set the font type. Select one from 3 font types. <Screen Saver> : You can set an image to use as a screen saver. Select either <Analog Clock>, <Animation1>, <Animation2> <Animation3>, and <Photo> and set the wait time.
-
Page 51: Setting Time
Settings Setting Time Settings Press and hold [ Display Time Language Tap [ System The Settings menu appears. Tap [ The Time menu appears. Use the [ <Sleep Timer> : Turns off power automatically after the preset time. Select either <Off>, <15min>, <30min>, <60min>, <90min>, or <120min>. <Auto Power Off>... - Page 52 Settings Setting Time Time Set Time Set Hour (Continued) Tap [ ] to select <Time set> and then tap [ Tap [ ] to move to <AM/PM, Hour, Minute> and use the [ to set the time. Tap [ The confirmation window will appear. Tap [ ] to select <Yes>...
-
Page 53: Setting Language
Settings Setting Language Settings Press and hold [ Display Time Tap [ Language System The Settings menu appears. Tap [ Use the [ Select from <English>, < < <Nederlands>, <Polski>, <Português>, and <Svenska>. The supported languages can be changed or added. NOTE You can set a preferred language for the menu. -
Page 54: Setting The System
Settings Setting the System Settings Display Time Language System <Resume>: You can set the start point where the player resumes playback after you stop playing the music. Selecting <On> will resume playback from the last stopped point while <Off> will resume playback from the beginning of the last played file. <Beep>: Enables button sounds. -
Page 55: Default Set
<Default Set> : Returns all settings to the default value. <About>: You can check the firmware version, memory capacity and file number. Firmware Version : Displays the current firmware version. Memory : Indicates the remaining memory capacity. <Used> indicates the usage, <Remain> indicates the remaining capacity and <Total>... -
Page 56: Troubleshooting
Troubleshooting Problem Power will not turn on. Buttons do not work. The screen will not turn on. Power is turning off. Battery life differs from the Manual. Program Malfunction Connection to your PC is disabled. If a malfunction is experienced, check the following. Check points &... - Page 57 Files or data are missing. only to files/data but also to the player. You have to be extra cautious as Samsung is not responsible for data loss. Abnormal Play Time Check if the file is in VBR (Variable Bit Rate) format.
-
Page 58: Menu Tree
Menu Tree Menu Select Screen Music » È º ¡§ Display Font Type Screen Saver Display Off You can quickly view the menu structure. FM Radio Photo Time Sleep Timer Auto Power Off Time Set Text Settings Language System Resume Beep Volume Limit FM Region... -
Page 59: Product Specifications
Product Specifications Model Name YP-K3 Power 3.7V (Li-Polymer Rechargeable) Built-in Battery Power 500mAh Music : MPEG1/2/2.5 Layer3(8kbps~320kbps, 22kHz~48kHz) Compatibility File Image : JPEG(ISO/IEC 10918-1/Annex F-Sequential DCT-based mode Earphone Output 20mW(16 ) 20Hz~20KHz Output Frequency Range 90 dB (based on 1KHz 0 dB) Signal to Noise Ratio Music 25 hrs (based on MP3 128kbps, volume level 15 and normal mode) Play Time... -
Page 60: Contact Samsung World Wide
Contact SAMSUNG WORLD WIDE If you have any questions or comments relating to Samsung products, please contact the SAMSUNG customer care center. - Page 62 License The product player accompanying this user manual is licensed under certain intellectual property rights of certain third parties. This license is limited to private non-commercial use by end-user consumers for licensed contents. No rights are granted for commercial use. The license does not cover any product player other than this product player and the license does not extend to any unlicensed product player or process conforming to ISO/IEC 11172-3 or ISO/IEC 13818-3 used or sold in combination with this product player.
- Page 63 REV 0.0...