
Related Manuals for Samsung MW830BA


Summary of Contents for Samsung MW830BA
- Page 1 Microwave Oven Owner’s Manual MW830WA / MW830BA Code No. : DE68-01870A...
-
Page 2: Safety
Do not use corrosive chemicals or vapors in this appliance. This type of oven is specifically designed to heat, cook, or dry food. It is not designed for industrial or laboratory use. - Page 3 Contact the nearest authorized service facility for examination, repair, or adjustment. • Do not cover or block any of the openings on this appliance. • Do not store this appliance outdoors. Do not use near water – for example, near a kitchen sink, in a wet basement, or near a swimming pool, etc.
-
Page 4: Use Of Extension Cords
This appliance is equipped with a cord that includes a grounding wire and a grounding plug. The plug must be plugged into an outlet that is properly installed and grounded. Plug the three-prong power cord into a properly grounded outlet of standard 115-120 voltage, 60 Hz. -
Page 5: Table Of Contents
Using the Instant Cook Buttons ...8 Instant Cook Chart/ ...9 Using the One Minute+ Button ...10 Defrosting ...10 Setting Cooking Times & Power Levels ... 10 Cooking Instructions ... 11 Cooking Utensils ... 11 Testing Utensils ... 11 Cooking Techniques ... 12 General Tips ... -
Page 6: Your New Microwave Oven
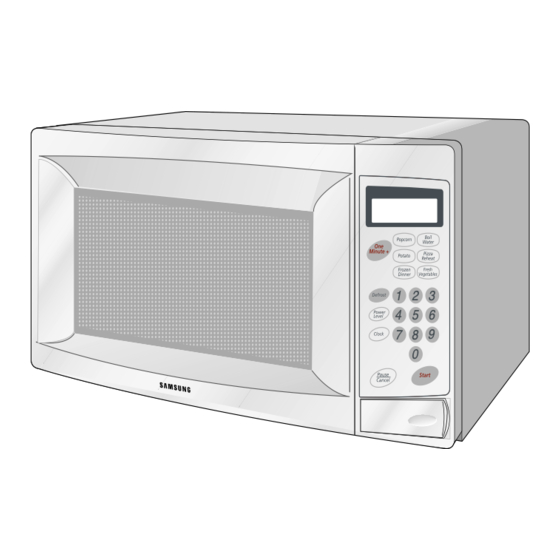
Your New Microwave oven Checking Parts Unpack your microwave oven and check to make sure that you have all the parts shown here. If any part is missing or broken, call your dealer. microwave oven glass tray roller guide ring... -
Page 7: Control Panel Buttons
Press once for every minute of cooking at High power. 3. Number buttons Sets cooking times. 4. Defrost Press to set the defrosting time of the food to be defrosted. 5. Power Level Sets power to level other than high. 6. Clock Sets current time. -
Page 8: Operation
Use the Number buttons to enter the current time. You must press at least three numbers to set the clock. If the current time is 5:00 enter, 5,0,0 Press Clock again. A colon will appear, indicating that the time is set. -
Page 9: Instant Cook Chart
1 Slice 2 Slices 3 Slices Note The cooking time of 3.0 oz. microwave-popcorn depends on the contents of butter and brands. Cooking time is adjustable for desired taste with numeric pads following package instructions. Weight • Use one microwave-only bag of popcorn. -
Page 10: Using The One Minute+ Button
Operation Using the One Minute+ Button This button offers a convenient way to heat food in one-minute increments at the High power level. Press the One Minute+ button once for each minute you wish to cook the food. For example, press it twice for two minutes. -
Page 11: Cooking Instructions
High power. The water should be warm and the dish you are testing should be cool. If the dish is warm, then it is absorbing microwave energy and is not acceptable for use in the microwave. -
Page 12: Cooking Techniques
Food at the outside of the dish absorbs more energy and heats more quickly, so stir from the outside to the center. The oven will turn off when you open the door to stir your food. Arrangement... -
Page 13: Cooking Guide
• Place meat on a microwave-safe roasting rack in a microwave-safe dish. • Start meat fat-side down. Use narrow strips of aluminum foil to shield any bone tips or thin meat areas. • Check the temperature in several places before letting the meat stand the recommended time. - Page 14 • Place fish on a microwave-safe roasting rack in a microwave-safe dish. • Use a tight cover to steam fish. A lighter cover of wax paper or paper towel provides less steaming. • Do not overcook fish; check it at minimum cooking time.
-
Page 15: Defrosting Guide
Unwrap food. Place food on microwave-safe rack, plate or shallow dish. • After first half of defrosting time: remove any remaining wrap, break food apart or separate pieces if possible, remove any thawed food, if possible, shield tips, thin meat or warm areas of food with foil. •... -
Page 16: Recipes
Cook at High for 60 to 90 seconds until mixture boils. Stir in milk until smooth. 3. Stir in red pepper. Cook at High for 2 to 3 minutes until mixture boils and thickens slightly, stirring twice. Stir in cheese until melted. - Page 17 High until potatoes are tender (10-12 min.); stir twice. Drain and set aside to cool slightly. 2. In a medium bowl, cook bacon at High until crisp (3-5 min.); stir once. Place bacon on a paper towel. Reserve 1 Tbs. drippings.
-
Page 18: Appendix
If there has not been a power outage, remove the plug from the outlet, wait ten seconds, then plug it in again. If there was a power outage, the time indicator will display “88:88” Reset the clock and any cooking instructions. -
Page 19: Care And Cleaning
Never operate the oven without food in it; this can damage the magnetron tube or glass tray. You may wish to leave a cup of water in the oven when it is not in use to prevent damage if the oven is accidentally turned on. -
Page 20: Specifications
Controls Timer Power Source Power Output Outside Dimensions Oven Cavity Dimensions Net/Gross Weight MW830WA/MW830BA 0.8cuft 10 power levels, including defrost 99 minutes, 99 seconds 120 VAC, 60 Hz 800 Watts 13/16 ”(W) X 10 ”(H) X 13 29/32 15/16 13(W) X 7 ”(H) X 12... -
Page 21: Manual Blok Warranty Card
This warranty will automatically be voided for any unit found with a missing or altered serial number. This warranty is valid only on products purchased and used in the Canada. -
Page 22: Samsung Electronics
The above described warranty repairs must be performed by a SAMSUNG Authorized Service Center. Along with this Statement, the Original Limited Warranty Statement and a dated Bill of Sale as Proof of Purchase must be presented to the Service Center. Transportation to and from the Service Center is the responsibility of the purchaser. - Page 23 Note...
-
Page 24: Quick Reference
2. Press the buttons(0-9) sequentially to enter the desired defrosting time. 3. Press START. 1. Press the POWER LEVEL button. If you wnat to set the power level to something other than High, press the POWER LEVEL button repeatedly. 2. Use NUMBER buttons to set cooking time. - Page 25 Four à Manuel du Propriétaire MW830WA / MW830BA...
- Page 26 • Cet appareil doit être mis à la terre. Connecter l’appareil à une prise secteur bien mise à la terre. Voir “Instructions importantes de mise à la terre” à la page 4 de ce manuel. • Placer ou installer cet appareil de façon conforme aux instructions fournies.
- Page 27 • Ne pas immerger le cordon ou la fiche dans l’eau. • Ne pas exposer le cordon à une source de chaleur.
- Page 28 NSTRUCTIONS DE À LA ERRE MPORTANTES Cet appareil doit être mis à la terre. Dans le cas d’un court-circuit électrique, le fait d’être mis à la terre réduit le risque de choc électrique en déviant le courant électrique. Cet appareil est muni d’un cordon qui comprend une troisième lame...
- Page 29 Commande (Instant Cook) ...8 Tableau de cuisson instantanée ...9 Commande (One Minute+)...10 Décongélation ...10 Ajustement du temps de cuisson et du niveau de puissance ...10 Instructions pour la cuisson ... 11 Ustensiles de cuisson... 11 Essais des ustensiles ... 11 Techniques de cuisson...
-
Page 30: Votre Nouveau Four Micro-Ondes
à venir. Veuillez inscrire le numéro de série de votre appareil (voir sur le côté ou à l’arrière du four) ainsi que la date de son achat dans l’espace ci-après. Nous vous recommandons d’attacher votre reçu à... -
Page 31: Defrost
5. Power Level Pour ajuster la puissance à des niveaux autres que haute puissance. 6. Clock Pour ajuster l’heure. 7. Pause/Cancel Touche servant à arrêter le four ou pour corriger une erreur. 8. Start Appuyer pour débuter la cuisson. p.10 p.10... -
Page 32: Pause/Cancel
Pause/Cancel une fois. Pour redémarrer toucher Start. • Pour arrêter la cuisson, effacer les instructions et retourner l’afficheur à l’heure ; appuyer deux fois Pause/Cancel. • Pour corriger une entrée, appuyer Pause/ Cancel une fois, puis reprendre l’entrée. -
Page 33: Tableau De Cuisson Instantanée
3 pointes Note Le temps de cuisson indiqué pour 86 gr de maïs soufflé tient compte du beurre et des grains de maïs. Vous pouvez modifier le temps de cuisson à votre goût à l’aide des touches numériques ou selon les instructions inscrites sur l’emballage. -
Page 34: Commande (One Minute+)
Le niveau de puissance vous permet de contrôler l’intensité de chaleur de chaud à très chaud, à l’aide de la commande Power Level. Appuyer sur la touche Power Level. La puissance est alors automatiquement ajustée à... -
Page 35: Instructions Pour La Cuisson
Appuyer sur la touche One Minute+ une fois pour la réchauffer une minute à haute puissance. L’eau doit être tiède et le plat en essai doit être froid. Si le plat devient tiède, c’est qu’il absorbe de l’énergie micro-ondes et n’est donc pas adéquat... -
Page 36: Techniques De Cuisson
Les surfaces à protéger sont : les bouts d’ailes de la volaille ; les bouts des cuisses de la volaille et les coins des plats de forme carrée ou des plats boulangés. N’utiliser que de petites quantités de papier aluminium. -
Page 37: Guide De Cuisson
également conçu pour le micro-ondes. • Placer le côté contenant le plus de gras vers le bas. À l’aide d’étroites bandes de papier aluminium recouvrir tous les os ou les parties les plus minces de la pièce de viande. •... - Page 38 Le niveau de puissance: Haut (High ) 700 gr Les œufs au micro-ondes • Ne jamais faire cuire les œufs dans leur coquille ni jamais réchauffer les œufs à la coque dans le four • Toujours percer les œufs afin qu’ils n’éclatent pas. •...
-
Page 39: Guide Pour La Décongélation
Au mi-temps de la décongélation, enlever le reste de l’emballage et séparer les divers morceaux, s’il y a lieu et enlever les morceaux décongelés ; si possible couvrir les bouts, les parties minces ou les surfaces chaudes des aliment avec des feuilles d’aluminium. -
Page 40: Recettes
Recouvrir. Cuire à médium pendant 45 à 50 min jusqu’à ce que les carottes et le bœuf soient ramollis en remuant 2 ou 3 fois. 3. Verser les pois et couvrir. Cuire à médium pour 10 min Laisser reposer pendant 10 min Retirer la feuille de laurier avant de servir. - Page 41 High jusqu’à ce que les oignons deviennent tendres (3 à 4 min) ; remuer une fois. 4. Verser en remuant le sucre, le sel la farine les graines de céleri et le poivre. Chauffer à High pour faire bouillir le mélange (30 à 40 secs.).
-
Page 42: Appendice
à la terre. • Si la prise est contrôlée par un commutateur, s’assurer que celui-ci est bien fermé (à on). • Retirer la fiche de la prise, attendre 10 secs. et rebrancher. • Réactiver le disjoncteur ou remplacer un fusible brûlé. -
Page 43: Nettoyage Et Entretien
500 ml d’eau (y ajouter le jus d’un citron pour donner une odeur de fraîcheur) dans un contenant de 1 litre à Hi pendant 5 min, amener à ébullition. Laisser reposer pendant une ou deux minutes. -
Page 44: Spécifications
Dimensions extérieures Dimension de la cavité Poids net / brut MW830WA/MW830BA 22,65 litres 10 niveaux de puissance incluant décongélation 99 min,99 secs. 120V ca, 60 Hz 800 Watts 489mm (L) 275mm (H) 351mm (P) 330mm (L) 201mm (H) 329mm (P) -
Page 45: Informations Sur La Garantie
Cette preuve d’achat doit être présentée à un Centre de service autorisé de SECA au moment où le service est requis et avant que le service ne soit rendu. Pour tous les modèles transportables carry-in, le transport vers le Centre de service autorisé de SECA et le retour vers le domicile du client sont la responsabilité... - Page 46 SAMSUNG ajoute à sa garantie les réparations et le service effectués aux États-Unis sur les produits SAMSUNG achetés au Canada et au Canada sur les produits SAMSUNG achetés aux États-Unis. Ceci pour les périodes de garantie précédemment spécifiées et ne s’appliquant qu’à...
- Page 47 Notes...
-
Page 48: Aide-Mémoire Rapide
3. Toucher Start 1. Toucher la commande (Power Level). Pour ajuster la puissance à un niveau autre que Haut (High), toucher à répétition la même commande jusqu’au niveau désiré. 2. Toucher les commandes numériques pour composer le temps de cuisson désiré.