Advertisement
Quick Links
DNM63 HW
1L
I/S
SIZE:594X210 mm
COLOR: 4C+4C
RACE IN THE AIR
PRE-FLIGHT CHECK
1. WHEELS TURN.
2. PROPELLERS SPIN.
3. WINGS ARE DEPLOYED.
4. ADJUST THE FLAP ON REAR SPOILER FOR BEST TAKE-OFF
PERFORMANCE. MOVE FLAP TO A SLIGHTLY DOWNWARD ANGLE
IF VEHICLE FLIES STRAIGHT UP. IF VEHICLE DOES NOT TAKE-OFF,
MOVE FLAP TO A SLIGHTLY UPWARD ANGLE.
FLYING THE VEHICLE
Switch controller and vehicle on, synchronize them and then select FLIGHT (
) Mode.
Taking Off:
Maintaining Flight:
Place the vehicle on the ground and stand behind it.
To increase altitude, push the throttle
Push the throttle joystick completely forward until the vehicle begins to
joystick forward.
take flight. If the plane veers right or left during take off, push the
steering joystick to the opposite direction to keep moving forward.
Once you've reached your desired altitude, slowly pull back
on the throttle joystick to level off.
To decrease altitude, slowly pull back on the throttle joystick.
Steering:
Landing:
Keep the throttle joystick still and slowly push the
Pull back on the throttle joystick and the vehicle will
steering joystick left or right. Return the steering joystick to the
descend. Just before the vehicle touches the ground, push the throttle
joystick forward a little and then let go. This will level the vehicle off so
center position once the vehicle is flying in the direction you want.
it does not crash nose first into the ground.
6
CONTENTS
L
L
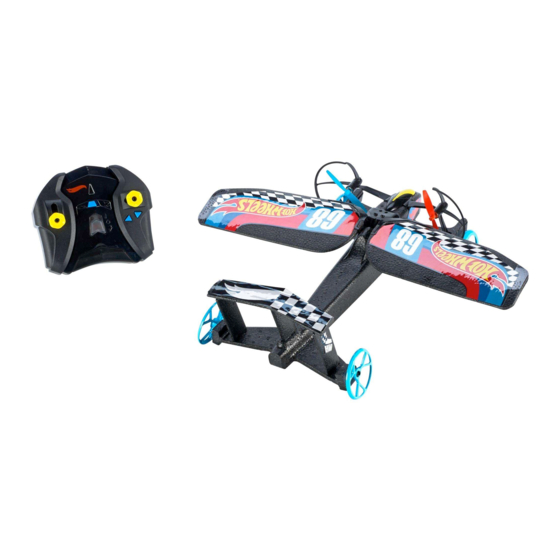
Colors and decorations may vary.
FEATURES
1
3
7
2
4
5
6
6
ABOUT THE CONTROLLER
ABOUT THE VEHICLE
TRANSFORMATION / GROUND (
) / FLIGHT (
)
1
7
VEHICLE POWER SWITCH
• Select ( ) to switch vehicle OFF.
MODE SWITCH – Use to transform and select between
Ground Mode and Flight Mode.
• Select ( ) to switch vehicle ON.
THROTTLE JOYSTICK – Controls both motors and is used
2
8
CHARGING SOCKET – Use to charge the vehicle's internal
to make the vehicle move forward / ascend / descend.
LiPo battery.
STEERING JOYSTICK – Controls the left and right motors
3
independently to make the vehicle turn left / right.
4
CONTROLLER POWER SWITCH
• Select ( ) to switch controller ON.
THE VEHICLE HAS A SPECIALLY-DESIGNED
• Select ( ) to switch controller OFF.
DURAFORM™ BODY COMPRISED OF EXPANDED
• Select ( ) to charge the vehicle.
POLYPROPYLENE (EPP), MAKING IT LIGHTWEIGHT AND
5
ALIGNMENT ADJUSTMENT BUTTONS – Use to correct
EXTREMELY RESILIENT FOR LONG-TERM DURABILITY.
the direction of the vehicle if it veers to either side.
6
POWER CABLE SOCKET – Use to charge the vehicle with
the USB cable (included).
SAFETY INFORMATION
Note to Adults: To ensure that the child's play is both safe and fun, please review all operating instructions and
safety rules with your child.
• The toy is not intended for children under 8 years old.
• Keep fingers, hair and loose clothing away from the propellers while the vehicle is switched ON.
• Stay at least 3 to 6 feet away from the vehicle. That goes for anyone watching as well.
• Always keep an eye on the vehicle. If it looks like it's going to crash into you, your friends or anything else, release the throttle joystick and step out of the way.
• Never disassemble or attempt to modify the vehicle.
• When not in use, turn off vehicle and then controller. To avoid accidental operation, remove batteries in controller.
• Operating range of controller is around 200 ft (60 m).
2
PERFORMANCE TIPS
SKY SHOCK
TM
DELIVERS A PLAYING TIME OF 5-7 MINUTES. YOUR TIMES MAY VARY, DEPENDING ON WIND,
TEMPERATURE AND OTHER ENVIRONMENTAL CONDITIONS.
• Give yourself plenty of flying room. For best results, operate vehicle in a wide open area.
• Avoid buildings, trees and power lines as they may obstruct your flight path.
• Launching into a gentle breeze will allow the vehicle to take off with the least amount of runway space.
• Make small, smooth and slow movements on the throttle and steering joysticks.
• Vehicle can be hand launched by holding it directly under the wings, then pushing the throttle joystick completely forward and gently throwing
the vehicle ahead, parallel to the ground.
• Point your controller up, not down toward your vehicle. If your vehicle gets too far away, it won't work properly.
• Don't drive your vehicle in sand or through water or snow. Do not immerse in water. If your vehicle or controller does get wet, wipe it with a
towel, remove batteries, and allow to dry completely overnight. Replace with fresh batteries before next use.
• PLAY SAFELY – Do not drive or fly vehicle in the street! Watch out for people, animals and obstacles.
• DO NOT attempt to operate your vehicle in strong winds. Wind will make it difficult to fly safely and will reduce battery life and flying time.
Remember that the wind may be stronger higher up in the sky than at ground level.
REPAIR & TROUBLESHOOTING
1. Use clear household tape to repair tears, creases or cracks. Use sparingly as added weight will affect performance.
2. Dirt or mud on the vehicle can affect its operation. Use a clean, dry cloth to remove any dirt immediately. If the vehicle gets wet, turn it off and allow
it to dry completely overnight.
3. When the vehicle does not respond, slows down, or loses range, recharge the vehicle. If performance does not improve following a recharge, install
fresh alkaline batteries in the controller.
4. Radio interference can affect your vehicle's performance. Interference can be caused by other R/C vehicles running on the same frequency, electrical
wires, large buildings, WiFi or Bluetooth. If you experience interference, turn off your vehicle and controller and relocate to a different area.
5. When exposed to an electrostatic source, the toy may malfunction. Switch OFF both the vehicle and controller. Remove batteries from the controller,
wait 30 seconds, re-insert batteries and switch ON again. This should reset your controller / vehicle and let you resume normal operation.
REPLACING THE PROPELLERS
The vehicle comes with 4 replacement propellers - 2 for each side. If either of the vehicle's propellers break off or become damaged,
replace them by following the steps below.
Coin
1. Use a coin (not included) to
2. Select the required propeller.
pry off the old propeller.
"L" is for left side
(BLUE PROPELLER).
"R" is for right side
(RED PROPELLER).
4. Use the coin to gently push
3. Align the pin from the motor
with the hole in the propeller.
the propeller onto the pin.
Make sure the molded letter
The coin will prevent the pin
(L or R) on the propeller is
from poking your finger.
facing the pin.
7
SET UP
1. CONTROLLER BATTERY INSTALLATION
1. Unscrew the battery cover with a Phillips head screwdriver (not
included).
2. Install 6 AA (LR6) alkaline batteries (not included) with polarity (+/-) as
shown inside the battery compartment. For longer life, use alkaline
batteries.
R
3. Replace battery cover and tighten screws.
R
4. Replace batteries in the controller if the vehicle runs slowly after a
recharge or if you see a green light flashing in the controller power
switch during play.
2. CHARGING THE VEHICLE
8
MUST CHARGE VEHICLE BEFORE FIRST USE. CHARGE TIME IS APPROXIMATELY 80 MINUTES OR MORE.
Your vehicle is powered by a LiPo battery that is permanently installed. The vehicle must be charged before play. It can be charged with the controller or
with the USB cable.
CHARGING WITH THE CONTROLLER
1. To charge, first make sure you have installed 6 AA alkaline batteries in the controller and that both the controller and vehicle are switched
OFF ( ).
2. Open the cover on the controller and take out the charging cable (see ).
a
3. Insert the charging plug firmly into the socket under the vehicle. Make sure the connection is secure (see ).
b
4. To begin charging, move the controller power switch from OFF ( ) to CHARGE ( ). A red light in the power switch will turn on. This indicates the
vehicle is charging. (see ).
c
5. The charging process takes up to 80 minutes. The red light will go off when charging is complete.
6. Move the controller power switch from CHARGE ( ) to OFF ( ).
7. Hold the charging plug and gently pull it out of the socket. NEVER pull on the cable as this may cause the cable to break.
8. Replace the charging cable into the controller and close the cover.
9. The vehicle will usually have about 5-6 minutes of flight time once fully charged.
a
b
c c
CHARGING WITH THE USB CABLE
1. Connect the controller to a powered USB port with the supplied USB cable.
2. Follow the same instructions as detailed in CHARGING WITH THE
CONTROLLER.
3. Remember to disconnect the USB cable from the controller before play.
3
BATTERY SAFETY INFORMATION
In exceptional circumstances batteries may leak fluids that can cause a chemical burn injury or ruin your
product. To avoid battery leakage:
• Non-rechargeable batteries are not to be recharged.
• Rechargeable batteries are to be removed from the product before being charged.
• Rechargeable batteries are only to be charged under adult supervision.
• Do not mix alkaline, standard (carbon-zinc), or rechargeable (nickel-cadmium) batteries.
• Do not mix old and new batteries.
• Only batteries of the same or equivalent type as recommended are to be used.
• Batteries are to be inserted with the correct polarity.
• Exhausted batteries are to be removed from the product.
• The supply terminals are not to be short-circuited.
• Dispose of battery(ies) safely.
• Do not dispose of this product in a fire. The batteries inside may explode or leak.
Battery Performance Note:
For best performance use alkaline batteries. Battery life may vary depending on battery brand.
Protect the environment by not disposing of this product with household waste
(2012/19/EU). Check your local authority for recycling advice and facilities.
L
L
R
Coin
For additional help, visit www.HotWheels.com
©2016 Mattel. All Rights Reserved. Mattel, Inc., 636 Girard Avenue, East Aurora, NY 14052, U.S.A. Consumer Services 1-800-524-8697.
Mattel U.K. Ltd., Vanwall Business Park, Maidenhead SL6 4UB. Helpline 01628 500303.Mattel Australia Pty., Ltd., Richmond, Victoria.
3121.Consumer Advisory Service - 1300 135 312. Mattel East Asia Ltd., Room 503-09, North Tower, World Finance Centre, Harbour City,
Tsimshatsui, HK, China. Tel.: (852) 3185-6500.Diimport & Diedarkan Oleh: Mattel Southeast Asia Pte. Ltd. , No 19-1, Tower 3 Avenue 7,
Bangsar South City, No 8, Jalan Kerinchi, 59200 Kuala Lumpur, Malaysia. Tel: 03-78803817, Fax: 03-78803867.
8
LiPo(LITHIUM POLYMER) BATTERY INFORMATION
• FULLY CHARGE THE BATTERY BEFORE STORING FOR AN EXTENDED PERIOD OF TIME (6 MONTHS OR LONGER). PERIODIC CHARGING
EVERY FEW MONTHS IS RECOMMENDED TO EXTEND BATTERY LIFE WHEN NOT IN USE. DO NOT STORE NEAR HEAT OR IN DIRECT
SUNLIGHT.
• DO NOT DISASSEMBLE THE VEHICLE'S PERMANENTLY INSTALLED LiPo (Lithium Polymer) BATTERY. IT IS A SEALED LiPo BATTERY. TO PROPERLY
RECYCLE, FOLLOW LOCAL LITHIUM POLYMER BATTERY RECYCLING GUIDELINES.
• DO NOT RECHARGE THE VEHICLE IF IT FEELS HOT. ALLOW IT TO COOL BEFORE RECHARGING.
• VEHICLE IS ONLY TO BE CHARGED USING THE CONTROLLER/CHARGER SUPPLIED. DO NOT CHARGE THE LiPo BATTERY IN ANY OTHER
BATTERY CHARGER.
• DO NOT ATTEMPT TO USE OR CHARGE THE VEHICLE IF IT SHOWS SIGNS OF LEAKAGE OR CORROSION.
• IF THE VEHICLE AND/OR CONTROLLER ARE WET, THOROUGHLY DRY BEFORE USING OR CHARGING.
• REGULARLY EXAMINE ALL WIRES AND CONNECTORS. IN THE EVENT OF DAMAGE, DISCONTINUE USE.
3. PAIRING THE CONTROLLER AND VEHICLE
You must pair the controller with the vehicle before you can control it.
FIRST SWITCH ON THE VEHICLE, THEN IMMEDIATELY SWITCH ON THE
CONTROLLER. The controller power switch changes from a flashing green
light to a solid green light when pairing is complete. If the green light does
not stop flashing after a few seconds, switch off the controller and vehicle,
then try again.
NOTE:
WHEN PLAYING WITH MULTIPLE VEHICLES, EACH MUST BE PAIRED
ONE AT A TIME. A maximum of 6 vehicles can be paired in one location.
4. ALIGNMENT ADJUSTMENT
It is recommended that you check the vehicle's alignment before playing.
Ground Mode
1. Switch controller to GROUND (
) Mode.
2. Push the throttle joystick forward to see if the vehicle will drive straight.
3. If the vehicle veers right, stop the vehicle and press the left alignment adjustment
button 2 or 3 times.
4. If the vehicle veers left, press the right alignment adjustment button 2 or 3 times.
5. Repeat steps 3 or 4 until the vehicle can travel in a straight line.
Flight Mode
1. Switch controller to FLIGHT (
) Mode.
2. Push the throttle joystick forward until the vehicle takes off.
3. The vehicle may veer to one side because of wind or turbulence. Use the steering
joystick to make the vehicle fly straight and level and then let go of the joystick.
4. Observe the vehicle and see if it will fly straight or veer to one side.
5. If the vehicle veers right, stop the vehicle and press the left alignment adjustment
button 2 or 3 times.
6. If the vehicle veers left, press the right alignment adjustment button 2 or 3 times.
7. Repeat steps 5 or 6 until the vehicle can fly in a straight line.
NOTE:
Alignment adjustment settings reset when controller is switched off and will need to
be checked before each use. The alignment adjustment button can be pressed a
maximum of 15 times in either direction.
4
4
PILOT'S MANUAL
OUTDOOR USE RECOMMENDED.
ADULT ASSEMBLY REQUIRED.
Keep these instructions for future reference as they contain important information.
IMPORTANT: Please read all instructions before operating your vehicle.
CAUTION:
Surfaces may become hot and cause burns if electronics get wet.
To prevent entanglement, keep all hair away from moving parts.
Adult supervision is recommended when the vehicle is being operated.
TRANSFORMATION
RACE CAR TO RACE PLANE
RACE PLANE TO RACE CAR
NOTES:
• DO NOT hold or obstruct wings during transformation.
• Vehicle will NOT transform in the air while flying.
• Vehicle MUST be on the ground in order to transform.
RACE ON THE GROUND
DRIVING THE VEHICLE
Switch controller to GROUND (
) Mode.
RIGHT
LEFT
FORWARD
FORWARD LEFT
FORWARD RIGHT
NOTES:
• The vehicle drives best on flat, smooth surfaces. Avoid driving through wet areas.
• To conserve battery life, the vehicle and controller goes to sleep when left idle for 5 minutes.
5
To wake up and continue play, switch the vehicle and controller OFF and then ON again.
5
TM
INSTRUCTION SHEET
SPECIFICATIONS
HW
Toy:
DNM63
Toy No.:
0970
Part No.:
594mm W x 210mm H
Trim Size:
148.5mm W x 210mmH
Folded Size:
ACCORDION
Type of Fold:
ONE
# colors:
Colors:
Paper Stock:
Paper Weight:
EDM No.:
6
7 8
1
COVER
8+
2
3
4
5
DNM64-0970
DNM65-0970
1100956665-DOM
1100974042-DOM
Asst.DNM63
Asst.DNM63
service.mattel.com
Advertisement

Related Manuals for Mattel HotWheels SKY SHOCK RC


Summary of Contents for Mattel HotWheels SKY SHOCK RC
- Page 1 3121.Consumer Advisory Service - 1300 135 312. Mattel East Asia Ltd., Room 503-09, North Tower, World Finance Centre, Harbour City, To prevent entanglement, keep all hair away from moving parts. Tsimshatsui, HK, China. Tel.: (852) 3185-6500.Diimport & Diedarkan Oleh: Mattel Southeast Asia Pte. Ltd. , No 19-1, Tower 3 Avenue 7, service.mattel.com Bangsar South City, No 8, Jalan Kerinchi, 59200 Kuala Lumpur, Malaysia.
- Page 2 size: 138 x 170 (mm) FOR PRODUCT SOLD IN USA • POUR LES PRODUITS VENDUS AUX ÉTATS-UNIS This device complies with Part 15 of the FCC Rules. Operation is subject to the following two conditions: (1) This device may not cause harmful interference, and (2) this device must accept any interference received, including interference that may cause undesired operation.