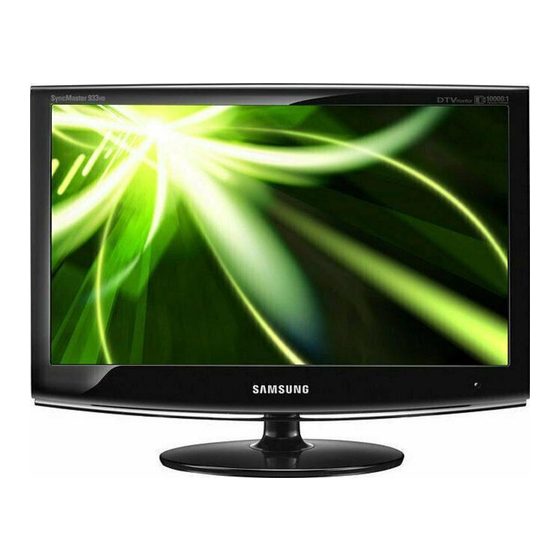
Samsung SyncMaster 933HD Plus User Manual
Samsung lcd tv monitor user manual
Hide thumbs
Also See for SyncMaster 933HD Plus:
- Manual del usuario (43 pages) ,
- User manual (43 pages)
Table of Contents
Advertisement
Advertisement
Chapters
Table of Contents
Troubleshooting

Related Manuals for Samsung SyncMaster 933HD Plus


Summary of Contents for Samsung SyncMaster 933HD Plus
-
Page 1: User Manual
SyncMaster 933HD Plus LCD TV MONITOR user manual imagine the possibilities Thank you for purchasing this Samsung product. To receive more complete service, please register your product at www.samsung.com/register Model Serial No BN59-00905F_eng.indd 1 2009-11-10 9:30:36... - Page 2 Displaying still images from Video games and PC for longer than a certain period of time may produce partial after-images. To prevent this effect, reduce the ‘brightness’ and ‘contrast’ when displaying still images. © 2009 Samsung Electronics Co., Ltd. All rights reserved. BN59-00905F_eng.indd 2 2009-11-10 9:30:36...
-
Page 3: Table Of Contents
CONTENTS General Information ■ Accessories ... 2 ■ Viewing the Control Panel ■ Viewing the Connection Panel ■ Remote Control ... 4 ■ Installing Batteries in the Remote Control Connections ■ Connecting VHF and UHF Antennas ■ Connecting Cable TV ... -
Page 4: General Information
GENERAL INFORmATION Accessories ¦ Please make sure the following items are included with your LCD TV. If any items are missing, contact your dealer. Remote Control / Batteries (AAA x 2) (Not available in all locations) / Power Cord / Cleaning Cloth / User Manual / Quick Setup Guide / Warranty Card (Not available in all locations) / Cable holder / Stand Base The items color and shape may vary depending on the model. -
Page 5: Viewing The Connection Panel
Viewing the Connection Panel ¦ POWER The product color and shape may vary depending on the model. 1 ANT IN – Connects to an antenna or cable TV system. 2 SERVICE – Connector for service only. 3 HDmI IN – Connects to the HDMI jack of a device with an HDMI output. -
Page 6: Remote Control
Remote Control ¦ You can use the remote control up to a distance of about 23 feet from the TV. The performance of the remote control may be affected by bright light. 1 POWER:Turns the TV on and off. 2 NUmERIC BUTTONS: Press to change the channel. -
Page 7: Connections
CONNECTIONS Connecting VHF and UHF Antennas ¦ If your antenna has a set of leads that look like the diagram to the right, see ‘Antennas with 300 Ω Flat Twin Leads’ below. If your antenna has one lead that looks like the diagram to the right, see ‘Antennas with 75 Ω... -
Page 8: Connecting Cable Tv
Connecting Cable TV ¦ To connect to a cable TV system, follow the instructions below. Cable without a Cable Box Plug the incoming cable into the ANT IN terminal on the back of the TV. Because this TV is cable-ready, you do not need a cable box to view unscrambled cable channels. -
Page 9: Connecting A Dvd / Blu-Ray Player / Satellite Receiver (Set-Top Box) Via Hdmi
Connecting a DVD / Blu-Ray player / Satellite receiver (Set-Top Box) via HDmI ¦ This connection can only be made if there is an HDMI Output connector on the external device. DVD / Blu-Ray player / Satellite receiver (Set-Top Box) Rear Panel What is HDMI? ●... -
Page 10: Connecting A Dvd / Blu-Ray Player / Satellite Receiver (Set-Top Box) Via Dvi
Connecting a DVD / Blu-Ray player / Satellite receiver (Set-Top Box) via DVI ¦ This connection can only be made if there is a DVI Output connector on the external device. DVD / Blu-Ray player / Satellite receiver (Set-Top Box) Each DVD / Blu-Ray player / Satellite receiver (Set-Top Box) has a different back panel configuration. -
Page 11: Connecting A Camcorder
Connecting a Camcorder ¦ Using a Video Cable Camcorder Each Camcorder has a different back panel configuration. When connecting a Camcorder, match the color of the connection terminal to the cable. Using an HDmI Cable HD Camcorder 1. Connect an HDMI Cable between the HDMI IN jack on the TV and the HDMI OUT jack on the camcorder. -
Page 12: Connecting A Pc
Connecting a PC ¦ Using the D-Sub Cable When connecting a PC, match the color of the connection terminal to the cable Using the HDmI Cable Each PC has a different back panel configuration BN59-00905F_eng.indd 10 TV Rear Panel ANT IN ANT IN AV IN AV IN... -
Page 13: Operation
OPERATION Turning the TV On and Off ¦ Press the POWER P button on the remote control. You can also use the P button on the TV. Plug & Play Feature ¦ When the TV is initially powered on, basic settings proceed automatically and subsequently. -
Page 14: Channel Control
If you want to reset this feature... 1. Press the mENU button to display the menu. Press the ▲ or ▼ button to select “Setup”, then press the E button. 2. Press the E button again to select “Plug & Play”. For further details on setting up options. The “... -
Page 15: Managing Channels
managing Channels ¦ Channel List ❑ Using this menu, you can add / delete or set favorite channels and use the program guide for digital broadcasts. All Channels „ Shows all currently available channels. Added Channels „ Shows all added channels. Favorite „... - Page 16 Add to Favorite / Delete from Favorite „ You can set channels you watch frequently as Favorite. Press the TOOLS button to display the Tools menu. You can also set the add to (or delete from) Favorites by selecting Tools → Add to Favorite (or Delete from Favorite). The ♥...
-
Page 17: Picture Control
The energy consumed during use can be significantly reduced if the level of Backlight is reduced, and that this will reduce the overall running cost. Advanced Settings ❑ Samsung’s new TVs allow you to make even more precise picture settings than previous models. Advanced Settings is available in Standard or movie mode. -
Page 18: Flesh Tone
White Balance „ You can adjust the color temperature for more natural picture colors. ● R-Offset / G-Offset / B-Offset / R-Gain / G-Gain / B-Gain in the light areas by changing the values of R, G, B. Recommended for advanced users only. ●... - Page 19 Temporary image retention may occur when viewing a static image on the set for more than two hours. After selecting “ Zoom1”, “Zoom2” or “Wide Fit”: Press the ◄ or ► button to select “Position”, then press the E button. Press the ▲ or ▼ button to move the picture up and down. Reset: Press the ◄...
-
Page 20: Using Your Tv As A Computer (Pc) Display
However, even if your actual screens look different, the same basic set-up information will apply in almost all cases. (If not, contact your computer manufacturer or Samsung Dealer.) 1. First, click on ‘Control Panel’ on the Windows start menu. -
Page 21: Setting Up The Tv With Your Pc
Setting up the TV with your PC ¦ Preset: Press the SOURCE button to select PC mode. magicBright : Entertain / Internet / Text / Dynamic Contrast / Custom ❑ MagicBright is a feature providing optimum viewing environment depending on the contents of the image you are watching. -
Page 22: Sound Control
SOUND CONTROL Configuring the Sound Menu ¦ mode → Standard / music / movie / Clear Voice / ❑ Custom You can select a sound mode to suit your personal preferences. Equalizer ❑ The sound settings can be adjusted to suit your personal preference. mode „... -
Page 23: Setup
SETUP Configuring the Setup Menu ¦ Language ❑ You can set the menu language. Time ❑ Clock „ Setting the clock is necessary in order to use the various timer features of the TV. The current time will appear every time you press the button. - Page 24 Timer 1 / Timer 2 / Timer 3 „ Three different on / off timer settings can be made. You must set the clock first. ● On Time : Set the Hour, Minute, am/pm, and Activate/Inactivate. (To activate timer with the setting you’ve chosen, set to “Activate”.) ●...
-
Page 25: Move Enter Return
V-Chip Lock → Off / On „ You can block rated TV Programs. TV Parental Guidelines „ You can block TV programs depending on their rating. This function allows you to control what your children are watching. ● TV-Y : Young children / TV-Y7: Children 7 and over / TV-G: General audience / TV-PG: Parental guidance / TV-14: Viewers 14 and over / TV-mA: Mature audience... - Page 26 Canadian French „ ● : General ● 8 ans+ : Programming generally considered acceptable for children 8 years and over to watch on their own. ● 13 ans+ : Programming may not be suitable for children under the age of 13. ●...
- Page 27 How to Reset the TV after the V-Chip Blocks a Channel (“Emergency Escape”) If the TV is tuned to a restricted channel, the V-Chip will block it. The screen will go blank and the following message will appear: 1. Enter your PIN, then press the E button and press the ▲ or ▼ button to temporarily disable the V-Chip Lock.
-
Page 28: Input / Support
Light Level ❑ Use to adjust the light level i.e., the brightness of the light. Melody → Off / Low / Medium / High ❑ A melody sound can be set to come on when the TV is powered On or Off. The Melody does not play. – When no sound is output from the TV because the –... -
Page 29: Configuring The Support Menu
● : If during the sound test you can hear sound only from one speaker or not at all, select Yes. There may be a problem with the TV. Contact Samsung’s call center for assistance. ● : If you can hear sound from the speakers, select No. There may be a problem with your external equipment. -
Page 30: Anynet
Anynet + with your Samsung TV’s remote. The Anynet + system can be used only with Samsung devices that have the Anynet + feature. To be sure your Samsung device has this feature, check if there is an Anynet + logo on it. -
Page 31: Setting Up Anynet
Setting Up Anynet+ ¦ Press the TOOLS button to display the Tools menu. You can also display Anynet + menu by selecting Tools → Anynet + (HDmI-CEC). Setup ❑ + (HDMI-CEC) → Off / On Anynet „ To use the Anynet + Function, Anynet + (HDMI-CEC) must be set to On. Anynet + (HDmI-CEC) function is disabled, all the When the Anynet + related operations are deactivated. -
Page 32: Switching Between Anynet + Devices
Switching between Anynet ¦ 1. Press the TOOLS button. Press the E button to select Anynet + (HDmI-CEC). 2. Press the ▲ or ▼ button to select Device List, then press the E button. + devices connected to the TV are listed. Anynet If you cannot find a device you want, press the red button to scan for devices. -
Page 33: Troubleshooting For Anynet
Troubleshooting for Anynet ¦ Problem Anynet + does not work. I want to start Anynet + . I want to exit Anynet + . The message Connecting to Anynet + device... appears on the screen. The Anynet + device does not play. -
Page 34: Installing The Software
Natural Color ¦ This software is for Samsung products only and enables you to adjust the displayed colors on the product so they more closely match the colors of printed pictures. For more information, refer to the online help of the software (F1). -
Page 35: Multiscreen
multiScreen ¦ MultiScreen enables you to partition multiple sections on the Monitor. ● Installing the Software 1. Insert the installation CD into the CD-ROM drive. 2. Select the MultiScreen setup program. If the pop-up screen for the software installation does not appear on the main screen, find and double-click the MultiScreen setup file on the CD-ROM. -
Page 36: Appendix
Troubleshooting ¦ If the TV seems to have a problem, first try this list of possible problems and solutions. If none of these troubleshooting tips apply, call Samsung customer service at 1-800-SAMSUNG. Problem Poor picture. Poor sound quality. - Page 37 Problem Black bars on the screen. Picture has a Red/Green or Pink tint. Closed Captioning not working. Snowy picture. Ghosting on picture. Screen is black and power indicator light blinks steadily. Image is not stable and may appear to vibrate when you have a computer connected to the PC input.
-
Page 38: Faq
¦ How can I change the frequency of the video signal? How can I change the resolution? How can I use the power saving function? How can I clean the outer case/ LCD Panel? Can I watch digital TV broadcasting with an analog TV? Can I use my present antenna to receive digital broadcasting? -
Page 39: Installing The Stand
Installing the Stand ¦ 1. Place the front of the TV onto a soft cloth or cushion on a table. Align the TV bottom along the table edge. 2. Insert the Stand Connector into the Stand in the direction shown by the figure. 3. -
Page 40: Wall Mount Kit Specifications (Vesa)
Samsung is not liable for these kinds of accidents. Samsung is not liable for product damage or personal injury when a non-VESA or non-specified wall mount is used or the consumer fails to follow the product installation instructions. -
Page 41: Securing The Installation Space
Install the product so the required distances shown in the figure are kept. When using a stand or wall-mount, use parts provided by Samsung Electronics only. – If you use parts provided by another manufacturer, it may result in a problem with the product or an injury due to the product falling. -
Page 42: Specifications
Specifications ¦ model Name Screen Size Diagonal Display area Pixel Pitch Display Color maximum Pixel Clock Power Supply PC Resolution Sound Output Dimensions (WxDxH) Body With stand Weight With Stand Environmental Considerations Operating Temperature Operating Humidity Storage Temperature Storage Humidity VESA mounting Interface Design and specifications are subject to change without prior notice. - Page 43 Contact SAmSUNG WORLDWIDE If you have any questions or comments relating to Samsung products, please contact the SAMSUNG customer care center. Customer Care Country Center 1-800- U.S.A SAMSUNG (726-7864) 1-800- CANADA SAMSUNG (726-7864) Country ARGENTINA BRAZIL CHILE COLOMBIA COSTA RICA...