Table of Contents
Advertisement
Available languages
Available languages
Quick Links
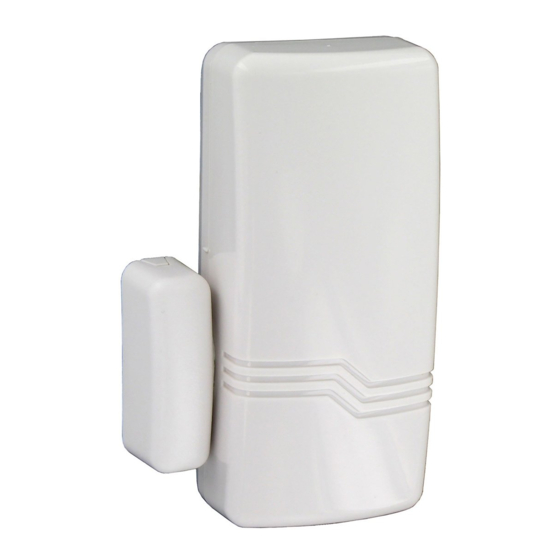
SHK(C)8M(2) : Wireless Shock Sensors - Installation Instructions (ENGLISH)
the LED will light up if the threshold is passed.
Note: after any setting change of the DIP switch, device must be
restarted: remove battery, wait 10 seconds, and insert it again to
power on device.
Pulse Count Configuration
The pulse count is the number of shocks required to trigger an
alarm in case of repeated attack. To configure the pulse count of
the device, you must enter LEARNING MODE.
1. To enter Learning Mode, power on the sensor with SW 3 in
the ON position (see Figure 5):
2. Wait for 10 seconds, until the red LED lights. You will then
have 30 seconds to register the pulse count.
3. Start tapping the area of coverage – while the red LED is ON.
Each valid impact will turn the LED OFF for 500ms then
it will return to ON.
The pulse count is automatically determined by the number
of valid impacts made to the area to be protected There is no
limit to the number of taps allowed. We recommend to tap
the area furthest away from the location of the detector.
If the LED doesn't go off, the area is out of coverage
range or the impact level is lower than required and the
shock was not taken into account. Try again using a higher
sensitivity.
After the 30 seconds the LED will flash to confirm the
number of pulse counts.
4. By default, the pulse count is set to 10. To restore the default
pulse count, repeat the procedure described in point 1,
without registering any shocks during the period of 30s after
the red LED has lit.
At the end of this period, the LED will flash 10 times to
confirm that the default pulse count has been restored.
The learn result will be stored into flash memory and will remain
unchanged until the next learning.
Note: In order to calibrate the sensor precisely, you can use the
Viper calibration tool device preset to 6 kg/cm
shock to frame - never use directly on glass - For areas larger
than 2.5m, it is recommended to use two sensors, in order to
ensure optimal coverage (Ref: PC.06138.00, not supplied).
Test Mode
Use Test Mode to check the configuration and settings of the
sensor. If Learning Mode is disabled or finished and Test Mode
has been enabled (SW 4 in the ON position), the module enters
Test / Installation Mode. In Test Mode:
■ The sensor detects the shock, tamper and contact alarm, as
normal.
■ The LED will indicate an alarm.
■ No RF message will be transmitted
■ Test Mode will be exited after 2 minutes.
Figure 1 on page 3 shows how to use the calibration tool to test
that the sensor is functioning correction. Each shock registered
causes the LED to light.
Power
The sensor signals a battery failure at the control panel when the
battery needs to be replaced. The sensor will continue to operate
for up to one week after this. Replace battery with 3V Lithium
battery only.
- 1 -
2
constant level of
Advertisement
Table of Contents

Related Manuals for Honeywell SHK8M


Summary of Contents for Honeywell SHK8M
- Page 1 SHK(C)8M(2) : Wireless Shock Sensors - Installation Instructions (ENGLISH) the LED will light up if the threshold is passed. Note: after any setting change of the DIP switch, device must be restarted: remove battery, wait 10 seconds, and insert it again to power on device.
- Page 2 - Réglage fin: Pour chaque niveau (Haute/basse), ajuster le niveau de sensibilité avec le potentiomètre (cf figure 3) Le SHK8M est un détecteur de chocs capable de détecter toute attaque contre la surface sur laquelle il est monté, idéalement Il est recommandé de régler la sensibilité du détecteur en mode placé...
- Page 3 SHK(C)8M(2) : Funk-Erschütterungsmelder – Installationshandbuch (DEUTSCH) Einstellung der Empfindlichkeit Die Empfindlichkeit des Geräts ist einstellbar. Es stehen zwei Einstellungsmodi zur Verfügung: - Grobeinstellung: Einstellung der Empfindlichkeit mit SW1 auf hoch oder gering. - Feineinstellung: Einstellung der Empfindlichkeit mit einem Potentiometer. Um die Einstellung zu überprüfen, geben Sie Testmodus ein und klopfen Sie auf einen bestimmten Punkt innerhalb des Meldebereichs, siehe Abb.
- Page 4 SHK(C)8M(2) : Draadloze schoksensoren – Installatiegids (NEDERLANDS) oppervlak, zoals een metalen deurkozijn, monteert. Configuratie van de gevoeligheid De gevoeligheid van het apparaat kan worden aangepast. Er zijn twee manieren om de gevoeligheid te controleren: - Grof: Selecteer met behulp van SW1 tussen hoge/lage gevoeligheid - Fijn: Pas de gevoeligheid aan met behulp van de potentiometer.
- Page 5 SHK(C)8M(2) : Sensores de choques inalámbricos – Guía de instalación (ESPAÑOL) Configuración de la sensibilidad Es posible ajustar la sensibilidad del dispositivo. Hay dos formas de controlar la sensibilidad: - General: ponga el SW1 en sensibilidad Alta o Baja. - Fina: ajuste la sensibilidad con el potenciómetro. Para confirmar el ajuste correcto, acceda al Modo de prueba y toque el punto del área de cobertura que se muestra en la Figura 1.
- Page 6 SHK(C)8M(2) : Sensori d'urto senza filo - Guida all'installazione (ITALIANO) Impostazione della sensibilità La sensibilità del sensore può essere regolata. La sensibilità può essere regolata in due modi: - Grossolano: Selezionare la sensibilità alta/bassa tramite SW1 - Fine: Regolare la sensibilità utilizzando il potenziometro. Per verificare l'impostazione, attivare il modo prova e urtare un punto compreso nell'area protetta indicata nella Figura 1 –...
- Page 7 / Modo desactivado / Modo prova attivato <10mm prova disattivato DIP Switch: Settings / réglages / Einstellungen / Mounting / Montage / Montaje / Montaggio Instellingen / Ajustes / Impostazioni © 2009 Honeywell International Inc. - 7 -...
- Page 8 Für die Schweiz gilt Anhang 4.10 des SR 814.013 für die Bat- Annex 4.10 van SR 814.013 van toepassing op de batterij die terie, die im Lieferumfang enthalten ist. met dit product werd meegeleverd. © 2009 Honeywell International Inc. - 8 -...
- Page 9 Quality Assurance Department / Service Qualité / Abteilung für Qualitätssicherung / Afdeling Kwaliteitsgarantie / Departamento de Control de Calidad / Servizio Qualità Honeywell Security Honeywell Security & Custom Electronics 1198, Avenue du Docteur Maurice Donat BP 1219 06254 MOUGINS CEDEX Tel.: +33 (0)4 92 94 29 50...