Samsung Rant SPH-m540 User Manual
Samsung cell phone user guide for sprint
Hide thumbs
Also See for Rant SPH-m540:
- Manual del usuario (231 pages) ,
- Specifications (2 pages) ,
- User manual (229 pages)

Related Manuals for Samsung Rant SPH-m540


Summary of Contents for Samsung Rant SPH-m540
-
Page 1: User Guide
User Guide www.sprint.com © 2009 Sprint. Sprint and the logo are trademarks of Sprint. Other marks are the property of their respective owners. 4/7/09... - Page 2 M540_BK03_PS_040609_F8...
-
Page 3: Table Of Contents
Table of Contents Introduction ....... i Your Phone’s Menu......ii Section 1: Getting Started . - Page 4 Erasing Phone Content ..... 71 Resetting Your Picture Account ....72 Resetting Your Phone Settings .
- Page 5 2J. microSD Card ..... . 108 Using Your Phone’s microSD Card and Adapter ......108 microSD Settings .
- Page 6 3C. Entertainment: TV and Music ..174 TV ........174 Music - Sprint Music Store .
-
Page 7: Introduction
Introduction This introduces you to Sprint User Guide the features of your new phone. It’s divided into four sections: Section 1: Getting Started Section 2: Your Phone Section 3: Sprint Service Section 4: Safety and Warranty Information Throughout this guide, you’ll find tips that highlight special shortcuts and timely reminders to help you make the most of your new phone and service. -
Page 8: Your Phone's Menu
Your Phone’s Menu The following table outlines your phone’s menu structure. For more information about using your phone’s menus, see “Navigating Through the Menus” on page 21. Contacts (Right Softkey) Options (Left Softkey) 1: Main Menu 2: Personalize Carousel 3: Personalize Home Screen 4: Tutorial 5: About Sprint One Click Maps... - Page 9 3: Ringers 1: Get New Ringers 2: My Stuff Manager Ringers 4: Screen Savers 1: Get New Screen Savers 2: My Stuff Manager Screen Savers 5: Applications 1: Get New Applications 2: My Stuff Manager Applications 3: Social Zone 6: Call Tones Photos 1: Camera Press the right softkey to view the following options:...
- Page 10 5: Launch 1: Review Pictures 2: Camera 3: Picture Mail 1: Inbox 2: Sent Mail 3: Saved Mail 4: Pending 4: My Albums 1: In Phone 2: Memory Card 3: Online Albums 5: PictBridge 6: Order Prints 7: Settings and Info 1: Auto Save to 1: Phone 2: Memory Card...
- Page 11 2: Text Message 1: Save in Outbox 2: Priority 3: Call Back # 4: Edit Signature 3: VoiceSMS Opt. 1: Speakerphone 2: From Name Contacts Settings 1: Display 1: Main Screen 1: Screen Saver 2: Incoming/Outgoing Calls 2: Brightness 3: Backlight 1: Slide open 2: 30 seconds 3: 15 seconds...
- Page 12 3: Bluetooth 1: On/Off 2: Visibility 1: Always visible 2: Visible for 3min 3: Hidden 3: My Device Name 4: My Device Info 5: Exchange Folders 1: In Phone 2: Memory card 6: Voice Routing Incoming 1: Hands-Free 2: Phone 3: Device Answered 7: Voice Routing Outgoing 1: Hands-Free...
- Page 13 5: Text Entry 1: Auto-Capital 1: On 2: Off 2: Auto-Space 1: On 2: Off 3: Dual Language 1: None 2: Spanish 4: Personal Dictionary 5: Used Word Dictionary 1: Yes 2: No 6: Display Candidate 1: Display On 2: Display Off 7: Prediction Start 1: 2nd letters 2: 3rd letters...
- Page 14 6: Contacts 1: Speed Numbers 2: Hide Secret 3: My Name Card 4: Wireless Backup 5: Services 7: Data 1: On/Off 2: Net Guard 3: Update Data Profile 8: Headset Mode 1: Turbo Button 2: Ringer Sound 9: Location 1: On 2: Off 10: Restrict and Lock 1: Voice...
-
Page 15: Get Stuff
9: Update Phone 1: Update Firmware 2: Update PRL 0: Voice Memo 1: Record 2: Review *: Voice Service 1: Call <Name or#> 2: Send Text <Name or #> 3: Send Picture <Name or #> 4: Send Voice SMS <Name or #> 5: Lookup <Name>... -
Page 17: Section 1: Getting Started
Section 1 Getting Started... -
Page 18: Setting Up Service
Section 1A Setting Up Service Setting Up Your Phone (page 2) Activating Your Phone (page 3) Setting Up Your Voicemail (page 4) Sprint Account Passwords (page 4) Getting Help (page 5) Setting up service on your new phone is quick and easy. section walks you through the necessary steps to unlock your phone, set up your voicemail, establish passwords, and contact Sprint for assistance with your... -
Page 19: Activating Your Phone
Note Your phone’s battery should have enough charge for your phone to turn on and find a signal, set up your voicemail, and make a call. You should fully charge your battery as soon as possible. See “Charging the Battery” on page 19 for details. Activating Your Phone If you purchased your phone at a Sprint Store should be activated and ready to use. -
Page 20: Setting Up Your Voicemail
Setting Up Your Voicemail All unanswered calls to your phone are automatically transferred to your voicemail, even if your phone is in use or turned off. Therefore, Sprint recommends that you set up your voicemail and personal greeting as soon as your phone is activated. While in the Sprint One Click main screen (standby mode), press and hold Follow the system prompts to:... -
Page 21: Getting Help
Voicemail Password You’ll create your voicemail password (or passcode) when you set up your voicemail. See “Setting Up Your Voicemail” on page 4 for more information on your voicemail password. Data Services Password With your Sprint phone, you may elect to set up an optional data services password to control access and authorize Premium Service purchases. - Page 22 From Your Sprint Phone Press to check minute usage and account balance. Press to make a payment. Press to access a summary of your Sprint service plan or get answers to other questions. From Any Other Phone Sprint Customer Service: 1-888-211-4727 Business Customer Service: Section 1A.
-
Page 23: Section 2: Your Phone
Section 2 Your Phone... -
Page 24: Phone Basics
Section 2A Phone Basics Your Phone (page 8) Viewing the Display Screen (page 12) Features of Your Phone (page 15) Turning Your Phone On and Off (page 16) Using Your Phone’s Battery and Charger (page 17) Navigating Through the Menus (page 21) Displaying Your Phone Number (page 22) Making and Answering Calls (page 22) Entering Text in Portrait Mode (page 33) -
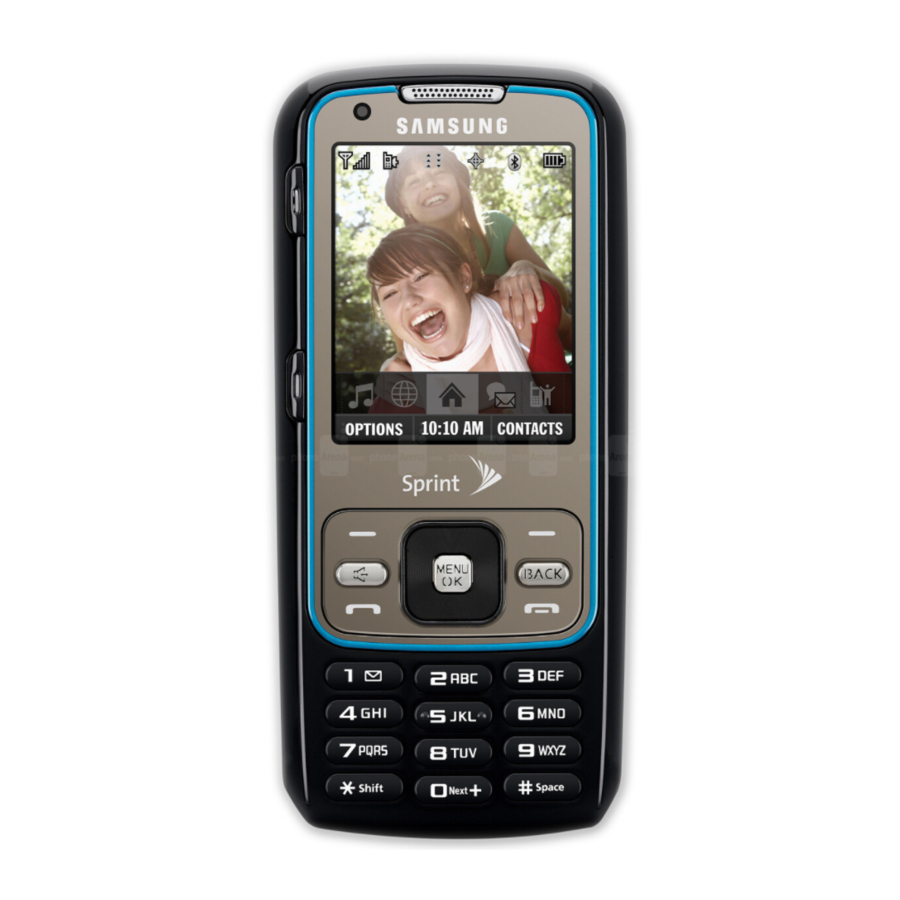
Page 25: Key Functions
Key Functions Earpiece lets you hear the caller and automated prompts. represents the signal Signal Strength Indicator strength by displaying bars. The more bars displayed, the better the signal strength. displays all the information needed Display Screen to operate your phone, such as the call status, the Contacts list, the date and time, and the signal and battery strength. - Page 26 represents the amount of Battery Strength Indicator remaining battery charge currently available in your phone. When all bars are displayed in the battery icon, the phone’s battery is fully charged. When no bars are displayed, the phone’s battery is completely discharged or empty. Softkey (left) Landscape Mode actions or menu items corresponding to the bottom left line on the display screen while the...
-
Page 27: Landscape Phone Features
Landscape Phone Features 24. Softkey (right) 25. Softkey (left) 26. QWERTY Keyboard 27. Fn Key 28. Shift Key 29. Symbol Key 30. Space Key Landscape Mode lets you select softkey Softkey (right) Landscape Mode actions or menu items corresponding to the bottom right line on the display screen while the phone is in landscape mode. -
Page 28: Viewing The Display Screen
Viewing the Display Screen Your phone’s display screen provides information about your phone’s status and options. This list identifies the symbols you’ll see on your phone’s display screen: To view a list of your phone’s icons and descriptions, from the main menu select Settings > Phone Info > Icon Glossary . - Page 29 indicates you have a new unread Text message. indicates you have a new voicemail message. indicates you have a new VoiceSMS message. indicates recently read VoiceSMS message. indicates you have an event scheduled. indicates an active alarm event. indicates you have a new text message. indicates your message is locked.
- Page 30 indicates that the camcorder is enabled. indicates that the self-timer function is enabled. indicates that the white balance has been set to Sunny. This is used for taking pictures or movies outdoors on bright sunny days. indicates that the white balance has been set to Cloudy.
-
Page 31: Features Of Your Phone
Bluetooth technology is hidden. Features of Your Phone The Samsung Rant™ is lightweight, easy to use, reliable, and it offers many features and service options. This list previews some of those features and provides page numbers where you can find out more:... -
Page 32: Turning Your Phone On And Off
Speed dial lets you dial phone numbers with one or two keypresses (see page 32). Turning Your Phone On and Off Turning Your Phone On Press and hold for two seconds. Once your phone is on, it may display “Searching for Service.”... -
Page 33: Using Your Phone's Battery And Charger
Sprint-approved or Samsung-approved batteries and accessories can be found at Sprint Stores or through Samsung; or call 1-866-343-1114 to order. They’re also available at www.sprint.com Battery Capacity Your phone is equipped with a Lithium Ion (Li-Ion) battery. - Page 34 Installing the Battery Remove the battery cover (located on the back of the phone). Press the Cover Release Latch (1) and then carefully lift the battery cover away from the phone (2). Section 2A. Phone Basics Slide the battery into the compartment so that the tabs on the end align with the slots at the bottom of the phone, making sure to line up the gold contacts (3).
- Page 35 If the battery charge is getting too low, the battery icon ( ) blinks and the phone sounds a warning tone. Always use a Sprint-approved or Samsung-approved desktop charger, travel charger, or vehicle power adapter to charge your battery. Section 2A. Phone Basics...
- Page 36 Using the Phone Charger Plug the flat end of the charger/accessories jack into the phone’s charger/accessories jack and the other end into an electrical outlet. Charge Indicator Section 2A. Phone Basics means the battery is charging. red indicator light located in the top right corner of charging icon the display screen lets you know the battery is charging.
-
Page 37: Navigating Through The Menus
Navigating Through the Menus The navigation key on your phone lets you scroll through menus quickly and easily. The scroll bar at the right of the menu keeps track of your position in the menu at all times. Note Your phone’s Sprint One Click main screen gives you instant access to your favorite features. -
Page 38: Displaying Your Phone Number
Backing Up Within a Menu To go to the previous menu: Press To return to standby mode: Press Displaying Your Phone Number Select and press . (Your phone number and other Phone Number information about your phone and account will be displayed.) Making and Answering Calls Making Calls... -
Page 39: Dialing Options
Dialing Options When you enter numbers in standby mode, you will see a variety of dialing options displayed as softkeys on the phone’s screen. To send a message to the number, press (left softkey). – or – To initiate a dialing option, press Options and choose one of the following options. -
Page 40: Answering Calls
Answering Calls Make sure your phone is on. (If your phone is off, incoming calls go to voicemail.) Press to answer an incoming call. (Depending on your settings, you may also answer incoming calls by pressing any number key. See “Call Answer Mode”... -
Page 41: Missed Call Notification
Answering a Roam Call With Call Guard Enabled Call Guard is an option that helps you manage your roaming charges when making or receiving calls while outside the Sprint National Network. Please see “Roaming” on page 74 for more information about roaming. -
Page 42: Calling Emergency Numbers
Calling Emergency Numbers You can place calls to 911 (dial ), even if your phone is locked or your account is restricted. Note When you place an emergency call, your phone automatically enters Emergency mode. To exit Emergency mode: Press to end a 911 call. -
Page 43: In-Call Options
In-Call Options Pressing Options (right softkey) during a call displays a list of available in-call features. To select an option, press the corresponding keypad number or select the option and press . The following options may be available through the Options menu: to add the new number to your Contacts list. -
Page 44: End-Of-Call Options
Using the Speakerphone To use your phone handsfree or to share a call with other people: Place your phone in Speaker Mode by pressing and holding the Speaker Key ( “Entering speaker mode” appears in the display. WARNING Because of higher volume levels, do not place the phone near your ear during speakerphone use. -
Page 45: Saving A Phone Number
Saving a Phone Number The Contacts list can store a maximum of 600 contact entries in total, with each contact entry containing a maximum of seven phone numbers. Each entry’s name can contain up to 64 characters. Your phone automatically sorts the Contacts entries alphabetically. (For more information, see “Contacts”... - Page 46 Dialing and Saving Phone Numbers With Pauses You can dial or save phone numbers with pauses for use with automated systems, such as voicemail or credit card billing numbers. Creating a saved series of numbers with pauses is very useful when entering data into an automated system.
-
Page 47: Plus Code Dialing
Plus (+) Code Dialing When placing international calls, you can use Plus Code Dialing to automatically enter the international access code for your location (for example, 011 for international calls placed from the United States). To make a call using Plus Code Dialing: Press and hold until a “... -
Page 48: Using Speed Dialing
To place a call using Prepend Abbreviated Dialing: Enter the last four digits of the number. Select the entry from the screen and Abbrev. Dial press Dialing From the Contacts List Select and press – or – Press (right softkey) from the main menu. Contacts Select the entry you want to call and press dial the entry’s default phone number. -
Page 49: Entering Text In Portrait Mode
Entering Text in Portrait Mode Your phone provides convenient ways to enter letters, numbers, and symbols whenever you are prompted to enter text (for example, when adding a Contacts entry or when using Sprint Mail and Text Messaging). In this section we’ll cover the steps necessary to enter text while the phone is in portrait mode where the keypad is the primary method of both text and character entry. - Page 50 to set a priority level of Urgent to the Mark as Urgent outgoing message. This notifies any recipient of the urgent read status for the outgoing message. to set the callback number seen by Set Callback # text message recipients. to store the current message as a Save as Draft draft for later modification and delivery.
- Page 51 Adding a Word to the T9 Database If a word you want to enter is not displayed as an option when you are using T9 Text Input, add it to the database by selecting the Alpha mode. Select the text input mode. (See “Selecting a Alpha Text Input Mode”...
-
Page 52: Entering Numbers, Symbols, Emoticons, And Preset Messages
English Sequence Upper Case . , @ 1 ? ! A B C 2 D E F 3 G H I 4 J K L 5 M N O 6 P Q R S 7 T U V 8 W X Y Z 9 One-character- shifted Space Note... -
Page 53: Setting Text Options
To enter preset messages: From a screen where you can enter text, press Options (right softkey) > Add Preset Message “Selecting a Text Message Option” on page 33.) Select a message and press Note Preset messages make composing text messages easier by allowing you to enter quick messages, such as “Meet me at,”... -
Page 54: Entering Characters In Dual Language
allows you to turn on or off the ability Auto-Space to insert a space automatically after a word is selected from the candidate list. allows you to turn on or off the Auto Word Insertion ability to insert predictive words into the text. When you have completed making your changes to these options, press softkey) to go back to the previous screen. -
Page 55: Entering Text In Landscape Mode
Entering Text in Landscape Mode Accessing the QWERTY Keyboard The Samsung Rant™ has a built-in, keyboard-style keypad, referred to as a QWERTY keyboard. The keyboard is located beneath the display screen and is accessed by sliding it open. This orients the phone's display to landscape (widescreen) mode. - Page 56 Navigation and Options in Landscape Mode Just as the screen orientation is changed, so is the functionality of both the softkeys and the navigation key. The left and right softkeys above the keypad are deactivated and their functionality is transferred to the two keys located below the landscape screen (shown adjacent).
-
Page 57: Entering Characters
Sym: Launches the Symbols page. Choose from an extensive list of symbols and other character sets. Inserts an empty space. Space: Moves the insertion point to OK/Enter: the next line in a message. Deletes the previous character, Back: similar to the backspace key on a computer keyboard. -
Page 58: Entering Numbers
To enter all uppercase characters, press before each letter. BILL Entering Numbers The keyboard can be used to enter numbers, letters, and symbols. Although these keys default to text (letters), numbers can be input by using conjunction with the correct number key. Press to input the character on the top row of the next key pressed. - Page 59 To enter symbols: Position the cursor where you want the symbol to appear within your message. Press and press the number key corresponding to the desired symbol to highlight a symbol and then insert it. Ted’s To enter preset messages: From a screen where you can enter text, press (right softkey) Options...
-
Page 60: Navigating The Main Screen
Section 2B Navigating the Main Screen Getting to Know Sprint One Click (page 44) Personalizing the Carousel (page 47) Personalizing the Home Screen (page 49) The easy-to-use Sprint One Click main screen gives you instant access to all your favorite features. what Sprint One Click does, how to navigate within the main screen, and how to personalize your main screen so you get the most out of your phone. - Page 61 The Sprint One Click Main Screen Bubbles Navigation Left Softkey The illustration above shows the basic layout of your phone’s main screen, also known as the standby screen. The call outs highlight what you’ll need to know to get started with Sprint One Click. –...
- Page 62 – The keys you’ll use to navigate Function Keys through the main screen are: : Press right or left to move the Navigation key carousel to select tiles. Selected tiles occupy the center position. Press the navigation key up or down to highlight bubbles (Home screen only) or menu items.
-
Page 63: Personalizing The Carousel
Personalizing the Carousel Now that you know what the carousel is, it’s time to make it work for you by adding, removing, or rearranging tiles to match how you want to use your phone. Adding a Tile to the Carousel Select and press Options... -
Page 64: Rearranging Tiles On The Carousel
Sprint One Click Tiles Google™ – Access Web features such as Google search, online Maps, Gmail™, and YouTube™. See “Launching Google via the Carousel” on page 169. Internet – Access data services, including the Sprint home page, Favorites, Recent Pages, the Enter Web Address menu, and Google search. -
Page 65: Personalizing The Home Screen
Select a tile category and then highlight a tile. To replace the previous tile, press softkey) or press to place the tile. Shortcut From the main screen, select a tile, press Options (left softkey) > Replace Tile , and then complete steps 3 and 4. - Page 66 Press (left softkey) and then highlight a bubble (see table on page 47). To add the bubble, press press . (To view a preview, press [right softkey].) If prompted, follow the instructions to personalize your bubble (for example, by selecting an astrological sign for the Horoscope bubble).
-
Page 67: Settings
Section 2C Settings Personalizing Your Phone (page 51) Sound Settings (page 52) Display Settings (page 56) Location Settings (page 58) Messaging Settings (page 58) Airplane Mode (page 62) TTY Use With Sprint Service (page 63) Phone Setup Options (page 64) You can customize your phone to sound, look, and operate just This section describes how to the way you want it to. -
Page 68: Sound Settings
Sound Settings Ringer Types Ringer types help you identify incoming calls and messages. You can assign ringer types to individual Contacts entries, types of calls, and types of messages. can be downloaded right to your Downloaded Ringers phone. include a variety of standard Preprogrammed Ringers ringer types and familiar music. - Page 69 Selecting Ringer Types for Messages Select and press > Settings > Sounds > Ringer Type > Messages Select Voicemail Text Message , or of ringer type categories will be displayed.) Select a category, and then use your navigation key to scroll through the available ringers. A sample ringer will sound as you highlight each option.
-
Page 70: Adjusting The Advanced Volume Settings
To select a Tone Length: Select and press Key Tone Select and press Tone Length Select Short Long and press To select a Tone Volume: Select and press Key Tone Select and press Tone Volume Select a tone level ( Key Tone Off press Adjusting the Phone’s Volume Settings... -
Page 71: Alert Notification
Use the navigation key to select (to use the ringer volume setting). – or – Use the navigation key to select (to use a volume setting that is different from the ringer volume setting). If you select , press Separate Volume (left softkey) if you wish the phone to vibrate in addition to ringing at the selected volume setting. -
Page 72: Display Settings
To deactivate Silence All: Press the volume button up repeatedly to select a volume level. Display Settings Changing the Backlight Time Length Select how long the display screen remains backlit after any keypress is made. Select and press Backlight Select a time setting and press Select Slide open, 30 seconds, 15 seconds, 8 seconds... -
Page 73: Changing The Dialing Font
Activating the PowerSave Mode Select and press > Settings > Display > PowerSave Mode Select , and press Changing the Phone’s Menu Orientation Although the menu is displayed as a series of onscreen icons, the arrangement of these icons is dependent on the current viewing mode: portrait or landscape. -
Page 74: Location Settings
Location Settings Your phone is equipped with a Location feature for use in connection with location-based services. The Location feature allows the network to detect your position. Turning Location off will hide your location from everyone except 911. Note Turning Location on will allow the network to detect your position using GPS technology, making some Sprint applications and services easier to use. -
Page 75: Setting Message Reminders
Setting Message Notification When you receive a message, your phone notifies you by displaying an icon on your display screen. You can also choose to be notified with a message notification on your display screen. Select and press > Settings > Messages > Notification Select Message &... - Page 76 Adding a Customized Signature Add a customized signature to each message you send. Select and press Signature. Read the onscreen message, select . (If you do not wish to attach a signature to your outgoing messages, select Enter a signature and press Text in Portrait Mode”...
- Page 77 Enter your message (see “Entering Text in Portrait Mode” on page 33 or “Entering Text in Landscape Mode” on page 39), and press message will be added to the beginning of the list.) Other Text Message Settings These settings allow you to configure the options associated with a text message sent from your phone.
-
Page 78: Airplane Mode
To set the draft alert: Select and press Draft Alert Select and press VoiceSMS Options These settings allow you to configure the settings that are used when sending SMS Voice messages to others. These options include: - allows you to turn the speakerphone Speakerphone on or off for recording SMS Voice messages. -
Page 79: Tty Use With Sprint Service
TTY Use With Sprint Service A TTY (teletypewriter, also known as a TDD or Text Telephone) is a telecommunications device that allows people who are deaf, hard of hearing, or who have speech or language disabilities, to communicate by telephone. Your phone is compatible with select TTY devices. -
Page 80: Phone Setup Options
WARNING 911 Emergency Calling Sprint recommends that TTY users make emergency calls by other means, including Telecommunications Relay Services (TRS), analog cellular, and landline communications. Wireless TTY calls to 911 may be corrupted when received by public safety answering points (PSAPs), rendering some communications unintelligible. -
Page 81: Call Answer Mode
Call Answer Mode Select how to answer incoming calls on your phone: whether you want to be required to press press any number key. Select and press > Settings > More... > Call Setup > Call Answer. Select an option and press to allow an incoming call to be answered Any Key by pressing any key except... -
Page 82: Display Language
Display Language You can choose to display your phone’s onscreen menus in English or in Spanish. Select and press Language Select English Español and press Setting Abbreviated Dialing To activate the Contacts Match feature: Select and press Call Setup > Contacts Match. Select and press To activate the Prepend feature:... -
Page 83: Security
Section 2D Security Accessing the Security Menu (page 67) Using Your Phone’s Lock Feature (page 68) Lock Services (page 69) Using Special Numbers (page 70) Erasing Phone Content (page 71) Resetting Your Picture Account (page 72) Resetting Your Phone Settings (page 72) Resetting Your Phone (page 72) Security Features for Data Services (page 73) By using the security settings on your phone, you receive peace... -
Page 84: Using Your Phone's Lock Feature
Using Your Phone’s Lock Feature Locking Your Phone When your phone is locked, you can only receive incoming calls or make calls to 911, Sprint Customer Service, or special numbers. (See “Using Special Numbers” on page 70.) Select and press Restrict and Lock >... -
Page 85: Lock Services
Lock Services This setting allows you to lock voice call functions and data services. When you enable Lock Services, you will be unable to make new calls (excluding emergency numbers) or to access the data services until the lock has been disabled in the Security menu. Locking Voice Services Select and press... -
Page 86: Using Special Numbers
Locking and Unlocking Your Contacts Locking your Contacts list prevents any alterations in its contents. No entry can be deleted or altered without first disabling this feature. Select and press Restrict and Lock Select and press Voice Enter your user lock code. Select and press Restrict... -
Page 87: Erasing Phone Content
Erasing Phone Content Use the Security menu to quickly erase all the content you have created or stored in your phone. Select and press > Settings > More... > Security and enter your lock code. Select Erase/Reset Select an option and press Erase Web Cookies to erase all web tracking cookies. -
Page 88: Resetting Your Picture Account
Resetting Your Picture Account Resetting your picture account settings clears the account settings and you will need to register your picture account again before you can use it. Select and press and enter your lock code. Security Select Erase/Reset > Reset Picture Account Read the disclaimer, select Resetting Your Phone Settings Resetting the default settings restores all the default... -
Page 89: Security Features For Data Services
Security Features for Data Services Enabling and Disabling Data Services You can disable data services without turning off your phone; however, you will not have access to all data services, including Web and messaging. Disabling data services will avoid any charges associated with these services. -
Page 90: Roaming
Roaming is the ability to make or receive calls when you’re off Your new dual band Rant™ by the Sprint National Network. ® Samsung works anywhere on the network and allows you to roam on other 1900 and 800 MHz digital networks where we’ve implemented roaming agreements with other carriers. -
Page 91: Setting Your Phone's Roam Mode
Roaming on Other Digital Networks When you’re roaming on digital networks, your call quality and security will be similar to the quality you receive when making calls on the Sprint National Network. However, you may not be able to access certain features, such as data services, depending on the available network. -
Page 92: Using Call Guard
Select an option and press to seek service on the Sprint National Automatic Network. When Sprint service is unavailable, the phone searches for an alternate system. to access the Nationwide Sprint PCS Sprint Only Network only and prevent roaming on other networks. -
Page 93: Using Data Roam Guard
Using Data Roam Guard Depending on service availability and roaming agreements, your phone may be able to access data services while roaming on certain digital systems. You can set your phone to alert you when you are roaming off the Sprint National Network and try to use data services such as messaging. -
Page 94: History
Section 2F History Viewing History (page 78) History Options (page 79) Making a Call From History (page 79) Saving a Phone Number From History (page 80) Erasing History (page 80) History keeps track of incoming calls, outgoing calls, and This section guides you through accessing missed calls. -
Page 95: History Options
History Options Select a History entry from the Recent History screen and press to display the date and time of the call, the phone number (if available), and the caller’s name (if the number is already in your Contacts). Press Options (right softkey) from the Recent History screen to display the following options:... -
Page 96: Saving A Phone Number From History
Saving a Phone Number From History Your phone can store up to 600 Contacts entries. Contacts entries can store up to a total of seven phone numbers, and each entry’s name can contain 64 characters. Select a History entry and press (right softkey) >... - Page 97 To erase all History entries: Select and press > History entry and press Options (right softkey) If you are certain you want to erase all history entries, select (left softkey). Delete – or – Select (right softkey) to return to the Cancel previous menu.
-
Page 98: Contacts
Section 2G Contacts Adding a New Contacts Entry (page 82) Adding a New Group (page 83) Finding Contacts Entries (page 84) Contacts Entry Options (page 85) Adding a Phone Number to a Contacts Entry (page 86) Editing a Contacts Entry’s Phone Number (page 86) Deleting a Contact (page 86) Assigning Speed Dial Numbers (page 87) Editing a Contacts Entry (page 88) -
Page 99: Adding A New Group
Enter the phone number for the entry and press Select a label for the entry ( Mobile , or ) and press Pager Others Press (left softkey). Done After you have saved the number, the new Contacts entry is displayed. (See “Contacts Entry Options” on page 85.) ICE –... -
Page 100: Finding Contacts Entries
Finding Contacts Entries There are several ways to display your Contacts entries: by name, by speed dial number and by group. Follow the steps outlined in the sections below to display entries from the Contacts menu. Finding Contacts by Name Select and press –... -
Page 101: Contacts Entry Options
To display the details of an entry, highlight it and press To dial the entry’s default phone number, press – or – To display additional Contacts entries, press the navigation key left or right. Finding Group Entries Select and press >... -
Page 102: Adding A Phone Number To A Contacts Entry
You can view the next entry by pressing the navigation key down or view the previous entry by pressing the navigation key up. Adding a Phone Number to a Contacts Entry Highlight a Contacts entry. (See “Finding Contacts Entries” on page 84.) Select (right softkey) Options... -
Page 103: Assigning Speed Dial Numbers
Assigning Speed Dial Numbers Your phone can store up to 98 phone numbers in speed dial locations. (For details on how to make calls using speed dial numbers, see “Using Speed Dialing” on page 32.) You can assign speed dial numbers when you add a new Contacts entry, when you add a new phone number to an existing entry, or when you edit an existing number. -
Page 104: Editing A Contacts Entry
Editing a Contacts Entry Highlight a Contacts entry. Press (right softkey) Options the Edit Entry menu. Select the information field you wish to edit ( , etc.) and press Ringer Add or edit the information and press Press Done (left softkey) to save your changes. Selecting a Ringer Type for an Entry Assign a ringer type to a Contacts entry so you can identify the caller by the ringer type. -
Page 105: Dialing Sprint Services
Dialing Sprint Services Your Contacts list is preprogrammed with contact numbers for various Sprint services. To dial a service from your Contacts: Select and press > Contacts. Highlight and press Add New Options and select an available service, Settings > Services such as Account Info Customer Service... - Page 106 Activating and Deactivating Wireless Backup To activate the wireless backup service: Select and press Wireless Backup > Subscribe confirm your license status.) Follow the onscreen instructions to purchase the license. Please wait while registering the license. (You will see a confirmation screen if it has been registered.) Note Once you have completed the registration, you will receive a text message with your password.
-
Page 107: Calendar And Tools
Section 2H Calendar and Tools Using Your Phone’s Calendar (page 91) Task List (page 94) Countdown (page 95) Using Your Phone’s Alarm Clock (page 95) Using Your Phone’s Memo Pad (page 96) Using the Calculator (page 97) Using the World Time (page 98) Updating Phone Software (page 98) Updating the PRL (page 98) Your phone is equipped with several personal information... -
Page 108: Event Alert Menu
Select an alarm time for the event by highlighting the alarm field: Select No Alarm On Time 1 Hr before Select a recurrence cycle for the event: Select Once Daily Weekly Highlight the ringer field and press Select a ringer category and then a ringer and press Select a Start and End time for the event by highlighting the time field and pressing... -
Page 109: Editing An Event
In the scheduler view, days with events scheduled are highlighted in blue. To display an event’s details, highlight it and press Going to Today’s Scheduler Menu Select and press > Tools > Calendar > Today Editing an Event Select and press >... -
Page 110: Task List
Erasing a Single Event Select and press Scheduler Select the day for which you would like to erase the single event and press In the scheduler view, days with events scheduled are highlighted in blue. Highlight the event from the list and press (right softkey) >... -
Page 111: Countdown
Select a due date by highlighting the Using your keypad and/or navigation key, set the date. Press (left softkey) to save and exit. Done Countdown This option allows you to enter a timer that counts down to an event based on a date and time specified. Select and press >... -
Page 112: Using Your Phone's Memo Pad
Select a time for the alarm by selecting the field. Using your keypad and/or navigation key, set the alarm time. Change the AM/PM entry by pressing (right softkey). Select a ringer type for the alarm by selecting the Ringer Type field and pressing Select a repeating status for the alarm by selecting field. -
Page 113: Using The Calculator
To read a saved note: Select and press > Tools > Memo Pad Select a note and press To edit a note: Select and press > Tools > Memo Pad Select a note and press Press (left softkey). Edit Press to erase a single character. -
Page 114: Using The World Time
Using the World Time To view the time in over 24 different locations: Select and press Press the navigation key left or right to scroll through different cities and time zones. Press (left softkey) to turn daylight saving Set DST time on or off. -
Page 115: Voice Services
Section 2I Voice Services Using Automatic Speech Recognition (ASR) (page 99) Managing Voice Memos (page 105) Your phone’s Voice Services let you place calls using your voice and store voice reminders right on your phone. includes easy-to-follow instructions for using voice- activated dialing. - Page 116 Tips for Using Voice Dial Voice Dial works best in quieter environments. When saying a name, speak at a normal speed and say the name clearly. There is no need to pause between the first name and last name. Adapting Digit Dialing Digit Dialing is speaker independent, which means that no training or adaptation is required.
- Page 117 To adapt Digit Dial to your voice: Select and press > Tools > Voice Service Press (right softkey) Settings > Adaptation > Adapt Voice Press (left softkey) to begin the process. (The Start phone displays the first digit sequence.) Wait for the beep, and then repeat the words, commands, and digits using a normal tone of voice.
-
Page 118: Calling Contacts Entries
Enabling or Disabling Digit Dial Choice Lists You can customize whether the Digit Dial feature displays the list of top voice recognition choices or automatically dials the first number, without displaying a choice list. To enable or disable choice lists for Digit Dial: Select and press Select... -
Page 119: Send A Text Message
Send a Text Message Use automatic speech recognition to launch text messaging on your phone and specify a recipient for the message. Press and hold followed immediately by the name “Send Text” of a person in your Contacts list and, optionally, the type of number ( Mobile1 Home1... -
Page 120: Look Up A Contacts Entry
Highlight a picture you wish to send and press . (The check box on the upper left corner will be marked. You can select multiple pictures.) Press (left softkey). Next To include a subject, scroll to . Enter your subject using either the keypad or keyboard and press Next exit. -
Page 121: Managing Voice Memos
by itself. A list of valid choices is “Go To” displayed and you are prompted with “Please Choose.” If the list is too long to fit on one screen, the screen displays “Next Menu.” You can say the name of a destination, or say “More Options”... -
Page 122: Playing Voice Memos
Playing Voice Memos Select and press Select and press Review a list of saved memos, with the first one selected.) Highlight the desired memo and press – or – Press the number corresponding to the memo you want to review. Note Voice Memos recorded from a direct phone conversation are shown in the list with the phone... - Page 123 Editing a Voice Memo Caption By default, the caption assigned to a voice memo is a sequential file name which consists of the date (Month_Day) followed by the memo number. For example, two memos recorded on February 2, 2008, would be listed as: Feb_02x1 and Feb_02x2. These file names (captions) can be changed.
-
Page 124: Microsd Card
Section 2J microSD Card Using Your Phone’s microSD Card and Adapter (page 108) microSD Settings (page 111) microSD Folders (page 111) Connecting Your Phone to Your Computer (page 112) Your phone lets you use a microSD expand the available memory space. digital card enables you to exchange images, music, and voice data between SD-compatible devices. - Page 125 Removing the microSD Card Remove the battery cover (located on the back of the phone). Press the Cover Release Latch (1) and then carefully lift the battery cover away from the phone (2). Locate the microSD card slot on the right side of the phone.
-
Page 126: Microsd Icon Indicators
Note Be sure to use only recommended microSD cards (up to 16GB). Using non-recommended microSD cards could cause data loss and damage your phone. Replacing the microSD Card Repeat steps 1 - 3 from “Removing the microSD Card” on page 109. Firmly press the card into the slot and release (it should pop partially out of the slot. -
Page 127: Microsd Settings
microSD Settings Viewing Memory in the microSD Card Select and press > Tools > Mass Storage > . (The used and available Memory Info. > Card memory space will be displayed.) Formatting the microSD Card Formatting a microSD card permanently removes all files stored on the card. -
Page 128: Connecting Your Phone To Your Computer
Creating Folders in the microSD Card The following steps allow your phone to create folders for storing files in your microSD card using only the File Manager. Select and press File Manager > Memory Card. Select Options > Create Folder Enter a name for the new folder. -
Page 129: File Manager
Turn on the phone. With the microSD inserted, select press Charge Indicator Select Tools > Mass Storage > Connect to PC the connection to be completed. When connected, the host computer will automatically detect your phone.) Note During this connection via the USB port, you will be unable to use your phone to make or receive calls. -
Page 130: Important Connection Information
To view the file structure on the phone or memory card: Select and press File Manager Select Phone Memory Card Highlight a folder or file and then select it by pressing Highlight a folder and press subfolders or files. To go up a level from your current folder location, select the grey arrow and press Highlight a music or picture file and press launch the file in its associated application. - Page 131 DO NOT turn off or restart your computer, or put it into standby mode, while using a mass storage device. Doing so will result in loss or damage of data. While you are connected to the computer, your phone’s screen will display “Phone Off.” You cannot make or receive calls.
-
Page 132: Camera
Section 2K Camera Taking Pictures (page 116) Recording Videos (page 122) Storing Pictures (page 124) Sending Sprint Picture Mail (page 127) Managing Sprint Picture Mail (page 129) Printing Pictures Using PictBridge (page 134) Order Prints (page 135) Settings and Info (page 135) Your phone’s built-in camera gives you the ability to take full- color digital pictures, view your pictures using the phone’s display, and instantly send them to family and friends. - Page 133 Zoom Image Saved Function Display Image Capture Capture Options Options Capture Press (left softkey), Capture button until the shutter sounds. (The picture will automatically be saved in your selected storage area.) To return to camera mode to take another picture, press the camera button.
- Page 134 Registering Your Sprint Picture Mail Account The first time you use any of the picture management options involving the Sprint Picture Mail Web site, you will be prompted to register your Sprint Picture Mail account and establish a password through your phone. This password will also allow you to sign in to the Sprint Picture Mail Web site at to access and manage your uploaded pictures and...
-
Page 135: Camera Mode Options
Camera Mode Options When the phone is in camera mode, press (right softkey) to display additional camera options: to activate the camera’s timer. (See “Setting Selftimer the Self-Timer” on page 120 for details.) to select an option from the following: Multi Shot to take multiple shots. - Page 136 Setting the Self-Timer From camera mode, press Selftimer Highlight the length of delay you want the timer to use ( 5 Sec 10 Sec ) and press (The default setting is Press when you are ready to start the timer. (The timer is displayed on the upper-right portion of the display screen during the self-timer countdown.)
- Page 137 To shoot a series of combined pictures: From camera mode, press Option Multi Shot > Divided Shot. Select one of the following options and press to deactivate the multiple shots option. to take a series of four pictures that are then combined into one image.
-
Page 138: Recording Videos
Selecting Camera Settings From camera mode, press Settings.. Select an option and press to select a picture’s file size ( Resolution , or High, Med to select the picture quality setting ( Quality , or Normal Economy to select a shutter sound ( Shutter Sound to turn the status bar Status Bar... -
Page 139: Video Mode Options
Press (right softkey) and select an option: Next to send the video. (See “Sending Send Pic/Video Sprint Picture Mail” on page 127.) to play the video. Play to upload the video to online albums. Upload Assign to assign the video as a video ringer or to voice calls. -
Page 140: Storing Pictures
Viewing Your Camcorder’s Status Area Display Brightness Zoom Fine Function Display Image Record Record Capture Section 2K. Camera Storing Pictures Your phone’s picture and video storage area is called My Pictures. There are two types of folders in My Image Saved Albums: Phone 3:47:28... -
Page 141: In Phone Folder Options
In Phone Folder Options When you are viewing the In Phone folder, press (right softkey) to display the following options: Options to play a selected video. Play Send to send an image or video to another user using Picture Mail or to a Bluetooth-enabled printer. to upload pictures to the Sprint Picture Mail Upload Web site (... -
Page 142: Memory Card
Memory Card If you have selected Memory Card location, your pictures will be automatically saved to your Memory Card folder. From the Memory Card folder, you can view all the pictures you have taken, store selected images in your In Phone folder, send pictures to the Sprint Picture Mail Web site ), delete images, and access www.sprint.com/picturemail... -
Page 143: Sending Sprint Picture Mail
To review pictures in the Online Albums folder: Select and press > Photos > My Albums > Online Albums Use your navigation key to scroll through and view the pictures. Online Albums Options When you are viewing the Online Albums folder, press (right softkey) to display Online Albums options. - Page 144 To enter additional recipients press (left softkey) to continue selecting additional entries. Press (right softkey) to manually enter New Addr either a wireless phone number or email address and press (left softkey). Continue If you wish to include a subject, scroll to press (right softkey).
-
Page 145: Managing Sprint Picture Mail
Sending Pictures From Messaging You can also send Sprint Picture Mail from your phone’s Messaging menu. Select , highlight Send Message > to access the Messaging menu. Mail – or – Select and press > Messages > Send Message > Picture Mail. Select a contact and press –... -
Page 146: Uploading Pictures
bubbles and cartoon effects, and use other features to transform your pictures. To access the Sprint Picture Mail Web site: From your computer’s Internet connection, go to www.sprint.com/picturemail Enter your phone number and Sprint Picture Mail password to register. (See “Registering Your Sprint Picture Mail Account”... -
Page 147: Downloading Your Online Pictures
Downloading Your Online Pictures From your online Sprint Picture Mail albums display at , you can select pictures to www.sprint.com/picturemail download to either your In Phone locations. From the online pictures display, place a check mark on the picture you wish to download and press (right softkey). -
Page 148: Accessing Online Picture Options From Your Phone
To place files into an existing album: Navigate the Other Options (located at the lower right of the page). Click the Move/Copy Media Select the source of the files. Place a check mark on each image you wish to add to your Album. Select whether you would like to selected images. - Page 149 to assign the pictures to be used as a: Assign to be displayed when a particular Picture ID ● Caller ID assignment is met for an incoming call. to be used by the screen saver Screen Saver ● application. to be displayed during Incoming/Outgoing Calls ●...
-
Page 150: Printing Pictures Using Pictbridge
Printing Pictures Using PictBridge Your phone is PictBridge compatible, allowing you to print directly from your phone without connecting to a computer. Simply connect your phone to a PictBridge- enabled printer and enjoy printing your photos. To print directly from your phone: Insert one end of the USB accessory cable into the USB slot on the printer. -
Page 151: Order Prints
Order Prints This menu allows you to order prints from third party vendors by uploading images saved on your phone. Images saved at the highest quality and resolution settings produce the best prints. Select and press > Photos Select an onscreen option and press Options include: Home Delivery Follow the onscreen instructions. -
Page 152: Bluetooth
Section 2L Bluetooth Turning Bluetooth On and Off (page 136) Using the Bluetooth Settings Menu (page 137) Bluetooth Profiles (page 138) Pairing Bluetooth Devices (page 139) Voice Routing (page 140) FTP Contents Folder (page 142) Sending Data via Bluetooth (page 142) Your phone features built-in Bluetooth technology, allowing you to share information more easily than ever before. -
Page 153: Using The Bluetooth Settings Menu
Bluetooth Status Indicators The following icons show your Bluetooth connection status at a glance: Bluetooth is hidden. Bluetooth is visible (active and enabled). Bluetooth is visible and connected to a device or transferring data. Bluetooth is active and connected to a stereo Bluetooth Headset. -
Page 154: Bluetooth Profiles
To access the Trusted Devices list: Select and press Trusted Devices Pair with Hands Free This displays your phone’s current list of external trusted Bluetooth devices. Bluetooth Profiles All of the Bluetooth settings you configure are stored in your phone’s Bluetooth user profiles. You can use different profiles for specific Bluetooth functions. -
Page 155: Pairing Bluetooth Devices
A2DP: Advanced Audio Distribution Profile allows you to transmit high quality stereo music from your phone to other compatible accessories including Bluetooth stereo headsets. AVRCP: Audio/Video Remote Control Profile enables your phone to remotely control compatible accessories including Bluetooth stereo headsets. You can play, pause, stop, forward, reverse, fast forward, or rewind from a headset. -
Page 156: Voice Routing
To pair your phone with another Bluetooth device: Select and press Add a New... Select a device category and press phone will display a list of discovered in-range Bluetooth devices.) Select from: Headset/Car Kits Printer Select a device and press softkey) to obtain more information about the device prior to pairing. - Page 157 automatically routed to the headset when it is connected (paired). Select and press > Settings > Bluetooth > Voice Routing Incoming. Select an incoming routing option and press Hands-Free allows you to answer the incoming call only from the paired Bluetooth device if it is paired and active.
-
Page 158: Ftp Contents Folder
FTP Contents Folder You can send and receive files between your phone and a Bluetooth-enabled computer using the FTP transfer protocol. The destination folder on your phone must first be set up to exchange data via FTP. To assign a folder for FTP transfers: Select and press Exchange Folders... - Page 159 To send pictures via Bluetooth: Select and press > Photos > My Albums Select a picture by highlighting it and then pressing Press (right softkey) Options > Send > via Bluetooth > . (The phone begins searching for available Bluetooth devices. Bluetooth-capable phones will appear in the list with an adjacent phone icon.) From the list of Found Devices, select the Bluetooth device and press...
-
Page 161: Section 3: Sprint Service
Section 3 Sprint Service... -
Page 162: Sprint Service Features: The Basics
Section 3A Sprint Service Features: The Basics Voicemail (page 146) Text Messaging (SMS) (page 150) SMS Voice Messaging (page 152) Caller ID (page 154) Call Waiting (page 155) Making a Three-Way Call (page 155) Call Forwarding (page 156) Now that you’ve explored your phone’s fundamentals, it’s time to learn about the calling features that enhance your Sprint service. -
Page 163: Voicemail Notification
Note Voicemail Passcode If you are concerned about unauthorized access to your voicemail account, Sprint recommends that you enable your voicemail passcode. (Do not activate One-Touch Message Access.) Voicemail Notification There are several ways your phone alerts you to a new message: By displaying a message on the screen. -
Page 164: Retrieving Your Voicemail Messages
Retrieving Your Voicemail Messages You can review your messages directly from your wireless phone or from any other touch-tone phone. To dial from your wireless phone, either speed dial your voicemail or use the menu keys. Using One-Touch Message Access Press and hold . -
Page 165: Using Expert Mode
Voicemail Key Guide Here’s a quick guide to your keypad functions while listening to voicemail messages. Date/Time Send Reply Replay Rewind Erase Return Call Cancel Help Using Expert Mode Using the Expert Mode setting for your personal voicemail box helps you navigate through the voicemail system more quickly by shortening the voice prompts you hear at each level. -
Page 166: Text Messaging (Sms)
Text Messaging (SMS) With Text Messaging, you can send and receive instant text messages between your wireless phone and another messaging-ready phone. When you receive a new message, it will automatically display on your phone’s screen. In addition, Text Messaging includes a variety of preset messages, such as “I’m running late, I’m on my way,”... - Page 167 Press (left softkey) when you have finished Continue entering recipients. (You may include up to 10 recipients per message.) Enter a message or use the preset messages or emoticons (smileys). To type a message, use either your keypad or keyboard to enter your message. (See “Entering Text in Portrait Mode”...
-
Page 168: Sms Voice Messaging
To use a smiley or emoticon, press the right softkey, select Text Mode > Emoticons number that corresponds to your selected icon and press You may select additional messaging options by pressing [right softkey] to Options Mark as Urgent Press (left softkey) to deliver your message. -
Page 169: Playing An Sms Voice Message
Select . (When activation is complete, an activation confirmation screen is displayed.) Note If you select No during step 2 above, you will see an alert message. If you select No after reading the message, incoming SMS Voice messages will not be downloaded to your phone. -
Page 170: Caller Id
Start recording after the beep. (You can record up to two minutes.) To finish recording, press Press (left softkey) to send the voice Send message. Enter a name to identify yourself and press (left softkey) to send the voice message. Accessing SMS Voice Messages When you receive a voice message, a pop-up notification will automatically be displayed on your... -
Page 171: Call Waiting
Call Waiting When you’re on a call, Call Waiting alerts you to incoming calls by sounding two beeps. Your phone’s screen informs you that another call is coming in and displays the caller’s phone number (if it is available and you are in digital mode). -
Page 172: Call Forwarding
When you’re connected to the second party, press again to begin your three-way call. If one of the people you called hangs up during your call, you and the remaining caller stay connected. If you initiated the call and are the first to hang up, all callers are disconnected. -
Page 173: Web And Data
Section 3B Web and Data Data Applications (page 157) Getting Started With Data Services (page 158) Accessing Messaging (page 163) Downloading Content (page 166) Exploring the Web (page 169) Data Services FAQs (page 173) Sprint offers easy and amazing data services you will really use. These features –... -
Page 174: Getting Started With Data Services
Getting Started With Data Services With your Sprint service, you are ready to start enjoying the advantages of data services. This section will help you learn the basics of using your data services, including managing your user name, launching a data connection, and navigating the Web with your phone. -
Page 175: Launching A Data Connection
Launching a Data Connection Select > Home and press – or – Select and press > Web connection starts and the home page is displayed.) The Data Services Home Page Note If Net Guard is enabled and displayed (see page 159), press OK (right softkey) to continue and launch the Web. -
Page 176: Navigating The Web
To change your Net Guard settings: Select and press Data > Net Guard Select to activate the Net Guard. Select to deactivate the Net Guard. Note When enabled, the Net Guard appears only once as long as you have not turned the phone off and on. Data Connection Status and Indicators Your phone displays the current status of your data connection through indicators at the top of the screen. - Page 177 Portrait Mode Left Softkey Landscape Mode Depending on which Web sites you visit, the labels on the softkeys may change to indicate their function. To use softkeys: Press a softkey. (If an additional pop-up menu is displayed when you press the softkey, select the menu items using your keypad [if they’re numbered], or by highlighting the option and pressing...
- Page 178 Selecting Once you’ve learned how to use softkeys and scroll, you can start navigating the Web. To select onscreen items: Use the navigation key to highlight an item, and then press the left softkey (or press You’ll find that the left softkey is used primarily for selecting items.
-
Page 179: Accessing Messaging
Accessing Messaging You can send and receive email messages, instant messages, and text messages and participate in Web-based chat rooms right from your phone. Messaging allows you to stay connected 24 hours a day anywhere on the Sprint National Network. Using Email Your phone’s Email application lets you access and manage multiple email accounts simultaneously in one... -
Page 180: Accessing Email
Select and press Add Account Follow the procedures outlined in “Getting Started With Email” on page 163. Note Mail Push allows your phone to automatically retrieve new email messages without having to select the Send/Receive option. When Mail Push is enabled, you will receive an onscreen notice of new email messages. -
Page 181: Accessing Sprint Instant Messaging
Accessing Sprint Instant Messaging Data services also provides you with access to popular instant messaging (IM) clients, including AOL ® Messenger , MSN Messenger, and Yahoo! Messenger. Select > Send Message > IM – or – Select and press > Messages > IM Select an IM provider, such as Messenger Windows Live Messenger... -
Page 182: Downloading Content
Downloading Content With data services, you have access to a dynamic variety of Premium Services content, such as downloadable Games, Ringers, Screen Savers, and other applications. (Additional charges may apply.) The basic steps required to access and download Premium Services content are outlined below. Accessing the Download Menus Select and press... - Page 183 Downloading an Item Once you’ve selected an item you wish to download, highlight it and press . You will see a summary page for the item including its title, the vendor, the download details, the file size, and the cost. Links allow you to view the page, which outlines the License Details...
- Page 184 is a storage area on the Sprint My Content Manager National Network that allows you to store all your Premium Services downloadable files. The files remain within the My Content Manager until their license terms have expired – even after you have downloaded the content to your phone.
-
Page 185: Exploring The Web
Exploring the Web With Web access on your phone, you can browse full- color graphic versions of your favorite Web sites, making it easier than ever to stay informed while on the go. Follow sports scores, breaking news, and weather, and shop on your phone anywhere on the Sprint National Network. - Page 186 Opening the Browser Menu The browser menu may be opened anytime you have an active data session, from any page you are viewing. To open the browser menu: Press (right softkey). (The browser menu will Menu be displayed.) Options available under the browser menu include: Returns the browser to the home page.
- Page 187 Creating a Bookmark Bookmarks allow you to store the address of your favorite Web sites for easy access at a later time. Go to the Web page you want to mark. Press (right softkey) to open the browser Menu menu. Select Mark this page and press...
- Page 188 Deleting a Bookmark Press Menu (right softkey) to open the browser menu. Select My Bookmarks Select a bookmark and press > Delete . (A confirmation will be displayed.) Press (left softkey) to remove the bookmark. Delete Note The default homepage (Sprint Vision Home) is can not be deleted.
-
Page 189: Data Services Faqs
Data Services FAQs How will I know when my phone is ready for data service? Your user name (for example, bsmith01@sprintpcs.com will be displayed when you access > Phone Info > Phone Number How do I sign in for the first time? You are automatically signed in to access data services when you turn on your phone. -
Page 190: Entertainment: Tv And Music
Section 3C Entertainment: TV and Music TV (page 174) Music - Sprint Music Store (page 177) Streaming Music (page 182) gives you the ability to listen to audio clips and Sprint TV to view video clips right from your phone’s display. Watch live TV and catch up on episodes of your favorite shows –... -
Page 191: Playing A Video Clip
Playing a Video Clip Select and press > Entertainment > TV Depending on your settings, you may be asked to accept a data connection. Select Sprint TV Sprint Radio Sprint Movies Channels to display channel options. Use your navigation key and press channel from the Sprint TV listings or to select an available category. - Page 192 How long are the clips? Will I know the estimated time it will take to play the clip prior to accessing it? Once you have selected a channel, you will see a listing of the available clips, with each clip’s length displayed after the clip’s title.
-
Page 193: Music - Sprint Music Store
If I put on my stereo headset and insert them into the phone’s headset jack, can I close the phone while I am playing an audio (or video) clip without interrupting the clip? Yes. When you insert your stereo headset into the phone’s headset jack, the phone automatically goes into “headset mode,”... -
Page 194: Purchasing And Downloading Music
After you have entered your password, highlight and press Create New Account Use your keypad and navigation key to explore the store. Purchasing and Downloading Music Now that you’re in the store, you can shop for songs to purchase and download to your phone’s microSD card. From the Sprint Music Store opening page, use your navigation key to select the choose an option:... -
Page 195: Playing Music From The Sprint Music Store
Playing Music From the Sprint Music Store The Sprint Music Store not only gives you access to great music, it also gives you a place to listen to and organize your music library. Accessing the Music Player From the Sprint Music Store opening page, select tab (default tab). - Page 196 The AAC+ files downloaded to your phone can only be played on your phone and on your account, and once they have been downloaded, they cannot be downloaded again without being repurchased. Sprint recommends you back up your AAC+ music files to your computer so you can access the files in case your microSD card is lost or damaged, or if you install a new microSD card.
- Page 197 To multitask on your phone: From the tab select Player All My Music song, and press to play the selected song. Press to exit the Music Store application without closing it and launch the popup menu, where you can choose from the following options: Resume Exit App.Manager...
-
Page 198: Streaming Music
Also, in some situations, the camera or camcorder may have limited functionality or become unavailable. For example, if you were currently playing music (via the Music Store), or playing a game in the background, and then wanted take a photo, the phone may prompt you with a “CPU Low, Kill the Application”... - Page 199 Select to see and hear a preview of your selected channel (if available). – or – Select Subscribe to purchase a monthly subscription to your selected channel. Once you have purchased access to a music or radio channel, you can select from a variety of stations to listen to your favorite music or get caught up on what’s new in music.
-
Page 200: Gps Navigation
Getting Driving Directions (page 186) Configuring Your Navigation Preferences (page 192) Launching the Product Tour (page 193) The Samsung Rant™ allows you to utilize built-in GPS hardware to easily access both directional information and location-ready features such as nearby companies and services. -
Page 201: Using Sprint Navigation
Registering for Service Before you can fully take advantage of the navigation feature, you must first properly register your device. Select and press > Drive To – or – Select and press > Maps > Sprint Navigation and press Select each of the onscreen registration fields and use either the keypad or keyboard to enter the required information. -
Page 202: Getting Driving Directions
: used when you do not know a physical City ● address but would like driving directions to a city. : locations based on business Businesses ● categories. : local airports based on current GPS Airports ● location. lets you search for locations based on Search Name, Category, or Location. - Page 203 Select and press Type It Speak It requires that you enter the physical address Type It using either the keypad or keyboard. to place a call to the TeleNav™ operator Speak It where you will speak the desired address. This is similar to calling 411 for directory assistance.
- Page 204 Once you have entered your desired location and your phone has begun providing you with driving directions, you can alter the information being displayed by using one of three other driving options, press softkey): Route Summary, Traffic Summary Search Along To review real-time traffic information along your route: Select and press...
-
Page 205: Using A Local Business Category
Press and press View > Search Along allows you to then search for a location based on a name, location, or category such as Food/Coffee, etc. See “Using a Local Business Category” on page 189. Using a Local Business Category The Rant™... -
Page 206: Creating A My Favorites Location
: sorts a list of matching results by Sort by Distance placing the closest location (to your present position) at the top and farthest location at the bottom. : sorts the results by their overall Sort by Rating consumer satisfaction rating (indicated by a set of star icons to the left of the entry). -
Page 207: Sharing A Recent Location With Others
To create a My Favorites location from a Recent Place: Select > Drive To > Recent Places – or – Select and press > Maps > Sprint Navigation > Drive To > Recent Places. Select an entry from the list and press softkey) and press >... -
Page 208: Configuring Your Navigation Preferences
Select (right softkey) to store the recipients Done and return to Share Address page. Select Send Now and press delivery process. Configuring Your Navigation Preferences Select > Share & More > Preferences press – or – Select and press > Share & More > Preferences. Section 3D. -
Page 209: Launching The Product Tour
: allows you to configure the Backlight Backlight setting between Always On On At Turns Device Settings : allows you to choose whether the Audio Options street names are announced during your navigation. Options include: Full Audio Instructions Only ● No Audio : allows you to change the Audio Language... -
Page 211: Section 4: Safety And Warranty
Section 4 Safety and Warranty Information... -
Page 212: Important Safety Information
Section 4A Important Safety Information General Precautions (page 196) Maintaining Safe Use of and Access to Your Phone (page 197) Using Your Phone With a Hearing Aid Device (page 198) Caring for the Battery (page 200) Radio Frequency (RF) Energy (page 201) Owner’s Record (page 203) User Guide Proprietary Notice (page 203) This phone guide contains important operational and safety... -
Page 213: Maintaining Safe Use Of And Access To
Maintaining Safe Use of and Access to Your Phone Do Not Rely on Your Phone for Emergency Calls Mobile phones operate using radio signals, which cannot guarantee connection in all conditions. Therefore you should never rely solely upon any mobile phone for essential communication (e.g., medical emergencies). -
Page 214: Using Your Phone With A Hearing
Not all phones have been rated for compatibility with hearing devices. Phones that have been rated have a label located on the box. Your Samsung Rant™ (SPH-M540) has an M4 and T4 rating . These ratings are not guarantees. Results will vary depending on the user’s hearing device and individual type and degree of... - Page 215 out the phone with your hearing device is the best way to evaluate it for your personal needs. M-Ratings: Phones rated M3 or M4 meet FCC requirements for hearing aid compatibility and are likely to generate less interference to hearing devices than unrated phones. (M4 is the better/higher of the two ratings.) T-Ratings: Phones rated T3 or T4 meet FCC requirements and...
-
Page 216: Caring For The Battery
Caring for the Battery Protecting Your Battery The guidelines listed below help you get the most out of your battery’s performance. Recently there have been some public reports of wireless phone batteries overheating, catching fire, or exploding. It appears that many, if not all, of these reports involve counterfeit or inexpensive, aftermarket-brand batteries with unknown or questionable manufacturing standards. -
Page 217: Radio Frequency (Rf) Energy
Radio Frequency (RF) Energy Understanding How Your Phone Operates Your phone is basically a radio transmitter and receiver. When it’s turned on, it receives and transmits radio frequency (RF) signals. When you use your phone, the system handling your call controls the power level. This power can range from 0.006 watt to 0.2 watt in digital mode. -
Page 218: Fcc Radio Frequency Emission
All phones must meet the federal standard, which incorporates a substantial margin of safety. As stated above, variations in SAR values between different model phones do not mean variations in safety. SAR values at or below the federal standard of 1.6 W/kg are considered safe for use by the public. The highest reported SAR values of the Rant™... -
Page 219: Owner's Record
Record the serial number in the space provided below. This will be helpful if you need to contact us about your phone in the future. Model: SPH-M540 (Samsung Rant™) Serial No.: User Guide Proprietary Notice CDMA Technology is licensed by QUALCOMM Incorporated... -
Page 220: Manufacturer's Warranty
What is Covered and For How Long? SAMSUNG TELECOMMUNICATIONS AMERICA, LLC (“SAMSUNG”) warrants to the original purchaser (“Purchaser”) that SAMSUNG’s Phones and accessories (“Products”) are free from defects in material and workmanship under normal use and service for the period commencing upon the date of... - Page 221 Limited Warranty does not cover any battery if (i) the battery has been charged by a battery charger not specified or approved by SAMSUNG for charging the battery, (ii) any of the seals on the battery are broken or show evidence of tampering, or (iii) the battery has been used in equipment other than the SAMSUNG phone for which it is specified.
- Page 222 PROVINCES DO NOT ALLOW LIMITATIONS ON HOW LONG AN IMPLIED WARRANTY LASTS, SO THE ABOVE LIMITATION MAY NOT APPLY TO YOU. IN ADDITION, SAMSUNG SHALL NOT BE LIABLE FOR ANY DAMAGES OF ANY KIND RESULTING FROM THE PURCHASE, USE, OR MISUSE OF, OR...
- Page 223 Limited Warranty, or make additional warranties binding on SAMSUNG. Accordingly, additional statements such as dealer advertising or presentation, whether oral or written, do not constitute warranties by SAMSUNG and should not be relied upon. Precautions for Transfer and Disposal...
- Page 224 If you are using a handset other than a standard numeric keypad, dial the numbers listed in brackets. Phone: 1-888-987-HELP (4357) ©2009 Samsung Telecommunications America. All rights reserved. No reproduction in whole or in part allowed without prior written approval. Specifications and availability subject to change without notice.
-
Page 225: Index
Index Numerics 2sec Pause 30 Abbreviated Dialing 31, 66 Activation 3 Airplane Mode 62 Alarm 95 Alert Notification 55 Alpha 33 Answering Calls 24 Applications 15 Applications, Downloading Automatic Speech Recognition 99–105 Backlight 56 Battery 17–20 Capacity 17 Charging 19 Disposal 200 Installing 18 Bluetooth 136–143... - Page 226 Entry Options 85 Finding Entries 84 Locking 70 Selecting a Ringer 88 Speed Dial Numbers 84 Unlocking 70 Contacts Match 31 Data Disable 73 Enable 73 Data Roam Guard 77 Data Services 157–173 Applications 157 Chat 165 Disabling 73 Downloading Content 166 FAQs 173 Home Page 159 Password 5...
- Page 227 Web Cookies 71 Web History 71 Event Adding 91 Alert Menu 92 Editing 93 Erasing a Day’s Events 93 Erasing Single Event 94 Going To 93 Viewing 92 Exchange Folders 142 FCC Notice 202 FTP Contents Folder 142 Google 169 GPS Navigation 184 Registration 185 Hard Pause 30...
- Page 228 Other Settings 61 Preset Messages 60 Priority 61 Save in Outbox 61 Signature 60 microSD Card 108–115 Multitasking 180 Music 177 My Content Manager 167 My Favorites Creating from a Recent Place Creating from Current Location 190 My Text 43 Navigating the Main Screen 44–50 Navigation 185...
- Page 229 PictBridge Printing 134 Picture Account Resetting 72 Pictures - See also Camera Sending 127 Storing Pictures 124 Taking 116 Plus Code Dialing 31 PowerSave Mode 57 Preferred Roaming List 98 Prepend 31 Preset Messages 33, 60, 152 PRL 98 Product Tour 193 Recent Location Sharing 191 Recent Place...
- Page 230 Sprint Picture Mail Downloading Online Pictures Managing 129 Registering 118 Sending Pictures 127 Uploading Pictures 130 Sprint Service Account Passwords 4 Activation 3 Dialing Sprint Services 89 Operator Services 6 Sprint 411 6 Sprint TV 174 Streaming Music 182 Symbol 33 T9 Text Input 34 T9(English) 33 Task List 94...
- Page 231 Ringer 54 Speakerphone 54 Text Message 54 Voicemail 54 Warranty 204 Web 159–172 Applications 157 Downloading Content 166 FAQs 173 Home Page 159 My Content Manager 167 Navigating the Web 172 Net Guard 159 User Name 158 Whisper Off 27 On 27 Wireless Backup 89 World Time 98...