
Related Manuals for Samsung Evergreen a667

Summary of Contents for Samsung Evergreen a667
-
Page 1: User Manual
P O R T A B L E Q U A D - B A N D M O B I L E P H O N E User Manual Please read this manual before operating your phone, and keep it for future reference. -
Page 2: Intellectual Property
Intellectual Property All Intellectual Property, as defined below, owned by or which is otherwise the property of Samsung or its respective suppliers relating to the SAMSUNG Phone, including but not limited to, accessories, parts, or software relating there to (the “Phone System”), is proprietary to Samsung and protected under federal laws, state laws, and international treaty provisions. - Page 3 T9 Text Input is licensed by Tegic Communications and is covered by U.S. Pat. 5,818,437; U.S. Pat. 5,953,541; U.S. Pat. 6,011,554 and other patents pending. ® ACCESS and NetFront™ are trademarks or registered trademarks of ACCESS Co., Ltd. in Japan and other countries. ®...
- Page 4 Your phone is equipped with an advanced voice processing chip that delivers clear mobile calls by suppressing background noise, intermittent sounds (like a siren or nearby conversation), and echoes, allowing you to hear and be heard nearly anywhere. How Does It Work? Based on the intelligence of the human hearing system, the technology: Captures, evaluates and distinguishes all the sound signals surrounding your phone, and the person you're speaking with.
- Page 5 MANUAL SHALL BE CONSTRUED TO CREATE AN EXPRESS OR IMPLIED WARRANTY OF ANY KIND WHATSOEVER WITH RESPECT TO THE PRODUCT. IN ADDITION, SAMSUNG SHALL NOT BE LIABLE FOR ANY DAMAGES OF ANY KIND RESULTING FROM THE PURCHASE OR USE OF THE PRODUCT OR ARISING FROM THE BREACH OF THE EXPRESS WARRANTY, INCLUDING INCIDENTAL, SPECIAL OR CONSEQUENTIAL DAMAGES, OR LOSS OF ANTICIPATED PROFITS OR BENEFITS.
-
Page 6: Table Of Contents
Table of Contents Section 1: Getting Started ...5 Setting Up Your Phone ....... 5 Charging a Battery . - Page 7 Sync Settings ........44 Finding My Own Phone Number .
- Page 8 Your Handset ........115 Samsung Mobile Products and Recycling ....116 UL Certified Travel Adapter .
- Page 9 Emergency Calls ....... . . 128 FCC Notice and Cautions ......129 Other Important Safety Information .
-
Page 10: Section 1: Getting Started
Section 1: Getting Started This section explains how to start using your phone by first configuring your hardware, activating your service, and then setting up your voice mail. Setting Up Your Phone Prior to use it is necessary to install both the battery and SIM into their corresponding internal compartments. -
Page 11: Installing The Battery
Note: If the card is not inserted correctly, the phone does not detect the SIM card. Re-orient the card back into the slot. Installing the Memory Card Your phone also supports the use of a memory card (microSD) for data storage of such things as data, music, pictures, and video files. -
Page 12: Charging A Battery
Your phone is powered by a rechargeable Li-ion battery. The Travel Adapter that is used to charge the battery, is included with your phone. Use only Samsung-approved batteries and chargers. Note: Long backlight settings, searching for service, vibrate mode, browser use, and other variables may reduce the battery’s talk and standby... -
Page 13: Low Battery Indicator
Incorrect Correct Correct Incorrect Plug the data cable into the base piece provided and into the Power/Accessory Interface connector on your phone. Plug the base piece into a standard AC wall outlet. When the battery is fully charged, the phone displays a message telling you the battery is full. -
Page 14: Switching The Phone On Or Off
Press and hold until the phone switches on. The phone launches the activation splash screen and then proceeds to search for the network. Once the network has been found, you can make or receive calls. Note: The display language is preset to English at the factory. To change the language, use the Language menu. -
Page 15: Section 2: Understanding Your Phone
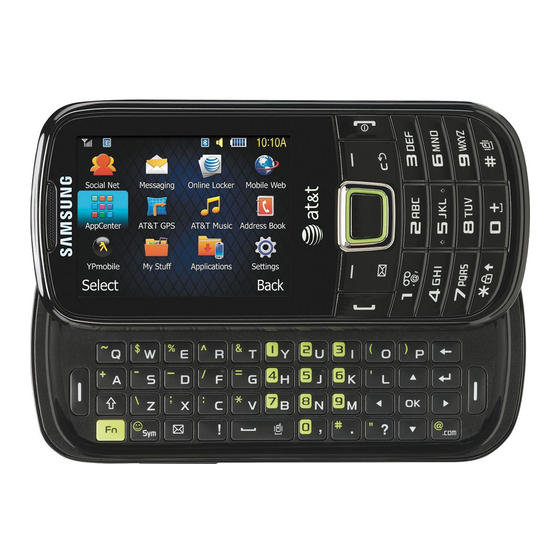
Section 2: Understanding Your Phone This section outlines some key features of your phone. It also displays the screen and the icons that display when the phone is in use. Features of Your Phone Your phone is lightweight, easy-to-use and offers many useful features. - Page 16 External speaker: allows you to hear the caller. Display: shows the information needed to operate your phone, such as the received signal strength, phone battery level, time, etc. Left Soft key: allows you to select actions or menu items corresponding to the bottom left line on the display screen. Talk/Send key: allows you to power on the phone, make or answer a call, access your Call History, Call Manager, and Call Block features.
-
Page 17: Front Open View (Landscape Mode)
Navigation keys: these keys allow you to scroll through phone menu options and provide shortcuts to phone functions from standby mode. • Up: displays the Create message screen. • Down: displays the Address Book. • Left: displays the My Stuff menu. •... -
Page 18: Side Views Of Your Phone
Enter key: allows you start a new line when typing a message. Back key: allows you to return to the previous menu. This key also allows you to return to the previous page within the Web browser. In Idle mode, press this key to display the Calendar in Month view. -
Page 19: Rear View Of Your Phone
Camera lens: is used to take pictures and shoot videos. Speaker: allows you to hear music. Display Layout Your display screen provides a wealth of information about the phone’s status and options.The display has 3 main areas: This list identifies the symbols you’ll see on your phone’s display and Indicator area: Indicators Time and Date... - Page 20 Displays when your connection to a 3G network is active. Displays when your phone is communicating with the 3G network. Displays when an internal microSD memory card is detected. Displays when the phone is connected to a computer via a supported USB cable connection. Displays within the Indicators area when a new text message is received.
-
Page 21: Menu Navigation
Displays when a TTY device has been inserted. Displays when browsing the web. Displays when your Address Book is synchronizing with the AT&T Address Book, the network backup service. For more information, refer to “Sync Settings” on page 44. Displays when signed on to AIM IM service. Displays when signed on to Windows Live IM service. -
Page 22: Go To
To scroll through these menus, press either the Up or Down Navigation key or the Volume key (located on the left side of your phone). Press the Select soft key or the key to make your selection. To return to the previous menu level, press the Back soft key or the key. -
Page 23: Multitask Functions
• Change: changes the currently selected shortcut and assigns another shortcut to this field. • Remove: removes the selected shortcut from this field. • Remove all: removes all the shortcuts from the fields in this menu. Options for unassigned shortcuts: •... -
Page 24: Section 3: Entering Text
Section 3: Entering Text This section outlines how to select the desired text entry mode when entering characters using the QWERTY keyboard-style keypad. This section also describes how to use the T9 predictive text entry system to reduce the number of key strokes needed to enter text. -
Page 25: Changing The Text Input Mode
Short press inserts a space. Double press inserts a period and a space. Press and hold in Idle mode to set phone to Silent mode. Press to display the symbols grid. Changing the Text Input Mode The available Text Input modes are: Fn (123 numeric), Abc, and Symbols (Sym). - Page 26 Symbol mode enables you to insert symbols and punctuation marks into text. In Landscape mode, press the matrix of symbols. Use the arrow keys to display more tables. Select the number of the corresponding symbol and press the OK soft key to insert the symbol into the text message. In Portrait mode, press Options –...
- Page 27 After pressing the keys corresponding to the word you want to add, press the key to display the alternative words. When the last alternative word displays, Spell displays. Press the Spell soft key. Enter the word you want to add using the ABC mode. Press the Add soft key or the The word is added to the T9 dictionary and becomes the first word for the associated keypress series.
-
Page 28: Section 4: Call Functions
Section 4: Call Functions This section describes how to make or answer a call. It also includes the features and functionality associated with making or answering a call. Note: Keys shown in this section represent keys shown on the front of the phone. -
Page 29: Making A Call Using Speed Dial
Press For more information, refer to “Adding Pauses to Contact Numbers” on page 43. Correcting an Entered Number Use the following steps to correct a mis-typed entry when dialing. After entering a number using the keypad: • If you make a mistake, press •... -
Page 30: Making A Call From The Address Book
You can store phone numbers that you use regularly on the SIM card or in the phone’s memory. These entries are collectively called the Address Book. For further details about the Address Book feature, see “Finding an Address Book Entry” on page 43. Answering a Call When a call is received the phone rings and displays the caller’s phone number, or name if stored in the Address Book. - Page 31 To make a new call while you have a call in progress: While on a call, press Options Dial the new phone number or look it up in the Address Book. Press to dial the second number. – or – Press Options New Call to dial the second number.
- Page 32 • Send Message: allows you to create and send a new Text or Multimedia Message. • More: – Calendar: Allows you to temporarily access your calendar while still maintaining the active call. – Memo: Allows you to access Notes. – Send DTMF: Sends DTMF (Dual Tone Multi-Frequency) tones to the contacts you have selected.
-
Page 33: Video Share
Press Unmute to deactivate the Mute function and reactivate the microphone. Searching for a Number in Address Book During the active call, press Options Highlight an Address Book entry. For further details about the Address Book feature, see “Finding an Address Book Entry” on page 43. Video Share The Video Share features allows you to place a call and share live or recorded video while on the call. -
Page 34: Recent Calls
During a call (while not in a Live Video Share session) you can share a recorded video for the recipient. Press Options Video Share from the available files in your Video folder. To make the connection, the recipient should press Accept and the Video begins to play on both phones. - Page 35 The number of calls missed displays on the Idle screen. From the Idle Screen, briefly press navigation key to scroll to the Missed calls screen. The most recently missed calls display. If there is only one missed call, pressing dials the number. Scroll through the list of missed calls.
-
Page 36: Call Time
From the Idle Screen, briefly press navigation key to scroll to the Missed calls screen. Highlight the desired missed call. Press Options Delete and press the Right navigation key to choose Selected or All. At the Delete? prompt, press Yes to delete or No to cancel. Call Time Press Menu My Stuff... - Page 37 The Call Waiting feature allows you to answer an incoming call while you have a call in progress, if this service is supported by the network, and you have set the Menu Voice Call Call waiting Menu to Activated. You are notified of an incoming call by a call waiting tone.
-
Page 38: Section 5: Messaging
Section 5: Messaging This section describes how to send or receive different types of messages. It also includes the features and functionality associated with messaging. Types of Messages Your phone provides the following message types: Text Messages • • Multimedia (Picture and Video) Messages Instant Messaging •... - Page 39 • Sound: allows you to choose an existing audio file from the Audio folder. • Templates: allows you to insert pre-written sentences, such as “Call me when you get this message”. • Emoticon: allows you to add emoticons, such as a happy face to your message.
-
Page 40: Viewing New Received Messages
Press Send again. Viewing New Received Messages In Idle mode, new messages are indicated by icons and a New Message pop-up. Press the View button from the New Message pop-up. Note: If you accidentally exit from this notification screen, navigate to Menu Messaging Inbox to access your messages. -
Page 41: Deleting Messages
When your phone’s memory is full, an notification message displays and you cannot receive any new messages. Use the Delete option to erase obsolete messages, freeing memory for new messages. You can delete the messages either individually or all at one time. Press Menu Messaging Inbox. - Page 42 Message Size : you can set the maximum allowed size for a multimedia – message. – Get Delivery Report : when this option is enabled, the network informs you whether or not your message was delivered. Get Read Report : when this option is enabled, your phone sends a –...
-
Page 43: Outbox
The Voicemail option allows you edit the existing number and create a new number to use when accessing remote voicemail. Important!: Changing the Voicemail Center Address can affect your ability to access your voicemail. Check with your provider’s Customer Service before changing. Push Message Push Messages are service provider-sent messages, that include software upgrades or general information messages. -
Page 44: Using Mobile Email
Select New Account and then select the available fields to enter your information such as Sign In as, Screen Name, E- mail Address or Yahoo! ID, and Password. Select any additional fields. Check the Save password or Auto-Sign In checkbox (if desired). -
Page 45: Section 6: Understanding Your Address Book
Section 6: Understanding Your Address Book This section allows you to manage your contacts by storing their name and number in your Address Book. You can sort Address Book entries by name, entry, or group. You can also synchronize your phone Address Book with AT&T Address Book, the network backup service. -
Page 46: Adding A New Contact
• AT&T Address Book: allows you to enable synchronization on any change made to your contacts between your phone Address Book and the AT&T Address Book. • Own Number: to display your current phone number (page 45). • FDN Contacts: assigns phone numbers as FDN entries (page 45). •... - Page 47 Note: Ringtones assigned to a contact will not be synchronized to AT&T Address Book. Adding More Fields to a Number While in the process of creating a new entry or editing an existing contact, you can add additional fields to the entry’s list of information.
-
Page 48: Using Contacts
• Select Update if this was a previously created entry and your are adding the current number to the previous entry. Enter the desired information. For more information, refer to “Saving a Number from the Idle screen” on page 41. Adding Pauses to Contact Numbers When you call automated systems, you are often required to enter a password or account number. -
Page 49: Address Book Entry Options
Tip: The Groups tab allows you to locate contacts by group. Use the Left or Right Navigation key to move between Contacts and Groups. Press the key or Options Address Book Entry Options To access the Address Book options, follow these steps: Press Menu Address Book entry from the list and press the... -
Page 50: Finding My Own Phone Number
This function is a memory aid, which you can use to check your own phone number if you need to do so. In Idle mode, press Menu Address Book Settings Own number <voice line #>. FDN Mode FDN (Fixed Dialing Number) mode, if supported by your SIM card, restricts your outgoing calls to a limited set of phone numbers. -
Page 51: Group Settings
Creating a New Group In Idle mode, press Menu Address Book Press Options Create group. Enter a name for this group in the New Group field and press Save. For more information, refer to “Entering Text” on page 19. Press Options Group Settings. -
Page 52: Adding Speed Dial Entries
In Idle mode, press Menu Address Book Highlight the group that you want to rename. Press Options Rename. Backspace over the original name and use the keypad to enter a new name for this group, then press Save. Adding Speed Dial Entries In Idle mode, press Menu Address Book List. -
Page 53: Deleting An Address Book Entry
In Idle mode, press Menu Address Book Management Copy Contacts to SIM. Highlight a member from the list or highlight All and press Check. Press Copy. Important!: When copying from the Phone to the SIM card some information may be lost. At the Continue? prompt, press Yes to copy the contact, or No to cancel. -
Page 54: Yellow Pages Mobile
In Idle mode, press Menu Address Book Management Delete Contacts from SIM. Highlight a member from the list or highlight All and press to create a checkmark. Press Delete. At the prompt, press Yes to delete the contact, or No to cancel. -
Page 55: Section 7: Changing Your Settings
Section 7: Changing Your Settings This section includes tips on how to use your phone’s features, as well as how to change and customize the display settings, call handling, security settings, and other settings associated with your phone. Quick Tips Quick Tips connects you to the AT&T Quick Tips web page where you can find information on the operation of your phone. - Page 56 Highlight Call Alert Type and press Select one of the following and press OK: • Melody: the phone rings using the ring melody selected in the Call Ringtone menu. • Vibration: the phone vibrates. • Vibration then Melody: the phone vibrates then plays a melody. •...
-
Page 57: Display
In Idle mode, select Menu Settings Highlight Normal and press Edit. Highlight the Phone tab. Highlight Keypad Tone and press following tones and press OK: • Beep • Lucid • Mute Highlight Power On Type and press Select one of the following and press OK: •... -
Page 58: Time And Date
• Light Settings: allows you to adjust the Brightness and set the Backlight Time. Note: Light settings can affect the length of time before battery recharge is necessary. – Brightness: allows you to adjust the display brightness for the LCD to see it better in different lighting conditions. -
Page 59: Phone Settings
Important!: Current time zones are based upon Greenwich Mean Time. Use the Left or Right Navigation key to locate a time-zone. A corresponding area of the world map displays. Highlight the Daylight saving checkbox and press Daylight Saving time applies, then press OK. Note: The Time Zone field does not display when Time Zone Updating is set to Automatic. -
Page 60: Auto Key Lock
The Shortcuts option allows you to change the applications assigned to your Navigation keys. In Idle mode, select Menu Settings Shortcuts. Use the Navigation keys to select the Up, Down, Right, or Left key. Press the Options Change. Highlight a new application to assign to the previously selected key. - Page 61 The Own Number option displays the number assigned to the SIM card in your phone. You can change the number, but entering another number may prevent you from making or receiving calls on the handset. You may also add other names and numbers into your phone for easy referral.
-
Page 62: Lock Applications
The following options are available: – Off: the phone connects directly to the network when you switch it on. – On: you must enter the PIN each time the phone is switched on. Note: Before disabling the Check PIN Code feature, you must enter your PIN. You can obtain your PIN from an AT&T customer service representative. - Page 63 This option allows you to change your current PIN, provided that the PIN Check feature is enabled. You must enter the current PIN before you can specify a new one. Once you enter a new PIN, you are asked to confirm it by entering it again. Change PIN2 Code The Change PIN2 option allows you to change your current PIN2 to a new one.
-
Page 64: Call Settings
The Restore Phone option is the same as the Reset Phone option described above in that all settings are reset to factory defaults. However, with the Restore Phone option, all user data deletes. Warning!: All User Data such as contacts, messages, pictures, videos, and music is deleted. -
Page 65: Connectivity
Press twice return to the previous Settings page. Adjusting the Voice Call Settings Select Voice Call and choose from the following options: • Call Forwarding: incoming calls are re-routed to a secondary number that you specify. Select the condition for the call forward action: –... - Page 66 To use the Bluetooth option you must first activate it. When the Bluetooth is deactivated, you cannot send or receive information via Bluetooth. To save battery life or in situations where Bluetooth use is prohibited, you can turn off the Bluetooth wireless technology headset.
- Page 67 Enter the passkey (if applicable). If connecting to a Bluetooth wireless device, consult your Bluetooth device user manual for your assigned PIN. If connecting to another handset, enter the same user-defined PIN on both handsets. Highlight the Connection Options field and use the Left or Right Navigation key to select Automatic (reconnects automatically), or Always Ask (asks before reconnecting) and press the Pair soft key.
-
Page 68: Configuring Your Phone's Usb Settings
Mode” pop-up when you connect to the PC. You can choose from either: Samsung PC Studio, Media Player, or Mass Storage. • Samsung PC Studio: sets Samsung PC Studio to launch as the default application when a USB connection is detected. - Page 69 Press Options Create, and press the Select soft key or key to create a new connection. Note: MEdia Net, AT&T MMS, and AT&T IMS are pre-configured and cannot be altered on this screen. Your phone is set up by default for connecting to the network.
-
Page 70: Applications Settings
IMS is the method used to connect to the server in order set up the Video Share option. In Idle mode, select Menu Settings IMS Settings. Select one of the following options: • Service allows you to set the IMS service to On or Off. Important!: If you reset the IMS Service to Off, you are unable to use the Video Share Option. -
Page 71: Music Player Settings
– Cookie Options: sets whether cookies are stored on your phone (Accept All or Reject All). If you select Prompt, the phone will ask you to save the cookies on every page requiring cookies. • Preferences: allows you to run JavaScript, display images, play sound, or run Flash. -
Page 72: Memory Management
To configure the starting day and view used when opening the Calendar application: In Idle mode, select Menu Settings Settings Calendar Settings. Press either of the following fields and edit the information: • Starting Day : allows you choose which day marks the first day in your calendar week (Sunday or Monday). -
Page 73: Software Update
Enter the user-defined password and press Confirm to clear the memory settings. For more information, refer to “Change Phone Password” on page 57. – or – Press Back to cancel. Check the Used Space In Idle mode, select Menu Settings Management Used Space. -
Page 74: Tty Settings
TTY (also known as a TDD or Text Telephone) is a telecommunications device that allows people who are deaf or hard of hearing, or who have speech or language disabilities, to communicate via a telephone. This phone comes TTY-ready and only requires the insertion of the TTY device to enable this feature. -
Page 75: Section 8: Camera
Section 8: Camera This section explains how to use the camera on your phone. You can take photographs and shoot video by using the built-in camera functionality. Your 2.0 megapixel camera produces photos in JPEG format. Important!: Do not take photos of people without their permission. Do not take photos in places where cameras are not allowed. - Page 76 corresponding indicator displays at the top left of the display. Choose from Camera, Camcorder, or Video Share. Shooting mode: allows you to set the shooting mode. Options • are: – Single: takes a single photo and view it before returning to the shooting mode.
- Page 77 – Shutter sound: allows you to select a tone to play when the camera’s shutter opens and closes. Sound selections are Shutter 1, Shutter 2, Shutter 3, or None. – Default storage: allows you to configure the default storage location for images/videos as either Phone or Memory Card (if inserted).
-
Page 78: Using The Camcorder
Press Menu My Stuff Pictures Press Options Set as Wallpaper. The wallpaper appears as a preview. Press Set to set the wallpaper. Using the Camcorder In addition to taking photos, the camera also doubles as a camcorder allowing you to also record, view, and send videos. Shooting Video Tip: When shooting video in direct sunlight or in bright conditions, it is recommended that you provide your subject with sufficient light by... -
Page 79: Accessing The Video Folder
corresponding indicator displays at the top left of the display. Choose from Camera, Camcorder, or Video Share. Recording Mode: select a video recording mode. Select Normal to • record a video within the limit of the currently available memory. Select Limit for MMS to record a video suitable for an MMS message. Select Video Share when you plan to share the video using Video Share. - Page 80 • Create Folder: creates a new My Stuff folder on either the Phone or Memory Card. • More: displays the following additional options: – Sort by: allows you to sort your videos by Date, Type, Name, or Size. – Bluetooth Visibility: allows you to set your bluetooth visibility so you can send the video via bluetooth.
-
Page 81: Section 9: Games & Applications
Section 9: Games & Applications Games The Games menu option allows you to access games that are on the phone and also shop for games using AppCenter. You can download new games and then save them to the Games folder. Press Menu My Stuff Games. - Page 82 and Multimedia using the built-in browser. You can also access the MEdia Home site. • AT&T FamilyMap: provides peace of mind by being able to conveniently locate a family member from your wireless phone or PC and know that your family's location information is secure and private.
- Page 83 time they call. When your friends update their profile pictures, it automatically updates on your phone. • Star Tweets: a subscription service that allows you to keep up-to-date and in touch with your favorite celebs on Twitter with Star Tweets. •...
-
Page 84: Section 10: Appcenter
Section 10: AppCenter The AppCenter allows you to shop for Ringtones, Games, Cool Tools/Apps, Videos, Color Graphics, Themes, and Answer Tones using the built-in browser. You can also access the MEdia Net Home site. Press Menu AppCenter to launch the AppCenter application. -
Page 85: Media Net Home
The MEdia Net menu option allows you to quickly access your MEdia Net homepage using the built-in browser. This page gives you quick access to information such as local weather, sports scores, horoscope information and quick links to the previously mentioned shopping sites. -
Page 86: Section 11: Mobile Web
Section 11: Mobile Web Your phone is equipped with att.net, your access to the mobile web. This section explains how to navigate att.net and introduces you to the basic features. Accessing the Mobile Web To access the Mobile Web browser: When the Idle screen displays, press Menu The att.net homepage displays. -
Page 87: Enter A Url
Press the Options soft key to access the following options: • Home [0]: returns you to the homepage where you started. • Go to URL: allows you to enter a web address to go to. • Go to Search: allows you to enter words to search the web. -
Page 88: Search The Internet
To perform an internet search using keywords, follow these steps: Select the Web tab. Navigate to the Yahoo! Search the Internet field and press Enter the keyword(s) to search using the QWERTY keypad Press OK. A list of search results displays. Select a link or press to return. -
Page 89: Emptying The Cookies
When the Idle screen displays, press Menu then press Options Go to Bookmarks. Press a bookmark item in the Bookmarks list. Adding Bookmarks When the Idle screen displays, press Menu Highlight the URL field and press Enter the URL using the QWERTY keypad Press the Options soft key, then select Add to Bookmarks. -
Page 90: Using Your History
The History list provides you with a list of the most recently visited websites. These entries are placeholders so you can return to previously unmarked web pages. When the Idle screen displays, press Menu then press Options History. Press an entry from the list to access the site. Press Clear to clear the history content. - Page 91 • Protocol: set the connection protocol used by the WAP browser: WAP or HTTP. • Home URL: enter the URL address of the page to use as your homepage. • Gateway Address: (WAP only) enter the gateway address of the proxy server.
-
Page 92: Section 12: At&T Gps
Section 12: AT&T GPS Your device is equipped with a Global Positioning System (GPS) receiver. Your device can receive location information from the GPS satellite through the internal antenna. AT&T GPS provides you with access to real-time GPS-driven applications. These programs not only allow you to achieve real-time GPS enabled turn-by-turn navigation, but also access local searches based on a variety of category parameters. -
Page 93: Launching At&T Navigator
Press Menu AT&T GPS AT&T Navigator. Read the AT&T Navigator Terms of Use and press YES to acknowledge the terms of use. Otherwise, press Exit. Highlight Login and press the Right Navigation key to launch the application. Read the Warning disclaimer and press Agree to acknowledge. -
Page 94: At&T Maps
Press Menu AT&T GPS AT&T Navigator Address. Highlight Type It or Speak It. • Type It: requires that you enter the physical address using the keypad. • Speak It: enables the voice response unit and translates voice to text. If typing in the address, highlight the following fields and use the keypad to enter the necessary information: •... -
Page 95: Where
Follow the on-screen instructions. Where WHERE™ is a downloadable mobile application that uses your current location (obtained via the built-in GPS) to help you find places of interest, things to do, and local information while you’re on the go. Press Menu AT&T GPS WHERE. -
Page 96: Section 13: At&T Music
Section 13: AT&T Music This section explains how to use the AT&T Music feature to shop for music, play music, identify songs, set up playlists, listen to the radio, and watch music videos. Accessing AT&T Music AT&T Music provides you access to a music player, music applications, and music communities and allows you to both identify and purchase music directly from your handset. - Page 97 My Favorites: allows you to access shortcuts to favorite artists, • albums, songs, and radio stations. My Library: allows you to access all music on your phone. Create or • manage playlists, and find music by artist, album, song, or genre. •...
-
Page 98: Section 14: My Stuff
Section 14: My Stuff The topics covered in this section include Applications, Audio, Games, Pictures, Online Locker, Tools, Video, Other Files, and Used Space. Press Menu My Stuff. Select from one of the following functions: Applications, Audio, Games, Online Locker, Pictures, Tools, Video, Other Files, or Used Space. -
Page 99: Applications
• Memory Card Details: displays details about the memory card such as Name, Maximum memory, and Available memory. Press Back after viewing. • Format: formats the memory card. This will remove all data from the memory card. • Rename Memory Card: allows you to rename the memory card. Backspace and enter a new name for the memory card then press Save. -
Page 100: Games
You can shop and download Answer Tones, manage your Answer Tones, and access Help files. To access the Answer Tones menu option, use the following steps: Press Menu My Stuff Audio Select one of the following options and follow the on-screen instructions. -
Page 101: Pictures
The Pictures menu option allows you to shop for and download new graphics (using AppCenter), then save them to your Pictures folder. To access the Pictures menu option, use the following steps: Press Menu My Stuff Pictures. Highlight a picture and press Options. Depending on the type of picture or file the following options may display: •... -
Page 102: Online Locker
• Send via: allows you to send a picture via Multimedia message, via Mobile Share, or via Bluetooth. • Set as: allows you to assign the current image as either your current Wallpaper, or as a Caller ID image used by a specific entry in the Address Book. -
Page 103: Tools
Important!: Standard Data rates apply when using Online Locker. Press Menu My Stuff Online Locker. Press Accept to accept the Terms & Conditions. Your Online Locker Album List is displayed. Press View to open an album. Select a photo or media item and press the Options key. The following options are available: •... -
Page 104: Used Space
The Used Space menu option allows you to view the usage and available memory for Applications, Audio, Games, Pictures, Video, and Other Files. To access the Used Space option, use the following steps: Press Menu My Stuff Used Space. The memory usage for the different items displays. Highlight Applications, Audio, Games, Pictures, Video, or Other Files. -
Page 105: Section 15: Tools
Section 15: Tools Tools are feature options that allow you to use your handset for a variety of non-phone related activities. To access any of the tools, perform the following: Press Menu My Stuff Tools. Use the AT&T Mall to purchase additional or supplemental applications (such as camera, camcorder, calendar, and alarm). - Page 106 • Shuffle on /off: allows you to turn shuffle On or Off. When turned on, the current list of songs are randomly shuffled for playback. • Add to Playlist: adds the currently active song to either a new or current playlist. •...
-
Page 107: Using Playlists
Playing Music while Using the Phone The Music Player allows you to play music in the background while performing other tasks on your phone. The music pauses when an incoming call is accepted, and the music resumes when the call ends. Music continues to play when you receive a Text Message, Multimedia Message, or an Instant Message. - Page 108 Enter a playlist name in the Enter name field and press the Save soft key. Select All tracks and press the Select soft key or the key. Select a song or All from the list and press the place a check mark next to the song. Press the Add soft key.
-
Page 109: Voice Recognition
Nuance Voice Recognition software is an advanced speech recognition software used to activate a wide variety of functions on your phone. Nuance software automatically voice activates (up to 1,000 contacts) for voice dialing and searching. No pre-recording or training needed. Speak a contact name naturally to dial, and use your voice to look up contacts, launch applications and navigate phone menus. -
Page 110: Record Audio
You must end your current Voice Commands call before you can make another call using Voice Commands. You can only originate the first call in a 3-way call using Voice Commands. Voice Recognition Tips Wait for the tone before you speak. •... -
Page 111: Alarms
• More: displays the following additional options: – Rename: allows you to rename the audio file. – Lock/Unlock: allows you to lock/unlock the Audio file. Lock prevents the audio file from deletion. Unlock allows deletion. – Bluetooth Visibility: allows you to make the audio file visible to a Bluetooth device. -
Page 112: Calendar
• Recurrence: use this option to set the repeating status for the alarm by placing a checkmark alongside those days you would like to use for the current alarm. Everyday places a checkmark alongside all days. • Snooze: use this option to set a Snooze Duration (Off, 5, 10, 15, 20, or 30 Minutes) and a Snooze Repetition (1, 2, 3, 5, or 10 Times). - Page 113 • Create: allows you to select an event category: Appointment, Anniversary, Holiday, Important or Private event. • Go to: allows you to go to your today’s calendar or that of a specified date. • Event List: allows you to refer to your scheduled events stored on your calendar according to the type of event: Appointment, Anniversary, Holiday, Important or Private event.
-
Page 114: Recent Calls
Highlight the Except weekends checkbox and press Check to exempt non-work days (weekends) from the event notification. Select the Until field and assign an expiration date for this event. Press Save to store the new event. Viewing an Event Press Menu My Stuff Tools Event list. -
Page 115: Tasks
• CO2 Emission options: select the type of fuel that your automobile uses. This will help calculate the CO2 emissions that were reduced by you walking instead of driving. Select Petrol, Diesel, or Auto LPG. • Fuel Efficiency: select the fuel efficiency of the automobile that you drive. -
Page 116: Calculator
Use the keypad to enter a new note and press Options Save. Calculator With this feature, you can use the phone as a calculator. The calculator provides the basic arithmetic functions; addition, subtraction, multiplication, and division. Press Menu My Stuff Tools Enter the first number using the keypad. -
Page 117: Converter
Press Options Reset to start over. Converter Your phone comes with a built-in conversion application. This conversion menu provides the following conversion categories: • Currency • Length • Weight • Volume • Area • Temperature Press Menu My Stuff Tools Select the specific converter function and press the key. -
Page 118: Timer
Press Menu My Stuff Tools Highlight a World Clock entry. Press Options Delete. At the Delete? prompt, press Yes to delete or No to cancel. Timer You can use this menu to set a countdown timer. Use a timer to count down to an event based on a preset time length (hours, minutes, and seconds). -
Page 119: Section 16: Health And Safety Information
Section 16: Health and Safety Information This section outlines the safety precautions associated with using your phone. These safety precautions should be followed to safely use your phone. Health and Safety Information Exposure to Radio Frequency (RF) Signals Specific Absorption Rate (SAR) Certification Information Your wireless phone is a radio transmitter and receiver. -
Page 120: Please Note The Following Information When Using Your Handset
For body worn operation, this phone has been tested and meets FCC RF exposure guidelines when used with an accessory that contains no metal and that positions the handset a minimum of 1.5 cm from the body. Use of other accessories may not ensure compliance with FCC RF exposure guidelines. -
Page 121: Samsung Mobile Products And Recycling
For more information, refer to “Standard Limited Warranty” on page 135. Samsung Mobile Products and Recycling Samsung cares for the environment and encourages its customers to recycle Samsung mobile phones and genuine Samsung accessories. Go to: http://mobile.samsungusa.com/recycling/index.jsp... - Page 122 exposure decreases rapidly with increasing distance from the source. The so-called "cordless phones," which have a base unit connected to the telephone wiring in a house, typically operate at far lower power levels, and thus produce RF exposures well within the FCC's compliance limits. Do wireless phones pose a health hazard? The available scientific evidence does not show that any health problems are associated with using wireless phones.
- Page 123 Occupational Safety and Health Administration • National Telecommunications and Information Administration • The National Institutes of Health participates in some interagency working group activities, as well. FDA shares regulatory responsibilities for wireless phones with the Federal Communications Commission (FCC). All phones that are sold in the United States must comply with FCC safety guidelines that limit RF exposure.
- Page 124 from wireless phones poses a health risk? A combination of laboratory studies and epidemiological studies of people actually using wireless phones would provide some of the data that are needed. Lifetime animal exposure studies could be completed in a few years. However, very large numbers of animals would be needed to provide reliable proof of a cancer promoting effect if one exists.
- Page 125 concerned about avoiding even potential risks, you can take a few simple steps to minimize your exposure to radio frequency energy (RF). Since time is a key factor in how much exposure a person receives, reducing the amount of time spent using a wireless phone will reduce RF exposure.
-
Page 126: Medical Equipment
whether they are used against the head or against the body. Either configuration should result in compliance with the safety limit. Do wireless phone accessories that claim to shield the head from RF radiation work? Since there are no known risks from exposure to RF emissions from wireless phones, there is no reason to believe that accessories that claim to shield the head from those emissions reduce risks. -
Page 127: Road Safety
Additional information on the safety of RF exposures from various sources can be obtained from the following organizations (Updated 1/1/2010): FCC RF Safety Program: • http://www.fcc.gov/oet/rfsafety/ Environmental Protection Agency (EPA): • http://www.epa.gov/radiation/ Occupational Safety and Health Administration's (OSHA): • http://www.osha.gov/SLTC/radiofrequencyradiation/index.html National Institute for Occupational Safety and Health (NIOSH): •... - Page 128 Let the person you are speaking with know you are driving. Suspend the call in heavy traffic or hazardous weather conditions. Rain, sleet, snow, ice and even heavy traffic can be hazardous. Do not take notes or look up phone numbers while driving. Jotting down a "to do"...
-
Page 129: Responsible Listening
Caution!: Avoid potential hearing loss. Damage to hearing occurs when a person is exposed to loud sounds over time. The risk of hearing loss increases as sound is played louder and for longer durations. Prolonged exposure to loud sounds (including music) is the most common cause of preventable hearing loss. -
Page 130: Operating Environment
American Academy of Audiology 11730 Plaza American Drive, Suite 300 Reston, VA 20190 Voice: (800) 222-2336 Email: info@audiology.org Internet: http://www.audiology.org National Institute on Deafness and Other Communication Disorders National Institutes of Health 31 Center Drive, MSC 2320 Bethesda, MD 20892-2320 Email: nidcdinfo@nih.gov Internet: http://www.nidcd.nih.gov/... -
Page 131: Using Your Phone Near Other Electronic Devices
for the safety of personnel, it is recommended that the equipment should only be used in the normal operating position (held to your ear with the antenna pointing over your shoulder if you are using an external antenna). Using Your Phone Near Other Electronic Devices Most modern electronic equipment is shielded from radio frequency (RF) signals. - Page 132 that may be compatible with their hearing devices. Not all phones have been rated. Phones that are rated have the rating on their box or a label located on the box. The ratings are not guarantees. Results will vary depending on the user's hearing device and hearing loss.
-
Page 133: Potentially Explosive Environments
If you use any other personal medical devices, consult the manufacturer of your device to determine if it is adequately shielded from external RF energy. Your physician may be able to assist you in obtaining this information. Switch your phone off in health care facilities when any regulations posted in these areas instruct you to do so. -
Page 134: Fcc Notice And Cautions
networks or when certain network services and/or phone features are in use. Check with local service providers. To make an emergency call: If the phone is not on, switch it on. Key in the emergency number for your present location (for example, 911 or other official emergency number). -
Page 135: Other Important Safety Information
phone warranty if said accessories cause damage or a defect to the phone. Although your phone is quite sturdy, it is a complex piece of equipment and can be broken. Avoid dropping, hitting, bending or sitting on it. Other Important Safety Information Only qualified personnel should service the phone or install the phone •... -
Page 136: Availability Of Various Features/Ring Tones
When you use your phone, the system handling your call controls the power level. This power can range from 0.006 watts to 0.2 watts in digital mode. Maintaining Your Phone's Peak Performance For the best care of your phone, only authorized personnel should service your phone and accessories. -
Page 137: Battery Precautions
If left unused, a fully charged battery will discharge itself over time and • must be recharged before use. Use only Samsung-approved batteries and recharge your battery only • with Samsung-approved chargers which are specifically designed for your phone. When a charger is not in use, disconnect it from the power source. -
Page 138: Care And Maintenance
Do not handle a damaged or leaking Lithium Ion (Li-Ion) battery. For safe disposal options for Li-Ion batteries, contact your nearest Samsung authorized service center. Always recycle. Do not dispose of batteries in a fire. Care and Maintenance Your phone is a product of superior design and craftsmanship and should be treated with care. - Page 139 Dispose of phones in accordance with local regulations. In some areas, • the disposal of phones in household or business trash may be prohibited. For safe disposal options for phones, contact your nearest Samsung authorized service center. Health and Safety Information...
-
Page 140: Section 17: Warranty Information
Product; (i) any other acts which are not the fault of SAMSUNG; or (j) Product used or purchased outside the United States. This Limited Warranty covers batteries only if battery... - Page 141 (iii) the battery has been used in equipment other than the SAMSUNG phone for which it is specified. What are SAMSUNG's Obligations? During the applicable warranty period, SAMSUNG will repair or replace, at SAMSUNG's sole option, without charge to Purchaser, any defective component part of Product.
- Page 142 WRITTEN WARRANTY STATED HEREIN. SOME STATES DO NOT ALLOW LIMITATIONS ON HOW LONG AN IMPLIED WARRANTY LASTS, SO THE ABOVE LIMITATION MAY NOT APPLY TO YOU. IN ADDITION, SAMSUNG SHALL NOT BE LIABLE FOR ANY DAMAGES OF ANY KIND RESULTING...
-
Page 143: End User License Agreement For Software
SAMSUNG and should not be relied upon. Samsung Telecommunications America, LLC 1301 E. Lookout Drive Richardson, Texas 75082 Phone: 1-800-SAMSUNG Phone: 1-888-987-HELP (4357) ©2010 Samsung Telecommunications America, LLC. All rights reserved. - Page 144 8. TERMINATION. This EULA is effective until terminated. Your rights under this License will terminate automatically without notice from Samsung if you fail to comply with any of the terms and conditions of this EULA. Upon termination of this EULA, you shall cease all use of the Software and destroy all copies, full or partial, of the Software.
- Page 145 SAMSUNG AND ITS LICENSORS (COLLECTIVELY REFERRED TO AS "SAMSUNG" FOR THE PURPOSES OF SECTIONS 9, 10 and 11) HEREBY DISCLAIM ALL WARRANTIES AND CONDITIONS WITH RESPECT TO THE SOFTWARE, EITHER EXPRESS, IMPLIED OR STATUTORY, INCLUDING, BUT NOT LIMITED TO, THE IMPLIED...
- Page 146 To avoid unintended information leaks and other problems of this sort, it is recommended that the device be returned to Samsung’s Customer Care Center for an Extended File System (EFS) Clear which will eliminate all user memory and return all settings to default settings.
- Page 147 Important!: If you are using a handset other than a standard numeric keypad, dial the numbers listed in brackets. Phone: 1-888-987-HELP (4357) © 2010 Samsung Telecommunications America. All rights reserved. No reproduction in whole or in part allowed without prior written approval. Specifications and availability subject to change without notice.
-
Page 148: Index
Index Accessing a Menu Function Adding a New Contact Adding More Fields Deleting Fields During a Call Idle Screen Address Book Adding a New Contact Adding Pauses to Contact Numbers Address Book Entry Options Copying an entry to the Phone Copying Entry to Phone Copying Entry to SIM Card Deleting an Address Book entry... - Page 149 Audio Auto Key Lock Battery charging Installing Low Battery Indicator Bluetooth Activation Discoverable mode My Bluetooth Info My Devices Bluetooth Device Stereo Browser Settings Business Card attaching to a message Calculator - Eco Calendar Deleting an Event Viewing an Event Call Functions 3-Way Calling (Multi-Party Calling) Address Book...
- Page 150 Display icons Light Settings Menu Style Wallpaper Eco Calculator Entering Text Changing the Text Entry Mode Using Fn 123 (numeric) Mode Using SYm (symbol) Mode Changing the Status Creating New Numbers Games Getting Started Setting Up Your Phone Voice mail Go to GPS Applications Shopping For...
- Page 151 Mobile Video Mobile Web Entering Text in the Mobile Web Browser Navigating with the Mobile Web Using Bookmarks MobiTV MobiVJ M-Ratings Multitasking Functions Music Music File Extensions AAC+ eAAC+ MPEG Music Player Settings Mute My Stuff Audio Games Music Other Files Pictures Recorded Audio Ringback Tones...
- Page 152 SAR values Security APN Control Change Phone Password Change PIN Code Change PIN2 Code Check PIN Code Lock Phone Lock SIM Card Set FDN Mode Service Dialing Numbers Set FDN Mode Settings Address Book Applications Call Settings Display Music Player Phone Phone Information Record Audio...
- Page 153 Video Share IMS Settings Initiating and Receiving a Video Share Session Play a Recording Settings Videos Vlingo - Voice Voice Mail Accessing From Another Phone Setup Voice Recognition Warranty Information WHERE Windows Live Hotmail World Clock Deleting an Entry Yellowpages Yellowpages Mobile YPmobile...