Table of Contents
Advertisement
Advertisement
Table of Contents

Related Manuals for Mercedes-Benz 1985 380SE


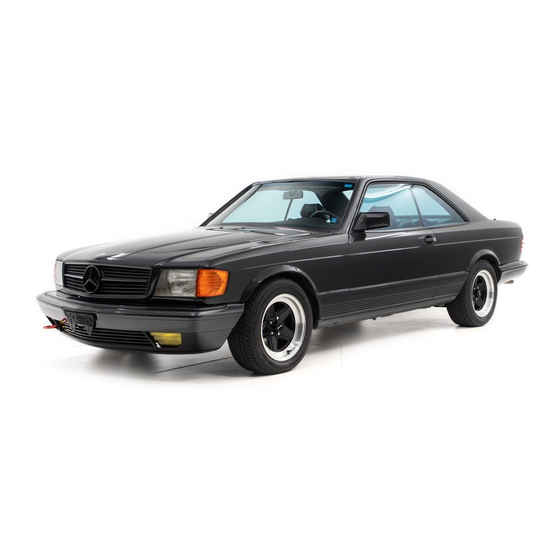
Summary of Contents for Mercedes-Benz 1985 380SE
- Page 1 Mercedes-Benz Owner' s Manual 380 SE 500SEL 500 SEC...
- Page 2 • have all the maintenance jobs specified by us carried out at regular intervals by an authorized MERCEDES-BENZ dealer. Driving in low temperature weather, in stop-and-go city traffic and on short hops, and in hilly country also increases fuel consumption.
- Page 3 M ercedes-B enz Owner’s Manual ® 380 SE 500 SEL 500 SEC Chassis 126 1985...
- Page 5 O u r company and staff wish you many hours of enjoyment with your new vehicle. You have placed a lot of trust in our company name by purchasing a MERCEDES, from which you may expect that it will give you long service with a minimum of trouble, and is easy to operate.
-
Page 7: Table Of Contents
Owner’s Manual, your Opening, Locking and Sliding R o o f......38 MERCEDES-BENZ dealer will be glad Unlocking of D o o r s ....15 Interior L a m p s ......39 to inform you o f correct care and Central Locking System . - Page 8 Contents Practical Hints Vehicle Care Driving Safety Head Restraints....68 MERCEDES-BENZ Maintenance H oo d......... Rear Seat C ushion....... 69 S y s te m ........Parking Brake......Ash trays........69 Spare Parts S e rv ic e ....Regular Inspections....
- Page 9 Contents Technical Data, Fuels, Coolants, Electrical S ystem ....Lubricants, etc. Headlamp Adjustment . . . Replacing B u lb s ....Identification P la te s ..... 88 Vehicle Operation F u s e s ........Vehicle Data C a r d s ..... 89 Spark P lu g s ......
-
Page 11: Vehicle Operation
Vehicle Operation... -
Page 12: Instruments And Controls
Instruments and Controls 14 Switch for heated rear window (page 39) For more detailed descriptions see quoted pages. 15 Switch for electric sliding roof (page 38) 1 Speaker grilles 16 Switch for hazard warning flasher system 2 Side ventilation outlets (page 32) 17 Switch for automatic antenna (page 46) 3 Swivelling outlets for nonheated fresh air (page 32) - Page 13 Instruments and Controls...
-
Page 14: Instrument Cluster
instrument Cluster 13 0 2-Sensor replacement indicator lamp (red): 1 Economical driving indicator (ECONOMY). ■ I See page 58 When the indicator lamp comes on, the 0 2-Sensor must be replaced 2 Coolant temperature gauge | | P Up to red marking: Maximum permissible tempe- 14 Supplemental restraint system indicator lamp (red). - Page 15 Instrument Cluster...
-
Page 16: Master Key And
Obtaining Replacement Keys after the car was locked with the master key. You are given 4 keys with your vehicle. Replacement keys can be obtained only via an autho rized MERCEDES-BENZ dealer. For security reasons, obtaining replacement keys requires consi derable time. -
Page 17: Unlocking Of D O O R S
Keys Doors When the rear door buttons are pushed down, the rear doors cannot be opened from the outside or the inside. They can only be opened after pulling buttons up. The driver’s door can be locked only if it is closed and the door lock has properly engaged. -
Page 18: Central Locking System
Keys Doors The trunk can remain locked while Central Locking System Note: the central locking system is The central locking system can be The entire vehicle may be locked or unlocked (e.g. while driving or when engaged from the driver-side door unlocked with the central locking leaving the car in a situation where it lock button, provided the door is... -
Page 19: Anti-Theft Alarm System
Keys Doors Anti-Theft Alarm System The alarm will last approximately Special Function 150 seconds in the form of blinking To activate the anti-theft alarm from The anti-theft alarm can be armed or exterior lamps. At the same time an the trunk, turn the master key in the disarmed with the master key (iden... -
Page 20: Seats
Seats Two sets of seat/head restraint posi Seat and Head Restraint tions may be programmed in Adjustment: memory. After the seat and head A Seat cushion adjustment. restraints are positioned, push B Seatback adjustment. memory button D, and within C Head restraint adjustment. 3 seconds push position button “1”. -
Page 21: Safety Head Restraints, Rear
Seats Note: Prior to operating the vehicle, the driver should adjust the seat height for proper vision as well as fore/aft placement and seat back angle to insure adequate control, reach, operation, and comfort. The head restraint should also be adjusted for proper height so that when the cushion is tipped completely forward, it should form a cradle... -
Page 22: Rear Seat Adjustment 500 Sel
Seats ► Rear Seat Adjustment 500 SEL Note: Electrical Adjustment of the Individual Rear Seats 500 SEL The seats can also be adjusted Move key in steering lock to when the key is withdrawn or in The switches are located on the position “2”. -
Page 23: Orthopedic Seat Backrest
Seats The inflation pressure of the air cushion may be continuously varied between position “0” = without pressure, and position “4” = maximum pressure, by changing the pressure regulator (1) setting. In addition, the cushion height may be changed to five different settings between position “A”... -
Page 24: Arm Rest (Rear Seat)
Seats Heater operation: Push in upper switch portion; posi tion 1 = normal heater operation, one indicator lamp lights up. Push in lower switch portion; posi tion 2 = rapid heating, both indicator lamps light up. After approximately 5 minutes in the rapid heating mode, the heater auto... -
Page 25: Supplemental Restraint System
Supplemental Restraint System Seat Belts and Emergency Warning system: - • 380 SE, 500 SEL: Tensioning Retractor Adjust front seat belts so as to The indicator is illuminated for have the upper belt located as 4-8 seconds after turning the steer Your vehicle is equipped with seat near as possible to the middle ing lock key to position “2”. - Page 26 Supplemental Restraint System seat belt is buckled or when resis- Unfastening: tance to its extension is encoun • Push in the red button (3) in the tered (e.g., accidental occupant belt buckle. contact). • The retractor should completely If the seat belt is not buckled within rewind the belt and latch plate (1).
- Page 27 Any authorized MERCEDES-BENZ dealer will gladly Warning! advise you on this subject. Rear seat passengers should always...
-
Page 28: Driver Airbag
This will not cause the supplemental restraint system to be activated. However, we strongly recommend that you visit an authorized MERCEDES-BENZ dealer immedia tely to have the system checked; otherwise the “SRS" may not be activated in a severe frontal accid... - Page 29 No modifications of any kind may be should be inspected by an autho the subsequent owner if it is made to any components or wiring rized MERCEDES-BENZ dealer at equipped with an “SRS” by alerting of the “SRS”. This includes the that time.
-
Page 30: Controls
Controls Note: Wipers, windshield washer, head lamp flasher, lighter, glove com Do not remove key from steering partment lamp, radio, seat heater for lock while the vehicle is in front seats. motion as this will cause the engagement of the steering lock A warning buzzer sounds when the thus rendering the vehicle key has been left in steering lock... -
Page 31: Lighting Switch
Controls Lighting Switch Notes: With the steering lock key removed 0 Off-position and the driver’s door open, a 1 Parking lamps (includes side warning buzzer sounds if the vehic marker lamps, tail lamps, license le’s exterior lamps are not switched plate lamps, instrument panel off (standing lamps excepted). -
Page 32: Combination Switch
Controls 6 Control for windshield washer system When the washer system is switched on, the wipers also operate. 7 Windshield wiper control 0 Windshield wiper switched off 1 Intermittent wiping II Normal wiper speed III High wiper speed Hints: If one of the turn signals fails, the turn signal indicator system flashes and sounds at a faster sequence Combination Switch... -
Page 33: Cruise Control
Controls The speed can be increased (e. g. memorized speed is cancelled for passing) by using the acceler when the key in the steering lock ator. As soon as the accelerator is is turned to position “ 1 ” or “0”. released, the previously set speed Note: will be resumed automatically. -
Page 34: Automatic Climate Control
Automatic Climate Control To ensure efficient operation of the automatic climate control system, » the air outlets (4), (5) and (6) must be kept open. For the rear passenger compart ment, a movable air outlet in the console, which can be opened and closed, supplies either non-heated, fresh air or cooled air. - Page 35 Automatic Climate Control Temperature Selection (° C) Fan Setting The interior temperature can be adjusted by Selection for fan settings can be made as § turning the temperature selector wheel. The follows: selected temperature is reached as quickly as possible and maintained. A basic setting of Push upper button for maximum fan speed 22°...
- Page 36 Automatic Climate Control EC (ECONOMY) = Economical setting; the air conditioning compressor stays off. In any other settings, the air conditioning compressor comes on with ambient temperatures above IC U -LC In i + 2° C/36° F. qo c t 1 U - j i l k t J j k H l We recommend this setting to be used with cool U U u...
- Page 37 Automatic Climate Control Multi-Level This setting is necessary for clearing a fogged wind shield. As soon as possible, reset to ^ In the heating mode, air is supplied to the windshield, foot area, air outlets (5) and (6), and the front doors - in the cooling mode, additionally to air outlet (4).
- Page 38 Automatic Climate Control @ Defrosting The maximum amount of heated air is directed to the windshield and side windows, regardless of tempera ture and fan speed setting. Note: The air conditioner removes considerable moisture from the air during operation. It is normal if water drips on the ground through openings in the car floor.
-
Page 39: Various Equipment
Various Equipment Exterior Mirrors Passenger side: Inside Rear View Mirror Turn key in steering lock to position Driver’s side: The mirror can be tilted to the anti “2”. The exterior mirror can be glare night position by means of the The exterior mirror (2) can be adjusted by means of the switch. -
Page 40: Sun Visors
Various Equipment > Sliding Roof Vanity mirror: Sun Visors Swing down sun visor. The lamps Turn key in steering lock to Swing sun visors down to protect are switched on when the cover is position “2”. against sun glare. opened. For this purpose the visor Press upper end (symbol) of rocker If sunlight enters through the side must be engaged in its inner mount... -
Page 41: Interior Lamps
Various Equipment Heated Rear Window The rear courtesy lamp is switched Interior Lamps on and off by the rear door contact With the engine running, press The switch for the front lamp has switches or by the rocker switch on symbol side of rocker switch to turn 3 positions. -
Page 42: Lighter
Various Equipment then be operated using the switches Power Windows Lighter in the center console. The rear door Switch group for power windows: Turn key in steering lock to position windows can also be operated using “ 1” or “2”. 1 front, left the switches (5) in each rear door Press in lighter;... -
Page 43: Radio
Radio 15 Fast tape forward locking [EE IIP button I k m i 16 Cassette eject button m i l 17 Cassette door — To turn the radio on or off, the steering lock key must be in posi I I M tion “1”... - Page 44 Radio To select AM or FM A fader control, installed in the center console, allows for balancing the Press any of the buttons marked sound level between the front and rear speakers. Q 3 through EQ to tune the radio to To adjust the tone characteristic the FM band.
- Page 45 Radio The radio is programmed to automatically search the entire band at three Note: sensitivity levels. During its first sweep, only the most powerful stations All AM stations have allocated received will be selected and locked in. During the next sweep, the less frequencies ending with a “0”.
- Page 46 Radio Tape Cassette playback Any AM station can be stored Safety Note similarly on any button marked 0 3 To avoid distraction from the vehicle’s It is recommended to use only good EZ3. through operation and the road, it is recom quality cassettes with a playback mended that the driver NOT perform time of not more than 60 to 90...
- Page 47 Radio Accordingly, for fast forward on the from midnight to midnight, that is time. In orderto set the timer E l . the tape, press the fast forward 24 hours. A time of 4:28 PM is indi steering lock key must be in posi button m —...
- Page 48 The height of the antenna can be Automatic Antenna adjusted to any intermediate posi The antenna switch can be actuated tion by actuating the antenna with the radio switched on and the switch: key in steering lock positions “1” • If the antenna switch is in the or “2”.
- Page 49 Driving...
-
Page 50: Hood
Parking Brake Hood Depress parking brake pedal. When Warning! To open, pull hood release handle the key is in position “2” of the located on the LH side below the The engine is equipped with a tran steering lock, the brake warning instrument panel. - Page 51 Have the following items checked regularly and prior to any long trip 1 Fuel Supply Use unleaded gasoline, for octane rating see “Capacities” and last page. 2 Tire Pressure For tire pressure table refer to fuel filler flap or last page. Check at least every other week.
-
Page 52: Catalytic Converter Cautions
Catalytic Converter Cautions As with any vehicle, do not idle, park Your MERCEDES-BENZ is equipped Should any noticeable irregularities or operate this vehicle in areas in the engine operation occur, with monolithic catalytic converters, where combustible materials such excessive unburned fuel may reach... - Page 53 —18° C/0° F, depress accel lock must be returned to “0” posi is installed. Every MERCEDES-BENZ erator three times prior to starting. tion before a new starting attempt is dealer will advise you on this made.
-
Page 54: Starting And Shifting Gears
Starting and Shifting Gears Accelerator position The automatic transmission simpli fies the handling of the vehicle. The Partial throttle = early upshifting = individual gears are shifted automat normal acceleration. ically dependent upon selector Full throttle = later upshifting lever position, vehicle speed and = maximum acceleration. - Page 55 Starting and Shifting Gears “N” Neutral. “2” Upshift to 2nd gear only. Trailer Operation For driving in mountainous No power is transmitted from When proceeding on a hill, do not the engine to the rear axle. regions. Since transmission allow the engine RPM to drop too When the brakes are released, will not shift up further, this low.
-
Page 56: Safe Driving
Safe Driving Power assistance: Aquaplaning: If ice has formed on the road, tire traction will be substantially When the engine is not running, Depending on the depth of the reduced. Under such weather both the service brake and the water layer on the road, aquaplaning conditions, drive, steer and brake may occur, even at low speeds. -
Page 57: Brake Pad Wear Indicator Lamp
MERCEDES-BENZ braking, this shows that the front pedal pressure may be necessary. dealer. wheel brake pads are worn. -
Page 58: Abs-Brake System (Anti-Lock Brake System)
We recommend that you visit resulting from excessive speed in km/h/5 mph has been exceeded an authorized MERCEDES-BENZ at least once after start-up. turns or following a vehicle too dealer as soon as possible to have closely. -
Page 59: Charge Indicator Lamp
“Fuels, Coolants, Lubricants, etc.”). repaired at an authorized accuracy of the displayed tempera During severe operating conditions MERCEDES-BENZ dealer as soon ture can only be verified by compa and stop-and-go city traffic, the as possible. rison to a thermometer located next... -
Page 60: Emission Control
After 1500 km/1000 miles speeds er indicates mostly more in the red MERCEDES-BENZ servicing require may gradually be increased to the area. ments. For details refer to the permissible maximum. -
Page 61: Special Operating Conditions
Have your car winterized at an winter season. Observe permis Increased pedal force may become authorized MERCEDES-BENZ sible maximum speed for M + S necessary to produce the normal dealer before the onset of winter. radial tires and the legal speed brake effect. -
Page 62: Tire Chains
Abroad, there is a widely-spread Use only tire chains that are tested Tire chains should only be driven MERCEDES-BENZ service network and recommended by us. Any on snow at speeds not to exceed at your disposal. If you travel into authorized MERCEDES-BENZ 50 km/h/30 mph. - Page 63 Vehicle Care...
-
Page 64: Y S Te M
MERCEDES-BENZ Maintenance System The coolant should be checked for A maintenance booklet is delivered Severe Operating Conditions sufficient protection before the start with your car listing all the mainte In the case of severe operating of and during the cold season. Have... -
Page 65: Spare Parts S E Rv Ic E
Spare Parts Service Cleaning and Care of the Vehicle All MERCEDES-BENZ dealers main In operation, your vehicle is In doing so, do not neglect the tain a stock of original spare parts subjected to a great amount of underside of the car. A prerequisite... -
Page 66: Jobs Related To Care
Rinse with clear water and tho ing. You can obtain MB car-care roughly wipe dry with a chamois. twice a year. products at every MERCEDES-BENZ dealer. To assist with the removal of accu If the vehicle has been run through... - Page 67 Velours: Pressure marks resulting months. Use the appropriate from dampness and heat may MERCEDES-BENZ Touch-Up Stick appear to be stains. Such marks for quick and provisional repairs of can be removed by wiping with a minor paint damage.
-
Page 69: Practical Hints
Practical Hints... -
Page 70: Safety Head Restraints
Practical Hints Safety Head Restraints Removing rear seat head restraints: Pull head restraint up until detent is Removing head restraints of front felt. Then pull it out sharply using seats: both hands. Bring the power adjustable head Installing head restraints: restraint to its highest position. -
Page 71: Rear Seat Cushion
(left and right) outwards while best be removed and installed by slightly lifting the front corner of the an authorized MERCEDES-BENZ seat cushion (do this carefully to dealer. avoid injury). Then pull the seat cushion forward. -
Page 72: First Aid Kit
(suction cups or legs). Such supports may lead to marring of the paint or even denting of the roof if excessive weight is placed on the rack. Your MERCEDES-BENZ dealer can give further advice. First Aid Kit To remove rear ash tray: Push the ash tray down while open... -
Page 73: Spare Wheel, Jack, Vehicle Tool Kit
Practical Hints Spare Wheel, Jack, Warning! Vehicle Tool Kit The jack is designed exclusively for jacking up the vehicle at the jack The spare wheel (1), jack (2) and tubes provided on either side of the vehicle tool kit are stored in a vehicle. -
Page 74: Wheels, Tires, Changing Wheels
Wheels Tires Changing Wheels Regular tire pressure checks at Wheels, Tires the 1st inspection. Retightening is also necessary when new wheels intervals of no more than 14 days Replace wheels or tires with the are fitted at a later date, e.g. when are therefore essential. -
Page 75: Changing Wheels
Wheels Tires Changing Wheels . Remove wheel. 4. Using the combination wrench, loosen but do not yet remove 9. Adjust the jack to allow the the wheel bolts. wheel to be slipped on without being lifted. 5. Clean jack supporting tube, if necessary. -
Page 76: Tire Inflation Pressure
Wheels Tires Changing Wheels Tire temperature and pressure Tire Inflation Pressure Example: increase with the vehicle speed. Tire Room temperature = A table (see fuel filler flap or last pressure should therefore only be approx. + 20° C /+ ° F page) lists the tire inflation pres... -
Page 77: Checking Fuels, Coolants, Lubricants, Etc
Checking Fuels Coolants Lubricants etc. The vehicle should be Wipe dipstick before any oil level parked on level ground and measurement. To determine the oil the oil level must be level, check both sides of the somewhere between the dipstick. Always determine the oil lower and the upper mark level by means of the straight hori... -
Page 78: Checking Coolant Level
Checking Fuels Coolants Lubricants etc. engine to cool down before remov Adding Coolant ing cap. The coolant reservoir If a small amount of coolant has to contains hot water and is under be added (due to evaporation of pressure. water), plain water can be used. Using a rag, turn cap to first notch to If a larger quantity of coolant has to relieve excess pressure. -
Page 79: Automatic Transmission Fluid Level
Checking Fuels Coolants Lubricants etc. Check transmission fluid level with The maximum and minimum fluid the engine idling, parking brake level marks on the dipstick are engaged and selector lever in posi applicable references only if the tion “P”. The vehicle must be parked transmission fluid has reached its on level ground. -
Page 80: Electrical System
Electrical System ]9 4 2 6 9427 Securing screw for cover of Headlamp Adjustment Headlamp Unit sealed-beam unit and for 1 Headlamp vertical adjusting Correct headlamp adjustment is 380 SE, 500 SEL fog lamp extremely important. Check and screw 7 Sealed-beam unit for high and readjust headlamps at regular inter... - Page 81 Electrical System Replacing bulbs: 0/3£(v t q f Bulbs for turn signal, standing, side marker and parking lamps (21/5 W/32/3 cp): Turn lamp holder with bulb to the left and remove. Depress bulb, turn to the left and take out. Sealed-beam unit for high and low Fog Lamp 500 SEC 4 Bulb for fog lamp (H 3):...
- Page 82 Electrical System 9 1 8 6 Trunk Lamp (10 W festoon lamp) License Plate Lamps Tail Lamp Assemblies (5 W festoon lamp) Trunk lamp (1) is easily accessible 1 Side marker lamp (10 W when trunk lid ( ) is open. Loosen both the securing screws 2 Turn signal lamp (21 W/32 cp) ) and take out lamp.
- Page 83 Electrical System Interior Lamps (10 W festoon lamp) Sun Visor Lamp (5 W festoon lamp) Glove Compartment Lamp (5 W festoon lamp) To replace the bulb, lift off front lamp To replace a bulb, pry off the cover at RH side, pull it out and open by inserting a screwdriver in the left To replace the bulb, pull out lamp.
-
Page 84: Fuses
Electrical System Fuse arrangement in the box - start Spark Plugs ing at the engine side and proceed This vehicle is equipped with spark ing outwards - plugs as required for driving in the RH row: odd numbers 1, 3, 5, etc. up USA. -
Page 85: Battery
Electrical System Battery Coat battery terminal clamps with Warning! acidproof grease. Keep battery Battery fluid contains sulfuric acid. Check fluid level in each cell appro clean and dry. Do not allow this fluid to come in ximately every four weeks, and more The service life of the battery is also contact with eyes, skin, or clothing. -
Page 86: Windshield Wipers
Unlocking the Fuel Filler Flap Emergency Operation of Sliding Roof Windshield Wipers In order to renew or release frozen windshield wiper blades, the wind shield wiper arms can be pulled out of their recess by hand. Sufficient force must be applied to overcome spring resistance. -
Page 87: Jump Starting
Tow-starting and Towing the Vehicle If the battery is discharged the Instructions: engine can be started with jumper A discharged battery can freeze at cables (minimum cable cross approx. -10° C/-I-140 F. In all cases it section is 25 mm2) and the (12 V) must be thawed out before jumper battery of another vehicle. - Page 88 Tow-starting and Towing the Vehicle Towing a Vehicle lever to position “ ” to tow-start the Warning! engine. Only touch the accelerator When the engine is not running, The vehicle may be towed with the when the engine is turning. As soon both the service brake and the steer...
-
Page 89: Technical Data Fuels Coolants Lubricants Etc
Technical Data Fuels Coolants Lubricants etc. -
Page 90: Identification Plates
Identification Plates When ordering spare parts, please quote chassis and engine numbers. Emission Control Tag (500 SEC left side) 7 Information Tag California version Vacuum line routing for emission control system 1 Certification Tag (left door pillar) 3 Chassis No. Emission Control Tag 2 Identification Tag (left window 4 Engine No. -
Page 91: Vehicle Data Cards
Data card No. 1 bears the key number and should never be left in the vehicle. Submit this card to your authorized MERCEDES-BENZ dealer to request a replacement key in case of loss. Data card No. 2 bears no key data and is kept in the Maintenance Booklet. -
Page 92: Technical Data
The q uo ted data a p p ly o n ly to th e standard v ehicle. See an authorize d MERCEDES-BENZ de a le r fo r th e c o rre s p o n d in g d ata of all spe c ia l b o d ies... - Page 93 Technical Data 380 SE Electrical System Main Dimensions Alternator_ _ 14V/80A Overall vehicle length 5145 mm/202.6 in Starter motor 12 V/1.5 kW Overall vehicle w id th. 1820 mm/ 71.7 in B attery..12 V Overall height.... 1436 mm/ 56.5 in Spark plugs..
-
Page 94: Sel, 500 Sec
1 The q u o te d data a p p ly o nly to th e standard vehicle. See an authorize d MERCEDES-BENZ dea ler fo r th e c o rre s p o n d in g data o f all s p e cia l b o d ies... - Page 95 Technical Data 500 SEL, 500 SEC Main Dimensions 500 SEL Main Dimensions 500 SEC Overall vehicle length.... Overall vehicle le n g th ..5285 mm/208.1 in 5060 mm/199.2 in Overall vehicle w id th ..1820 mm/ 71.7 in Overall vehicle w idth ....
-
Page 96: Capacities
Coolants Lubricants etc. Capacities Inquire at your authorized Therefore use only brands tested Vehicle components and their MERCEDES-BENZ dealer. respective lubricants must match. and recommended by us. Fuels, coolants, lubricants, etc. Recommended engine oil Total oil capacity in case of engine oil and... -
Page 97: Fuels Coolants Lubricants Etc
12.5 1/13.2 US qt Cooling system Coolant 500 SEL, 500 SEC 13.0 1/13.7 US qt 1 A ny au th o riz e d MERCEDES-BENZ dea ler w ill advise yo u on reco m m e n d e d brands. -
Page 98: Engine Oils
MERCEDES-BENZ. A recommended engine oil may be not exceed Your MERCEDES-BENZ dealer will used for topping up if the oil level The ratio of Methanol to gasoline provide you with additional informa drops to the dipstick minimum mark must not exceed 3%. -
Page 99: Coolants
MERCEDES-BENZ dealer. The coolant solution must be used MERCEDES-BENZ dealer for main year round to provide the necessary Anticorrosion/antifreeze tenance service. corrosion protection and increase in... -
Page 100: Service Literature
One Mercedes Drive P.O. Box 350 Montvale, New Jersey 07645 Att: Technical Publications Tel: (201) 573-0600 for Canada: Mercedes-Benz of Canada 849 Eglinton Ave., East Toronto 17, Ont., Canada Att: Service Department Tel: 416-425-3550 The above companies will be happy to handle any such requests from customers. -
Page 101: Consumer Information
Consumer Information This has been prepared as required Uniform Tire Quality Grading Temperature “A”, “B”, “C” of all manufacturers of passenger The temperature grades of “A” (the Relevant tire grade information on cars under Title 49, Code of U.S. highest). “ B” and “C” representing tire flanks. - Page 102 Consumer Information 380 SE Vehicle Stopping Distance This figure indicates braking performance that can be met or exceeded by the vehicles to which it applies, under different conditions of loading and with partial failures of the braking system. The information presented represents results obtainable by skilled drivers under controlled road and vehicle conditions, and the information may not be correct under other conditions.
- Page 103 Consumer Information 500 SEL, 500 SEC Vehicle Stopping Distance This figure indicates braking performance that can be met or exceeded by the vehicles to which it applies, under different conditions of loading and with partial failures of the braking system. The information presented represents results obtainable by skilled drivers under controlled road and vehicle conditions, and the information may not be correct under other conditions.
- Page 106 Printed in G erm any We reserve th e rig h t to m odify th e te ch n ic a l deta ils of th e v e h icle as given in th e data and illu s tra tio n s o f th is O w ner’s M anual (s.e.e.o.). R e printing, tra n sla tio n and cop yin g , even o f e xce rp ts, is n o t perm itted w ith o u t o u r p rio r autho riza tio n in w riting.
- Page 107 What You Should Know at the Gas Station • Fuel: Unleaded gasoline: Average Octane of • Coolant: For normal replenishment, use water Research and Motor 87 (RON of 91). (potable water quality). Fuel tank capacity approx. 90 I/23.8 US gal, For further information (e.g.
- Page 108 D aim ler-B enz AG Stuttgart-U ntertuerkheim Z entralkundendienst £...