Samsung SCW61 Owner's Instruction Manual
Video camcorder
Hide thumbs
Also See for SCW61:
- Owner's instruction manual (65 pages) ,
- Owner's instruction book (59 pages) ,
- Service manual (125 pages)
Table of Contents
Advertisement
ENGLISH
Video Camcorder
8mm
SCW61/W62
Hi
SCW61/W62
Owner's Instruction Book
Before operating the unit, please read
this instruction book thoroughly, and retain it for
future reference.
Videocámara
8mm
SCW61/W62
Hi
SCW61/W62
Manual de instrucciones del usuario
Antes de utilizar la videocámara, lea
completamente el presente manual de
instrucciones, y consérvelo para futuras
consultas.
ELECTRONICS
FRANÇAIS
AD68-00375C
Advertisement
Table of Contents

Related Manuals for Samsung SCW61


Summary of Contents for Samsung SCW61
- Page 1 ENGLISH Video Camcorder SCW61/W62 SCW61/W62 Owner’s Instruction Book Before operating the unit, please read this instruction book thoroughly, and retain it for future reference. FRANÇAIS Videocámara SCW61/W62 SCW61/W62 Manual de instrucciones del usuario Antes de utilizar la videocámara, lea completamente el presente manual de instrucciones, y consérvelo para futuras...
-
Page 2: Table Of Contents
Affichage ...12 Accessoires fournis avec votre caméscope ...14 Réglage du Caméscope Mise en place de la poignée de soutien et de la bandoulière...15 Installation de la pile au lithium ...16 Connexion d’une alimentation ...17 Utilisation de l’adaptateur secteur et du câble DC...17 Utilisation du bloc batterie ...18... - Page 3 Fonctions BLC ...33 Sélection d’un mode d’exposition automatique ...34 Effets spéciaux numériques en mode Caméscope...36 Réglage et enregistrement de la date et de l’heure ...38 Sélection et enregistrement d’un titre ...40 Fondu en ouverture ou en fermeture...42 Équilibrage du blanc ...43 Démonstration ...44...
-
Page 4: Notices And Safety Instructions
Keep the terminals clean. The camera, adapter or battery pack will not work properly if the terminals are dirty. Check them before use, and wipe them with a dry cloth or tissue if necessary. Notices regarding the LENS Do not let the LENS point toward the sun. - Page 5 When you take the camcorder from cold temperature outside to warm temperature inside during the winter. When you take the camcorder from cool temperature inside to hot temperature outside during the summer. 2) If the “DEW” protection feature is activated, leave...
- Page 6 La longévité de la pile au lithium est de huit à dix mois à partir de sa mise en place et dans des conditions normales d’utilisation.
- Page 7 Notices regarding video head cleaning To ensure normal recording and clear picture, clean the video heads. When playing back the pictures , if they are noisy or hardly visible, the video heads may be dirty. If this happens, clean the video heads with a dry type cassette cleaner.
-
Page 8: Getting To Know Your Camcorder
BLC function. (see page 33) DSE (Digital Special Effects) The DSE enables you to give a creative look to your films by adding various special effects. (see page 36) Program AE (Auto Exposure) The Program AE enables you to adapt the shutter speed and aperture to adjust to the type of scene to be filmed. -
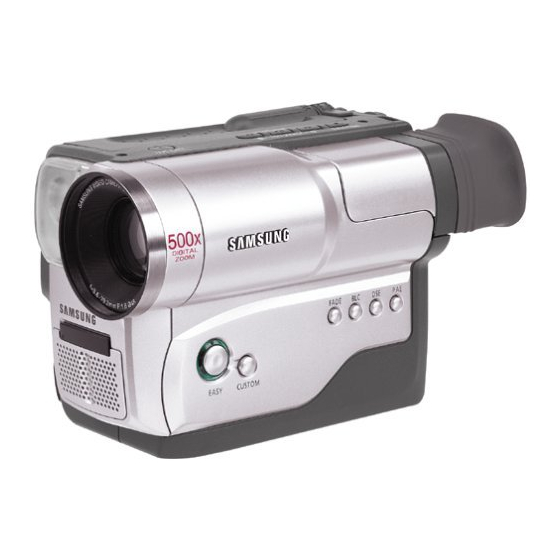
Page 9: Front View/Side View/Rear View
(REW) 6. TAPE EJECT 11. VIDEO LIGHT 1. LENS 8. MIC 10. EASY 1. Lens (see page 56) 6. TAPE EJECT (see page 21) Use when ejecting the tape. 2. EDIT (REW) 7. EVF (Electronic Viewfinder) EDIT works in STANDBY mode. - Page 10 20. Cable DC (voir page 17) (voir page 31) Ce bouton fonctionne en mode 21. Voyant de recharge MENU. (voir page 18) 16. PROGRAM AE (voir page 34) 22. S-VIDEO out (voir page 47) Fonctionne en mode Caméscope. 23. Pile au lithium (voir page 16)
- Page 11 24. ZOOM (see page 27) 30. POWER Switch (see page 17) - CAMERA : Select to record. 25. Cassette Compartment - OFF : Select to turn off the camcorder. 26. Hooks for Shoulder Strap - PLAYER : Select to playback.
-
Page 12: Osd (On Screen Display)
ENGLISH Getting to Know Your Camcorder OSD (On Screen Display) You can turn the OSD on/off by setting the Display menu on/off. The TITLE, DATE/TIME, EASY and CUSTOM functions can be operated even after the OSD is turned off. The OSD is displayed in the viewfinder and the monitor. - Page 13 White Balance mode (see page 43) Indicates the White Balance mode is activing. The White Balance modes are AUTO, INDOOR and OUTDOOR. s. Hi8 Indicates the use of the Hi8 tape in recording or playing back modes. FRANÇAIS Familiarisez-vous avec le caméscope Affichage Heure (voir page 38) Indique l'heure à...
-
Page 14: Accessories Supplied With The Camcorder
ENGLISH Getting to Know Your Camcorder Accessories Supplied with the Camcorder Make sure that the following basic accessories are supplied with your camcorder. Basic Accessories 1. AC Power Adapter 1. AC Power Adapter. (see page 17) 2. AC cord. (see page 17) 3. -
Page 15: Preparing
Preparing Adjusting the Hand Strap and Shoulder Strap Hand Strap It is very important to adjust the hand strap for better recording. The hand strap enables you to: - Hold the camcorder in a stable, comfortable position. - Press the Zoom and the red Record button without having to change the position of your hand. -
Page 16: Lithium Battery Installation
La longévité de la pile au lithium est de huit à dix mois à partir de sa mise en place et dans des conditions normales d’utilisation. Lorsqu’elle s’affaiblit ou est déchargée, l’affichage de la date et de l’heure clignote pendant cinq secondes environ lorsque vous passez... -
Page 17: Connecting The Power Source
Make sure that the image appears in the Viewfinder. Note: If the adapter is used next to a TV or the camcorder, it may cause the TV or camcorder to emit noise. Move the adapter away from the TV, camcorder or the antenna cable. -
Page 18: To Use The Battery Pack
50 % de la batterie a été rechargé ; s’il clignote deux fois par seconde, 50 % à 75 % de la batterie a été rechargé ; s’il clignote trois fois par seconde, 75 % à 100 % de la batterie a été... -
Page 19: Using The Battery Pack
It should never be charged in a room temperature that is below 32°F(0°C). The life and capacity of the battery pack will be reduced if it is used in temperatures below 32°F(0°C), even when it is fully recharged. The life and capacity of the battery pack will be reduced if the bat- tery pack is left in temperatures above 104°F(40°C) for a long peri-... -
Page 20: Battery Level Display
The recording time is affected by environmental temperature and conditions. The recording time becomes very short in a cold environment. The continuous recording time in the operating instructions is measured under the condition of using a fully charged battery pack at 77°F(25°C). -
Page 21: Inserting And Ejecting A Cassette
There are several cassette types, depending on: Color system used Recording/Playback time Inserting and Ejecting a Cassette Check to see if the battery pack is in place or AC adapter is connected. 1. Press the EJECT button. The compartment opens automatically. -
Page 22: Basic Recording
CAMERA position? CAMERA Did you insert a cassette? (see page 21) Make sure that STANDBY is displayed in the OSD (if the red tab of the cassette is opened, STANDBY will not be displayed) Did you open the LENS CAP? Make sure the image you want to record appears in the Viewfinder. - Page 23 START/STOP ou placez le commutateur principal sur OFF, puis de nouveau sur CAMERA. Cette fonction a été conçue pour économiser la durée de la batterie et pour protèger les têtes vidéo et la cassette. Recherche de séquences Vous pouvez visionner une scène précise à...
-
Page 24: Hints For Stable Image Recording
Be sure not to touch the built-in microphone. 4. Choose a comfortable, stable position for the shots that you are taking. You can lean against a wall or on a table for greater stability. Do not forget to breathe gently. -
Page 25: Playing Back A Tape On The Camcorder
You can monitor the playback picture on the Viewfinder. Make sure that the battery pack is in place. 1. Hold down the tab of the power switch and push the switch to PLAYER mode. 2. Insert the tape you have just recorded. -
Page 26: Viewing A Still Picture
Arrêt sur image Pendant la lecture, appuyez sur PLAY/STILL (PLAY/STILL) pour mettre le caméscope en mode pause. Pour reprendre la lecture, appuyez de nouveau sur cette touche. Recherche d’une image Maintenez enfoncée la touche (REW) pendant la lecture. Pour reprendre la lecture normale, relâchez la touche. -
Page 27: Advanced Recording
If you cannot get a sharp focus in telephoto zoom, move the lever to the “W” side unti the focus is sharp. You can record a subject that is at least 1 mm away from the lens surface in the wide angle position. -
Page 28: Digital Zoom
The picture quality deteriorates as you go towards the “T” side. 1. Set the power switch to CAMERA mode. 2. Make sure that the DIGITAL ZOOM feature is on. (see page 29) 3. When you move the ZOOM lever to the “T” side, the picture will be enlarged within 22x minimum to 500x maximum ZOOM. - Page 29 3. To deactivate DIGITAL ZOOM function, press the D.ZOOM button again. The DIGITAL ZOOM indicators disappear from the screen. Note: The D.ZOOM ON/OFF function will not operate in EASY, REC or CUSTOM modes. Perfectionnez vos enregistrements Modèles SCW61/W62 1. Placez le commutateur principal en position CAMERA.
-
Page 30: Easy Mode (For Beginners)
Battery level, recording mode, counter, date/time, will be displayed as the camcorder starts to run. The word “EASY” will appear on the EVF at the same time. However, the Date/Time will only be seen if it has been previously set. -
Page 31: Custom-Creating Your Own Customized Recording Settings
In CUSTOM mode, the MENU, MF, DSE and P.AE functions are not available. If you want to use these, you must first switch the EASY or CUSTOM mode off. The CUSTOM settings will be stored in the camera (providing a good lithium battery has been installed). -
Page 32: Mf/Af (Manual Focus/Auto Focus)
MF/AF (Manual Focus/Auto Focus) The MF/AF function works in the CAMERA mode only. In most situations, it is better to use the Automatic Focus feature, as it enables you to concentrate on the creative side of your recording. Manual focusing may be necessary under certain conditions that make automatic focusing inadequate. -
Page 33: Blc
Advanced Recording 4. Turn the UP/DOWN dial up or down until the object is focused. 5. You will obtain a sharp picture after you zoom out. 6. To return to AF(Auto Focus), press the MF button again. Note: The MF function will not operate in EASY, CUSTOM or MENU mode. -
Page 34: Program Ae (Automatic Exposure)
2. SPORTS mode ( For recording people or objects moving quickly; you should able to playback the picture in slow motion on an 8 mm VCR or stop on a given image with very little blur. 3. PORTRAIT mode ( For focusing on the background of the subject, the background being out of focus. - Page 35 No Display : Full Auto mode. Notes: The screen status that is changed by the P.AE button will be recorded on the tape. To end the P.AE function, press the P.AE button once or several times, until the P.AE Icon is no longer displayed.
-
Page 36: Dse (Digital Special Effects) In Camera Mode
Advanced Recording DSE (Digital Special Effects) in CAMERA mode The digital effects enable you to give a creative look to your record- ing by adding various special effects. Select the appropriate digital effect for the type of picture that you wish to record. - Page 37 1. Set the power switch to CAMERA mode. 2. Press the DSE button, SEPIA will be displayed. 3. Keep pressing the DSE button, until the desired mode is displayed. 4. Press the START/STOP button to start recording. 5. To exit the DSE functions, press the DSE button once or several times until no DSE mode is displayed on the Viewfinder.
-
Page 38: Setting And Recording The Date/Time
Setting and recording the date/time feature works in the CAMERA mode only. You can record the date/time on the tapes, so you will know when it was made. The date and time are recorded whenever they are dis- played on the viewfinder. - Page 39 Si le caméscope ne conserve pas les réglages de l’horloge, cela signifie que la pile au lithium est déchargée. (voir page 16) Si la date et l’heure ont été enregistrées sur la bande, elles ne peuvent pas être masquées lors de la lecture.
-
Page 40: Selecting And Recording A Title
Selecting and Recording a Title Selecting and recording a TITLE is possible in the CAMERA mode only. The TITLE feature allows you to select a preset title stored in the camcorder’s memory. You can also select the language of the titles. - Page 41 8. Turn UP/DOWN dial to whichever TITLE you desire. 9. Press ENTER. The selected title will appear on the screen for 2 ~ 3 seconds and will disappear. At the same, the camcorder will return to the menu mode. Recording a Title Note: Make sure that you have selected a TITLE.
-
Page 42: Fade In And Out
The FADE function works in CAMERA mode only. You can give your films a professional look by using special effects such as fading in and out at the beginning or end of a sequence. To Start Recording 1. Before recording, hold down the FADE button. -
Page 43: White Balance
You can set it to INDOOR or OUTDOOR by pressing the ENTER button. 5. Press the MENU ON/OFF button to exit the WHITE BALANCE setting screen. Notes: The MENU ON/OFF function will not operate in EASY, REC or CUSTOM mode. FRANÇAIS Perfectionnez vos enregistrements Équilibrage du blanc Cette fonction permet de préserver la couleur unique de l’objet dans... -
Page 44: Demonstration
La fonction DEMO est disponible uniquement en mode Caméscope lorsque vous ne filmez pas. Elle fonctionne en boucle tant que vous ne placez pas le commuta- teur principal sur OFF pour l'arrêter. 1. Placez le commutateur principal sur la position CAMERA. -
Page 45: Lighting Techniques
After Recording 1. Eject the tape that you have recorded. (see page 21) 2. If you want to protect accidental erasure of the tape you have recorded, push the red tab on the cassette. 3. Set the POWER switch to OFF. -
Page 46: Playing Back A Tape
To watch with TV monitor It is practical to use a TV monitor to view tapes indoors. To play a tape back, the TV must feature a compatible color system. (see page 51) Connecting to a TV which has an Audio and Video input jack Use the Audio/Video cable supplied with your camcorder. - Page 47 Playing back a Tape Notes: SCW61/W62 feature a monaural audio system. If your TV or VCR are stereo, connect the audio cable to input “L” of your TV or VCR. You can use an S-VIDEO cable to obtain better quality pictures if you have the S-VIDEO connector on your TV.
-
Page 48: Various Functions In Player Mode
DSE in PLAYER mode The procedure for using DSE in PLAYER mode is the same as the procedure for using DSE in CAMERA mode, except that the power switch must be set to PLAYER instead of CAMERA. Please refer to pages 36 and 37. -
Page 49: Multi Playback (Using A Pal60 System)
Multi Playback (using a PAL60 System) This Camcorder can convert an NTSC tape recorded in the SP mode to the “PAL60” format, allowing you to view it on a PAL TV which has Vertical sync adjustment circuitry for 60Hz. –... -
Page 50: Maintenance
(PLAY/STILL) button. Press the (STOP) button after about 30 seconds. Check the quality of the picture using a video cassette. If it is still bad, repeat the operation. If the problem continues, contact your local authorized service center. Storing the Camcorder You must detach the BATTERY PACK from the camcorder when storing. -
Page 51: Using Your Camcorder Abroad
Color system You can view your recording on the Viewfinder. However, to view a recording on a television or to make a copy to a video cassette recorder, the television or VCR must be NTSC: SCW61/ W62- compatible and have the appropriate audio/video jacks. -
Page 52: Troubleshooting
ENGLISH Troubleshooting Troubleshooting Before contacting a service center, perform the following simple checks. They might save you the time and expense of an unnecessary call. Self Diagnosis Display Display Blinking Inform that... Action slow the battery pack is Change it to a charged almost discharged one. -
Page 53: Checking
ENGLISH Troubleshooting Checking If you run into any problem using the camcorder, use the following table to troubleshoot the problem. If these instructions do not allow you to solve the problem, take a note of: The model and serial number marked on the bottom of the camcorder. - Page 54 Une erreur mécanique s'est peut-être faire avec le caméscope. produite. (voir page 52) Une bande verticale Le contraste entre le sujet et le fond est apparaît lorsque vous trop important. Le caméscope ne peut pas filmez un sujet lumineux filmer normalement. Éclairez l’arrière-plan sur un fond sombre pour réduire le contraste ou utilisez la...
-
Page 55: Moisture Condensation
If the camcorder is brought directly from a cold place to a warm place, moisture may condense inside the camcorder, on the surface of the tape, or on the lens. In this condition, the tape may stick to the head drum and be damaged or the unit may not operate correctly. -
Page 56: Specifications
Auto wide macro Min. Illumination 0.3 lux (visible) Connectors Video out Mini jack, 1 Vp-p, 75 ohms, Unbalanced Audio out Mini jack, 7.7 dBs, imp.: less than 820 ohms General Power requirement DC 8.4V (1.5A) Power consumption SCW61/W62: 3.3W Built-in mic... -
Page 57: Index
ENGLISH Index - A - - E - ABROAD ...51 EASY ...30 AC POWER ADAPTER ...17 EDIT ...23 AF ...32 EJECT ...21 AUDIO ...46 AUTO FOCUSING ...32 AUTO MODE ...34 - F - AUTO POWER OFF ...23 FADE IN ...42 FADE OUT ...42... - Page 58 MODE SPOTLIGHT...34 MOSAIC...36 - T - - N - TAPE END ...52 TETES VIDEO ...51 NEG ...36 TITRE...40 NIVEAU DE LA BATTERIE ...20 NTSC ...51 - V - - O - VIDEO ...46 OSD ...12 - P - - Z - PAL...51...
-
Page 59: Warranty
à partir de celui-ci est à la charge du client. Le ticket de caisse original et daté doit être conservé par le client et constitue l’unique preuve valide d’achat. Il doit être présenté au service agréé... - Page 60 Germany http://www.samsung.de Sweden http://www.samsung.se Poland http://www.samsung.com.pl Canada http://www.samsungcanada.com Panama http://www.samsung-panama.com Spain http://www.samsung.es FRANÇAIS CE CAMESCOPE EST DISTRIBUÉ PAR : ELECTRONICS *Samsung Electronics’ Internet Home Page France http://www.samsung.fr United States http://www.samsungusa.com United Kingdom http://www.samsungelectronics.co.uk Australia http://www.samsung.com.au Germany http://www.samsung.de Sweden http://www.samsung.se Poland http://www.samsung.com.pl...