
Related Manuals for Bose PROFLIGHT


Summary of Contents for Bose PROFLIGHT
- Page 1 Owner’s Guide-German Owner’s Guide-Spanish Owner’s Guide-French Owner’s Guide-Portu- guese PROFLIGHT AVIATION HEADSET...
- Page 2 I M P ORTA N T SA F ET Y I N STR UCT IO NS Please read and keep all safety and use instructions. Important Safety Instructions WARNINGS/CAUTIONS • Do NOT use the headphones with noise canceling mode at any time the inability to hear surrounding sounds may present a danger to yourself or others, e.g., while riding a bicycle or walking in or near traffic, a construction site or railroad, etc.
- Page 3 To avoid risk of explosion, replace the batteries only with AA alkaline batteries. Properly dispose of used batteries. • Do NOT repair the headset yourself. Contact the Bose organization in your country/region for specific care, return and shipping instructions. Visit: global.Bose.com •...
- Page 4 • Connect the equipment into an outlet on a circuit different from that to which the receiver is connected. • Consult the dealer or an experienced radio/TV technician for help. Changes or modifications not expressly approved by Bose Corporation could void the user’s authority to operate this equipment.
- Page 5 X: Indicates that this toxic or hazardous substance contained in at least one of the homogeneous materials used for this part is above the limit requirement of GB/T 26572. Taiwan Restriction of Hazardous Substances Table Equipment name: Bose® ProFlight Aviation Headset, Type designation: 424411 Restricted substances and its chemical symbols Polybrominated...
- Page 6 Taiwan Importer: Bose Taiwan Branch, 9F-A1, No.10, Section 3, Minsheng East Road, Taipei City 104, Taiwan Phone Number: +886-2-2514 7676 Mexico Importer: Bose de México, S. de R.L. de C.V. , Paseo de las Palmas 405-204, Lomas de Chapultepec, 11000 México, D.F. Phone Number: +5255 (5202) 3545 Apple and the Apple logo are trademarks of Apple Inc.
-
Page 7: Table Of Contents
CON TE NTS CON TE NTS BOSE® CONNECT APP Features ..........................11 WHAT’S IN THE BOX Contents ..........................12 Headset components ....................13 IMPORTANCE OF PROPER FIT Fit the headband ......................14 Choose the correct StayHear + tips ................ 15 ®... - Page 8 Bluetooth® indicator ....................... 31 Power indicator........................ 32 BLUETOOTH CONNECTIONS Connect using the Bluetooth menu on your mobile device ......33 Connect your mobile device using the Bose Connect app ......34 ® Bluetooth audio priority ....................34 Disconnect a mobile device ..................35 Reconnect a mobile device ..................
- Page 9 CON TE NTS CON TE NTS BLUETOOTH FUNCTIONS Bluetooth volume functions ..................38 Call functions ........................38 CARE AND MAINTENANCE Store the headset ......................40 Clean the headset ......................41 Limited warranty ......................41 Serial number location ....................42 Replacement parts and accessories ................ 42 Side pad cushion .....................
- Page 10 CON TE NTS CON TE NTS INSTALLATION Mount the aircraft panel connector ................. 50 Mono connection diagram .................. 51 Stereo connection diagram ................52 Details on making the connections ..............53 TECHNICAL INFORMATION FAA Technical Standard Order .................. 56 E N G L I S H...
-
Page 11: Bose® Connect App
BOSE® CO NN E CT AP P Enhance your headset experience with the Bose Connect app. FEATURES Easily connect to and switch between multiple mobile devices with a single swipe. Customize your headset experience: Name your headset. Share audio and music. -
Page 12: What's In The Box Contents
ProFlight Aviation Headset ® NOTES: Aircraft connector types vary. See page 29. If any part of the product is damaged, don’t use it. Contact your authorized Bose dealer or Bose customer service. ® Visit: global.Bose.com/Support/ProFlight E N G L I S H... -
Page 13: Headset Components
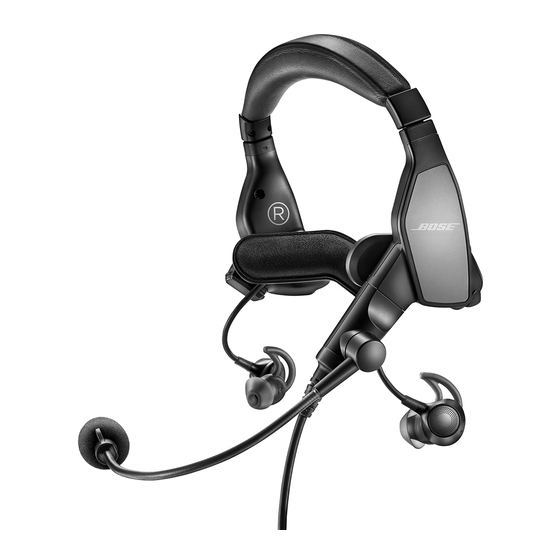
WHAT ’ S I N T H E BOX HEADSET COMPONENTS Headband Side pad Earbud storage hook StayHear®+ tip Microphone Cable clip Power indicator Power button Acoustic Noise Cancelling™ switch (see page 20) Bluetooth indicator Bluetooth/Multi-function button Bluetooth volume up Bluetooth priority switch Bluetooth volume down (see page 34) -
Page 14: Importance Of Proper Fit
I M P ORTA N CE O F P R O P E R FI T FIT THE HEADBAND Proper fit is important both for comfort and optimal noise cancellation performance. 1. Using the left T and right U icons on the headband to orient the headset properly, rotate the side pads into position. -
Page 15: Choose The Correct Stayhear ® + Tips
I M P ORTA N CE O F P R O P E R F I T CHOOSE THE CORRECT STAYHEAR ® + TIPS For optimal audio performance, it is important to choose the correct size StayHear+ tip. Select the size that gives you the best comfort and fit in each ear. To determine the best fit, you may need to try all three sizes. -
Page 16: Single Earbud Use
I M P ORTA N CE O F P R O P E R F I T Single earbud use When you want to use the headset with one earbud, you can stow the other earbud using the earbud storage hook on the back of the side pad. Earbud storage hook CHANGE THE STAYHEAR + TIPS... -
Page 17: Adjust The Microphone
I M P ORTA N CE O F P R O P E R F I T I M P ORTA N CE O F P R O P E R FI T ADJUST THE MICROPHONE NOTE: By default, the reversible microphone ships from the factory attached to the left side of the headset. -
Page 18: Conditions Related To Fit
I M P ORTA N CE O F P R O P E R F I T I M P ORTA N CE O F P R O P E R FI T CONDITIONS RELATED TO FIT In very loud conditions, such as during takeoff, you may experience a brief reduction in noise cancellation as the headset compensates for a momentary pressure change. -
Page 19: Headset Controls
HEA DSET CO NT RO L S POWER ON Press the Power button I. Power button The Power indicator glows amber then blinks according to the power level. See “Power indicator” on page 32. NOTE: The first time you power on your headset, noise cancellation is fully enabled. See “Acoustic Noise Cancellation”... -
Page 20: Acoustic Noise Cancellation
ACOUSTI C N OI S E CAN CE L L ATI O N Acoustic Noise Cancellation reduces unwanted noise providing a clearer, more lifelike audio performance. You can choose your noise cancellation based on your listening preferences and environment. NOTE: When you receive a call, the headset remains at the current noise cancellation level. -
Page 21: Tap Control For Talk-Through Communication
ACOUSTI C N OI S E CAN CE L L ATI O N TAP CONTROL FOR TALK-THROUGH COMMUNICATION When you need to focus on interpersonal communication coming from a specific direction, you can automatically set noise cancelling to Low on single earbud by firmly double-tapping the earbud. -
Page 22: Operation Switches
OP ER ATI ON SW ITC H E S OPERATION SWITCH FUNCTIONS The operation switches are located in the control module battery compartment. NOTE: Some operation switches are not available on all models. FUNCTION POSITION DEFAULT DESCRIPTION Reserved for future use. Reserved Power on automatically when connected to aircraft power (select models only). -
Page 23: Change The Operation Switches
OP ER ATI ON SWI TCH E S OP ER ATI ON SW ITC H E S FUNCTION POSITION DEFAULT DESCRIPTION Power off automatically after 3 to 45 minutes of inactivity. NOTES: When running on battery power and unplugged from the intercom, the headset powers off unless there is an Auto off active mobile device audio present. - Page 24 OP ER ATI ON SWI TCH E S OP ER ATI ON SW ITC H E S 5. Insert two alkaline AA batteries, observing proper polarity. CAUTION: If the batteries don’t fit correctly, do NOT force them in. Forcing an improper connection will cause permanent damage to the control module.
-
Page 25: Microphone Placement
M I CROP HON E P L ACE M E NT By default, the reversible microphone ships from the factory attached to the left side of the headset, however, in some configurations it may ship separately. It can be easily attached to the left or right side of the headset. - Page 26 M I CROP HON E P L ACE M E NT M I CROP HON E P L ACE M E NT 3. Push the release button, and gently pull the microphone from the connector socket. Release button Connector socket 4.
- Page 27 M I CROP HON E P L ACE M E NT 7. On the right side, align the release button to the release button opening, and insert the microphone connector into the base of the connector socket. 8. Slide the microphone connector into the connector socket until the release button is secure.
-
Page 28: Batteries
BATT E R I E S REPLACE THE BATTERIES When the battery indicator blinks red, the batteries must be replaced. NOTE: For aircraft-powered headsets, batteries are not required for operation if aircraft power is available. See “Aircraft Connectors” on page 29. 1. -
Page 29: Aircraft Connectors
6-pin Lemo connector to a Dual plug for On function. additional connection flexibility. NOTE: Contact Bose customer service for more information about these connectors. DUAL PLUG The battery (only) powered version of the headset has two general aviation aircraft connectors that insert into specific jacks on the aircraft control panel. The microphone connector is shorter, thinner and has a slightly different shape than the intercom connector. -
Page 30: 5-Pin Xlr, 6-Pin Lemo, And 7-Pin Xlr
A IRCR A F T CO NN E CTO R S BATT E R I E S 5-PIN XLR, 6-PIN LEMO, AND 7-PIN XLR The 5-pin XLR, 6-pin Lemo, and 7-pin XLR aircraft connectors insert into the aircraft control panel and provide the headset with aircraft power and intercom audio. 6-pin Lemo 5-pin XLR and 7-pin XLR Connect to the aircraft... -
Page 31: Status Indicators
STAT US I ND I CATO R S The Bluetooth and Power indicators are located on the front of the control module. BLUETOOTH INDICATOR Shows the connection status of a mobile device. Bluetooth indicator INDICATOR ACTIVITY SYSTEM STATE Blinking purple (in sync with Power indicator) Ready to connect Blinking blue (alternating with Power indicator) Connecting... -
Page 32: Power Indicator
STATUS I N D I CATO R S STATUS I N D I CATO R S POWER INDICATOR Shows the power source and level. Power indicator POWER SOURCE INDICATOR ACTIVITY SYSTEM STATE Aircraft Slow blinking green Power On Blinking green Power On—batteries high Battery (8 hours or more ) -
Page 33: Bluetooth Connections
B LU E TO OT H CO NN E CT I O NS Bluetooth wireless technology lets you stream audio from mobile devices such as smartphones, tablets, and laptop computers. Before you can stream audio from a device, you must connect the device with your headset. CONNECT USING THE BLUETOOTH MENU ON YOUR MOBILE DEVICE 1. -
Page 34: Connect Your Mobile Device Using The Bose Connect App
CONNECT YOUR MOBILE DEVICE USING THE BOSE ® CONNECT APP Download the Bose Connect app, and follow the on-screen connections instructions. PROFLIGHT Once connected you hear a tone, and the Bluetooth indicator blinks blue. BLUETOOTH AUDIO PRIORITY The aircraft intercom system (ICS) is always the headset’s primary audio source. -
Page 35: Disconnect A Mobile Device
Bluetooth feature off. Move the Bluetooth priority switch to the Off position. Use the Bose® Connect app to disconnect your mobile device. TIP: You can also use Bluetooth settings to disconnect your device. Disabling the Bluetooth feature disconnects all other devices. -
Page 36: Reconnect A Mobile Device
B LU ETOOT H CO N NE CT IO NS B LU E TO OT H CO NN E CT I O NS RECONNECT A MOBILE DEVICE When powered on, the headset tries to reconnect with the two most recently-connected devices. NOTE: The devices must be within range (30 ft. -
Page 37: Managing Multiple Bluetooth Connections
To connect an additional device, use the Bluetooth menu on your device or download the Bose Connect app. NOTES: Only one device can be heard at a time. Bluetooth audio will never override the intercom. -
Page 38: Bluetooth Functions
BLU E TO OT H F U NC TI O NS BLUETOOTH VOLUME FUNCTIONS The Bluetooth volume controls are located on the side of the control module. Bluetooth volume up Bluetooth volume down FUNCTION WHAT TO DO Press H. Bluetooth volume up Press z. - Page 39 To use the headset when unplugged from the intercom (to listen to audio or to make or receive calls), Bose recommends to disable the Auto Off feature for uninterrupted functionality. See “Operation Switches” on page 22.
-
Page 40: Care And Maintenance
CA RE A N D M A IN T E N AN CE STORE THE HEADSET Place the headset in the carry case for easy, convenient storage. Store the headset in a ventilated area away from direct sunlight. Remove the batteries before storing the headset for extended periods. 1. -
Page 41: Clean The Headset
(visit global.Bose.com for Bose contact information in your country/region) for specific return and shipping instructions. 2. Label and ship the product, freight prepaid, to the address provided by the Bose organization in your country. 3. Place any necessary return authorization number prominently on the outside of the carton. -
Page 42: Serial Number Location
The serial number is located on the side pad. To view the serial number, gently grab and peel the side pad cushion from the left edge away from the side pad. Serial number Reference this serial number when you register your product or contact Bose for technical support. REPLACEMENT PARTS AND ACCESSORIES Through normal use, parts like windscreens and ear tips may require periodic replacement. -
Page 43: Headband Cushion
CA RE A N D M AI NTE N AN CE Headband cushion Replace the cushion after regular care and maintenance fails to restore the cushion to its original size and shape. 1. Gently grab and peel the headband cushion away from the headband. 2. -
Page 44: Stayhear ® + Tips
CA RE A N D M AI NTE N AN CE 5. Insert the left and right tabs into the plastic cap. StayHear + tips ® Replace tips every six months or every 350 hours of use, depending on how often you fly. -
Page 45: Troubleshooting
Try connecting another Bluetooth device (see page 37). OTHER SOLUTIONS If you could not resolve your issue, see the table below to identify symptoms and solutions to common problems. If you are unable to resolve your issue, contact Bose customer service. Visit: global.Bose.com/Support/ProFlight Acoustic Noise Cancelling™ PROBLEM WHAT TO DO If using aircraft power, check the aircraft fuse or circuit breaker. -
Page 46: Intercom Communications
TR OUBL ES H O OTI N G Intercom communications PROBLEM WHAT TO DO Make sure the volume controls are not set too low on the control module (see page 38) or the intercom. Noise cancellation active, but no incoming Make sure the aircraft connectors are securely inserted into the audio aircraft control panel. -
Page 47: Audio
TR OUBL ES H O OTI N G TR OUBL ES H O OTI N G Audio PROBLEM WHAT TO DO Reduced noise Make sure the StayHear + tips are clean and free of debris. ® cancellation, See “Clean the headset” on page 41. intermittent clicking If the headset emits any loud noise and related loss of sounds, or... -
Page 48: Microphone
TR OUBL ES H O OTI N G TR OUBL ES H O OTI N G Microphone PROBLEM WHAT TO DO Make sure the white surface on the microphone is facing your lips. See “Adjust the microphone” on page 17. Make sure the microphone is fully connected to the headband. -
Page 49: Auto On/Off
It may take up to 9 minutes for the headset to power off when not in use immediately after initial power up. If the headset has not powered off after 15 minutes, contact Bose technical support. E N G L I S H... -
Page 50: Mount The Aircraft Panel Connector
MOUNT THE AIRCRAFT PANEL CONNECTOR The aircraft panel connector is part of the optional 6-pin wiring harness assembly. Visit www.Bose.com or www.global.Bose.com for information or purchase. WARNING: The aircraft panel connector must be mounted by a technician who is qualified to perform this type of avionics installation for the aircraft you are using. -
Page 51: Mono Connection Diagram
CAUTION: Do NOT use excessive force or bend the installed connector. This may damage or break internal solder joints. NOTE: The aircraft panel connector cannot be installed in an audio system using transformer-coupled audio outputs. Contact Bose technical support. Mono connection diagram 10-32... -
Page 52: Stereo Connection Diagram
BLK/WH Audio Microphone - Jack Existing Barrel PTT switch (gnd) (PTT) and wiring (no connection to Bose headset) Phone Stereo Headphone - Jack audio (right) Existing wiring to aircraft stereo intercom/audio panel Barrel (audio gnd) (phone audio left) E N G L I S H... -
Page 53: Details On Making The Connections
TR OUBL ES H O OTI N G IN STA L L AT IO N Details on making the connections The pinouts for the optional installed connector are detailed in the table below. PIN NUMBER COLOR PURPOSE V+IN: Headset power (10-32 VDC). Use a 1/4 amp fuse or a 1/2 amp circuit breaker. -
Page 54: Technical Information
T ECHN I CA L I NFO RM AT I O N SPECIFICATION DESCRIPTION 92dB SPL measure at 1 mW input signal, 1 kHz, in Mono mode Headphone sensitivity Mono mode: 300 Ohms ON and OFF Headphone impedance Stereo mode: 600 Ohms ON and OFF RTCA-214a range: 300 to 3500Hz Headphone frequency response... - Page 55 T ECHN I CA L I NFO RM AT I O N TR OUBL ES H O OTI N G SPECIFICATION DESCRIPTION Operating: 5 to 158°F (-15 to 70°C) Temperature and Altitude Storage: -67 to 158°F (-55 to 70°C) (Category A) Altitude: 15,000 feet maximum pressure altitude for full cancellation Bluetooth wireless...
-
Page 56: Faa Technical Standard Order
TR OUBL ES H O OTI N G FAA TECHNICAL STANDARD ORDER The Bose ProFlight Aviation Headset that is approved to TSO and ETSO C139a are ® appropriately marked. The product interface, cables, and microphones have been designed to function in or withstand exposure to the environmental conditions below. - Page 57 T ECHN I CA L I NFO RM AT I O N Environmental categories cited refer to RTCA/DO-160G and RTCA/DO-214a (December 18, 2013). The conditions and tests required for TSO approval of this are minimum performance standards. It is the responsibility of those installing this article either on or within a specific type or class of aircraft to determine that the aircraft installation conditions are within the TSO standards.
- Page 58 ©2018 Bose Corporation, The Mountain, Framingham, MA 01701-9168 USA AM802347 Rev. 02...