
Related Manuals for Samsung SCX-6555NX Series


Summary of Contents for Samsung SCX-6555NX Series
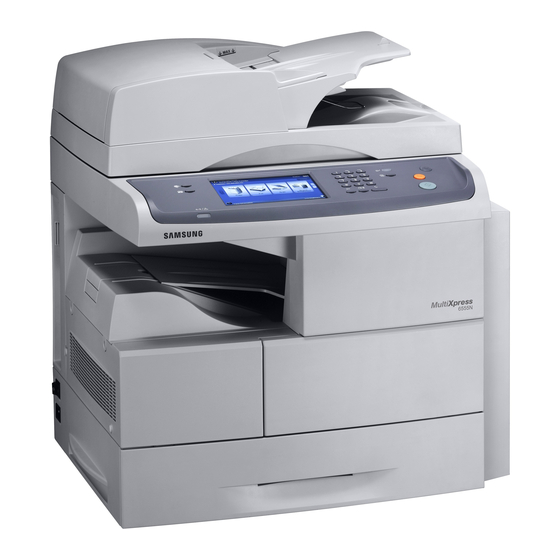
- Page 1 SCX-6555NX Series Multi Functional Printer User’s Guide imagine the possibilities Thank you for purchasing a Samsung product.
-
Page 2: Features Of Your New Laser Mfp
MFP Thank you for purchasing this Samsung multifunctional product. Your machine provides printing, copying, scanning, and faxing functions. With the machine, you can: SPECIAL FEATURES Some features are optional. Please check the specifications sections. (See "Specifications" on page 115.) -
Page 3: Features By Models
FEATURES BY MODELS The machine is designed to support all of your document needs – from printing and copying, to more advanced networking solutions for your business. Basic features of this machine include; FEATURES USB 2.0 USB Memory DADF (Duplex Automatic Document Feeder) Hard Disk Network Interface Enthernet 10/100/1000 Base TX wired LAN Duplex (2-sided) printing... -
Page 4: Finding More Information
Provides you with help information on printer driver properties and instructions for setting up the properties for printing. To access a printer driver help screen, click Help from the printer properties dialog box. Samsung website If you have Internet access, you can get help, support, printer drivers, manuals, and order information from the Samsung website, www.samsungprinter.com. -
Page 5: Safety Information
safety information IMPORTANT SAFETY SYMBOLS AND PRECAUTIONS What the icons and signs in this user manual mean: Hazards or unsafe practices that may result in severe personal injury or death. WARNING Hazards or unsafe practices that may result in minor personal injury or property damage. CAUTION To reduce the risk of fire, explosion, electric shock, or personal injury when using your laser MFP, follow these basic safety precautions:... -
Page 6: Laser Safety Statement
13. Unplug the machine from the telephone jack, PC and AC wall outlet and refer servicing to qualified service personnel under the following conditions: • When any part of the power cord, plug or connecting cable is damaged or frayed. •... -
Page 7: Ozone Safety
During normal operation, this machine produces ozone. The ozone produced does not present a hazard to the operator. However, it is advisable that the machine be operated in a well ventilated area. If you need additional information about ozone, request your nearest Samsung dealer. MERCURY SAFETY Contains Mercury, Dispose According to Local, State or Federal Laws.(U.S.A. -
Page 8: Radio Frequency Emissions
RADIO FREQUENCY EMISSIONS FCC Information to the User This device complies with Part 15 of the FCC Rules. Operation is subject to the following two conditions: • This device may not cause harmful interference, and • This device must accept any interference received, including interference that may cause undesired operation. This equipment has been tested and found to comply with the limits for a Class A digital device, pursuant to Part 15 of the FCC Rules. - Page 9 FCC Regulations state that changes or modifications to this equipment not expressly approved by the manufacturer could void the user’s authority to operate this equipment. In the event that terminal equipment causes harm to the telephone network, the telephone company should notify the customer that service may be stopped. However, where prior notice is impractical, the company may temporarily cease service, providing that they: a) promptly notify the customer.
-
Page 10: Openssl License
PBXs of the European countries: In the event of problems, you should contact the Euro QA Lab of Samsung Electronics Co., Ltd. in the first instance. The product has been tested against TBR21. To assist in the use and application of terminal equipment which complies with this standard, the European Telecommunication Standards Institute (ETSI) has issued an advisory document (EG 201 121) which contains notes and additional requirements to ensure network compatibility of TBR21 terminals. -
Page 11: Original Ssleay License
ORIGINAL SSLEAY LICENSE Copyright (C) 1995-1998 Eric Young (eay@cryptsoft.com) All rights reserved. This package is an SSL implementation written by Eric Young (eay@cryptsoft.com). The implementation was written so as to conform with Netscapes SSL. This library is free for commercial and non-commercial use as long as the following conditions are aheared to. The following conditions apply to all code found in this distribution, be it the RC4, RSA, lhash, DES, etc., code;... -
Page 12: Table Of Contents
contents contents LOADING ORIGINALS AND PRINT MEDIA Features of your new laser MFP Safety Information INTRODUCTION Printer overview Front view Rear view Control panel overview Introducing the touch screen and useful buttons Touch screen Machine Setup button Job Status button XOA button Power Saver Button Interrupt button... - Page 13 contents Loading paper in tray 1, optional tray or optional high capacity feeder In the multi-purpose tray Setting the paper size and type COPYING Understanding the Copy screen Basic tab Advanced tab Image tab Copying originals Changing the settings for each copy Changing the size of originals Reducing or enlarging copies Copying on both sides of originals (Duplex)
- Page 14 contents Original Type Color Mode Darkness Erase Background Scan to Edge Quality File Format Scan Preset BASIC PRINTING Printing a document Canceling a print job FAXING (OPTIONAL) Preparing to fax Understanding the Fax screen Basic tab Advanced tab Image tab Sending a fax Setting the fax header Sending a fax...
- Page 15 contents MACHINE STATUS AND ADVANCED SETUP USING USB MEMORY DEVICE Adding documents to a reserved delay fax job Forwarding a received fax to other destination Forwarding a sent fax to other destination by a fax Forwarding a received fax to other destination by a fax Forwarding a sent fax to other destination by an email Forwarding a received fax to other destination by an email Forwarding a sent fax to other destination by server...
- Page 16 Cleaning the transfer unit Cleaning the scan unit Maintaining the Toner cartridge Toner cartridge storage Handling instructions Use of non-Samsung and refilled toner cartridge Estimated cartridge life Replacing the toner cartridge Maintaining the imaging unit Expected cartridge life Replacing the imaging unit...
- Page 17 contents SPECIFICATIONS 115 General specifications 115 Printer specifications 116 Copier specifications 116 Scanner specifications 116 Facsimile specifications (optional) GLOSSARY INDEX...
-
Page 18: Introduction
introduction These are the main components of your machine: This chapter includes • Printer overview • Control panel overview • Introducing the touch screen and useful buttons • Managing your machine from the website PRINTER OVERVIEW Front view DADF document width Side cover guides DADF cover... -
Page 19: Control Panel Overview
CONTROL PANEL OVERVIEW Leads you to the machine setup and advanced Machine Setup settings. (See "Machine Setup" on page 75.) Shows the jobs currently running, queued jobs or Job Status completed jobs. Shows the status of your machine. (See Status "Managing your machine from the website"... -
Page 20: Introducing The Touch Screen And Useful Buttons
• XOA: Enters the XOA menu. In order to use this menu, XOA applications should be installed. For more information, contact your local Samsung dealer or the retailer where you purchased your machine. • Copy: Enters the Copy menu. -
Page 21: Xoa Button
Before using the XOA applications, they should be installed. If the XOA button is not displayed, make sure that the machine gets XOA license. For more information, contact your local Samsung dealer or the retailer where you purchased your machine. -
Page 22: Understanding The Status Led
UNDERSTANDING THE STATUS LED When the problem occurs, the Status LED indicates the machine's condition by the light color of it's action. STATUS DESCRIPTION • The machine is off-line. • The machine is in power save mode. When data is received, or any button is pressed, it switches to on-line automatically. -
Page 23: Menu Overview
MENU OVERVIEW The control panel provides access to various menus to set up the machine or use the machine's functions. These menus can be accessed by pressing Machine Setup, Job Status, or touching menus on the display screen. Refer to the following diagram. Main screen The Main screen is shown on the display screen on the control panel. -
Page 24: Job Status Button
Supplies Life tab Machine Info tab (Page 75) (Page 75) Toner Cartridge Machine Details Imaging Unit Customer Support Fuser Kit Machine Serial Feed Roller Kit Number Feed Roller Kit - Bypass IP Address Tray Hardware Options Document Feeder Roller Configuration BTR Kit Software Versions DADF Friction Pad Kit... -
Page 25: Supplied Software
If you are a Windows or Macintosh OS, install the software from the supplied CD and if you are a Linux OS user, download the software from the Samsung website (www.samsung.com/ printer) and install. CONTENTS Windows •... -
Page 26: Getting Started
getting started This chapter gives you step-by-step instructions for setting up the machine. This chapter includes: • Setting up the hardware • Setting up the network • System requirements SETTING UP THE HARDWARE This section shows the steps to set up the hardware which is explained in the Quick Install Guide. -
Page 27: Configuring Network Protocol Via The Machine
Configuring network protocol via the machine You can set up TCP/IP network parameters, follow the steps listed below. 1. Make sure your machine is connected to the network with an RJ-45 Ethernet cable. 2. Make sure you have turned on the machine. 3. -
Page 28: Macintosh
Macintosh REQUIREMENT (RECOMMENDED) OPERATIN G SYSTEM Mac OS X • PowerPC G4/ • 128 MB for a 10.4 or lower PowerPC based • Intel MAC (512 MB) processors • 512 MB for an Intel based MAC (1 GB) Mac OS X •... -
Page 29: Machine's Basic Settings
82.) 6. After the installation is finished, a window appears asking you to print a test page and to register yourself as a user of Samsung machines in order to receive information from Samsung. If you so desire, select the corresponding checkbox(es) and click Finish. -
Page 30: Setting The Authentication Password
Setting the authentication password To set your machine up or change the settings, you have to login. To change password, follow the next steps. 1. Press Machine Setup on the control panel. 2. Press Admin Setting. 3. When the login message appears, enter password. Touch the password input area, then the question marks appears, use the number keypad on the control panel to enter the password. -
Page 31: Changing The Default Settings
Setting network values 1. Print the machine’s network configuration report to find your machine’s MAC address. (See "Printing a report" on page 82.) 2. From the Windows Start menu, select All Programs > Samsung Network Printer Utilities > SetIP. 3. Click 4. -
Page 32: Understanding The Keyboard
UNDERSTANDING THE KEYBOARD You can enter alphabet characters, numbers, or special symbols using the keyboard on the touch screen. This keyboard is specially arranged like a normal keyboard for better usability for the user. Touch the input area where you need to enter characters and the keyboard pops up on the screen. -
Page 33: Loading Originals And Print Media
loading originals and print media This chapter introduces you to how to load originals and print media into your machine. This chapter includes: • Loading originals • Selecting print media LOADING ORIGINALS You can use the scanner glass or DADF to load an original for copying, scanning, and sending a fax. -
Page 34: Selecting Print Media
Some print media may meet all of the guidelines in this section and still not produce satisfactory results. This may be the result of improper handling, unacceptable temperature and humidity levels, or other variables over which Samsung has no control. • Before purchasing large quantities of print media, ensure that it meets the requirements specified in this user’s guide. -
Page 35: Specification On Print Media
Specification on print media TYPE SIZE Plain paper Letter Legal Folio Oficio JIS B5 ISO B5 Executive Statement Envelope Envelope B5 Envelope Monarch Envelope No. 10 Envelope DL Envelope C5 Envelope C6 Transparency Letter, A4, Oficio Labels Letter, Legal, Folio, A4, JIS B5, ISO B5, Executive, A5, Statement, Oficio, A6... -
Page 36: Media Sizes Supported In Each Mode
Media sizes supported in each mode MODE SIZE Copy mode Letter, A4, Legal, Oficio, Folio, Executive, JIS B5, A5, Single side printing All sizes supported by the machine Letter, A4, Legal, Folio, Duplex printing Oficio, JIS B5, ISO B5, Executive, A5, Statement Letter, A4, Legal Fax mode... -
Page 37: Changing The Size Of The Paper In The Paper Tray
MEDIA TYPE GUIDELINES Transparencies • To avoid damaging the machine, use only transparencies designed for use in laser printers. • Transparencies used in the machine must be able to withstand 180 °C, the machine’s fusing temperature. • Place them on a flat surface after removing them from the machine. -
Page 38: Loading Paper
520 sheets of paper. (See "Supplies" on page 110.) Using photographic paper or coated paper may cause problems, requiring repairs. Such repairs are not covered by Samsung’s warranty or service agreement. 1. To load paper, pull and open the paper tray and place paper with the side you want to print facing down. -
Page 39: In The Multi-Purpose Tray
In the multi-purpose tray The multi-purpose tray can hold special sizes and types of print material, such as postcards, note cards, and envelopes. It is useful for single page printing on letterhead or colored paper. Tips on using the multi-purpose tray •... -
Page 40: Setting The Paper Size And Type
4. Squeeze the multi-purpose tray paper width guides and adjust them to the width of the paper. Do not force too much, or the paper will be bent, which will result in a paper jam or skew. Depending on the media type you are using, keep the following loading guidelines: •... -
Page 41: Copying
copying This chapter gives you information about using your machine as a copy machine. This chapter includes • Understanding the Copy screen • Copying originals UNDERSTANDING THE COPY SCREEN When you press Copy on the Main screen, the Copy screen appears which has several tabs and lost of copying options. -
Page 42: Image Tab
Image tab • Erase Edge: Allows you to erase punch holes, staple marks, and fold creases along any of the four documents edges. (See "Erasing edges" on page 47.) • Erase Background: Prints an image with no background. (See "Erasing background images" on page 47.) •... -
Page 43: Reducing Or Enlarging Copies
paper, and 3rd page is the letter-sized paper, then the machine prints the output first letter, legal, and letter in order from several trays. • Other preset values: Allows user to easily select commonly used values. Reducing or enlarging copies Press the Basic tab >... -
Page 44: Deciding The Form Of Copy Output (Collated / Staple)
Deciding the form of copy output (Collated / Staple) Press the Basic tab > Output, then use left/right arrows to select Collated or Stapled. This feature is supported only when the original is on the DADF. If you want to copy originals on the scanner glass and copy both sides of originals, the message Another Page? appears after the first page copied. -
Page 45: Copying Id With The Manual Id Copy Option
• If the original is larger than the printable area, some portions may not be printed. • If this option is grayed out, select the Duplex option to 1 -> 1 Sided, the Output option to Collated. Copying ID with the manual ID copy option If you want to copy several ID cards on a paper, or adjust the copying position of the page, follow the next steps. -
Page 46: Clone Copying
1. Place a single original face down on the scanner glass. (See "Loading originals" on page 33.) 2. Press Copy from the Main screen. 3. Select the tray in Paper Supply. 4. Press the Advanced tab > Poster Copy. This feature is available only when the options in the Basic tab are selected as below;... -
Page 47: Cover Copying
6. Press OK. 7. Press Start on the control panel to begin copying. This feature is possible only with A4, Letter, Legal, Folio, Oficio, JIS B5, ISO B5, Executive, A5 and Statement sized paper. Cover copying The machine automatically adds covers to your copied set using stock taken from a different tray. -
Page 48: Watermark Copying
1. Place the originals face up in the DADF. Or place a single original face down on the scanner glass. (See "Loading originals" on page 33.) 2. Press Copy from the Main screen. 3. Press the Image tab > Margin Shift 4. -
Page 49: Scanning 49 Scanning Basics
See Software section. • Samsung SmarThru Office: This feature is the accompanying software for your machine. You can use this program to scan images or documents, and this feature can be used via the local connection or the network connection. -
Page 50: Basic Tab
Basic tab This section explains the Basic tab of Scan to Email and Scan to Server, and Scan to PC's basic screen. Scan to Email • From: Sender's email address. • To/Cc/Bcc: Recipients' addresses. Cc is for copies to an additional recipient and Bcc is for the same as Cc but without their name be displayed. -
Page 51: Output Tab
• Color Mode: Adjusts the color options of the scan output. If the original is color and you want to scan in color, press Color Mode. (See "Color Mode" on page 57.) • Darkness: Adjusts the degree of darkness of the scan output. Use left/right arrow to adjust the values. -
Page 52: Entering Email Addresses By The Address Book
4. Click Machine Settings > E-mail Setup > Individual Address Book. Then the screen shows Individual Address Book on the right side of the screen. 5. Click Add. 6. When the Add E-Mail screen appears, select the Index number, enter User Name and E-mail Address. 7. -
Page 53: Using Scan And Fax Manager 2
The Scan and Fax Manager2 program can only be used in the Window and Macintosh system. If you use the Macintosh, see Software section. 1. From the Start menu, click Samsung Printers > Scan and Fax Manager2. You can open Scan and Fax Manager2 by right clicking the Smart Panel icon in the Windows task bar and seleting Scan and Fax Manager2. -
Page 54: Scanning By A Network Connection
- Image Adjustment: Allows you to perform some transformations of the scanned image. These transformations include automatic adjustment of image size, straightening and rotation. - Image Enhancement: Allows you to remove various defects of the image and improve its quality. - Additional settings: Allows special processing of scanned images. - Page 55 4. Enter the IP address in dotted decimal notation or as a host name. 5. Enter the server port number, from 1 to 65535. The default port number is 25. 6. Check the box next to SMTP Requires Authentication to require authentication.
-
Page 56: Scanning Originals And Sending Via Smb/Ftp (Scan To Server)
SCANNING ORIGINALS AND SENDING VIA SMB/ FTP (SCAN TO SERVER) You can scan an image and send it to a total of 5 destinations via the SMB or FTP. Preparation for scanning to SMB/FTP Select the folder and share it with the machine in order to receive the scanned file. -
Page 57: Original Size
FEATURE RESOLUTION (DPI) Scan to Email 100, 200, 300, 400, Scan to PC 100, 200, 300, 400, Scan to Server 100, 200, 300, 400, Original Size You can specify the scanning area on the originals by selecting the pre- defined size, or putting in the margin value or Auto. If you set this option to Auto, the machine senses and determines the size of the original. -
Page 58: Scan To Edge
Scan to Edge You can set the machine to scan full size of a page as it is. Usually, the machine scans a page except edges, which means the margin, especially when you do the copy job with certain sized paper in the tray. But if you scan and sent it right away via the network, as the file, the machine does not need to exclude the edges from the originals. -
Page 59: Basic Printing
basic printing This chapter explains common printing tasks. This chapter includes: • Printing a document PRINTING A DOCUMENT Your machine allows you to print from various Windows, Macintosh, or Linux applications. The exact steps for printing a document may vary depending on the application you use. -
Page 60: Faxing (Optional)
faxing (optional) This chapter gives you information about using your machine as a fax machine. This chapter includes: • Preparing to fax • Understanding the Fax screen • Sending a fax • Receiving a fax • Adjusting the document settings •... -
Page 61: Advanced Tab
• Duplex: Selects whether the machine send faxes one side of the original, both sides of the original. • Resolution: Adjusts the resolution options. Advanced tab • Original Size: Selects the size of the original document. Press OK to update current setting. •... -
Page 62: Sending A Fax Manually (On Hook Dial)
7. Press Start on the control panel. The machine starts to scan and send a fax to destinations. • When you want to cancel a fax job, press Stop before the machine start transmission. Or press the Job Status button, and select the job you want to delete, press Delete. -
Page 63: Sending A Priority Fax
Sending a priority fax This function is used when a high priority fax need to be sent ahead of reserved operations. The original is scanned into memory and immediately transmitted when the current operation is finished. In addition, priority transmission will interrupt a sending to multiple destinations between stations (example, when the transmission to station A ends, before transmission to station B begins) or between redial attempts. -
Page 64: Receiving Faxes In Memory
Receiving faxes in memory Since your machine is a multi-tasking device, it can receive faxes while you are making copies or printing. If you receive a fax while you are copying or printing, your machine stores incoming faxes in its memory. Then, as soon as you finish copying or printing, the machine automatically prints the fax. -
Page 65: Storing Individual Fax Numbers (Speed Dial No.)
Storing individual fax numbers (Speed Dial No.) 1. Press Fax > the Basic tab > Individual. • Edit: Changes the ID, Speed Dial No., and Fax No.. • New: Creates the new Speed Dial No.. • Delete: Deletes the selected Speed Dial No.. •... -
Page 66: Storing The Originals For Polling
4. Receiver presses Start to receive the stored fax. Storing the originals for polling 1. Press Fax from the Main screen. 2. Place the originals face up in the DADF. Or you can use the scanner glass with a single original document, face down. 3. -
Page 67: Storing Originals In Mailbox
4. Press the down arrow to scroll down, if necessary. 5. Press Mailbox Setup. 6. Press Mailbox Configuration. Then the screen displays Mailbox List. 7. Select a Mailbox on the Mailbox List. 8. Press Edit Mailbox. 9. Press Mailbox ID and enter ID with number keypad on the control panel. Up to 20 numbers you can enter. -
Page 68: Printing A Report After Sending A Fax
5. Enter Remote Fax No, Mailbox No., and Passcode. All these field are filled with information from the receiver. 6. Press OK. PRINTING A REPORT AFTER SENDING A FAX You can set the machine to print a report whether a fax transmission is successfully completed or not. -
Page 69: Forwarding A Received Fax To Other Destination By A Fax
4. Press down arrow on the right side. 5. Press Fax Forward Settings > Forward to Fax Setting > Send Forward. 6. Press On and enter a fax number using the keypad on the control panel. 7. Press OK. Forwarding a received fax to other destination by a With this feature, you can forward every fax you received to other destination by faxing. - Page 70 using USB memory device This chapter explains how to use a USB memory device with your machine. This chapter includes: • About USB memory • Understanding the USB screen • Plugging in a USB memory device • Scanning to an USB memory device ABOUT USB MEMORY USB memory devices are available with a variety of memory capacities to give you more room for storing documents, presentations, downloaded...
- Page 71 SCANNING TO AN USB MEMORY DEVICE You can scan a document and save the scanned image onto a USB memory device. When you scan a document, the machine uses the default settings such as the resolution. You can also customize your own scan setting.
- Page 72 • Scan Preset: Automatically changes some scan options such as file format, resolution, and more. You can adjust options to fit each specific purpose. (See "Scan Preset" on page 73.) • File Format: Selects the file format of the scan output. (See "File Format"...
- Page 73 Darkness You can select the degree of darkness of the scanned output. If your original document is light or faded, press the right arrow to make the output darker. Press USB > Scan to USB > the Image tab > Darkness. Press right arrow to enhance the darkness degree then, press OK.
- Page 74 • Overwrite:You can set the machine to delete previous job information on USB as you store new job information. PRINTING FROM A USB MEMORY DEVICE You can directly print files stored on a USB memory device. You can print TIFF, BMP, JPEG, and PRN files. Direct Print option supported file types: •...
-
Page 75: Machine Status And Advanced Setup
machine status and advanced setup This chapter explains how to browse the current status of your machine, and the method of setting for the advanced machine setup. Please read this chapter carefully in order to use your machine's diverse features. This chapter includes: •... -
Page 76: Browsing The Machine's Status
BROWSING THE MACHINE’S STATUS You can browse the machine information and validate some features of the machine. 1. Press Machine Setup on the control panel. 2. Press Machine Status > the Machine Info tab. OPTION DESCRIPTION Machine Details This option shows the customer support information on the email address and the phone number you stored from Admin Setting. - Page 77 OPTION DESCRIPTION Power Saver You can reduce energy consumption by setting these features. Power Saver has three options, first Scan Power Save turns off the scanner lamp under the glass. And Power Save turns off all the fans within the machine after a certain time. Low Power Save turns off the fans within the machine except a core fan for the fuser unit.
-
Page 78: Copy Setup
COPY SETUP For copy output, you can set up several options in advance. 1. Press Machine Setup on the control panel. 2. Press Admin Setting. When the login message pops up, enter password and press OK. 3. Press the Setup tab > Copy Setup. OPTION DESCRIPTION Page Number... - Page 79 OPTION DESCRIPTION Redial The machine can automatically redial a remote fax machine, if it was busy. You can set the number of redial attempts and an interval between attempts. Selecting 0 for Redial Times means that the machine will not use this feature. Speaker Volume This controls the sound when a fax actually starts to transfer data.
-
Page 80: Network Setup
NETWORK SETUP You may set up the network with the machine's touch screen. Before doing that, you must have the information concerning the type of network protocols and computer system you use. If you are not sure which setting to use, contact your network administrator to configure this machine network. -
Page 81: Optional Service
OPTION OPTION Authentication Foreign Device • Internal Credits: It is used Mode Interface when you cancel the job or when the job is cancelled by the (Continue) (Continue) device due to insufficient credits (coin) or is canceled by user’s request. If you select Enable, the machine deposits a credit equal to the number of sheets that did not print out correctly,... -
Page 82: Printing A Report
PRINTING A REPORT You can print a report on the machine's configuration or font list, etcetera. 1. Press Machine Setup on the control panel. 2. Press Admin Setting. When the login message pops up, then enter password and press OK. 3. -
Page 83: Monitoring The Supplies Life
maintenance This chapter provides information for maintaining your machine and the toner cartridge. This chapter includes • Printing a machine report • Monitoring the supplies life • Finding the serial number • Sending the toner reorder notification • Sending the imaging unit reorder notification PRINTING A MACHINE REPORT You can print the machine's information and job report. -
Page 84: Checking Document Box
CHECKING DOCUMENT BOX The machine shows the document box list of the print or fax job. Press Document Box on the Main screen. If the screen displays an other menu, press ( ) to go to the Main screen. • User Box tab: Create the box where you can save the document such as the file you have printed, sent by email or scanned. -
Page 85: Maintaining The Toner Cartridge
Use of non-Samsung and refilled toner cartridge Samsung Electronics does not recommend or approve the use of non- Samsung brand toner cartridges in your printer including generic, store brand, refilled, or remanufactured toner cartridges. -
Page 86: Maintaining The Imaging Unit
3. Turn the cartridge locking lever toward the right until you hear a 'click', to release the toner cartridge. 4. Lift the locking lever and pull the toner cartridge out. 5. Remove the new toner cartridge from its bag. 6. Thoroughly roll the cartridge five or six times to distribute the toner evenly inside the cartridge. -
Page 87: Replacing The Imaging Unit
Replacing the imaging unit 1. Open the side cover. 2. Open the front cover. 3. Turn the cartridge locking lever toward the right until you hear a 'click', to release the toner cartridge. 4. Lift the locking lever and pull the toner cartridge out. The toner cartridge must be removed to replace the imaging unit. -
Page 88: Maintenance Parts
10. Slide the toner cartridge in until it locks in place. 11. Turn the cartridge locking lever toward the left until you hear a 'click'. 12. Close the front cover, then the side cover. After replacing the toner cartridge, wait for several minutes without powering off until the machine enters to standby mode. -
Page 89: Troubleshooting
troubleshooting This chapter gives helpful information for what to do if you encounter an error. This chapter includes: • Tips for avoiding paper jams • Clearing document jams • Clearing paper jams TIPS FOR AVOIDING PAPER JAMS By selecting the correct media types, most paper jams can be avoided. When a paper jam occurs, follow the steps outlined on page 89. -
Page 90: Misfeed Of Exiting Paper
Misfeed of exiting paper 1. Remove the remaining documents from the DADF. 2. Open the DADF cover. 3. Open the document input tray upwards and pull the document gently out of the DADF. 4. Close the DADF cover and the document input tray. Then place the documents back in the DADF. -
Page 91: Clearing Paper Jams
5. Close the white document background and the scanner lid. Then load the removed pages back into the DADF. CLEARING PAPER JAMS When a paper jam occurs, the warming message appears on the display screen. Refer to the table below to locate and clear the paper jam. MESSAGE LOCATION OF JAM Paper Jam in tray 1,... -
Page 92: In The Optional Tray
Do not touch the shiny imaging unit surface. Scratches or smudges will result in poor print quality. 4. Carefully remove the misfeed paper in the direction shown. 5. Close the side cover and insert the paper tray. Lower the rear part of the Tray to align the rear edge with the corresponding slot of the machine, then insert it completely. -
Page 93: In The Optional High Capacity Feeder
in this area, stop and go to step 4. 4. Pull out the optional tray 2. 5. Lift the front part of the tray slightly up to release the tray from the machine. If the paper does not move when you pull, or if you do not see the paper in this area, stop and go to step 6. - Page 94 3. Pull the jammed paper out, in the direction shown, pulling gently and slowly in order to avoid tearing the paper. If the paper does not move when you pull, or if you do not see the paper in this area, stop and go to step 4. 4.
-
Page 95: In The Multi-Purpose Tray
In the multi-purpose tray 1. If the paper is not feeding properly, pull the paper out of the machine. 2. Open and close the side cover. Printing automatically resumes. In the fuser area or around the toner cartridge The fuser area is hot. Take care when removing paper from the machine. -
Page 96: In The Duplex Unit Area
In the duplex unit area If the duplex unit is not inserted correctly, paper jam may occur. Make sure that the duplex unit is inserted correctly. 1. Open the side cover. 2. Release the guide to pull the jammed paper easily. 3. -
Page 97: Understanding Display Messages
3. Remove the jammed paper. 4. Pull up on the stacker lever and then close the stacker front cover. Paper jam at exit of finisher 1. Gently pull the paper out through the exit area. UNDERSTANDING DISPLAY MESSAGES Messages appear on the Smart Panel program window or on the control panel display to indicate machine status or errors. - Page 98 Check size please call for service. Install the fuser unit. Call for service. Replace the imaging unit with a Samsung- Original paper jam genuine toner cartridge. in front of scanner (See "In the multi- purpose tray" on...
- Page 99 Check the IP address used in other place or obtain a new IP elsewhere. address. The toner cartridge Install a Samsung- you have installed is genuine toner cartridge, not for your machine. designed for your machine. The toner cartridge is...
-
Page 100: Solving Other Problems
SOLVING OTHER PROBLEMS The following chart lists some conditions that may occur and the recommended solutions. Follow the suggested solutions until the problem is corrected. If the problem persists, please call for service. Touch screen problem CONDITION SUGGESTED SOLUTIONS The touch screen Turn the machine off and turn it on again. -
Page 101: Printing Problems
The machine is not Select Samsung SCX-6x55X selected as the Series PCL 6 or Samsung default printer. SCX-6x55X Series PS as your default printer in your Windows. Check the machine for the following: •... -
Page 102: Printing Quality Problems
CONDITION POSSIBLE CAUSE SUGGESTED SOLUTIONS Pages print, but The toner cartridge Redistribute the toner, if is defective or out of necessary. they are blank. toner. If necessary, replace the toner cartridge. The file may have Check the file to ensure that blank pages. - Page 103 CONDITION SUGGESTED SOLUTIONS White Spots White spots appears on the page: • The paper is too rough and a lot of dirt from a paper falls to the inner devices within the machine, so the transfer roller may be dirty. Clean the inside of your machine.
-
Page 104: Copying Problems
CONDITION SUGGESTED SOLUTIONS Back of printouts Check for leaking toner. Clean the inside of the machine. Contact a service representative. are dirty Solid Color or • The imaging unit may not be installed Black pages properly. Remove the cartridge and reinsert •... -
Page 105: Scanning Problems
CONDITION SUGGESTED SOLUTIONS Toner cartridge • Your originals may contain pictures, solids, produces fewer or heavy lines. For example, your originals copies than expected may be forms, newsletters, books, or other before running out of documents that use more toner. toner. -
Page 106: Common Postscript Problems
CONDITION SUGGESTED SOLUTIONS The incoming fax has • The fax machine sending you the fax may blank spaces or is of be faulty. poor-quality. • A noisy phone line can cause line errors. • Check your machine by making a copy. •... -
Page 107: Common Linux Problems
Common Linux problems CONDITION SUGGESTED SOLUTIONS The machine does • Check if the printer driver is installed in your not print. system. Open Unified Driver configurator and switch to the Printers tab in Printers configuration window to look at the list of available printers. - Page 108 CONDITION SUGGESTED SOLUTIONS The machine does • Check if your machine is attached to your not appear on the computer. Make sure that it is connected scanners list. properly via the USB port and is turned on. • Check if the scanner driver for your machine is installed in your system.
-
Page 109: Common Macintosh Problems
Common Macintosh problems CONDITION SUGGESTED SOLUTIONS The printer does not Incompatibility between the PDF file and the Acrobat products: print PDF file correctly. Printing the PDF file as an image may Some parts of graphics, solve this problem. Turn on Print As text, or illustrations are Image from the Acrobat printing options. -
Page 110: Ordering Supplies And Accessories
ordering supplies and accessories This chapter provides information on purchasing cartridges and accessories available for your machine. This chapter includes: • Supplies • Accessories The optional parts or features may differ by countries. Contact your sales representatives whether the part you want is available in your country. -
Page 111: How To Purchase
Italia, France, Sweden, Denmark, Finland, Austria, Switzerland, Belgium, Hungary. HOW TO PURCHASE To order Samsung-authorized supplies or accessories, contact your local Samsung dealer or the retailer where you purchased your machine, or visit www.samsungprinter.com and select your country/region to obtain information on calling for technical support. -
Page 112: Installing Accessories
Your machine is a full-featured model that has been optimized to meet most of your printing needs. Recognizing that each user may have different requirements, however, Samsung makes several accessories available to enhance your machine’s capabilities. This chapter includes •... -
Page 113: Activating The Added Memory In The Ps Printer Properties
Devices and Printers. For Windows Server 2008 R2, select Control Panel > Hardware > Devices and Printers. 4. Select the Samsung SCX-6x55X Series PS printer. 5. Click the right mouse button on the printer icon and select Properties. 6. Select Device Settings. -
Page 114: Enabling Fax Feature After Installing The Fax Option Kit
6. Slide the stapler unit in until it locks in place. 7. Close the finisher cover. ENABLING FAX FEATURE AFTER INSTALLING THE FAX OPTION KIT After installing the Fax kit, you have to set up the machine in order to use this function. -
Page 115: Specifications
specifications This chapter guides you about this machine’s specifications such as various features. This chapter includes; • General specifications • Printer specifications • Copier specifications GENERAL SPECIFICATIONS Item Description DADF Up to 100 sheets 75 g/m DADF document • Width: 148.5 to 218 mm size •... -
Page 116: Scan To Usb,
a. Print speed will be affected by operating system used, computing performance, application software, connect on method, media type, media size, and job complexity. b. Please visit www.samsungprinter.com to download the latest software version. COPIER SPECIFICATIONS Item Description Up to 53 ppm in A4 (55 ppm in Letter) Copy speed Duplex copy •... -
Page 117: Glossary
glossary The following glossary helps you get familiar with the product by understanding the terminologies commonly used with printing as well as mentioned in this user's guide. An Automatic Document Feeder (ADF) is a mechanism that will automatically feed an original sheet of paper so that the machine can scan some amount of the paper at once. -
Page 118: Fuser Unit
An emulator duplicates the functions of one system with a different system, so that the second system behaves like the first system. Emulation focuses on exact reproduction of external behavior, which is in contrast to simulation, which concerns an abstract model of the system being simulated, often considering its internal state. -
Page 119: Mac Address
A Light-Emitting Diode (LED) is a semiconductor device that indicates the status of a machine. MAC address Media Access Control (MAC) address is a unique identifier associated with a network adapter. MAC address is a unique 48-bit identifier usually written as 12 hexadecimal characters grouped in pairs (e. g., 00-00-0c- 34-11-4e). -
Page 120: Subnet Mask
Subnet Mask The subnet mask is used in conjunction with the network address to determine which part of the address is the network address and which part is the host address. TCP/IP The Transmission Control Protocol (TCP) and the Internet Protocol (IP); the set of communications protocols that implement the protocol stack on which the Internet and most commercial networks run. -
Page 121: Contact Samsung Worldwide
If you have any comments or questions regarding Samsung products, contact the Samsung customer care center. COUNTRY/REG CUSTOMER CARE CENTER ARGENTINE 0800-333-3733 ARMENIA 0-800-05-555 AUSTRALIA 1300 362 603 AUSTRIA 0810-SAMSUNG (7267864, € 0.07/min) AZERBAIJAN 088-55-55-555 BAHRAIN 8000-4726... - Page 122 PUERTO RICO 1-800-682-3180 QATAR 800-2255 REP. DOMINICA 1-800-751-2676 RUSSIA 8-800-555-55-55 SINGAPORE 1800-SAMSUNG (726-7864) SLOVAKIA 0800-SAMSUNG (726-7864) SOUTH AFRICA 0860 SAMSUNG (726-7864) SPAIN 902-1-SAMSUNG(902 172 678) SWEDEN 0771 726 7864 (SAMSUNG) SWITZERLAND 0848-SAMSUNG (7267864, CHF 0.08/min) SYRIA 1825-22-73 TADJIKISTAN 8-10-800-500-55-500 TAIWAN...
- Page 123 index ADF, load adjustment altitude 29 admin setting altitude adjustment answering machine/fax authentication network accounting 80 printing a report 76, 82 setting up 30, 76 auto center Book copy checking stored document cleaning inside 84 outside 84 scan unit 84 transfer unit 84 Clone copy collated...
-
Page 124: Original Type
Group Group fax number 65 ID copy ID stamp in copying imaging unit imaging unit reorder notification Individual email addresses for scanning 51 individual fax number 65 clearing paper from the duplex unit area clearing paper from the exit area 95 clearing paper from the fuser unit 95 clearing paper from the multi-purpose tray 95... -
Page 125: Color Mode
problems copying 104 display message 97 faxing 105 paper feeder 100 PostScript 106 printing 101 scanning 105 touch screen 100 Windows 106 quality scanning 58, 73 remote code replacing components imaging unit 87 toner cartridge 85 replacing stapler Report Resolution faxing 64 scanning 56 scan preset... - Page 126 This user’s guide is provided for information purposes only. All information included herein is subject to change without notice. Samsung Electronics is not responsible for any direct or indirect damages, arising from or related to use of this user’s guide.
- Page 127 REV 1.04...
-
Page 128: Software Section
Samsung Printer Software section... - Page 129 Software section Contents 1. Installing Printer Software in Windows Installing Printer Software ... 5 Installing Software for Local Printing ... 5 Installing Software for Network Printing ... 8 Reinstalling Printer Software ... 11 Removing Printer Software ... 12 2. Basic Printing Printing a Document ...
- Page 130 Setting Up a Host Computer ... 26 Setting Up a Client Computer ... 26 7. Scanning Scanning Using Samsung SmarThru Office ... 27 Using Samsung SmarThru Office ... 27 Uninstalling Samsung SmarThru Office ... 28 Using Onscreen Help File ... 29...
- Page 131 Scanning Using the WIA Driver ... 29 Windows XP/Server 2003 ... 29 Windows Vista ... 29 Windows 7 ... 30 8. Using Smart Panel Understanding Smart Panel ... 31 Opening the Troubleshooting Guide ... 32 Changing the Smart Panel Program Settings ... 32 9.
- Page 132 For a USB-connected ... 42 Printing ... 43 Printing a Document ... 43 Changing Printer Settings ... 43 Printing Multiple Pages on One Sheet of Paper ... 45 Duplex Printing ... 45 Scanning ... 46...
-
Page 133: Installing Printer Software In Windows
Installing Printer Software in Windows This chapter includes: • Installing Printer Software • Reinstalling Printer Software • Removing Printer Software : The following procedure is based on Windows XP, for other operating systems, refer to the corresponding Windows user's guide or online help. Installing Printer Software You can install the printer software for local printing or network printing. -
Page 134: Custom Installation
If the test page prints out correctly, click Yes. If not, click No to reprint it. To register yourself as a user of Samsung Printers in order to receive information from Samsung, select the checkbox and click Finish. You are now sent to the Samsung web site. - Page 135 If the test page prints out correctly, click Yes. If not, click No to reprint it. To register yourself as a user of Samsung Printers in order to receive information from Samsung, select the checkbox and click Finish. You are now sent to the Samsung web site.
-
Page 136: Installing Software For Network Printing
Installing Software for Network Printing When you connect your printer to a network, you must first configure the TCP/IP settings for the printer. After you have assigned and verified the TCP/IP settings, you are ready to install the software on each computer on the network. You can install the printer software using the typical or custom method. - Page 137 After the installation is finished, a window appears asking you to print a test page and to register yourself as a user of Samsung Printers in order to receive information from Samsung. If you so desire, select the corresponding checkbox(es) and click Finish.
- Page 138 Click Next. • If necessary, select a language from the drop-down list. Select Custom installation. Click Next. The list of printers available on the network appears. Select the printer you want to install from the list and then click Next. •...
-
Page 139: Reinstalling Printer Software
After the installation is finished, a window appears asking you to print a test page and to register yourself as a user of Samsung Printers in order to receive information from Samsung. If you so desire, select the corresponding checkbox(es) and click Finish. -
Page 140: Removing Printer Software
: If your printer is not already connected to the computer, the following window will appear. • After connecting the printer, click Next. • If you don’t want to connect the printer at this time, click Next, and No on the following screen. Then the installation will start and a test page will not be printed at the end of the installation. -
Page 141: Basic Printing
Basic Printing This chapter explains the printing options and common printing tasks in Windows. This chapter includes: • Printing a Document • Printing to a file (PRN) • Printer Settings - Layout Tab - Paper Tab - Graphics Tab - Extras Tab - About Tab - Printer Tab - Using a Favorite Setting... -
Page 142: Printing To A File (Prn)
Printing to a file (PRN) You will sometimes need to save the print data as a file for your purpose. To create a file: Check the Print to file box at the Print window. Select the folder and assign a name of the file and then click OK. -
Page 143: Layout Tab
Layout Tab The Layout tab provides options to adjust how the document appears on the printed page. The Layout Options includes Multiple Pages per Side, Poster Printing and Booklet Printing. See “Printing a Document” on page 13 for more information on accessing printer properties. Paper Orientation Paper Orientation allows you to select the direction in which information is printed on a page. -
Page 144: Graphics Tab
Plain Paper: Normal plain paper. Select this type if your printer is monochrome and printing on the 16 lb (60 g/m Recycled Paper: 20 lb to 24 lb (75~90 g/m Color Paper: 20 lb to 24 lb (75~90 g/m ) color-backgrounded paper. -
Page 145: Extras Tab
Advanced Options You can set advanced settings by clicking the Advanced Options button. • TrueType Options: This option determines what the driver tells the printer about how to image the text in your document. Select the appropriate setting according to the status of your document. -
Page 146: About Tab
• Use Printer Fonts: When Use Printer Fonts is checked, the printer uses the fonts that are stored in its memory (resident fonts) to print your document, rather than downloading the fonts used in your document. Because downloading fonts takes time, selecting this option can speed up your printing time. -
Page 147: Advanced Printing
Advanced Printing This chapter explains printing options and advanced printing tasks. • Your printer driver Properties window that appears in this User’s Guide may differ depending on the printer in use. However the composition of the printer properties window is similar. -
Page 148: Printing Posters
Printing Posters This feature allows you to print a single-page document onto 4, 9, or 16 sheets of paper, for the purpose of pasting the sheets together to form one poster-size document. To change the print settings from your software application, access printer properties. -
Page 149: Printing On Both Sides Of Paper
Printing on Both Sides of Paper You can print on both sides of a sheet of paper. Before printing, decide how you want your document oriented. The options are: • Printer Setting, if you select this option, this feature is determined by the setting you’ve made on the control panel of the printer. -
Page 150: Using Watermarks
Using Watermarks The Watermark option allows you to print text over an existing document. For example, you may want to have large gray letters reading “DRAFT” or “CONFIDENTIAL” printed diagonally across the first page or all pages of a document. There are several predefined watermarks that come with the printer, and they can be modified, or you can add new ones to the list. -
Page 151: Using Overlays
Using Overlays What is an Overlay? An overlay is text and/or images stored in the computer hard disk drive (HDD) as a special file format that can be printed on Dear ABC any document. Overlays are often used to take the place of preprinted forms and letterhead paper. -
Page 152: Using Windows Postscript Driver
Using Windows PostScript Driver If you want to use the PostScript driver provided with your system CD-ROM to print a document. PPDs, in combination with the PostScript driver, access printer features and allow the computer to communicate with the printer. An installation program for the PPDs is provided on the supplied software CD-ROM. -
Page 153: Using Direct Printing Utility
Using Direct Printing Utility This chapter explains how to use Direct Printing Utility to print PDF files without having to open the files. AUTION • You can not print PDF files that are restricted to print. Deactivate the printing restriction feature, and retry printing. -
Page 154: Sharing The Printer Locally
Sharing the Printer Locally You can connect the printer directly to a selected computer, which is called “host computer,” on the network. The following procedure is for Windows XP. For other Windows OS, refer to the corresponding Windows User's Guide or online help. -
Page 155: Scanning
Then you can fax or e-mail the files, display them on your web site or use them to create projects that you can print using Samsung SmarThru software or the WIA driver. This chapter includes: •... -
Page 156: Uninstalling Samsung Smarthru Office
- Network Scan: After scanning via network, you can store the scanned output in JPEG, TIFF, or pdf file. To use network scanner, your computer should install the Samsung Network Scan Manager and register the scanner within that program. Refer to Scanning chapter in user's guide. -
Page 157: Using Onscreen Help File
Using Onscreen Help File For more information about SmarThru, click corner of the window. The SmarThru Help window opens and allows you to view onscreen help supplied on the SmarThru program. Scanning Process with TWAIN- enabled Software If you want to scan documents using other software, you will need to use TWAIN-compliant software, such as Adobe Photoshop. -
Page 158: Windows 7
Windows 7 Load the document(s) face up into the DADF (or ADF). Place a single document face down on the document glass. Click Start → Control Panel → Hardware and Sound → Devices and Printers. Click right button of mouse on device driver icon in Printers and Faxes →... -
Page 159: Using Smart Panel
Programs or All Programs → your printer driver name → Smart Panel. OTES • If you have already installed more than one Samsung printer, first select the printer model you want in order to use the corresponding Smart Panel. Right-click (in Windows or Linux) or click (in Mac OS X) the Smart Panel icon and select your printer name. -
Page 160: Opening The Troubleshooting Guide
Opening the Troubleshooting Guide Using the troubleshooting guide, you can view solutions for error status problems. Right-click (in Windows or Linux) or click (in Mac OS X) the Smart Panel icon and select Troubleshooting Guide. Changing the Smart Panel Program Settings Right-click (in Windows or Linux) or click (in Mac OS X) the Smart Panel icon and select Options. -
Page 161: Using Your Printer In Linux
You need to download Linux software package from the Samsung website (www.samsung.com/printer) to install the printer softwares. Samsung’s Unified Linux Driver package contains printer and scanner drivers, providing the ability to print documents and scan images. The package also delivers powerful applications for configuring your machine and further processing of the scanned documents. -
Page 162: Uninstalling The Unified Linux Driver
: You must log in as a super user (root) to install the printer software. If you are not a super user, ask your system administrator. From the Samsung website, download the Smart Panel package to your computer. Right click the Smart Panel package and extract the package. -
Page 163: Using The Unified Driver Configurator
Configurator Double-click Unified Driver Configurator on the desktop. You can also click the Startup Menu icon and select Samsung Unified Driver and then Unified Driver Configurator. Press each button on the Modules pane to switch to the corresponding configuration window. -
Page 164: Scanners Configuration
• Add Class... : Allows you to add a new printer class. • Remove Class : Removes the selected printer class. Scanners Configuration In this window, you can monitor the activity of scanner devices, view a list of installed Samsung MFP devices, change device properties, and scan images. Switches to Scanners configuration. -
Page 165: Configuring Printer Properties
Configuring Printer Properties Using the properties window provided by the Printers configuration, you can change the various properties for your machine as a printer. Open the Unified Driver Configurator. If necessary, switch to Printers configuration. Select your machine on the available printers list and click Properties. -
Page 166: Printing Files
To abort the current job, click Cancel. Printing Files You can print many different types of files on the Samsung machine device using the standard CUPS way - directly from the command line interface. The CUPS lpr utility allows you do that. -
Page 167: Using The Image Manager
The document is scanned and the image preview appears in the Preview Pane. Drag the pointer to set the image area to be scanned. Change the scan options in the Image Quality and Scan Area sections. • Image Quality: allows you to select the color composition and the scan resolution for the image. - Page 168 You can use the following tools to edit the image: Tools Function Saves the image. Cancels your last action. Restores the action you canceled. Allows you to scroll through the image. Crops the selected image area. Zooms the image out. Zooms the image in.
-
Page 169: Using Your Printer With A Macintosh
Double-click the MAC_Installer folder. Double-click the Installer OS X icon. Enter the password and click OK. The Samsung Installer window opens. Click Continue Select Easy Install and click Install. Easy Install is recommended for most users. All components necessary for printer operations will be installed. -
Page 170: Setting Up The Printer
Samsung in Printer Model and your printer name in Model Name. • For MAC OS 10.4, if Auto Select does not work properly, select Samsung in Print Using and your printer name in Model. • For MAC OS 10.5~10.6, if Auto Select does not work properly, select Select a driver to use... -
Page 171: Printing
Printing OTES • The Macintosh printer’s properties window that appears in this User’s Guide may differ depending on the printer in use. However the composition of the printer properties window is similar. • You can check your printer name in the supplied CD- ROM. -
Page 172: Printer Features
Graphics The Graphics tab provides options for selecting Resolution(Quality) and Color Mode. Select Graphics form the Presets' drop-down list to access the graphic features. Mac OS 10.4 Resolution(Quality) • : You can select the printing resolution. The higher the setting, the sharper the clarity of printed characters and graphics. -
Page 173: Printing Multiple Pages On One Sheet Of Paper
Printing Multiple Pages on One Sheet of Paper You can print more than one page on a single sheet of paper. This feature provides a cost-effective way to print draft pages. From your Macintosh application, select Print from the File menu. Select Layout. -
Page 174: Scanning
Scanning You can scan docoments using Image Capture. Macintosh OS offers Image Capture. Make sure that your machine and computer are turned on and properly connected to each other. Load the document(s) face up into the DADF (or ADF). OR place a single document face down on the document glass. -
Page 175: Oftware Section
OFTWARE SECTION NDEX advanced printing, use 19 booklet printing 20 canceling scan 29 document, print Macintosh 43 Windows 13 double-sided printing 21 Extras properties, set 17 favorites settings, use 18 Graphics properties, set 16 help, use 18 install printer driver Macintosh 41 Windows 5 installing... - Page 176 scanning Linux 38 SmarThru 27 TWAIN 29 WIA driver 29 scanning from Macintosh 46 setting darkness 16 favorites 18 image mode 16 resolution Windows 16 toner save 16 true-type option 16 software install Macintosh 41 Windows 5 reinstall Windows 11 system requirements Macintosh 41 uninstall...