
Related Manuals for Lab:One Recordings ZPLANE

Summary of Contents for Lab:One Recordings ZPLANE
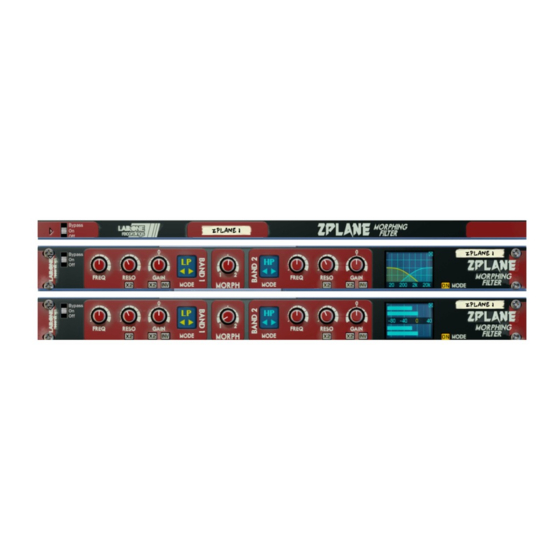
- Page 1 Z-PLANE Instruction Manual V1.0 MORPHING FILTER Rack Extension for Reason Instruction Manual...
-
Page 2: Table Of Contents
V1.0 Contents Page Subject Thank You, Acknowledgements & Dedications Introduction A brief guide to ZPlane Working with ZPlane Using the Dual Function Display CV Inputs & controls MIDI Implementation chart How to ‘latch’ your own MIDI via Remote Overriding Licence Agreement... - Page 3 We hope you continue to enjoy using ZPlane in your projects for now and for future. Lab:One Recordings © 2017...
- Page 4 Reject, Low Shelf and High Shelf modes. Zplane is designed to be a transparent effect depending on the filter type in action. Shelving filters as well as EQ filters set to zero dB gain should have no apparent effect on the audio signal and would appear ‘dry’...
-
Page 5: A Brief Guide To Zplane
Z-PLANE Instruction Manual V1.0 A brief guide of ZPlane ZPlane is based on Red Queen 3-Mode 10-Band Equalizer’s Zplane function. The Front Panel Bypass Switch (Bypass effect / Enable effect / Disable effect) Frequency control Resonance control trim & double resonance toggle Gain control trim &... - Page 6 Z-PLANE Instruction Manual V1.0 The filter frequency controls set the frequency centre of the filter – this can range from 20Hz to 22000kHz – the full frequency spectrum of human listening (at most). The filter resonance controls determine the ‘sharpness’ of the filter. Low resonance settings can create ‘smoother’...
- Page 7 Mono devices, when connecting a new ZPlane to them, can automatically route their mono signal in to the left channel, and the left output of ZPlane is connected to the originally wired socket of the mono device, closing the audio loop. Stereo devices can automatically connect their outputs to the left and right inputs of ZPlane, and ZPlane completes the audio chain by connecting its outputs to the originally connected stereo pair sockets.
- Page 8 Tool Palette in Reason (F8), select ‘Studio Effects’ when in the ‘Devices’ tab, and locate the ‘ZPlane Morphing Filter’ device, click on the icon and drag it to the device you wish to add it to. Page 8...
-
Page 9: Working With Zplane
In setup (A), this would use ZPlane as an insert effect. This means that whatever control you adjust on ZPlane, it will affect the total sound coming out of the sampler / synth module. If ZPlane is in bypass mode, the audio playing would still sound ‘clean’ and unaffected. - Page 10 Reason sampler / synth module In setup (B), this would use ZPlane as a send effect. This means that whatever control you adjust on ZPlane, it will affect the sound coming from the Master Section at a set amount, determined by the Send Effect dial on that specific Mix / Audio channel.
-
Page 11: Using The Dual Function Display
V1.0 Using the Dual Function Display ZPlane’s Dual Function Display allows you to see the metering before and after filter processing, plus an additional mode view the filter curves that you are actively applying to the incoming audio signal. Simply click the display to change views. Meters mode is always default upon creation. - Page 12 Z-PLANE Instruction Manual V1.0 Page 12...
-
Page 13: Cv Inputs & Controls
CV inputs and controls ZPlane has a total of 7 CV inputs, with corresponding trim knobs (to scale CV input signals). The CV input sockets are unipolar by design but can allow bi-polar signal. Each of the 7 CV sockets connect to the 7 knob controls on the front of ZPlane, giving more creative use of the equalizer where the user sees best fit. - Page 14 Z-PLANE Instruction Manual V1.0 MIDI Implementation table Below is a listing of all MIDI Control Change (CC) numbers, which can be applied to your choice of device. MIDI Controls Band 1 Frequency Band 1 Resonance Band 1 Gain Morph / Mix control Band 2 Frequency Band 2 Resonance Band 2 Gain...
-
Page 15: How To 'Latch' Your Own Midi Via Remote Overriding
Reason allows the user to re-define certain controls via MIDI devices by using the Remote Override configuration. This means that a control on ZPlane can be mapped by any MIDI controller you have connected to your DAW. However, you can only map one specific control to any of the available Remote ‘receiving’... - Page 16 Z-PLANE Instruction Manual V1.0 Once you are happy with the control being set, you can click ‘OK’ to continue with the new setting, or ‘CANCEL’ to abort the mapping. Also note that if you accept this mapping, the control (if already linked to another) will be fixed to the new mapping.
-
Page 17: Licence Agreement
(the “Product”) on one personal computer at a time. If you want to use the Product on more than one personal computer at a time, or if you want to network the Product, you must obtain separate licenses from LAB:ONE by contacting them via info@lab-one-recordings.co.uk. - Page 18 Restricted Rights clause at FAR 52.227-19. Contractor is Lab One Recordings. 9. TERMINATION. This License Agreement will terminate immediately if you breach any of its terms. Upon termination, you will be required promptly to return to LAB:ONE or to destroy all copies of the Product covered by this License Agreement.
- Page 19 Z-PLANE Instruction Manual V1.0 Page 19...