Table of Contents
Advertisement
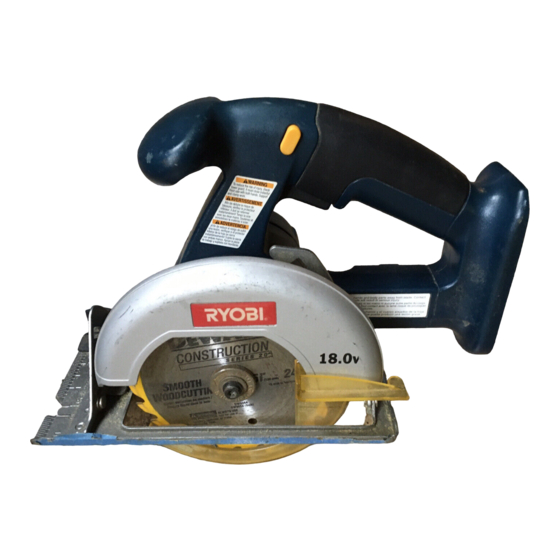
Your new cordless circular saw has been engineered and manufactured to Ryobi's high standard for dependability, ease of
operation, and operator safety. Properly cared for, it will give you years of rugged, trouble-free performance.
WARNING: To reduce the risk of injury, the user must read and understand operator's manual.
Thank you for buying a Ryobi cordless circular saw.
SAVE THIS MANUAL FOR FUTURE REFERENCE
OPERATOR'S MANUAL
5-1/2 in. (140 mm), 18 VOLT
CORDLESS CIRCULAR SAW
MODEL NO. R10633
SPECIFICATIONS:
Blade Diameter
Blade Arbor
Cutting Depth at 0°
Cutting Depth at 45°
No Load Speed
Motor
Charge Rate
Charger Rating
5-1/2 in. (140 mm)
3/8 in. (10 mm)
1-9/16 in. (40 mm)
1-1/8 in. (29 mm)
4,200 RPM
18 Volt DC
1 Hour
120 Volts, 60 Hz, AC
Advertisement
Table of Contents

Related Manuals for Ryobi R10633


Summary of Contents for Ryobi R10633
- Page 1 Charge Rate Charger Rating Your new cordless circular saw has been engineered and manufactured to Ryobi’s high standard for dependability, ease of operation, and operator safety. Properly cared for, it will give you years of rugged, trouble-free performance. WARNING: To reduce the risk of injury, the user must read and understand operator's manual.
-
Page 2: Table Of Contents
Inspect it carefully to make sure no breakage or damage has occurred during shipping. If any parts are damaged or missing, contact your nearest Ryobi Authorized Service Center to obtain replacement parts before attempting to operate saw. A blade, blade wrench, and this operator's manual are also included. -
Page 3: General Safety Rules
Use battery only with charger listed. MODEL BATTERY PACK R10633 1322401, 1323303, 130256001 or 130224007 ■ Use battery operated tool only with specifically des- ignated battery pack. Use of any other batteries may create a risk of fire. -
Page 4: Specific Safety Rules
If both hands are holding the saw, they cannot be cut by the blade. ■ Keep your body positioned to either side of the saw blade, but not in line with the saw blade. KICKBACK could cause the saw to jump backwards. -
Page 5: Important Safety Instructions For Charger
■ Maintain a firm grip on the saw and position your body and arm in a way that allows you to resist KICK- BACK forces. KICKBACK forces can be controlled by the operator, if proper precautions are taken. -
Page 6: Important Safety Instructions For Charger
IMPORTANT SAFETY INSTRUCTIONS FOR CHARGER ■ To reduce the risk of damage to charger body and cord, pull by charger plug rather than cord when disconnecting charger. Following this rule will reduce the risk of serious personal injury. ■ Make sure cord is located to that it will not be stepped on, tripped over, or otherwise subjected to damage or stress. -
Page 7: Symbols
Important: Some of the following symbols may be used on your tool. Please study them and learn their meaning. Proper interpretation of these symbols will allow you to operate the tool better and safer. SYMBOL NAME Volts Amperes Hertz Minutes Alternating Current Direct Current No Load Speed... -
Page 8: Features
OPTIONAL RIP GUIDE SCREW (WING SCREW) SPINDLE BASE Do not allow familiarity with your circular saw to make you careless. Remember that a careless fraction of a second is sufficient to inflict severe injury. Page 8 LOCK-OFF BUTTON... -
Page 9: Operation
Refer to "Charging Your Battery Pack" for normal recharging of batteries. If the charger does not charge your battery pack under normal circumstances, return both the battery pack and charger to your nearest Ryobi Authorized Service Center for electrical check. Page 9 BATTERY CHARGER RED LIGHT "ON"... - Page 10 WARNING: A 5-1/2 in. (140 mm) blade is the maximum blade capacity of your saw. Never use a blade that is too thick to allow outer blade washer to engage with the flats on the spindle. Larger blades will come in contact with the blade guard, while thicker blades will prevent blade screw from securing blade on spindle.
- Page 11 NOTE: The guard is operating correctly when it moves freely and readily returns to the closed position. If for any reason your lower blade guard does not close freely, take it to the nearest Ryobi authorized service center for service before using. Page 11...
- Page 12 See Figure 8. The best guard against kickback is to avoid dangerous practices. Kickback occurs when the blade stalls rapidly and the saw is driven back towards you. Blade stalling is caused by any action which pinches the blade in the wood.
- Page 13 ■ When making a cut use steady, even pressure. Never force cuts. ■ Do not cut warped or wet lumber. ■ Always hold your saw firmly with both hands and keep your body in a balanced position so as to resist the forces of kickback should it occur.
- Page 14 After you complete your cut release the trigger and allow the blade to come to a complete stop. Do not remove your saw from workpiece while the blade is moving. WARNING: To make sawing easier and safer, always maintain proper control of your saw.
- Page 15 TO CROSS CUT OR RIP CUT When making a cross cut or rip cut, align your line of cut with the outer blade guide notch on the saw base as shown in figure 17. Since blade thicknesses vary, always make a trial cut in scrap material along a guideline to determine how much, if any, the guideline must be offset to produce an accurate cut.
- Page 16 TO BEVEL CUT The angle of cut of your saw may be adjusted to any desired setting between zero and 50°. NOTE: When making cuts at 50°, blade should be set at full depth of cut. When making 45° bevel cuts, there is a notch in the saw base to help you line up the blade with the line of cut.
- Page 17 POSITIVE 0 BEVEL STOP See Figure 21. Your saw has a positive 0° bevel stop, that has been factory adjusted to assure 0° angle of your saw blade when making 90° cuts. However, misalignment can occur during shipping. TO CHECK ■...
-
Page 18: Operation
OPTIONAL RIP GUIDE (EDGE GUIDE) See Figure 23. Use a guide when making long or wide rip cuts with your saw. An optional rip guide with a five inch scale is available or you can make an efficient rip guide by clamping a straight edge to your workpiece. -
Page 19: Maintenance
They contain chemicals that can damage, weaken or destroy plastic. BATTERIES The saw's battery pack is equipped with nickel-cadmium rechargeable batteries. Length of service from each charging will depend on the type of work you are doing. -
Page 20: Parts Ordering / Service
Ryobi Authorized Service Center. Be sure to provide all pertinent facts when you call or visit. Please call 1-800-525-2579 for your nearest Ryobi Authorized Service Center. You can also check our web site at www.ryobitools.com for a complete list of Authorized Service Centers.