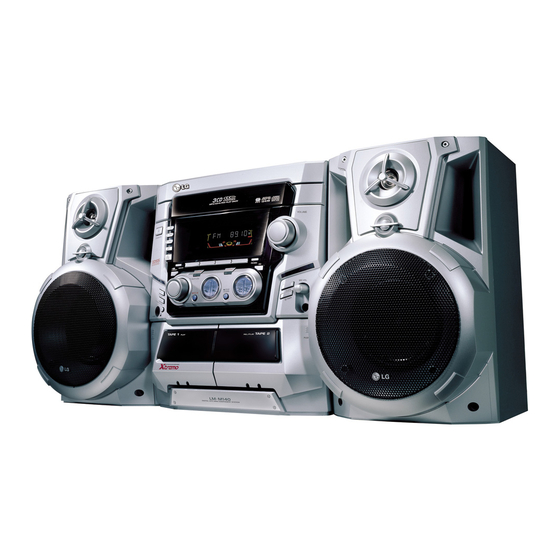
Table of Contents
Advertisement
Advertisement
Table of Contents

Summary of Contents for LG LM-M140X
- Page 1 LM-M140(ENG)-53U MINI HI-FI System OWNER’S MANUAL MODEL : LM-M140A/D/X LMS-M140 Please read this manual carefully before operating your set. Retain it for future reference. Designs and specifications are subject to change without notice for improvement. CD-R/RW...
-
Page 2: Precautions
Precautions CAUTION CAUTION Use of controls or adjustments or performance of procedures other than those specified herein may RISK OF ELECTRIC result in hazardous radiation exposure. SHOCK DO NOT OPEN Laser component in this product is capable of emitting radiation exceeding the limit for Class 1. CAUTION:TO REDUCE THE RISK OF ELECTRIC SHOCK DO NOT REMOVE COVER(OR BACK) NO USER SERVICEABLE PARTS INSIDE. -
Page 3: Table Of Contents
Table of Contents INTRODUCTION OPERATION Precautions ....... 2 Presetting the radio stations....11 Table of Contents . -
Page 4: Before Use
Before Use Safety Precautions Notes on Remote Control Handling the unit Remote Control Operation Range When shipping the unit Point the remote control at the remote sensor and press the buttons. The original shipping carton and packing materials • Distance: About 23 ft (7 m) from the front of the come in handy. -
Page 5: Front Panel/Rear Panel
Front Panel/Rear Panel POWER ( STANDBY/ON) button PUSH EJECT position-TAPE 2 (DECK 2) • DISC DIRECT PLAY buttons 10. • CLOCK button (DISC 1, DISC 2, DISC 3) • TIMER button • DISC SKIP button • MIC JACK (MIC) - 6.3mm : OPTIONAL •... -
Page 6: Remote Control
Remote Control AUX button POWER button TUNER/BAND button PRESET ( ) buttons MUTE button CD FUNCTION buttons VOLUME CONTROL ( ) button PLAY/ PAUSE ( ) button • CD STOP( ) button • SLEEP button CD SKIP/SEARCH ) buttons • PROGRAM button REPEAT button •... -
Page 7: Connections
Connections Speaker System Connection Connect the speakers using the supplied speaker cords by matching the colors of the terminals and those of the cords. To obtain the best possible surround sound, adjust the speaker parameters (distance, level, etc.). ANTENNA Black Left Speaker Right Speaker otes... -
Page 8: Audio Adjustment
Audio Adjustment Setting the voltage (OPTIONAL) Sleep Function If your set is equipped with a voltage selector at the When the sleep timer is used, the power is automatically back side, be sure to set it to your local power supplied turned off after the specified time has elapsed. -
Page 9: Timer Function
Audio Adjustment Timer Function Press SET to confirm the hour to switch on. The unit can set the clock function in power on/off state. With the TIMER function you can have the radio reception and recording, CD play, tape play or auxiliary Set the minute to switch on by pressing source play and recording turned on and off at the time PRESET DOWN/UP or turning MULTI JOG. -
Page 10: Rds Function - Optional
RDS Function - OPTIONAL About RDS Programme Search (PTY) This unit is equipped with RDS (Radio Data System), A major benefit of RDS is its ability to encode broad- which brings a wide range of information from FM radio. casts with Programme Type (PTY) codes that indicate RDS is a system for transmitting station call signs or the type of material being broadcast. -
Page 11: Presetting The Radio Stations
Presetting the radio stations You can preset 50 stations for FM and AM. Before Press PROG./MEMO.. tuning, make sure that you have turned down the - The station is stored. volume to the minimum. Repeat steps 2 to 5 to store other stations. Press TUNER (or TUNER/BAND on the remote control) to select the frequency (AM or FM) you want. -
Page 12: Tape Playback
Tape Playback Basic Playback To Stop Play Press STOP( )/CLEAR on the front panel or TAPE Press TAPE 1/2 to select TAPE 1 or TAPE 2. STOP( ) on the remote control during playback. (“NO TAPE” appears in the display window.) Open cassette TAPE 1 (or 2) by pushing Tape Counter Reset PUSH EJECT position. -
Page 13: Cd Playback
CD Playback Basic Playback To Search a Track After pressing and holding button Press POWER ( STANDBY/ON) to turn on the on the remote control during playback, then release unit. at the point you want. Press the CD button on the front panel to enter otes the CD mode. -
Page 14: To Repeat Play
CD Playback To Repeat Play To Program Play To play one track repeatedly You can arrange the order of the tracks on the discs and create your own program. The program can contain up Press REPEAT once during playback. to 20 tracks. - “REPEAT 1”... -
Page 15: Troubleshooting
Troubleshooting Check the following guide for the possible cause of a problem before contacting service. Cause Correction Symptom No power. • The power cord is disconnected. • Plug the power cord into the wall outlet securely. No sound. • The audio cables are not connected •... -
Page 16: Specifications
Specifications Power supply Refer to the back panel of the unit. Power consumption 40 W Mass 6.3 kg External dimensions (W x H x D) 273 x 330 x 360 mm Frequency response 40 - 18000 Hz Signal-to-noise ratio 70 dB Dynamic range 70 dB Tuning Range...


