Table of Contents
Advertisement
Quick Links
Advertisement
Table of Contents

Related Manuals for Sony XPERIA R1 PLUS


Summary of Contents for Sony XPERIA R1 PLUS
-
Page 1: User Guide
User guide Xperia R1 Plus ™... -
Page 2: Table Of Contents
Contents Getting started................6 About this User guide................6 Overview..................... 6 Assembly.................... 7 Screen Protection................8 Starting Your Device for the First Time..........8 Why Do I Need a Google™ Account? ..........9 Device security................10 Making Sure Your Device is Protected..........10 Screen Lock..................10 Unlocking Your Device Automatically..........12 SIM Card Protection.................13... - Page 3 Internet and MMS Settings ..............37 Wi-Fi....................37 Sharing Your Cellular Data Connection........... 40 Controlling Data Usage..............41 Selecting Cellular Networks.............. 42 Virtual private networks (VPNs)............43 Synchronizing data on your device..........44 Synchronizing with Online Accounts..........44 Synchronizing with Microsoft® Exchange ActiveSync®....44 Basic settings................
- Page 4 Favorites..................68 Sending contact information.............68 Avoiding Duplicate Entries in the Contacts Application....69 Messaging and chat..............70 Reading and sending messages............. 70 Organizing your messages..............71 Calling from Messaging..............71 Messaging settings................71 FM Radio..................72 Listening to the radio................72 Favorite radio channels..............72 Radio Sound Settings..............
-
Page 5: Getting Started
Getting started About this User guide This is the Xperia™ R1 Plus User Guide for the Android™ 7.1.2 software version. If you're not sure which software version your device is running, you can check it in the Settings menu. System and application updates can present the features in your device in another way than described in this User Guide. -
Page 6: Assembly
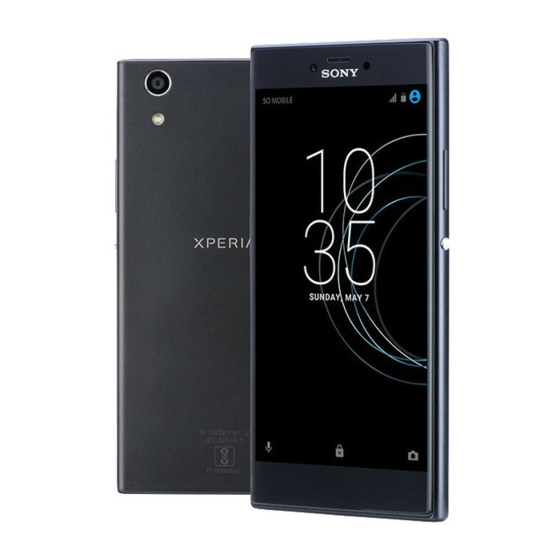
Headset jack Microphone Front camera 10 Charger/USB Type-C cable port Receiver 11 Speaker Microphone 12 Rear camera Light sensor 13 Flashlight Charging/Notification light 14 Nano SIM/Memory card slot Volume buttons Power button Assembly Your device only supports nano SIM cards. The nano SIM card and the memory card have separate slots in the same holder. -
Page 7: Screen Protection
Screen Protection Before using your device, remove the protective film by pulling up on the protruding tab. Starting Your Device for the First Time It is recommended that you charge the battery for at least 30 minutes before starting up your device for the first time. You can still use your device while it is charging, see Charging Your Device on page 30. -
Page 8: Why Do I Need A Google™ Account
Why Do I Need a Google™ Acount? Your Xperia™ device from Sony runs on the Android™ platform developed by Google™. A range of Google™ applications and services is available on your device when you purchase it, for example, Gmail™, Google Maps™, YouTube™, and the Play Store™ application which gives you access to the Google Play™... -
Page 9: Device Security
Device security Making Sure Your Device is Protected Your device includes several security options, strongly recommended in case of loss or theft. These options are as follows: • Set a secure screen lock on your device using a PIN, password, or pattern to prevent anyone from accessing or resetting your device. - Page 10 type to only a PIN or password. This occurs when your network administrator specifies a lockscreen type for all EAS accounts for enterprise security reasons. Contact the network administrator of your company or organization to check what network security policies are implemented for cellular devices. For more settings for each screen lock type, tap beside Screen lock.
-
Page 11: Unlocking Your Device Automatically
Unlocking Your Device Automatically The Smart Lock feature makes unlocking your device easier by letting you set it to unlock automatically in certain situations. You can keep your device unlocked, for example, when it’s connected to a Bluetooth® device or when you’re carrying it with you. -
Page 12: Sim Card Protection
Making Sure You're Secure when Using Trusted Devices Different Bluetooth® devices support different Bluetooth® standards and security capabilities. There's a chance someone could keep your Xperia™ device unlocked by imitating your Bluetooth® connection, even if your trusted device is no longer nearby. -
Page 13: Finding The Identification Number Of Your Device
To Change the SIM Card PIN 1 From the Home screen, tap 2 Find and tap Settings > Security > Set up SIM card lock. 3 Tap Change SIM PIN. 4 Enter the old SIM card PIN and tap OK. 5 Enter the new SIM card PIN and tap OK. -
Page 14: Learning The Basics
Learning the basics Using the touchscreen Tapping • Open or select an item. • Mark or unmark a checkbox or option. • Enter text using the on-screen keyboard. Touching and holding • Move an item. • Activate an item-specific menu. •... - Page 15 Pinching and spreading • Zoom in or out on web pages, photos, and maps, and when you’re taking photos or shooting videos. Swiping • Scroll up or down a list. • Scroll left or right, for example, between Homescreen panes. •...
-
Page 16: Locking And Unlocking The Screen
Locking and Unlocking the Screen When your device is on and left idle for a set period of time, the screen darkens to save battery power and locks automatically. This lock prevents unwanted actions on the touchscreen when you are not using it. When you buy your device, a basic screen swipe lock is already set. - Page 17 To browse the Home screen Homescreen panes You can delete panes or add new ones to your Homescreen (up to unlimited panes). Homescreen Settings To Disable or Uninstall an Application from the Homescreen Disabling a pre-installed app deletes all data, but the app can be enabled again from Settings >...
-
Page 18: Application Screen
Application screen The Application screen, which you open from the Homescreen, contains the applications that come pre-installed on your device as well as applications that you download. To view all applications on the Application screen 1 From your Home screen, tap 2 Slide up and down on the Application screen. -
Page 19: Navigating Applications
Navigating Applications You can navigate between applications using the navigation keys and the recently used applications window, which lets you switch easily between all recently used applications. The navigation keys are the Back key, the Home key, and the Recent apps key. -
Page 20: Widgets
Split Screen Mode Split screen mode enables you to view two applications at once, for example, if you want to view your email inbox and a web browser at the same time. 1 Application 1 in upper window 2 Split screen border – Drag to resize windows 3 Application 2 in lower window 4 Split screen key –... -
Page 21: Shortcuts And Folders
To Resize a Widget 1 Touch and hold a widget, and then release it. If the widget can be resized, for example, the Calendar widget, then a highlighted frame and resizing dots appear. 2 Drag the dots inward or outward to shrink or expand the widget. 3 To confirm the new size of the widget, tap anywhere on the Home screen. -
Page 22: Background And Themes
To rename a folder on the Homescreen 1 Tap the folder to open it. 2 Tap the folder's title bar to show the Folder name field. 3 Enter the new folder name and tap DONE. Background and Themes Your device comes with a default background, but you can adapt the Home screen and Lock screen to your own style using wallpapers and themes featuring different colors and patterns. - Page 23 • The lockscreen To Open or Close the Notification Panel 1 To open the Notification panel, drag the status bar downward, or simply double- tap it. 2 To close the Notification panel, drag or flick the panel upward. After opening the Notification panel, you can access the Quick Settings panel by dragging the status bar down again.
-
Page 24: Notification Light
Managing Notifications on the Lockscreen Show all Get all notifications on the lockscreen. When you have this setting notification turned on, keep in mind that all content (including the content of incoming email and chat messages) will content be visible on your lockscreen unless you designate the relevant apps as Hide sensitive content in the App notifications settings menu. -
Page 25: Icons In The Status Bar
Icons in the status bar Status icons No SIM card Signal strength No signal Roaming Sending and downloading LTE data Sending and downloading GPRS data Sending and downloading EDGE data Sending and downloading 3G data Sending and downloading HSPA+ data A Wi-Fi connection is enabled and data is being transmitted A Wi-Fi connection is enabled but there is no internet connection. -
Page 26: Applications Overview
Notification icons New text message or multimedia message Ongoing call Missed call Call on hold Call forwarding is turned on New voicemail message New email message Downloading data Uploading data Cellular data is disabled Perform a basic setup of your device A software update is available System updates are available Downloading system updates... - Page 27 Browse, search, and buy thousands of products right from your device. Protect your device against viruses, malware, spyware, phishing attempts, and online exploitation. Use the Calculator application to perform basic calculations. Use the Calendar application to keep track of events and manage your appointments.
- Page 28 Optimize settings to suit your own requirements. Create, edit, and collaborate with others on spreadsheets. Use the Sketch application to create and explore images, then share them with your friends. Create, edit, and collaborate with others on presentations. Use the Support application to access user support on your device. For example, you can access a User Guide, troubleshooting information, plus tips and tricks.
-
Page 29: Battery And Maintenance
Your device has an embedded, rechargeable battery that can only be replaced by an authorized Sony repair center. You should never try to open or take apart the device yourself. Doing so can cause damage and void your warranty. -
Page 30: Battery And Power Management
49. • Uninstall applications that you are not using, see Application screen on page19. • Use a Sony original handsfree device to listen to music. Handsfree devices consume less battery than your device's loudspeakers. • Restart your device every now and then. -
Page 31: Updating Your Device
To Make Exceptions to Power Saving Features for Apps 1 From your Home screen, tap 2 Find and tap Settings > Battery. 3 Tap and select Battery optimization. You will see a list of applications that are not optimized. 4 To add or remove applications from this list, tap APPS and select or de-select an application from the list to edit its optimization settings. -
Page 32: Maintenance Using A Computer
To Update Your Device Using a Computer 1 Using a USB Type-C™ cable, connect your device to the computer. 2 Make sure the screen of your device is unlocked, and the USB connection mode on the device is set to Transfer files. 4 Make sure the computer can access the internet. -
Page 33: Storage And Memory
Storage and memory Your device has several different storage and memory options. • The internal storage is about 32 GB and is used to store downloaded or transferred content along with personal settings and data. Some examples of data saved to internal storage are alarm, volume, and language settings;... - Page 34 To Transfer Media Files to the Memory Card 1 Make sure you have a memory card inserted in your device. 2 From your Home screen, tap 3 Find and tap Settings > Storage > SD card. 4 Mark the files that you want to transfer to the memory card. 5 Tap , then tap Move to.., choose the path that you want to transfer.
-
Page 35: Downloading Applications
Downloading applications Downloading Applications from Google Play™ Google Play™ is the official online Google store for downloading applications, games, music, movies, and books. It includes both free and paid applications. Before you start downloading from Google Play™, make sure you have a working internet connection, preferably over Wi-Fi to limit data traffic charges. -
Page 36: Internet And Networks
Internet and networks Browsing the web The Google Chrome™ web browser for Android™ devices comes pre-installed in most markets. Go to http://support.google.com/chrome and click the "Chrome for Mobile" link to get more detailed information about how to use this web browser. To Browse the Web 1 From your Home screen, tap 2 Find and tap... - Page 37 To View Downloaded internet and MMS Settings 1 From your Home screen, tap 2 Find and tap Settings > More > Mobile networks. 3 Tap Access Point Names. 4 To view more details, tap any of the available items. Wi-Fi Use Wi-Fi to surf the internet, download applications, or send and receive emails.
- Page 38 Increasing Wi-Fi Signal Strength There are a number of things you can do to improve Wi-Fi reception: • Move your device closer to the Wi-Fi access point. • Move the Wi-Fi access point away from any potential obstructions or interference. •...
-
Page 39: Sharing Your Cellular Data Connection
• PIN method – your device creates a random PIN (Personal Identification Number), which you enter on the WPS-supported device. To Connect to a Wi-Fi Network Using a WPS Button 1 From the Home screen, tap 2 Find and tap Settings > Wi-Fi. 3 Turn on Wi-Fi if it is not already on. -
Page 40: Controlling Data Usage
To Use Your Device as a Portable Wi-Fi Hotspot 1 From your Home screen, tap 2 Find and tap Settings > More > Tethering & portable hotspot. 3 Tap Portable hotspot settings. 4 Tap Set up Wi-Fi hotspot, and enter the Network name information. 5 To select a security type, tap the Security field. -
Page 41: Selecting Cellular Networks
To Set a Data Usage Warning 1 Make sure cellular data traffic is turned on. 2 From your Home screen, tap 3 Find and tap Settings > Data usage > Billing cycle. 4 To set the warning level, tap Data warning, enter the desired data limit and tap SET. -
Page 42: Virtual Private Networks (Vpns)
To Activate Automatic Network Selection 1 From your Home screen, tap 2 Find and tap Settings > More > Mobile networks. 3 Tap Preferred network type, and then select the network. Virtual private networks (VPNs) Use your device to connect to virtual private networks (VPNs), which allow you to access resources inside a secured local network from a public network. -
Page 43: Synchronizing Data On Your Device
Synchronizing data on your device Synchronizing with Online Accounts Synchronize your device with contacts, email, calendar events, and other information from online accounts, for example, email accounts such as Gmail™ and Exchange ActiveSync, Facebook™, and Flickr™. You can synchronize data automatically for such accounts by activating the auto-sync function, or you can synchronize each account manually. - Page 44 Remove an EAS Account 1 From your Home screen, Tap Settings > Accounts. 2 Tap Exchange ActiveSync, then select the EAS account you want to remove. 3 Tap, then tap Remove account. 4 Tap REMOVE ACCOUNT again to confirm. This ternet verslo01thls publicatlo Pnnt...
-
Page 45: Basic Settings
Basic settings Accessing settings View and change settings for your device from the Settings menu. The Settings menu is accessible from both the Application screen and the Quick settings panel. To Open the Device Settings Menu from the Application Screen 1 From your Home screen, tap 2 Find and tap Settings. - Page 46 To Set Your Device to Vibrate for Incoming Calls 1 From your Home screen, tap 2 Find and tap Settings > Sound. 3 Tap the Also vibrate for calls slider to enable the function. To Set a Ringtone 1 From your Home screen, tap 2 Find and tap Settings >...
- Page 47 Setting Exceptions for Do Not Disturb Mode You can select which types of notifications are allowed to sound in Do not disturb mode and you can filter exceptions based on who the notifications come from. The most common types of exceptions include: •...
-
Page 48: Application Settings
Screen lock Use Screen lock to set your device to display only the screen for a specific application. For example, if you are playing a game and you accidentally touch the Home navigation key, the Screen lock feature prevents the active game app screen from being minimized. You can also use this feature when you lend your device to another person to make it harder for them to access more than one application. - Page 49 To allow a permission 1 To allow a permission, tap Allow. 2 When the confirm dialog appears for the second time, you can choose the Don't ask again option if you wish. 3 A dialog will also explain why the app needs the permissions and what it uses them for specifically.
-
Page 50: Resetting Your Applications
To Manage App Links from the Settings Menu 1 From your Home screen, tap 2 Find and tap Settings > Apps. 3 Tap and find Opening links. 4 Select an app and adjust the settings as desired. Resetting Your Applications You can reset an application or clear application data if your application stops responding or causes issues with your device. -
Page 51: Language Settings
To Select Content for the Screen Saver 1 From your Home screen, tap 2 Find and tap Settings > Display > Screen saver. 3 Tap the slider to enable the function. 4 Select what you want to display when the screen saver is active. To Start the Screen Saver Manually 1 From your Home screen, tap 2 Find and tap Settings >... -
Page 52: Multiple User Accounts
Multiple User Accounts Your device supports multiple user accounts so that different users can log in separately to the device and use it. Multiple user accounts work well in situations where you share the same device with other people or lend your device to someone to use for a while. - Page 53 About the Guest User Account If someone just wants to use your device temporarily, you can enable a guest account for that user. In Guest mode, your device starts up as a freshly installed system with only the preinstalled apps. Once your guest is finished using your device, you can wipe the session clean so that the next guest can start fresh.
-
Page 54: Typing Text
Typing text On-Screen Keyboards There are a number of pre-installed text entry providers on your device. The default text entry provider may depend on the regional or language settings you use. One or more text entry providers might not be available in your region. To display the on-screen keyboard to enter text •... -
Page 55: Editing Text
Editing text You can select, cut, copy and paste text as you write. You can access the editing options by double-tapping the entered text. The editing options then become available via an application bar. Text Editing Bar After selecting text by double-tapping on a word, an editing bar appears with several tools available: •... -
Page 56: Calling
Calling Making calls You can make a call by manually dialing a phone number, by tapping a number saved in your contacts list, or by tapping the phone number in your call log. You can also use the smart dial function to quickly find numbers from your contacts list and call logs by entering part of a contact number or name and selecting from the suggestions that appear. -
Page 57: Receiving Calls
To Make an International Call 1 From your Home screen, tap 2 Find and tap . The call log is displayed. 3 Tap to display the dialpad. 4 Touch and hold 0 until a “+” sign appears. 5 Enter the country code and the area code without the initial zeros, followed by the phone number. -
Page 58: Using The Call Log
Ongoing Calls Turn on the loudspeaker during a call Mute the microphone during a call Enter DTMF digits during a call Put the current call on hold or retrieve a call on hold Make a second call End a call To change the volume during a call •... -
Page 59: Forwarding Calls
To Add a Number from the Call Log to Your Contacts 1 From your Home screen, tap 2 Find and tap 3 Tap a number displayed in the call log, then select Create new contact or Add to a contact. 4 Edit the contact details, then tap To View Call Log Options 1 From your Home screen, tap... -
Page 60: Multiple Calls
To Change the SIM Card PIN2 1 From the Home screen, tap 2 Find and tap Settings > Call. 3 Tap Fixed dialing numbers > Change PIN2. 4 Enter the old SIM card PIN2 and tap OK. 5 Enter the new SIM card PIN2 and tap OK. 6 Confirm the new PIN2 and tap OK. -
Page 61: Conference Calls
Conference calls With a conference or multiparty call, you can have a joint conversation with two or more people. For details about the number of participants that you can add to a conference call, contact your network operator. To Make a Conference Call During an ongoing call, tap . - Page 62 To Make an Emergency Call 1 Open the dialpad. 2 Enter the emergency number, then tap You can make emergency calls even when no SIM card is inserted or when all outgoing calls are blocked. To make an emergency call while the SIM card is locked 1 Tap EMERGENCY.
-
Page 63: Contacts
Contacts Searching and viewing contacts Search for contacts View more options Favorites , All contacts and Groups tabs Use the slider to jump to contacts starting with the selected letter 5 View contact details Add a contact To Search for a Contact 1 From your Home screen, tap , then tap 2 Tap... -
Page 64: Adding And Editing Contacts
Adding and editing contacts To Add a Contact 1 From your Home screen, tap , then tap 2 Tap 3 If you synchronized your contacts with one or more accounts and you are adding a contact for the first time, you must select the account you want to add the contact to. Alternatively, tap Phone contact if you only want to use and save this contact on your device. -
Page 65: Transferring Contacts
To Delete Contacts 1 From your Home screen, tap , then tap 2 Touch and hold the contact that you want to delete. 3 To delete several or all contacts, mark the checkboxes beside the contacts that you want to delete. 4 Tap , then tap Delete. -
Page 66: Backing Up Contacts
To Import Contacts From a Memory Card 1 From your Home screen, tap , then tap 2 Press , then tap Import/export > Import from .vcf file. 3 Select where to store your contacts. 4 Tap SD card. 5 Select the files that you want to import by tapping them. ®... -
Page 67: Favorites
Go back to the main Contacts screen View more options Medical and personal information and emergency contacts tab Medical and personal information Favorites Contacts that you mark as favorites appear under the favorites tab in the Contacts application along with your most frequently called contacts or "top contacts". This way you get quicker access to these contacts. -
Page 68: Avoiding Duplicate Entries In The Contacts Application
To Send Several Contacts at Once 1 From your Home screen, tap , then tap 2 Touch and hold a contact then mark or unmark the checkboxes beside the contacts that you want to share. 3 Tap , then tap Share. 4 Select an available transfer method and follow the on-screen instructions. -
Page 69: Messaging And Chat
Messaging and chat Reading and sending messages The Messaging application shows your messages as conversations, which means all messages to and from a particular person are grouped together. The number of characters you can send in a single message varies depending on the provider and the language you use. -
Page 70: Organizing Your Messages
To forward a message 1 From your Home screen, tap , and then find and tap 2 Tap the conversation containing the message you want to forward. 3 Touch and hold the message you want to forward, and then tap 4 Enter the recipient’s name or phone number, then select from the suggestions that appear. -
Page 71: Fm Radio
FM Radio Listening to the radio The FM radio in your device works like any FM radio. For example, you can browse and listen to FM radio stations and save them as favorites. You must connect a wired headset or headphones to your device before you can use the radio. This is because the headset or headphones act as an antenna. - Page 72 To Move between Radio Channels • Drag the frequency band left or right. • Alternately, tap the arrows on either side of the band to jump to the next clear radio signal. To start a new search for radio channels 1 When the radio is open, tap .
-
Page 73: Camera
Camera Taking Photos and Recording Videos Configure the other camera settings Apply facial enhancement effects Switch between the front and main camera Choose different special effect Choose the scene mode Select capturing mode Shutter button – Take photos or record videos View photos and videos To Take a Photo From the Lockscreen 1 To activate the screen, briefly press the power key... -
Page 74: General Camera Settings
To Record a Video 1 Activate the camera. 2 If video mode is not selected, tap , and then select 3 Point the camera toward the subject. 4 To start recording, tap 5 To pause when recording a video, tap . -
Page 75: Shutter Sound
Saving a Photo’s Geographic Location Enable the Saving location function to geotag your photos, saving the approximate geographical location as you shoot. The geographical location is determined by wireless networks and GPS technology. To Turn On Geotagging 1 Activate the camera. 2 Tap 3 Tap Store location, then tap Touch to adjust... -
Page 76: Still Camera Settings
Still camera settings To adjust the still camera settings 1 Activate the camera. 2 To display all settings, tap 3 Select the setting that you want to adjust, then edit as desired. Still camera settings overview Resolution Main camera: 13MP 4128×3096 (4:3) 12-megapixel resolution with 4:3 aspect ratio. -
Page 77: Countdown Timer
Countdown timer With the self-timer, you can take a photo without holding the device. Use this function to take self-portraits or group photos with everyone in the photo. You can also use the self- timer if you want to avoid shaking the camera when taking photos. The photo is taken as soon as you tap the shutter button or press the camera key. -
Page 78: Video Camera Settings
Video camera settings To Adjust the Video Camera Settings 1 Activate the camera. 2 Tap , and then select 3 To display settings, tap 4 Select the setting you want to adjust, then make your changes. Video camera settings overview Video quality Adjust the video resolution for different formats. -
Page 79: Connectivity
Connectivity Bluetooth® Wireless Technology Use the Bluetooth® function to send files to other Bluetooth® compatible devices, or to connect to hands-free accessories. Bluetooth® connections work better within 10 meters (33 feet), with no solid objects in between. In some cases you have to manually pair your device with other Bluetooth®... - Page 80 ® To Connect Your Device to Another Bluetooth Device 1 From your Home screen, tap 2 Find and tap Settings > Bluetooth. 3 Tap the Bluetooth® device you want to connect to. ® To Unpair a Bluetooth Device 1 From your Home screen, tap 2 Find and tap Settings >...
-
Page 81: Smart Apps And Features That Save You Time
Smart Apps and Features That Save You Time Google Search & Now Use the Google app to search the internet. You can also enable a feed for regular updates - for example, you can get traffic information before commuting to work, find popular restaurants in your area, see your favourite team's current score, and more. -
Page 82: Travel And Maps
Travel and maps Using Location Services Location services allow applications such as Maps and the camera to use information from your cellphone or Wi-Fi network as well as Global Positioning System (GPS) information to determine your approximate location. If you're not within a clear line of sight of GPS satellites, your device can determine your location using the Wi-Fi function. -
Page 83: Using Data Traffic When Traveling
Using Data Traffic when Traveling When you travel outside of your home cellphone network, you may need to access the internet using cellular data traffic. If so, you need to activate data roaming on your device. You may incur additional charges when you activate data roaming. It is recommended to check the relevant data transmission charges in advance. -
Page 84: Clock And Calendar
Clock and Calendar Calendar Use the Calendar application to manage your time schedule. If you have signed in to and synchronized your device with one or several online accounts that include calendars, for example, your Google™ account, then calendar events from these accounts will also appear in the Calendar application. -
Page 85: Clock
Clock You can set one or several alarms and use any sound saved on your device as the alarm signal. The alarm does not sound if your device is turned off. The alarm time format displayed is the same as the format you select for your general time settings, for example, 12-hour or 24-hour. - Page 86 To Edit an Existing Alarm 1 Find and tap Clock, then tap the alarm that you want to edit. 2 Make the desired changes. 3 Tap SAVE. To Turn an Alarm On or Off • Find and tap Clock, and then tap the slider for the alarm you want to turn on or off. To Delete an Alarm 1 Find and tap Clock, and then touch and hold the alarm you want to delete.
-
Page 87: Accessibility
Accessibility Magnification Gesture Magnification gesture allows you to zoom in to parts of the screen by tapping an area of the touchscreen three times in succession. To Enable or Disable Magnification Gesture 1 From your Home screen, tap 2 Find and tap Settings > Accessibility > Magnification gesture. 3 Tap the slider under Magnification gesture. -
Page 88: Support And Legal
Support and Legal Help in Menus and Applications Some applications and settings have help available in the options menu, which is normally indicated by in the individual applications. Rebooting, Resetting, and Repairing You can force your device to restart or shut down if it stops responding or won't restart normally. - Page 89 Warranty, SAR, and Usage Guidelines For information about warranty, SAR (Specific Absorption Rate), and safety guidelines, please read the Important information provided under Settings > About phone > Legal information on your device. Recycling Your Device Got an old device lying around the house? Why not recycle it? By doing so, you will help us reuse its materials and components, and you’ll protect the environment, too! Find out more about the recycling options in your region at www.sonymobile.com/recycle/.
- Page 90 This is an internet version of this publication. © Print only for private use.