Sony DSC-HX60 Service Manual
Hide thumbs
Also See for DSC-HX60:
- Instruction manual (507 pages) ,
- Help manual (172 pages) ,
- Manual (2 pages)
Table of Contents
Advertisement
SERVICE MANUAL
Ver. 1.0 2014.02
Note:
Be sure to keep your PC used for service and checking of this unit
always updated with the latest version of your anti-virus software.
In case a virus affected unit was found during service, contact your
Service Headquarters.
Model information table
Model
Destination
Color system
GPS
Wi-Fi
NFC
• Abbreviation
AUS : Australian model
CH : Chinese model
CND : Canadian model
HK : Hong Kong model
J
: Japanese model
KR : Korea model
RU : Russian model
DSC-HX60/HX60V
9-834-781-11
DSC-HX60/HX60V
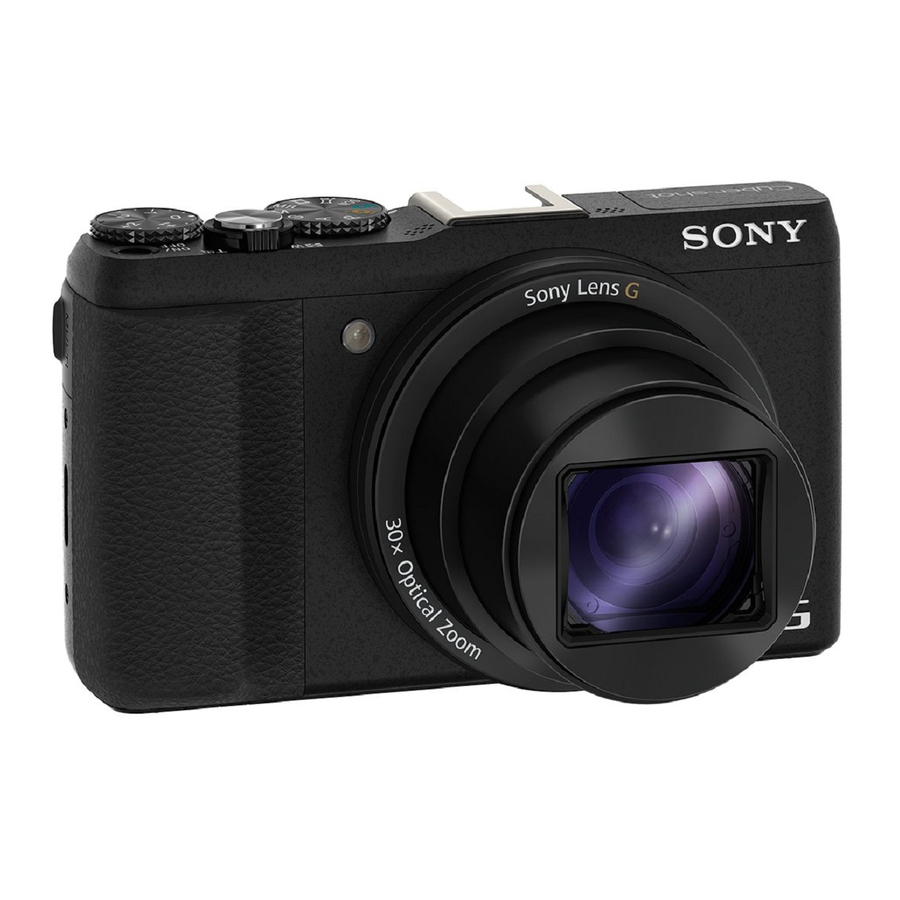
Photo: DSC-HX60V
DSC-HX60
AEP, UK, RU, CH
US, CND, E, KR, J
PAL
-
Sony Corporation
注意:
修理時に使用するパソコンは,ウィルス検出ソフトが常にアップ
デートを行っているパソコンを使用してください。もし,修理を
行うセット,もしくはパソコンがウィルスに感染している事が判
明した場合は,ソニーグループ内は社内技術相談窓口に,特約店
様は特約店様専用電話窓口 (修理窓口) にご相談ください。
DSC-HX60V
AEP, UK, E, AUS, HK
NTSC
PAL
DIGITAL STILL CAMERA
US Model
Canadian Model
AEP Model
UK Model
Russian Model
E Model
Australian Model
Hong Kong Model
Chinese Model
Korea Model
Japanese Model
Published by Sony Techno Create Corporation
2014B08-1
© 2014.02
Advertisement
Table of Contents

Related Manuals for Sony DSC-HX60


Summary of Contents for Sony DSC-HX60
- Page 1 CH : Chinese model CND : Canadian model HK : Hong Kong model : Japanese model KR : Korea model RU : Russian model DIGITAL STILL CAMERA 2014B08-1 DSC-HX60/HX60V © 2014.02 Sony Corporation 9-834-781-11 Published by Sony Techno Create Corporation...
-
Page 2: Safety Check-Out
CRITIQUES POUR LA SÉCURITÉ DE FONCTIONNEMENT. NE COMPONENTS WITH SONY PARTS WHOSE PART NUMBERS REMPLACER CES COMPOSANTS QUE PAR DES PIÈCES SONY APPEAR AS SHOWN IN THIS MANUAL OR IN SUPPLEMENTS DONT LES NUMÉROS SONT DONNÉS DANS CE MANUEL OU PUBLISHED BY SONY. - Page 3 らは必ずもとどおりにして下さい。 ください。また,従来の半田よりも粘性が強いため, サービス後は安全点検を IC端子などが半田ブリッジしないように注意してく サービスのために取外したネジ,部品,配線がもとどお ださい。 りになっているか,またサービスした個所の周辺を劣化 ・ 半田こてのこて先は,必ず無鉛半田用と有鉛半田用に分け させてしまったところがないかなどを点検し,安全性が て管理してください。 確保されていることを確認して下さい。 無鉛半田と有鉛半田が混在すると剥離現象が発生してしま チップ部品交換時の注意 います。 ・ 取外した部品は再使用しないで下さい。 ・ タンタルコンデンサのマイナス側は熱に弱いため交換 時は注意して下さい。 フレキシブルプリント基板の取扱いについて ・ 半田こてのこて先温度は約350℃に設定してくださ い。 ・ 同一パターンに何度もコテ先を当てないで下さい。 (3 回以内) ・ パターンに力が加わらないよう注意して下さい。 注意 電池の交換は, 正しく行わないと破裂する恐れがあります。 電池を交換する場合には必ず同じ型名の電池又は同等品と 交換してください。 使用済み電池は,取扱指示に従って処分してください。 DSC-HX60/HX60V – 2 –...
-
Page 4: Specifications
Configuration method: WPS (Wi-Fi Approx. 20.4 Megapixels * Supports Micro USB compatible device. Protected Setup) / manual Lens: Sony G 30× zoom lens Access method: Infrastructure Mode f = 4.3 mm – 129 mm (24 mm – NFC: NFC Forum Type 3 Tag... -
Page 5: Repair Parts List
品と交換してください。 使用済み電池は、 取扱指示に従って処分してください。 • 外装部品色表示 例: (SILVER) :セットの色を表す。 (Silver) :部品の色を表す。 • Abbreviation AUS : Australian model : Chinese model CND : Canadian model : Hong Kong model : Japanese model : Korea model : Russian model : Taiwan model DSC-HX60/HX60V... -
Page 6: Exploded Views
Ref. No. Part No. Description 4-463-246-02 BOTTOM (470), CABINET A-1998-647-A SW-1006 BOARD, COMPLETE 4-463-754-01 BUTTON (CENTER) (470) 4-463-753-01 BUTTON (KURUPON) (470) X-2588-510-1 CABINET (REAR) ASSY (970C) LCD901 A-1955-497-A SERVICE, PANEL BLOCK ASSY #243 4-412-769-01 SCREW (M1.4), NEW TRU-STAR, P2 DSC-HX60/HX60V... -
Page 7: Main Section
Ref. No. Part No. Description A-1977-843-A FRONT (970C), CABINET (HX60V) 4-484-574-01 HOLDER (970), ANTENNA A-1977-848-A FRONT (961C), CABINET (HX60) 4-463-247-03 LID (470), MULTI #243 4-412-769-01 SCREW (M1.4), NEW TRU-STAR, P2 A-1998-721-A SY-1032 BOARD, COMPLETE (SERVICE) 1-893-111-11 SW-1017 FLEXIBLE BOARD DSC-HX60/HX60V... -
Page 8: Bth Block Section
SCREW, TRIPOD (350) 4-463-210-01 COVER (470), BT FLEXIBLE A-1998-650-A BT-2010 FLEXIBLE BOARD, COMPLETE BT001 1-756-710-12 LITHIUM RECHARGEABLE BATTERY 4-463-244-02 PLATE (470), STRAP 1-780-826-11 TERMINAL BOARD, BATTERY *BT901 C901 1-118-284-11 CAP, ALUMINIUM ELECT (55μF 330V) C902 1-118-285-11 CAP, ALUMINIUM ELECT (35μF 330V) DSC-HX60/HX60V... -
Page 9: Upper Block Section
ANTENNA (SERVICE), NFC (Note 2) 1-887-951-11 RL-1012 FLEXIBLE BOARD SP901 1-858-343-71 LOUDSPEAKER (1.0CM) A-2037-950-B SERVICE (970), CABINET UPPER 3-348-998-61 SCREW (M1.4X4), TAPPING, PAN 1-845-239-11 MIC HOLDER #140 2-635-562-01 SCREW(M1.7) A-1998-651-A SH-1006 FLEXIBLE BOARD, COMPLETE #284 4-433-882-21 TAPPING (1.4) (ECOLOGY) DSC-HX60/HX60V... -
Page 10: Lens Block Section
A-1940-535-A GEAR WH LUBRICATED ASSY A-1940-465-A CD-1005 FLEXIBLE BOARD, COMPLETE (including CMOS imager) A-1940-536-A GEAR A LUBRICATED ASSY 4-476-409-01 PLATE, MR A-1940-537-A GEAR B LUBRICATED ASSY 4-294-347-01 RETAINER, FG #176 3-947-504-31 SCREW (M1.2) #258 4-299-468-11 SCREW, TAPPING UB1.2 (CH) DSC-HX60/HX60V... - Page 11 1-2. FUSE SY-1032 BOARD SY-1032 BOARD (SIDE A) (SIDE B) 5.0V F5650 4.2V 4.2V Primary side Ref. No. Part No. Description F0100 1-576-415-31 FUSE (2A/32V) 1-576-842-31 FUSE (0.63A/32V) *F0101 1-576-843-31 FUSE (0.8A/32V) *F0102 F5650 1-576-415-31 FUSE (2A/32V) DSC-HX60/HX60V...
- Page 12 Instruction Manual (ENGLISH, TRADITIONAL CHINESE) Ref. No. Part No. Description 8-022-359-00 Rechargeable Battery Pack NP-BX1/J (J) 8-022-359-31 Rechargeable Battery Pack NP-BX1/UC (US, CND) 8-022-359-50 Rechargeable Battery Pack NP-BX1/CE (EXCEPT US, CND, CH, J) 8-022-359-71 Rechargeable Battery Pack NP-BX1/CN (CH) DSC-HX60/HX60V...
-
Page 13: Troubleshooting
Detailed Code Refer to “2-1-3. Self-diagnosis Code Tabl e”. C : Corrected by customer Indicates the appropriate E : Corrected by service step to be taken. engineer E.g. 13 ..Format the “memory card”. 32 ..Turn on power again. DSC-HX60/HX60V... -
Page 14: Self-Diagnosis Code Table
1 Acceleration sensor hardware error Turn the power off and on again. Electronic compass hardware error (GPS hardware Turn the power off and on again. error) Note: After repair, be sure to perform “3-5. PROCESS AFTER FIXING FLASH ERROR”. DSC-HX60/HX60V... -
Page 15: Service Note
Start the Adjust Manual in the Adjust Station and execute the “Angular velocity sensor sensitivity adj”. SY-1032 BOARD (SIDE B) Y: YAW sensor sensitivity P: PITCH sensor sensitivity Type A: SE7701 (PITCH/YAW) Type B: Note: The sensor sensitivity of SE7701 of SY-1032 board is written only repair parts. DSC-HX60/HX60V... -
Page 16: Preparing The Short Jig
In order to prevent an electric shock, wrap insulating tape completely around the resistor and its leads. Resistor with a rated value of approximately 1 k Ω /1 W (Part No. 1-215-869-11). Small clip Small clip Wrap insulating tape completely around the resistor and its leads. DSC-HX60/HX60V... - Page 17 6. To further confirm that the unit is connectable, connect the unit to the personal computer and double-click the “current connection” from the icon displayed on the notice field, make sure that the unit is displayed in the Wireless internet access column. DIRECT-xxxx:DSC-HX60V DSC-HX60/HX60V...
-
Page 18: Process After Fixing Flash Error
When “FLASH error” (Self-diagnosis Code E : 91 : 01) occurs, to prevent any abnormal situation caused by high voltage, setting of the flash is changed automatically to disabling charge and flash setting. After fixing, this setting needs to be deactivated. Method for Initializing the Flash Error Code Reset Flash Error using the Flash Error Repair Tool Ver_[].[].exe. DSC-HX60/HX60V... - Page 19 そのためFlyer of WLAN Reset ( Flyer of WLAN Reset_9834752[][].pdf) をダウンロードしてプリント出力し,セットに添付して 返却してください。 角速度センサ 補修用基板と交換する時,角速度センサ (SE7701) の感度表示を書き留めてください。 Adjust StationからAdjust Manualを起動させて 「Angular velocity sensor sensitivity adj.」 を実行させてください。 SY-1032 BOARD (SIDE B) Y: YAW 感度表示 P: PITCH 感度表示 Type A: SE7701 (PITCH/YAW) Type B: Note:SY-1032基板のSE7701感度表示は補修用基板にしか記載されておりません。 DSC-HX60/HX60V...
- Page 20 • コネクターを取り外す際に,線材部 (極細) を持って引っ張る と断線する恐れがありますので,絶対に線材部 (極細) を持っ て引っ張らないでください。 • 線材部 (極細) を押さえながらコネクターを差し込むと,線材 部 (極細) が断線する恐れがありますので,絶対に線材部 (極細) には負担をかけないでください。 3-3. ストロボ用充電コンデンサの放電について ストロボ用充電コンデンサは非常に高い電圧で充電されています。 そのため, ストロボ用充電用コンデンサに手を触れた場合には, 感電する可能性があります。 この高電圧は, 本機の電源を切っただけでは放電されません。 必ずショート治具をストロボ用充電コンデンサに接続して残留電圧を放電してください。 ショート治具の準備 ショート治具は1 kΩ/1 W程度の抵抗器の両端に小型のクリップを接続して作成します。 抵抗器は絶縁テープで完全に覆い, 感電しないように処理してください。 1 k Ω /1 W 程度の抵抗器 (部品コード:1-215-869-11) 小型クリップ 小型クリップ 絶縁テープで巻く DSC-HX60/HX60V...
- Page 21 – JAPANESE – 3-4. Wi-Fi機能の確認 Wi-Fi 機能を確認するときは以下の手順で行ってください。 用意する機器: Wi-Fi接続の可能なWindowsパソコン 本機の電源を入れる。 本機の を押して, 再生モードにする。 → → [スマートフォン転送] → [カメラから選ぶ] → [この画像] を選ぶ。 Wi-Fi準備が完了すると以下の画面に切り替わり,Wi-Fi接続のためのパスワードが表示される。 スマートフォン転送 Wi-Fi スマートフォンを操作して 本機にWi-Fi接続してください SSID DIRECT-XXXX:DSC-XXXX パスワード XXXXXXXX 機器名称 DSC-XXXX キャンセル 決定 パソコン側で接続可能なワイヤレスネットワークとして,本機が検出されることを確認する。 さらに接続可能なことを確認したい場合には本機とパソコンを接続後,通知領域に表示されているアイコンから 「現在の接 続先」 をダブルクリックし,ワイヤレスインターネットアクセスの欄に本機が表示される事を確認する。 DIRECT-xxxx:DSC-HX60V DSC-HX60/HX60V...
- Page 22 – JAPANESE – 3-5. フラッシュエラー発生時の対処法 本機はフラッシュエラー(自己診断コードE : 91 : 01) が発生した場合,高電圧による異常を防止するために自動的にフラッシュ 充電および発光禁止の設定になります。 フラッシュエラー発生後はエラーの解除を行う必要があります。 フラッシュエラーの解除方法 Flash Error Repair Tool Ver_[].[].exe を使用して Flash Error を解除してください。 DSC-HX60/HX60V...
-
Page 23: Disassembly And Assembly
• ST-1021 Flexible Board 6 SY-1032 Board • SW-1017 Flexible Board 8 BTH Block • BT-2010 Flexible Board 4 Panel Block Assy 5 Main Frame 7 Lens Block • CD-1005 Flexible Board • LF-2038 Flexible Board q; Cabinet Front 2 Cabinet Bottom DSC-HX60/HX60V... - Page 24 CN4107 MULTI C902 CD-1005 FLEXIBLE BOARD C901 LENS BLOCK 26 30 C901, C902 LCD901 (CHARGING CAPACITOR) (LCD MODULE) BT901 SY-1032 BOARD SY-1032 BOARD BATTERY (SIDE B) (SIDE A) TERMINAL 3.0 INCH COLOR CN2001 SE7701 (PITCH/YAW) CN6800 CN8040 BACKLIGHT CN9000 DSC-HX60/HX60V...
-
Page 25: Main Block
Connector x 2 Refer to “Notes on Assembling the LCD unit” when assembling. (page 4-6) #243 (1) Claws Multi Lid Claws Main Section (See page 4-4) #243 (1) #243: M1.4 X 3.5 Claws (Black) Claws 4-412-769-01 Claws #243 (2) #243 (1) DSC-HX60/HX60V... - Page 26 Hold the Lens Block at the Do not hold the following part. center of both sides. Zoom Motor Very weak Hold here. Connector #243: M1.4 X 3.5 (Black) 4-412-769-01 Focus Lens Lens Barrier Very weak Focus Unit Very weak Very weak DSC-HX60/HX60V...
- Page 27 Do not touch this part. (DSC-HX60V only) MIC Holder Plate #284 (Rotary Base) RL-1012 Flexible Board #284 Flash pop-up Button #140 Insulating sheet #28: M1.4 X 4.0 (Tapping) #140: M1.7X 2.0 #284: M1.4 X 3.0 (Tapping) (Silver) (Black) (Black) 3-348-998-61 2-635-562-01 4-433-882-21 Solders DSC-HX60/HX60V...
-
Page 28: Complementary Information
(2) Notes on Assembling the LCD unit After the LCD unit has been installed, make sure that the Flexible Cabinet (Upper) Assy Board of the LCD unit is arranged within the SY-1032 Board area. SY-1032 Board Adjust the position Flexible Board of the LCD unit DSC-HX60/HX60V... - Page 29 (2) Connect the BT-2010 Flexible Board to the Terminal Battery (6) Notes on Assembling the Upper Block Board. BT-2010 Flexible Board Upper Block Speaker Cabinet (Front) Terminal Battery Board BTH Assy (3) Set the Lithium Rechargeable Battery. Route the speaker harnesses. Lithium Rechargeable Battery DSC-HX60/HX60V...
-
Page 30: Lens Block
4. Heat the Ornamental Ring A with a drier. 5. Turn the Ornamental Ring A clockwise and counterclockwise to detach it. Ornamental Ring A Tweezers Drier Solvent 6. Disengage the four claws and remove the Barrier Assy. Claws Barrier Assy DSC-HX60/HX60V... -
Page 31: Installation
2. Attach two Barrier Tapes so that the end of each tape comes to the dent. Note: Attach Barrier Tapes carefully so that they do not wrinkle. 3. Attach the Ornamental Ring A and push it gently. Ornamental Ring A Barrier Tapes Barrier Tapes DSC-HX60/HX60V... - Page 32 DC Motor Worm Assy Disconnect the flexible board. 6. Disconnect the three sensors on the LF-2038 Flexible Board. 7. Remove the five screws to detach the Rear Lens Assy. LF-2038 Flexible Board Screws Screws Rear Lens Assy Sensors Sensor DSC-HX60/HX60V 4-10...
- Page 33 12. Insert the Gear B and turn it clockwise to set the lens unit in the TELE end state. Note: Turn the Gear B to the maximum. 13. Release the flexible board from the boss and pull the Flexible Board out of the hole. Flexible Board Boss Flexible Board Gear B Hole DSC-HX60/HX60V 4-11...
- Page 34 Note: Turn the Gear B to the maximum. Gear B Gear B 15. Remove the 3 Group Frame Block Assy and the Core Unit_1 from the Fixed Barrel. Core Unit_1 3 Group Frame Block Assy Fixed Barrel Fixed Barrel Core Unit_1 DSC-HX60/HX60V 4-12...
- Page 35 Note: For removing the Barrier Assy, refer to “(1) Ornamental Ring A or Barrier Assy Replacing Method”. Note For removing the Ornamental Ring A Rear edge of Core Unit_3 and the Barrier Assy, refer to "(1) Ornamental Ring A or Barrier Assy Replacing Method". Barrier Ring Barrier Assy Front Assy DSC-HX60/HX60V 4-13...
- Page 36 Front Assy Spring White part About 12 (Approx. 4mm) Linear Guide Barrel_A Linear Guide Barrel_A 22. Turn the Barrier Frame to remove it from the 1 Group Frame Block Assy. Barrier Frame Front Assy 1 Group Frame Block Assy DSC-HX60/HX60V 4-14...
- Page 37 24. Unhook the 2G Spring at two locations and remove the 2 Group Frame Block Assy from the Linear Guide Barrel_B. Tweezers 2G Spring 2 Group Frame Block Assy 2 Group Frame Block Assy 2G Spring Linear Guide Barrel_B DSC-HX60/HX60V 4-15...
- Page 38 3. While matching the cabinet numbers of the Cam Barrel and the Linear Guide Barrel_B, insert the Linear Guide Barrel_B into the Cam Barrel turning the Linear Guide Barrel_B in the direction of arrow. Cam Barrel Core Unit_3 Cabinet number Linear Guide Barrel_B DSC-HX60/HX60V 4-16...
- Page 39 Barrel_A Barrier Frame Linear Guide Barrel_A 8. While matching the concave of the Front Assy with the triangle mark on the Core Unit_3, insert the Core Unit_3 into the Front Assy. Front Assy Concave Core Unit_3 Triangle mark DSC-HX60/HX60V 4-17...
- Page 40 Barrel come to the position shown below. Linear Motion Cam Barrel Match the gear end of the Drive Gear Barrel Assy with the semicircular cutout of the Linear Motion Cam Barrel. Diamond mark Concave Drive Gear Barrel Assy DSC-HX60/HX60V 4-18...
- Page 41 Fixed Barrel. Core Unit_1 Semicircular cutout Match the semicircular cutout of the Core Unit_1 with the gear B mounting portion of the Fixed Barrel. Gear B mounting portion Fixed Barrel 15. Insert the Gear B. Gear B Gear B DSC-HX60/HX60V 4-19...
- Page 42 Note: Turn the Gear B to the maximum. Gear B 18. Pass the flexible board through the hole in the Fixed Barrel and fix the flexible board to the groove and the boss. Flexible board Hole Fixed Barrel Boss Groove DSC-HX60/HX60V 4-20...
- Page 43 Gear A Gear WH DC Motor Worm Assy Screws Boss 22. Secure the Rear Lens Assy with five screws. 23. Connect the three sensors on the LF-2038 Flexible Board. LF-2038 Flexible Board Screws Screws Rear Lens Assy Sensors Sensor DSC-HX60/HX60V 4-21...
- Page 44 28. Fix the FG Retainer to the boss and then to the claw. 29. Fix the Z Retainer to the two projections and then to the claw. Claw Projections Claw Claw Boss FPC Retainer Z Retainer FG Retainer Projections 30. Perform the Flange Back Adjustment after the assembling. DSC-HX60/HX60V 4-22...
- Page 45 To perform Destination Data Write for this model, the Adjust manual of the DSC-WX50 series must have been installed. Install the Adjust manual of the DSC-WX50 series in advance. (JAPANESE) これらの機種で調整を行なうには,アジャストマニュアルとアジャストステーションが必要です。 アジャストステーションとは 機種別のアジャストマニュアルを起動するためのソフトウェアです。 アジャストステーションのインストーラと一緒に,インストレーションマニュアルが付いていますので,内容を必ず確認して ください。 アジャストマニュアルとは デジタルカメラ及びカムコーダのサービス用の調整ソフトウェアで,調整及び各種動作確認を行うことが可能です。 アジャストマニュアルのインストーラと一緒に,インストレーションマニュアルが付いていますので,内容を必ず確認してく ださい。 注意1: インストールは必ず Adjust station を先に行なってください。 注意2: この機種で仕向け設定を行うには,DSC-WX50シリーズの Adjust manual がインストールされている必要 があります。 先に DSC-WX50 シリーズの Adjust manual をインストールしてください。 DSC-HX60/HX60V...
-
Page 46: Revision History
Revision History S.M. Rev. Ver. Date History Contents issued 2014.02 Official Release — —...