LG LZ-H025GBA4 Installation Manual
Hide thumbs
Also See for LZ-H025GBA4:
- Owner's manual (19 pages) ,
- Installation manual (23 pages) ,
- Installation manual (25 pages)
Table of Contents
Advertisement
INSTALLATION MANUAL
AIR
CONDITIONER
Please read this installation manual completely before installing the product.
Installation work must be performed in accordance with the national wiring standards
by authorized personnel only.
Please retain this installation manual for future reference after reading it thoroughly.
VENTILATOR
Original instruction
[Representative] LG Electronics Inc. EU Representative : LG Electronics European Shared
Service Center B.V. Krijgsman 1, 1186 DM Amstelveen, The Netherlands
[Manufacturer] LG Electronics Inc. Changwon 2nd factory 84, Wanam-ro, Seongsan-
gu, Changwon-si, Gyeongsangnam-do, KOREA
For more information, Refer to the CD or LG Web site (www.lg.com).
P/NO : MFL67855526
www.lg.com
Advertisement
Table of Contents

Related Manuals for LG LZ-H025GBA4


Summary of Contents for LG LZ-H025GBA4
- Page 1 Service Center B.V. Krijgsman 1, 1186 DM Amstelveen, The Netherlands [Manufacturer] LG Electronics Inc. Changwon 2nd factory 84, Wanam-ro, Seongsan- gu, Changwon-si, Gyeongsangnam-do, KOREA For more information, Refer to the CD or LG Web site (www.lg.com). www.lg.com P/NO : MFL67855526...
-
Page 2: Table Of Contents
Ventilator installation manual TABLE OF CONTENTS Installation Required parts Required tools requirements Safety precautions....3 Introduction ......7 Symbols used in this manual.........7 Feature dimension diagram .......7 Installation ......11 • Screws • Screw driver Installation map....11 • Nuts • Spanner Installation of main body..13 •... -
Page 3: Installation
Safety precautions Safety precautions To prevent injury to the user or other people and property damage, the following instructions must be followed. Incorrect operation due to ignoring instruction will cause harm or damage. The seriousness is classified by the following indications. WARNING This symbol indicates the possibility of death or serious injury. - Page 4 Safety precautions Do not modify or Do not install, remove, Be cautious when extend the power or re-install the unit by unpacking and cable. yourself (customer). installing the product. • There is risk of fire or • There is risk of fire, elec- •...
- Page 5 Safety precautions Install this product in Use the designated When passing metal and environments electrical wires for the ducts through wooden where the outside air terminal board con- buildings clad with intake meets the fol- nections, and connect metal laths, wire laths lowing conditions: the wires securely so or metal, these ducts...
- Page 6 Safety precautions CAUTION Installation Don't connect the Do not install the prod- Install the product in ground wire to the uct at a smoky and an insulated space window frame or water oily place like kitchen from outdoor air. cock. or factory.
-
Page 7: Introduction
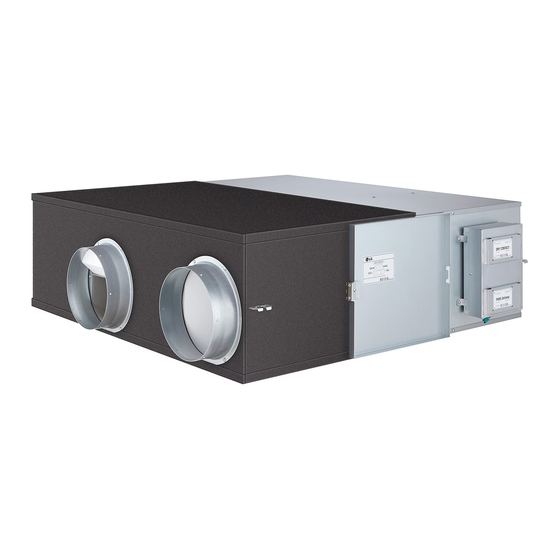
This symbol alerts you to the risk of electric shock. This symbol alerts you to hazards that could cause harm to the product. This symbol indicates special notes. NOTICE Feature dimension diagram Model : LZ-H025GBA4 / LZ-H035GBA4 Suspension fixture Blower for exhausting air (Return Air) (Exhaust Air) (Outdoor Air) - Page 8 Introduction Model : LZ-H050GBA4 Suspension fixture Blower for exhausting air (Return Air) (Exhaust Air) (Outdoor Air) (Supply Air ) Blower for supplying air Control box Maintenance cover Total heat exchanger Air filter Unit : mm Nominal Figure Pitch of suspension fixture Duct connection flange Duct pitch Weight...
- Page 9 Introduction Model : LZ-H080GBA4 / LZ-H100GBA4 Suspension fixture Blower for exhausting air (Return Air) (Exhaust Air) (Supply Air) Blower for supplying air (Outdoor Air) Control box Maintenance cover Total heat exchanger Air filter Unit : mm Nominal Figure Pitch of suspension fixture Duct connection flange Duct pitch Weight...
- Page 10 Introduction Model : LZ-H150GBA4 / LZ-H200GBA4 Maintenance cover Control box Total heat exchanger Air filter Unit : mm Pitch of suspension Figure Duct connection flange Duct pitch Weight fixture Model LZ-H150GBA4 1 313 1 140 738 987 1 176 339 LZ-H200GBA4 h It necessary to secure sufficient space for maintenance more than the dimensions described in the product service.
-
Page 11: Installation
Installation Installation Installation map (LZ-H025GBA4/LZ-H035GBA4/LZ-H050GBA4/LZ-H080GBA4/LZ-H100GBA4) Plane figure RA grille Ventilator SA grille Maintenance space Inspection hatch Front view Duct slope: More than 1/30(wall side) obtaining of right distance Duct (Preventing penetration of rain water) Ceiling fixing bolt(Supplied by installer) New type hood... -
Page 12: Front View
Installation Installation map (LZ-H150GBA4/LZ-H200GBA4) Plane figure RA grille Ventilator Maintenance SA grille space Inspection hatch Front view Duct slope: More than 1/30(wall side) obtaining of right distance Ceiling fixing bolt(Supplied by installer) (Preventing penetration of rain water) New type hood (Preventing penetration of rain water) SA grille... -
Page 13: Installation Of Main Body
Installation Installation of main body Assembly of washer, nut Ceiling fixing bolt Tighten the common washer and nut (more than 21mm (M10) for the outside diameter of M10, to the commercial ceil- ing fixing bolt (M10) as shown in the right figure. Spring washer •... - Page 14 Installation Heat insulating material CAUTION: Aluminium • Check that there are no foreign materi- als (paper, vinyl, etc) or cutoff powders in the duct before connecting the duct. • Take care so that shock may not be Main body applied to the damper plate within the Duct to OA main body when performing the duct connection work.
-
Page 15: Method To Connect Power Cord
After inserting the power cord into the bushing, fully insert it into the termi- nal block for connection. • Fix the power cords with the clamp. • Make sure that the power cords may not be removed by pulling them. LZ-H025GBA4/LZ-H035GBA4/LZ-H050GBA4 LZ-H150GBA4/LZ-H200GBA4 LZ-H080GBA4/LZ-H100GBA4 Power M.D. -
Page 16: How To Connect Remote Controller(Accessory)
Installation How to connect remote controller(accessory) Please connect indoor unit and remote controller using connection cable. Please check if connector is normally connected. Indoor Unit side Connecting cable Please use extension cable if the distance between wired remote controller and indoor unit is more than 10m. -
Page 17: Group Control
Installation Group control When installing more than 2 units of air conditioner to one wired remote controller, please connect as the right figure. Signal wire • If it is not event communication indoor unit, set the unit as slave. • Check for event communication Signal wire through the product manual. -
Page 18: Installer Setting -How To Enter Installer Setting Mode
Installation Installer setting -How to enter installer setting mode CAUTION Installer setting mode is to set the detail function of the remote controller. If the installer setting mode is not set correctly, it can cause problems to the product, user injury or property damage. - Page 19 Installation <Installer setting code table> General ventilation product Function Code Value Test run 01 : Test run setup Address setting 00~FF : Address of central control <ESP level> <ESP value> <Example> SA(Supply Air) ESP 01 : Low 0~255 02 : High EA(Exhaust Air) ESP Function Code ESP step...
-
Page 20: Test Running
Test running Test running Method to operate and select air volume – Interlinked operation with ventilation. It is used when air conditioner is interlinked with ventilation product. It is a function that cools and refreshes indoor air using the ventilation product at the same time oper- ating the air conditioning function. -
Page 21: Method To Operate And Select Air Volume - Ventilation Single Operation
Test running Method to operate and select air volume – Ventilation single operation It is a function to cool and refresh the indoor air using general ventilation product.. Ventilation single operation Press button on the remote controller. Pressing button will change the ventilation mode. -
Page 22: In Case Of Finding A Problem At A Test Running
Test running In case of finding a problem at a test running Symptom Check item Counter-measure The product doesn't work Is power not supplied? Supply power Is the indoor temperature less It's standby mode for protecting than 15 ℃ (59 ℉) or more than total heat exchanger.