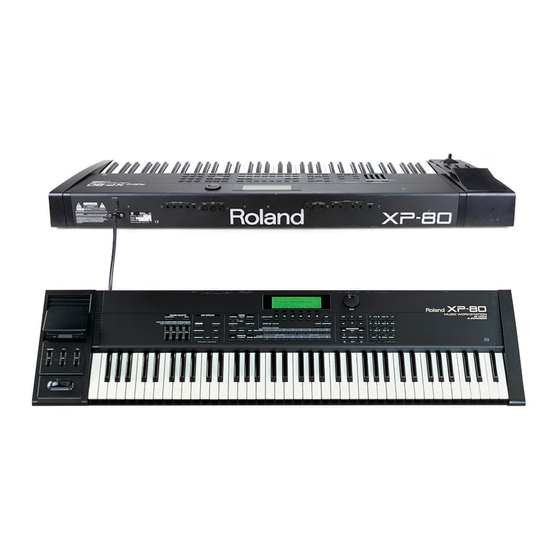
Roland XP-80 Quick Start Manual
Music workstation 64 voice 4 x expansion
Hide thumbs
Also See for XP-80:
- Supplemental notes (8 pages) ,
- Owner's manual (251 pages) ,
- Owner's manual (248 pages)
Table of Contents
Advertisement
QUICK START
Introduction
Thank you for purchasing the Roland XP-80 Music
Workstation. The XP-80 effectively combines a synthe-
sizer sound source and sequencer whose performance
and functions are on a par with the Roland XP-50, along
with extended functions for easier operation and a wide
scope of music production. From live performance to
desk top music applications, the XP-80 delivers all the
power to produce great music.
Using the XP-80 manuals
To be able to enjoy the full music-making potential of
the XP-80, become completely familiar with its func-
tionality and have trouble-free use, please take some
time to read this Quick Start and the Owner's Manual.
Quick Start
This manual explains how you can quickly and easily
begin enjoying the XP-80. To take complete advantage
of the many advanced functions of the XP-80, first read
the Quick Start manual, then the Owner's Manual.
Owner's Manual
Be sure to read Chapter 1 which explains XP-80 basic
concepts and operation. The remaining chapters can be
read for more information as necessary, referring to the
contents or indices.
Copyright
1996 ROLAND CORPORATION
All rights reserved. No part of this publication may be
reproduced in any form without the written permission of
ROLAND CORPORATION.
Contents
controls ..............................................2
Connect your XP-80 ..........................6
Turn the power on .............................7
Play a demo song..............................8
Play sounds .....................................10
Reset to default factory settings.................................10
Select and play Patches.............................................10
Play percussion sounds from the keyboard ...............11
Try out performance functions ...................................12
Play arpeggios (Arpeggiator) .....................................14
Try out the demo disk .....................15
Listen to the demo songs ...........................................15
Combine Patterns for playback ..................................16
Add rhythmic 'feel' to the songs .................................18
Try out some user groove templates..........................18
Playing songs in sequence (Chain Play)....................20
Record a song .................................21
Select a Performance.................................................21
Clear internal memory................................................22
Record the drums using realtime recording ...............22
View the recorded data ..............................................25
Record the bass using step recording........................25
Record the melody using realtime recording..............27
for the song .....................................29
Select a different Patch for the melody ......................29
Assign a new name to the Performance ....................29
Store the Performance ...............................................30
Save your new song........................31
Format a disk .............................................................31
Save your song to disk...............................................32
DanceKit...........................................33
Profiles of composers.....................36
1
Advertisement
Table of Contents

Related Manuals for Roland XP-80


Summary of Contents for Roland XP-80
-
Page 1: Table Of Contents
Workstation. The XP-80 effectively combines a synthe- sizer sound source and sequencer whose performance and functions are on a par with the Roland XP-50, along with extended functions for easier operation and a wide scope of music production. From live performance to desk top music applications, the XP-80 delivers all the power to produce great music. -
Page 2: Names And Functions Of Buttons And Controls
Press this button ON when adjusting volume balance in real time using the four sliders. B. KEY EFFECTS section The buttons in this section allow you to assign various functions to the keys of the XP-80’s keyboard. [RPS] Switches RPS on/off. [ARPEGGIO] Switches Arpeggiator on/off. - Page 3 [SHIFT], the value will change in bigger increments. I. SEQUENCER section The buttons in this section are used for playback and recording of the XP-80’s sequencer. [REC] Press this to begin recording. BEAT indicator This blinks in sync with the tempo and beat of the song.
-
Page 4: Side Panel
[FWD] Use this button to fast-forward the song. Pressing this button while holding down [SHIFT] moves you to the end of the song. If you hold down this button as you press [BWD], the song will fast-forward faster. [0]–[9] (Numeric keys) Use these to set a value. -
Page 5: Rear Panel
Rear panel POWER Power switch Press to turn the power on/off. AC inlet Connect the AC power cable (included) to this inlet. With units rated for 117V operation, the AC cable is already connected to the unit. CONTROL PEDAL HOLD THRU CONTROL PEDAL 1–4 jacks You can connect optional expression pedals to these... -
Page 6: Connect Your Xp-80
Connect your XP-80 The XP-80 does not contain an amp or speakers. In order to hear sound, you will need to con- nect it to a keyboard amp, audio system, or headphones. Refer to the following diagram and connect the XP-80 to the external equipment you are using. -
Page 7: Turn The Power On
Turn the power on of your amp or audio system. Play the XP-80 and gradually raise the volume controls of the XP-80, your amp or mixer to an appropriate volume level. VOLUME Be careful not to raise the VOLUME slider of the XP-80 too much. -
Page 8: Play A Demo Song
Play a demo song The XP-80 contains a demo song and you use ‘demo play’ to play it. It’s the easiest introduction to the XP-80’s exceptional sounds and effects. If you play a demo song, the current song existing in internal memory will be lost. To keep the song in the internal memory, save the song to disk (p.32) before executing demo play. - Page 9 To modify the volume level of each Part Press [F6] (Info), then [F4] (Volume) to call up the Part Information display for Volume. Press [l], [r], [u] or [d] to move the cursor (black box) to the Part whose volume level you want to modify and set the desired volume level.
-
Page 10: Play Sounds
REVERB Select and play Patches The XP-80 contains a large number of sounds ready for you to play. The sounds that you select and play on the XP-80 are generally called ‘Patches.’ Here’s how to select and play Patches. <Procedure>... -
Page 11: Play Percussion Sounds From The Keyboard
UTILITY EFFECTS CHORUS Play percussion sounds from the keyboard The XP-80’s Rhythm Sets contain a wide variety of percussion sounds and special effects. Here’s how to select a Rhythm Set and play percussion sounds. <Procedure> Press [RHYTHM]. The Play display (RHYTHM) will appear. -
Page 12: Try Out Performance Functions
While playing the keyboard, you can move the sliders up or down to modify the volume level or timbre. How sound varies depends on the current setting. For details, refer to “XP-80 operating envi- ronment setup (System parameters and their functions)” (p.88) in the Owner’s Manual. - Page 13 Solo You can play using single notes, by pressing [SOLO] (indicator lights). This function is especial- ly effective when playing a sax, flute or other monophonic instrument. Using [PORTAMENTO] with [SOLO] ON allows you to simulate performance techniques like violin glissandos. KEY EFFECTS ARPEGGIO PORTAMENTO...
-
Page 14: Play Arpeggios (Arpeggiator)
Play arpeggios (Arpeggiator) You can play a broken chord (arpeggio) automatically, by simply pressing a chord. For exam- ple, if you press a C major chord, the XP-80 plays an arpeggio such as C G... <Procedure> Press [PATCH]. Press [ARPEGGIO] to turn the indicator on. -
Page 15: Try Out The Demo Disk
Try out the demo disk Listen to the demo songs The disk supplied with XP-80 contains 8 demo songs. Listen to the demo songs to get a better idea of just what the XP-80 can do. File Name DEMO_000.SVQ DEMO_001.SVQ DEMO_002.SVQ... -
Page 16: Play Back A Pattern By Pressing Specific Keys (Rps).16
These Pattern collections will not play back even when you press [STOP/PLAY]. By pressing specific keys, however, you can play back drum, bass or other instrument phrases. Here’s how you can play a song combining these Patterns. Song name Composer Tatsuya Senoh Copyright © 1995 Roland Corporation... - Page 17 Press [STOP/PLAY]. No sound will play, but the sounds to be used for Pattern playback will be selected. By putting the XP-80 in playback mode, you can synchronize the timing at which each Pattern will begin playback. Press various keys to play back the Patterns, referring to the figure below.
-
Page 18: Add Rhythmic 'Feel' To The Songs
To end preview, press [STOP/PLAY] again. Try out some user groove templates In addition to the templates stored in the XP-80’s memory (PRE:001–PRE:071), you can also select user groove templates for Groove quantization. User groove templates are those you can manipulate for a Groove Quantize based on the feel of any songs you like. - Page 19 Press [ENTER] to finalize the song selection. The box surrounding the song number and file name will disappear, and the cursor will be positioned at the song number. Press [F2] (Quantiz). The message “This Song is not Internal Song. Load anyway?” will be displayed. Press [F5] (OK) to load the song into the internal memory.
-
Page 20: Playing Songs In Sequence (Chain Play)
Playing songs in sequence (Chain Play) Chain Play successively plays back songs on disk in the order you specify. The demo disk con- tains “XP-80.SVC” which is preset to play back song numbers 01–08 successively. Here’s how to perform chain play. -
Page 21: Record A Song
Record a song Here’s how to use the XP-80 to record a simple song. On the XP-80, the musical performance data for one song or composition is called a ‘song.’ As you record the following sample song, you’ll become familiar with basic recording procedures. -
Page 22: Clear Internal Memory
Clear internal memory A song to be recorded must first be loaded into internal memory. You will need to clear the memory before recording a new song. <Procedure> Press [UTILITY]. Press [6], then [ENTER]. The Song Initialize display (UTILITY/SngInit) appears. Press [F6] (Execute) to clear internal memory. - Page 23 Select Phrase track for the recording destination. Press TRACK/PART [10] and the indicator will blink. When you select Phrase track 10, the drum sound of the correspondingly numbered Part 10 will automatically be selected for recording. BANK TRACK/PART TONE SWITCH NUMBER TRACK/PART This completes preparations for recording.
- Page 24 <Rehearsal> In recording mode, the Rehearsal function allows you to confirm which percussion instrument is assigned to each key or practice the passage, without actually recording the notes. <Procedure> Press [F6] (Rehrsal) while in recording mode. A “ ” symbol will be displayed next to “Rehrsal.” To return to normal recording mode, press [F6] (Rehrsal) again.
-
Page 25: View The Recorded Data
View the recorded data The notes you record on the sequencer are recorded as MIDI messages. Let’s use the Microscope display (SEQ/Micro) to check the drum performance data you recorded just now. <Procedure> While holding down [SHIFT], press [BWD] to move right to the beginning of the first measure of the song. - Page 26 Press [REC]. The Step Recording display (SEQ/Micro) will appear. This completes preparations for recording. Now let’s record the notes by following the staff notation. Select the step time (note length) for the first note. The first note to be input is a quarter note. Move the cursor to “Step Time,”...
-
Page 27: Record The Melody Using Realtime Recording
Next, you’ll input an eighth-note rest. Select an eighth note as the step time, by turning the VALUE dial counterclockwise or pressing [DEC], then press [F6] (REST). Next you’ll enter two sixteenth notes. Select a sixteenth note as the step time, by turning the VALUE dial counterclockwise or pressing [DEC], then press the G2 key twice. - Page 28 Select Phrase track 1 as the recording destination of the melody, by pressing TRACK/PART [1]. The indicator will blink. By selecting the Phrase track 1, “64voice Piano” assigned to the corre- spondingly numbered Part 1 will be ready for recording. BANK TRACK/PART NUMBER...
-
Page 29: Create An Appropriate Performance For The Song
Create an appropriate Performance for the song The sample song you’ve just recorded uses a preset Performance. However, that Performance’s settings may not be ideal for your song. This section will explain how you can modify the Performance to better suit your song. Different aspects of a Performance can be modified, but as an example, let’s change the Patch “PR-A:001 64voice Piano”... -
Page 30: Store The Performance
Store the Performance The Performance settings that you modify are temporary. They will be lost if you turn the power off or select another Performance. If you wish to retain the modified settings, you must store them in user memory. <Procedure>... -
Page 31: Save Your New Song
Check the disk. The XP-80 uses 2DD or 2HD 3.5 inch floppy disks. When you format a disk, all data existing on that disk will be lost. If you will be using a disk that has been used with another device, make sure that it does not contain data you wish to keep. -
Page 32: Save Your Song To Disk
Save your song to disk You can save your song to the disk you just formatted. <Procedure> Make sure that the Disk Menu display (DISK/Menu) is up. If another display is showing, press [DISK] to call up the Disk Menu display. Press the numeric key [2], then [ENTER]. -
Page 33: Dancekit
The “Dance Kit” disk contains carefully selected sounds and music data geared toward the cur- rent dance music scene. By using this disk, you will be able to hear for yourself how the XP-80 can be used to its full potential. Maybe it will provide some hints which can be used for your own music! In the “Dance Kit”... -
Page 34: Demo Songs
Roland Corporation holds the copyrights to all the Phrases of these Patterns. You may use these Phrases when creating new works of your own without requesting permission from Roland. Roland Corporation, however, assumes no responsibility or liability whatsoever with regard to any infringements upon the copyrights of any third parties that may result through your use of these materials. - Page 35 Performance (user) No. Name Key Mode Maze Magic LAYER WhatIsThis? LAYER Pulsey Hamng LAYER Sublimation LAYER Cheesy LAYER Low Pressure LAYER Labyrinth 2 LAYER Childhood LAYER Piper LAYER Sirens Pad LAYER Dual Juno LAYER Power Saw LAYER S&H Pad 5th LAYER Bs+AnaSeq LAYER...
-
Page 36: Profiles Of Composers
Tatsuya Senoh A Roland engineer who is a member of the XP-80 develop- ment team, and also the possessor of a deep understanding of music. The included disk contains demo songs created by Mr.