Advertisement
Quick Links
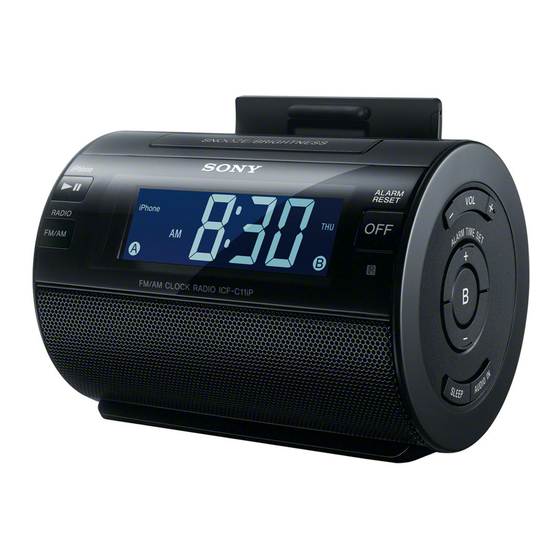
Personal Audio System
Operating Instructions
©2013 Sony Corporation Printed in China
ICF-C11iP
Before operating the system, please read this guide thoroughly
Getting started
and retain it for future reference.
WARNING
To reduce the risk of fire or electric shock, do
Connecting to an AC
not expose this apparatus to rain or moisture.
power source
To reduce the risk of fire, do not cover the ventilation of the
apparatus with newspapers, tablecloths, curtains, etc. And do
Connect the AC adaptor (supplied) to the DC IN 6V jack on the
not place lighted candles on the apparatus.
rear of this unit firmly and plug it into a wall outlet.
To reduce the risk of fire or electric shock, do not expose this
apparatus to dripping or splashing, and do not place objects
filled with liquids, such as vases, on the apparatus.
Do not install the appliance in a confined space, such as a
bookcase or built-in cabinet.
Do not expose the batteries (battery pack or batteries installed)
to excessive heat such as sunshine, fire or the like for a long time.
As the main plug of AC adaptor is used to disconnect the AC
adaptor from the mains, connect it to an easily accessible AC
outlet. Should you notice an abnormality in it, disconnect it from
the AC outlet immediately.
The nameplate and important information concerning safety are
located on the bottom exterior of the main unit and on the
surface of the AC adaptor.
Notes
CAUTION
Do not twist or place heavy objects on the AC adaptor cord.
Danger of explosion if battery is incorrectly replaced. Replace
To disconnect AC power, grasp the plug itself, not the cord.
only with the same type.
About the battery as a backup
On copyrights
power source
iPhone, iPod, iPod nano, and iPod touch are trademarks of Apple
Inc., registered in the U.S. and other countries.
This unit contains a CR2032 battery as a backup power source to
Lightning is a trademark of Apple Inc.
keep the clock and the alarm operating during a power
"Made for iPod, " and "Made for iPhone" mean that an electronic
interruption. (No Power No Problem system)
accessory has been designed to connect specifically to iPod or
When to replace the battery
iPhone, respectively, and has been certified by the developer to
meet Apple performance standards. Apple is not responsible for
the operation of this device or its compliance with safety and
When the battery becomes weak, "" appears in the display.
regulatory standards. Please note that the use of this accessory
If a power interruption occurs while the battery is weak, the
with iPod or iPhone may affect wireless performance.
current time and alarm will be erased.
No Power No Problem is a trademark of Sony Corporation.
Replace the battery with a Sony CR2032 lithium battery. Use of
another battery may cause a fire or explosion.
Notes
To replace the battery, see "Replacing the battery of the unit" for
This unit is not specified for use with an iPad, and malfunction
details.
may result if used with one.
In the Operating Instructions, "iPhone" is used as a general
Connecting the AM loop
reference to functions on an iPod or iPhone, unless otherwise
specified by the text or illustrations.
aerial
Precautions
The shape and length of the aerial is designed to receive AM
signals. Do not dismantle or roll up the aerial.
To disconnect AC power, grasp the plug itself, not the cord.
Since a strong magnet is used for the speaker, keep credit
1
Remove only the loop part from the plastic
cards using magnetic coding or spring-wound watches, CRT-
stand.
based TVs, or projectors, etc., away from the unit to prevent
2
possible damage from the magnet.
Set up the AM loop aerial.
Do not leave the unit in a location near a heat source such as a
Refer to the Startup Guide.
radiator or airduct, or in a place subject to direct sunlight,
3
Insert the AM loop aerial connector in the AM
excessive dust, mechanical vibration, or shock.
ANTENNA jack on the rear of the unit.
Allow adequate air circulation to prevent internal heat build-
up. Do not place the unit on a surface (a rug, a blanket, etc.) or
To remove the AM loop aerial
near materials (a curtain) which might block the ventilation
Push and hold down the tab of the aerial terminal clamp, and
holes.
remove the AM loop aerial.
Should any solid object or liquid fall into the unit, unplug the
unit and have it checked by qualified personnel before
operating it any further.
During a thunderstorm, do not touch the antenna (aerial) and
plug.
Do not touch the unit with wet hands.
Do not place the unit anywhere near water.
Notes on the AC adaptor
Use only the supplied AC adaptor. To avoid damaging the
system, do not use any other AC adaptor.
Remote control
Before using the supplied remote for the first time, remove the
Polarity of the plug
insulation film.
Plug the AC adaptor into a nearby wall outlet (mains). In the
case of a problem, unplug it from the wall outlet (mains)
immediately.
Do not install the AC adaptor in a confined space, such as a
bookcase or built-in cabinet.
To reduce the risk of fire or electric shock, do not expose the
AC adaptor to dripping or splashing, and do not place objects
filled with liquids, such as vases, on the AC adaptor.
NOTES ON LITHIUM BATTERY
Wipe the battery with a dry cloth to assure a good contact.
Be sure to observe the correct polarity when installing the
When to replace the battery
battery.
Do not hold the battery with metallic tweezers, otherwise a
With normal use, the battery (CR2025) should last for about 6
months. When the remote can no longer operate the unit,
short-circuit may occur.
replace the battery with a new one.
If you have any questions or problems concerning your unit,
please consult your nearest Sony dealer.
Note
If you are not going to use the remote for a long time, remove
the battery to avoid any damage that may be caused by
leakage or corrosion.
4-450-037-12(1)
Operations
Setting the clock
When using the unit for the first time after purchase, perform the
following on the unit:
1
Remove the insulation film of the backup
battery at the bottom of the unit.
2
Plug in the unit.
3
Press and hold CLOCK/MODE until the year
flashes in the display.
4
Press ALARM TIME SET + or – repeatedly to set
the year, and then press CLOCK/MODE.
5
Repeat step 4 to set the month, day, hour and
minute.
The seconds start incrementing from zero.
Notes
If you do not press any button for about 1 minute while
setting the clock, the clock setting will be canceled.
A 100-year calendar (2013 - 2112) is installed in the unit. When
the date is set, the day of the week is automatically displayed.
MON = Monday, TUE = Tuesday, WED = Wednesday,
THU = Thursday, FRI = Friday, SAT = Saturday, SUN = Sunday
To change the time format
You can choose a time format of the 12-hour system (default) or
the 24-hour system.
Press and hold OFF and SNOOZE/BRIGHTNESS on the unit at
the same time for at least two seconds.
The time format toggles between the 12-hour system ("AM
12:00" = midnight) and the 24-hour system ("0:00" = midnight).
To display the year and date
During clock display, press DISPLAY/MEMORY once for the date
and month, and press it again for the year.
After a few seconds, the display will change back to the current
time automatically.
To change the display to the
summer time (daylight saving
time) indication
Press and hold OFF and DISPLAY/MEMORY on the unit at the
same time for at least 2 seconds.
" " and "On" appear in the display and the time indication
changes to the summer time (daylight saving time).
To deactivate the summer time (daylight saving time)
adjustment, press and hold OFF and DISPLAY/MEMORY on the
unit at the same time for at least 2 seconds again.
" " and "OFF" appear in the display to show that summer time
(daylight saving time) has been canceled.
Notes
The summer time (daylight saving time) adjustment is
defaulted to off.
When the summer time (daylight saving time) adjustment is
activated, the time will be one hour ahead.
For places where the summer time (daylight saving time) is
not one hour ahead of the standard time, when the summer
time (daylight saving time) begins, adjust the time manually.
Using an iPhone with the unit
To set an iPhone
1
Open the Dock cover.
2
Hold the unit, and set the iPhone onto the unit
in line with the Dock connector.
side facing up
When an iPhone is difficult to set
Push the Dock cover slightly backwards while setting the iPhone.
Startup Guide
Note on operating an iPhone
Hold the iPhone when you are operating it.
To remove an iPhone
Hold the unit when removing the iPhone.
Notes
An iPhone in a case or cover can be set on this unit. Remove
the case or cover if it interferes with the Dock connection.
Set the iPhone on the Dock connector firmly.
When setting or removing the iPhone, hold it at the same
angle as the Dock connector on the unit. Do not pull the
iPhone forward too far.
When setting or removing the iPhone, hold the unit securely.
Do not twist or bend the iPhone, as this may result in
connector damage.
Remove the iPhone when transporting it; otherwise, a
malfunction may result.
To charge an iPhone
You can use the unit as a battery charger for an iPhone.
Charging begins when the iPhone is connected to the unit. The
charging status appears in the display of the iPhone. For details,
refer to the user's guide of the iPhone.
Continued on the reverse side
Advertisement

Related Manuals for Sony ICF-C11iP


Summary of Contents for Sony ICF-C11iP
- Page 1 To charge an iPhone time (daylight saving time) begins, adjust the time manually. No Power No Problem is a trademark of Sony Corporation. Replace the battery with a Sony CR2032 lithium battery. Use of another battery may cause a fire or explosion. Notes You can use the unit as a battery charger for an iPhone.
-
Page 2: Specifications
To return to the iPhone component does not work. Sony cannot accept responsibility in the event that data Press and hold DISPLAY/MEMORY for at least recorded to an iPhone is lost or damaged when using the Press .