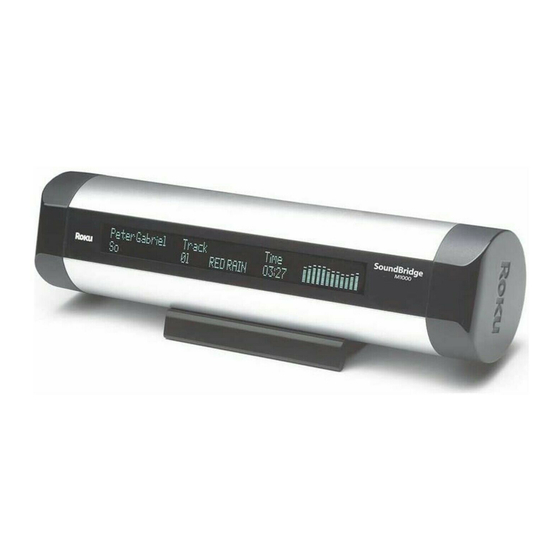
Roku SoundBridge User Manual
Roku network music player user guide soundbridge
Hide thumbs
Also See for SoundBridge:
- User manual (40 pages) ,
- User manual (88 pages) ,
- Manual (63 pages)
Table of Contents
Advertisement
Quick Links
Advertisement
Table of Contents

Related Manuals for Roku SoundBridge


Summary of Contents for Roku SoundBridge
- Page 1 User Guide | Software v 2.0...
- Page 2 Thanks for purchasing a Roku SoundBridge! We hope you enjoy using it as much as we’ve enjoyed creating it. SoundBridge lets you play music you have stored on your PC or Mac anywhere in your home. It also lets you access many of the thousands of Internet radio stations that broadcast on the web.
-
Page 3: Table Of Contents
Read on for detailed explanations of the steps above. I. Music Server Software Requirements Roku SoundBridge is designed to act as a remote client for several kinds of music jukebox software. With SoundBridge software version 2.0, SoundBridge users can connect directly to their Windows Media Connect or Musicmatch music library, as well as to iTunes. -
Page 4: Hooking Up Your Home Network
3. Download Windows Media Connect, a free download from Microsoft available on Oct 12, 2004, or via Windows Update Installer. 4. Check to make sure your SoundBridge software is running v. 2.0 using the “Check for new software” command in the “System Configuration” menu. SoundBridge will then reboot. -
Page 5: Hooking Up Soundbridge To Your Speakers Or Stereo System
III. Hooking Up SoundBridge to Your Speakers or Stereo System Both end caps of your SoundBridge unit are removable. The right end cap covers the audio connectors and AC power connector, the left one holds an Ethernet connector and your Wi-Fi Network adapter CompactFlash slot (Wi-Fi adapter may be sold separately depending on your SoundBridge model). -
Page 6: Connecting Soundbridge To Ac Power
IV. Connecting SoundBridge to AC Power Plug the small power cord into the SoundBridge unit, and plug the other end into to a wall outlet. Note that the back of the end cap has a hole for routing your audio and power cables toward the back of the unit. -
Page 7: Enabling Music Sharing
Control Panel.) On the Wizard window that appears, scroll to the bottom of your devices list and click “Add.” Select your SoundBridge device and click “OK.” Check to ensure that SoundBridge appears on your list of authorized devices. Click “Close.”... -
Page 8: Choosing Your Music Library
An optional wall mounting kit is available for sale at www.rokulabs.com/ buy. This allows the SoundBridge to be mounted to the wall or under a cabinet using a sleek, hidden bracket which screws into your wall. For more information, please visit Roku’s web site. -
Page 9: Music Playback - Overview
After your software has been updated, you may want to check Roku’s web site for the latest version of the SoundBridge user guide. Roku will release a new version of the user guide for PDF download if new features or functions have been added to the SoundBridge software. -
Page 10: Screen Icons Quick Reference
MUSIC PLAYBACK — TUTORIAL The Main Menu To begin navigating through your music, start on your “Main” menu, by pressing the Menu button. The display on SoundBridge should look something like this: Ë PLAYLISTS BROWSE Only the first two lines of the Main Menu are displayed at once (or the first four lines, if you are... -
Page 11: Browsing By Album
Please note that songs purchased from the Apple Music Store will be denoted in the display with a padlock œ icon. SoundBridge is not able to play back these “locked” files – they will simply be skipped over during playback. -
Page 12: Building A Song Queue
At any point, you can review what’s in your Song Queue by pressing the down arrow 6 from the Now Playing screen, which is the default screen that appears while SoundBridge is playing. The Now Playing screen looks something like this: DON’T PANIC... -
Page 13: Erasing A Song Queue
Shuffle Off — will play everything in your Song Queue in the original order. You can execute the Repeat and Shuffle command from any menu in SoundBridge. Even though you can only see the mode change on the Now Playing screen, the command is taking effect. -
Page 14: Browsing By Artist, Song Or Composer
Browsing by Artist, Song or Composer From the Main Menu, use the Down 6 arrow to highlight BROWSE and then press Select. Navigate to BROWSE ARTISTS and press Select. Your screen will look something like this: Ë ANNIE LENNOX <A> BEN FOLDS FIVE Find the artist you would like to play and press Select. -
Page 15: Internet Radio
One of SoundBridge’s coolest features is its ability to play Internet radio stations. Currently, iTunes offers the easiest way to play Internet radio on SoundBridge. You can also use WinAmp with a free plugin from twonkyvision.com that will enable http streams for internet radio. -
Page 16: Changing Music Libraries
The only sure way to know if a radio station will play on SoundBridge is simply to try it. Changing Music Libraries Press Menu on your remote control. Navigate down to “Change Library or Configuration” and press Select. All your available libraries will be displayed. Press Select to access your desired music library. -
Page 17: Restoring Factory Default Settings
4444. Type “?” at the command prompt to see a list of commands. We will be documenting in more detail how to control a SoundBridge in the coming months, as well as updating the software in this area. When documentation is available, it will be posted on the developer section of our web site. - Page 18 6. Turn on your SoundBridge by plugging the power cord into the right side of the device, then into the wall AC outlet. Verify that the screen displays the Roku logo. 7. Upon startup, SoundBridge will attempt to connect to any wireless access point within range that does not require a password.
- Page 19 You may need to enter the password for your base station. You should then see the screen below. The line labeled “Wireless Network Name”: is the name of your network, also known as an “SSID.” You will either select this network on the SoundBridge screen or enter it manually if your network is “closed.”...
- Page 20 “Base Station” menu (see illustration above) and write down the value that appears in the dialog (see illustration below). This is the value you will enter into SoundBridge’s wireless setup password field. (Select password type “hex” in the SoundBridge menu.) Example 2: Apple AirPort (PC Users) Step 1: Open the AirPort Admin utility (Start/Programs/Airport Admin Utility).
- Page 21 Step 2: Make a note of the name of your wireless network in the “Network Name” field (see Step 3: Select the “Equivalent Network Password” from the “Base Station” drop down menu. below).
- Page 22 IP address. After successfully logging in, you will see a page similar to the following: Make a note of the “SSID” (in this case “wireless”), this you will need to enter into the “SSID” field in SoundBridge’s wireless setup.
- Page 23 “Key 1” field (“49774B692D” in this case). This is the value you will enter into SoundBridge’s wireless setup’s “Password” field. You now have the information necessary to configure your SoundBridge to connect to your network. You may close your web browser.
- Page 24 Make a note of the value of the key with the active radio button (the default key, in this case “Key 1”: “562E7FF0A0”). This is the password that you will need to enter into your SoundBridge’s wireless setup “Password” field. You now have the information necessary to set up your...
-
Page 25: Customer Support
Roku SoundBridge interfaces to iTunes using the Apple DAAP protocol, under license from Apple. This license gives apple the right to terminate the license for any reason. Roku has no control over this, and is not responsible in the unlikely event Apple does so. In this event, Roku will use commercially reasonable efforts to provide software that installs on your PC via a download that provides similar functionality, but Roku makes no representations or warranties regarding the features available in such a situation. -
Page 26: Limited Warranty
For a period of one (1) year from the date of purchase (“Warranty Period”), if ROKU determines that the SoundBridge is defective, ROKU will repair the unit or replace the unit (with either a new or rebuilt SoundBridge unit), at its option, at no charge and, if applicable, will pay the labor charges incurred by any SoundBridge authorized service facility. -
Page 27: Fcc Warnings And Safety Information
2. This device must accept any interference received, including interference that may cause undesired operation. Responsible party (contact for FCC matters only): Roku, LLC, 399 Sherman Ave. #12, Palo Alto, CA 94306, 650-321-1394. For customer service questions go to: http://www.rokulabs.com/support/. - Page 28 8. Accessories. Do not place this product on an unstable cart, stand, tripod, bracket or table. The product may fall, causing serious injury to a child or adult and serious damage to the product. Use only with a cart, stand, tripod, bracket or table recommended by the manufacturer, or sold with the product.
-
Page 29: Technical Specifications
System Requirements iTunes users: WindowsXP or 2000 SoundBridge Mounting Kit Windows Media Connect users: Windows Easily mount your SoundBridge on a wall or XP with Service Pack 2 beneath a cabinet with concealed hardware that Musicmatch users: Windows 98 SE/Me/XP highlights SoundBridge’s sleek design. - Page 30 Need help? Go to www.rokulabs.com/support © 2004 Roku, LLC. All rights reserved. ROKU, the ROKU logo, and SoundBridge are trademarks or registered trademarks of Roku, LLC in the United States and other countries. All other trademark are trademarks or registered trademarks of their respective owners.