Advertisement
Quick Links
Download this manual
See also:
User Manual
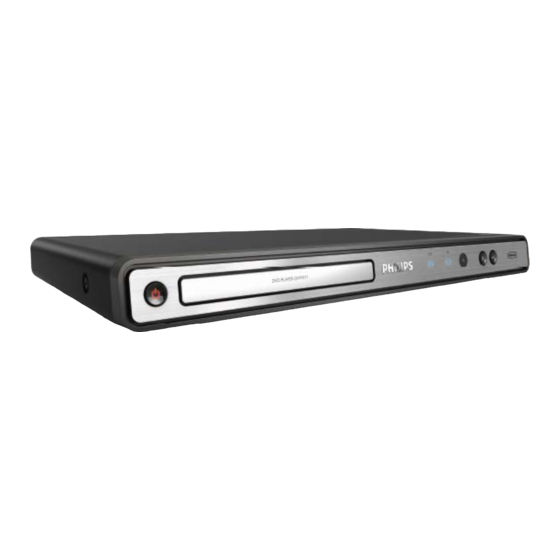
DVD PLAYER
Service Manual
TABLE OF CONTENTS
Technical Specification, PCBs Location....................... 1
Safety Instruction ...................................................... 2
Instruction for Use...................................................... 3
Mechanical and Dismantling Instructions...................... 4
Service Modes, Troubleshooting.................................. 5
Overall Block Diagram, Wiring Diagram......................... 6
Electrical Diagram...................................................... 7
Exploded View Diagram & Service Part List....................8
Revision List............................................................. 9
©Copyright 2009 Philips Consumer Electronics B.V. Eindhoven, The Netherlands
All rights reserved. No part of this publication may by reproduced, stored in a retrieval system or
transmitted, in any form or by any means, electronics, mechanical, photocopying, or otherwise
without the prior permission of Philips.
Published by BU AVM – FK
Version
1.2
Printed in the Netherlands
DVP3100/98 /79/96
Chapter
Subject to modification
3141 785 34401
Advertisement

Related Manuals for Philips DVP3100/96


Summary of Contents for Philips DVP3100/96
- Page 1 Exploded View Diagram & Service Part List………………..8 Revision List……………………………………………………. 9 ©Copyright 2009 Philips Consumer Electronics B.V. Eindhoven, The Netherlands All rights reserved. No part of this publication may by reproduced, stored in a retrieval system or transmitted, in any form or by any means, electronics, mechanical, photocopying, or otherwise without the prior permission of Philips.
-
Page 2: Technical Specification
1.0 TECHNICAL SPECIFICATION VIDEO PERFORMANCE COMPONENT VIDEO RGB Test equipment:Audio Precision System2 Luminance amplitude output: 700mV ± 10% Test discs:CDDA: Philips audio signal test disc 1 RGB unbalance:5% DVD: Philips LVP 9.01 audio test disc Sync. Amplitude: 300mV ± 100mV Load Impedance:100KΩ... - Page 3 1.1 PCBs LOCATION DVD BOARD 8W/2P POWER BOARD DECK AMI POWER SW BOARD KEY BOARD USB BOARD VERSION VARIATIONS Type/Versions: DVP3100 Service policy Board in used: DVD BOARD 8W/2P POWER BOARD KEY BOARD USB BOARD POWER SW BOARD *TIPS: C -- Component Lever Repair. M -- Module Lever Repair X -- OCX...
- Page 4 Select “0” setting = Region Free (confidential) Procedure for SW upgrade 1. The upgrade will provide a document re-named: PHILIPS.BIN “PHILIPS.BIN” copy to USB or CD-ROM into the data; 3. Reading the USB or CD-ROM,in accordance with prompt,press ”OK” key to upgrade.
-
Page 5: Safety Instruction
2.0 Safety instruction 1. General safety 2. Laser safety Safety regulations require that during a repair: This unit employs a laser. Only qualified service . Connect the unit to the mains via an isolation personnel transformer. May remove the cover, or attempt to service this . - Page 6 3.0 INSTRUCTION FOR USE You can download this information from the following websites: http://www.philips.com/support...
-
Page 7: Mechanical And Dismantling Instructions
4.0 MECHANICAL AND DISMANTLING INSTRUCTIONS The following guidelines show how to dismantle the player. Step1: Remove 5 screws around the Top Cover, and then remove the Top Cover(Figure1) Figure 1 Step2:If the tray can’t open in normal way, you can make it through the instruction as below (Figure2) Figure 2 Step2: If it is necessary to dismantle Loader or Front Panel, the Front door should be removed first(Figure3) Figure 3... - Page 8 4.0 MECHANICAL AND DISMANTLING INSTRUCTIONS Step4: Remove the 10 screws on board to dismantle the DVD BOARD & POWER BOARD & LED BOARD (Figure 4&5) Figure4 Figure5...
- Page 9 Trouble shooting chart Spindle motor does not move Motor not move Check the FFC connection Correct connection between 24P and the loader. Check whether “MO_VCC” Check the MOVCC power (VCC) voltage is normal. supply Check whether laser voltage Check/Replace Q10 Q11. (1.9V for CD &...
- Page 10 Trouble shooting chart The power can not be on or off The power can’t be on or off Check the power supply Replace the power board on the power board and the connection to or correct the connection to decoder board is normal. Check if the CON2 on the front Check/Correct connection board to J 6(7PIN) on the decoder board...
- Page 11 Trouble shooting chart Disc cannot be read . Disc cannot be read. Check the FFC connection Check the loaded circuit between 24P and the loader. 1.Check voltage on pin 23 of U2 varies between 0 and 3.3V: Check whether there is 3.3V for CD laser voltage (1.9V for CD 0V for DVD...
- Page 12 Trouble shooting chart Only DVD disc or only disc except DVD can be played Only DVD disc, or only disc except DVD can be Played. Check Check the loaded circuit connection between 24pin and the loader. Check laser voltage (1.9V) output on Collector of Q11, if Check the solder status on U2 and pin 17 of U2 is at low level.
- Page 13 Trouble shooting chart Distorted audio and loud noise Distorted audio and loud noise Check he power supply voltages +12V Replace L2 to the operation amplifying L2 are normal Check whether Replace Q12, Q14 muting transistors Q12, Q14, are normal Checking the U2 leads the feet has no to break Correct connection to open...
- Page 14 Trouble shooting chart Abnormal color of video picture Abnormal color of video picture Check whether the 27MHz Check Y1, R17, C21 and C22 output signal is normal. Check whether the 3.3V Check other of power supply electric and 1.8V power supply circuit voltages on the decoder board are normal.
- Page 15 Trouble shooting chart Remote reception is insensitive or fails. Remote reception is insensitive or fails. Check if the remote Check battery control works properly. Check power Check R1 R2 on front board supply voltage to the remote censor is normal Use an oscilloscope to check if there is output waveform IR1(PIN 3 - RCwaveform)
- Page 16 Trouble shooting chart No video picture, no sound. No video picture, no sound. Check whether voltages from the power Check the loaded circuit board to the decoder board are normal. CVBS(L27 point) waveform Check if the reset circuit consisting of C13, Q4, Q3,R11,R12,R13,R15,R16 is normal Change C13,Q4,Q3 (at a high level for tens of milliseconds, then constantly at 0V).
- Page 17 Trouble shooting chart No display on LED, and buttons do not work LED and buttons do not work Check whether there is correct contact Correct connection between CON1 of front board and J 6 of decoder board Check DV33(+3.3V) Fix power supply board top voltage on the power a power supply for should and front board...
- Page 18 WIRING DIAGRAM SDRAM 3.3V AV-OUT RCA 1*16&4*16 1.8V 3.3V 1.8V ASA 8829B+Sanyo DV38 4558 DVD-CVBS ASA 8829B+ DVD-AU-R DVD-AU-L Sanyo DV38 Y&U&V RCA MT1389L COAX AM5888S SENSOR Flash 8M&16M...
- Page 19 CIRCUIT DIAGRAM- MAIN BOARD +12V +12V [2,4] POWER PART [2,4] DV33 DV33 [2,3,4,5] 4.3K/1%/5.1K 89L_3V3 89L_3V3 FB18 8550 + CE1 10K/1% 220uF/6.3v 0.1uF URST# URST# POWER I/F 5.6dip TROUT TROUT +P12V OUT18 TRIN +P12V TRIN TROUT TROUT TROPEN TROPEN 4x1 W/HOUSING TRCLOSE TRCLOSE FOSO...
- Page 20 CIRCUIT DIAGRAM - MAIN BOARD 89L_3V3 89L_3V3 MCU PART L12 FB600R ADACVDD DQ[0..15] DQ[0..15] RFV18-1 0.1uF 89L_3V3 RFVDD3 DACVDD3 DACVDD3 MA[0..11] MA[0..11] 0.1uF 100uF/10v + CE9 DQM[0..1] DQM[0..1] 0.1uF BA[0..1] 0.1uF 0.1uF 10uF/10v BA[0..1] 100k DCLK DCLK RAS# SERVO RF DeCAP. RAS# CAS# CAS#...
- Page 21 CIRCUIT DIAGRAM - MAIN BOARD DQ[0..15] DQ[0..15] MA[0..11] SDRAM & FLASH PART MA[0..11] DQM[0..1] DQM[0..1] BA[0..1] BA[0..1] DCLK DCLK RAS# RAS# CAS# CAS# SD33 DRAM I/F SD33 + CE19 SDCKE 100uF/10v 0.1uF 0.1uF 0.1uF SF_CK SF_CK SF_CS DCS# SF_CS SF_DI MA10 DQ10 SF_DI...
- Page 22 CIRCUIT DIAGRAM - MAIN BOARD AUDIO PART AUDIO I/F 100pF AKIN AKIN 5.1k AUDIO_MUTE EC21 AUDIO_MUTE 2 10uF/16V NJM4558 +12V +12V 10uF/25V 4700pF 3300pF A_MUTE 100k 2N3904 +12V DV33 DV33 1,2,3,4,5 AVCC AVCC AVCC 1,2,4,5 2N3906/NC 100pF POWER 4.7K 5.1k EC13 10uF/16V NJM4558...
- Page 23 CIRCUIT DIAGRAM - MAIN BOARD CVBS_OUT CVBS_OUT VIDEO PART ASPDIF ASPDIF VIDEO_EN VIDEO_EN VB_5V ASPDIF COAXIAL VIDEO I/F 75,1%/NC 0.1uF R/V_OUT 330pF AUDIO I/F L24 1.8uH 2N3906/NC DV33 DV33 [1,2,3,4] AVCC AVCC [1,2,4,5] +12V 75,1% +12V [1,5] [1,2,5] 100P 100P POWER VB_5V 3906...
- Page 24 CIRCUIT DIAGRAM - FRONT BOARD LED LIGHT & IR 3.3V 100R REM301 IRVCC 3.3V R5 4.7K 3.3V LED1 100R KS1 OPEN/CLOSE CE1 4.7UF/6.3V 100pF POWER ON 120R 120R 2N3904 2N3904 Play/Pause 3.3V LED+ LED- DATA R6 4.7K 2N3904 100pF CON1 CON2 LED+ LED-...
- Page 25 CIRCUIT DIAGRAM - STB/POWER BOARD STB/POWER PART CON4 4x1 W/HOUSING LED3 POWER OFF Standby/Power...
- Page 26 MAIN BOARD TOP...
- Page 27 MAIN BOARD BOTTOM...
- Page 28 7-10 LED LIGHT BOARD TOP PCB COMPONENT LAYOUT...
- Page 29 7-11 LED LIGHT BOARD BOTTOM PCB COMPONENT LAYOUT...
- Page 30 7-12 STB TOP PCB-COMPONENT LAYOUT...
- Page 31 7-13 STB BOT PCB-COMPONENT LAYOUT...
- Page 32 8.0 Exploded View Diagram...
- Page 33 996510029219 AC CORD VDE 12DETCHBLE 1.3M XIEJIN DVP3100/98 CARADP 996510029037 AC CORD CT 79FIXED 1.3M XIEJIN DVP3100/79 ACCORD 996510029658 AC CORD UL 37FIXED 1.3M XIEJIN DVP3100/96 996510029612 R/C T19YY3111-1 BLACK TZH AVCABLE 996510028065 AV CORD RCA/M*3/1.3M BOTH ENDS YI LI...
- Page 34 9.0 REVISION LIST Version 1.0 • Initial release Version 1.1 • Version 1.2 • • Modification spare part list...