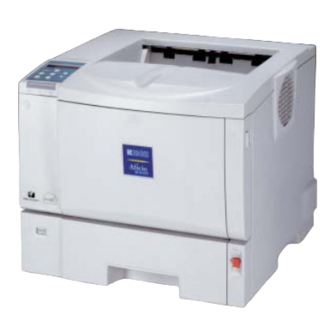
Ricoh Aficio AP400 Operating Instructions Manual
Ricoh printer operating instructions
Hide thumbs
Also See for Aficio AP400:
- Network manual (154 pages) ,
- Setup manual (96 pages) ,
- Operating instructions manual (30 pages)
Table of Contents
Advertisement
Quick Links
Advertisement
Table of Contents

Related Manuals for Ricoh Aficio AP400


Summary of Contents for Ricoh Aficio AP400
-
Page 1: Maintenance Kit
MAINTENANCE KIT Type 400 Operating Instructions... - Page 2 Introduction This manual describes detailed instructions on the operation and notes about the use of this machine. To get maximum versatility from this machine all operators are requested to read this manual carefully and follow the instructions. Please keep this manual in a handy place near the machine.
-
Page 3: Table Of Contents
TABLE OF CONTENTS Trademarks...1 1. Replace Maintenance Kit Before Replacing ...3 Checking the contents of the box...3 Preparing to replace the parts... 4 Replacing Parts...5 Replacing the Friction Pad ...5 Replacing the Paper Feed Rollers ...6 Replacing the Transfer Roller ... 8 Replacing the Fusing Unit ... -
Page 5: Trademarks
Trademarks Microsoft, Windows, and Windows NT are registered trademarks of Microsoft@ Corporation in the United States and/or other countries. Other product names used herein are for identification purposes only and might be trademarks of their respective companies. We disclaim any and all rights in- volved with those marks. -
Page 7: Replace Maintenance Kit
• Be sure to turn off the printer and wait for about an hour before replacing parts. Not waiting for the printer to cool down can result in a burn. -
Page 8: Preparing To Replace The Parts
• The power cord is unplugged from the wall outlet. • The interface cable is unplugged from the printer. Important ❒ Wait about an hour after the printer is turned off to allow internal parts to cool down before replacing the Maintenance Kit. ⇒ p.8 “Replacing the Transfer Roller”... -
Page 9: Replacing Parts
Pull out the paper tray until it stops. B B B B While lifting the front side of the tray, pull it out of the printer. C C C C Remove paper from the paper tray. Place the tray upside down on a flat surface. -
Page 10: Replacing The Paper Feed Rollers
Reference See “Moving and Transporting the Printer” in the Printer Refer- ence on the CD-ROM labeled "Operating Instructions". B B B B Move the printer to the edge of a sturdy and stable table or desk. ZKEM190E ZKEM110E... - Page 11 ❒ Be sure to move the printer hor- izontally. Moving the printer facing up on down may cause the toner to scatter. ❒ Do not put the printer on an un- stable or tilted surface. Note ❒ If the printer is equipped with...
-
Page 12: Replacing The Transfer Roller
E E E E Hold the green parts of the roller on both sides, and remove the roller from the printer as shown in the illustration. ZKEH120E F F F F Insert the new transfer roller on the socket with the gear of the roller positioned on the left. - Page 13 Important ❒ Do not insert the roller on the back of the socket, or the printer might be damaged. ❒ Insert the metallic part of the roller on the socket. If you insert the sponge part of the roller, the roller might be damaged.
-
Page 14: Replacing The Fusing Unit
R CAUTION: • The fusing unit becomes very hot. When installing the new fus- ing unit, turn off the printer and wait about an hour. After that, in- stall the new fusing unit. Not waiting for the unit to cool down can result in a burn. - Page 15 Duplex Unit was removed in step , "Replacing the Paper Feed Rollers". A Insert the rear cover to the in- side grooves on both sides of the printer in a horizontal di- rection. ZKEX224E B Close the rear cover. Proceed to step ZKEX225E...
-
Page 16: Index
INDEX friction pad , 5 fusing unit , 10 paper feed roller , 6 transfer roller , 8... - Page 17 MEMO...
- Page 18 MEMO G830-8600...
- Page 19 Copyright © 2003...
- Page 20 Printed in China GB GB EN USA G830-8600...