
Related Manuals for RCA DRC6282


Summary of Contents for RCA DRC6282
-
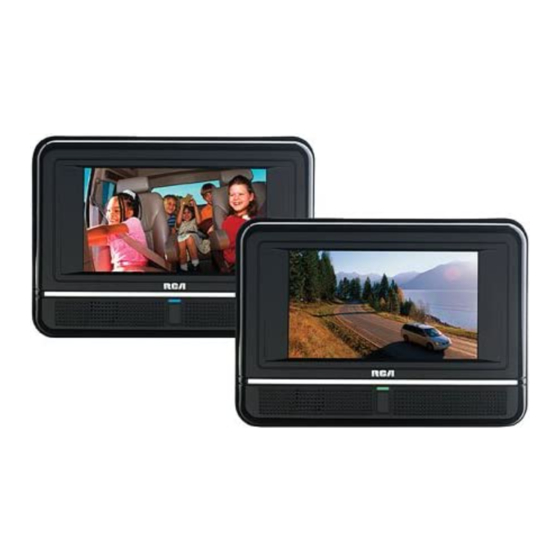
Page 1: User Manual
User manual DRC6282 It is important to read this instruction book prior to using your new product for the first time. -
Page 2: Safety Precautions
Safety Precautions Warning: To reduce the risk of electric shock, do not remove cover (or back). No user-serviceable parts inside. Refer servicing to qualified service personnel. To prevent fire or shock hazard, do not expose this unit to rain or moisture. Do not place objects filled with liquids on or near this unit. -
Page 3: Fcc Information
If your product operates on batteries, adhere to the following precautions: A. Any battery may leak electrolyte if mixed with a different battery type, if inserted incorrectly, or if all batteries are not replaced at the same time. B. Any battery may leak electrolyte or explode if disposed of in fire or an attempt is made to charge a battery not intended to be recharged. -
Page 4: Important Safety Instructions
P l e a s e l o c a t e t h e i n c l u d e d accessories. To order replacement units, visit http:// www.1800customersupport.com/RCA Remote control (with battery) ... x 2 Car power adapter splitter ... x 1 Car power adapter ... -
Page 5: Table Of Contents
Table of Contents Safety precautions ... 1 - 2 FCC information ... 2 Important safety instructions ... 3 Accessories ... 3 Table of contents ... 4 Getting started ... 5 Remote control reference guide .. 6 Unit reference guide ... 7 Power supply ... -
Page 6: Getting Started
Getting Started Remove the plastic sheet before operating remote control. Using the remote control • Point the remote control at the REMOTE SENSOR located on the unit. • When using this unit in bright light, the infrared REMOTE CONTROL SENSOR may not work properly. -
Page 7: Remote Control Reference Guide
Remote Control Reference Guide 1) VIDEO MODE button Press to adjust Brightness, Panel Display or Contrast of the unit of screen. Press to adjust Brightness and use the select other. PREV button Press to move back through titles, chapters or tracks on a disc. SEARCH buttons SEARCH: Fast reverse playback. -
Page 8: Unit Reference Guide
Uuit Reference Guide UNIT A (with green stripe on the front unit) UNIT B (with blue stripe on the front unit) button Press the button and hold the front panel to open the disc door. SEARCH button Press to perform fast reverse playback. SEARCH button Press to perform fast forward playback. -
Page 9: Power Supply
Power Supply Using the car power adapter The included 12V car power adapter is designed for use with vehicles that have a 12V, negative ground electrical system. Using unit A and B together Using one unit only Fuse replacement instructions IMPORTANT This car adapter is for use with 12 volt batteries only. -
Page 10: Connections
Connections Connecting unit to a TV If your TV has Audio/Video inputs, you can connect the unit to your TV using Audio/Video cable. Watching a DVD on your TV 1. Connect your TV to the unit using an Audio/ Video cable. 2. -
Page 11: Playing A Game Systems/Video Equipment On Unit
Playing a game systems/video equipment on unit You can connect game systems or other video equipment for playback through unit. Watching video equipment 1. Connect the other equipment to the unit using an A/V Cable. 2. Turn on the unit. Slide the DVD/AV IN switch to AV IN. -
Page 12: Placement
Placement Mounting in the vehicle Use the supplied mounting straps to install the units on the back of the vehicle's headrests. Tightly wrap the mounting strap around the headrest. SAFETY WARNING! • This unit should never be used by the vehicle's driver or left unsecured in the vehicle while driving. •... -
Page 13: Using The Stand
Using the stand You can stand the units up on a desk or table using the stand on the back. Unit Operation Turning the unit on 1) Slide the STANDBY/ON switch on the top of the both units to the “ON” position. 2) Slide the AV IN / DVD switch of unit to DVD. -
Page 14: Playing Discs - Basic Functions
Playing Discs - Basic Functions Compatible discs • DVD, DVD-R, DVD-RW • CD, CD-R, CD-RW Compatible formats • DVD, JPEG, CD Regional coding Your unit has been designed to process regional management information stored on DVD discs. The regional code for your unit is 1. Discs that have a different regional code will not be played. -
Page 15: Angle Selection (Dvd)
Angle selection (DVD) Some DVDs contain scenes that have been shot from a number of different angles. For these discs, the same scene can be viewed from each of these different angles. 1. While you are playing a DVD with different angles recorded, press the ANGLE button to view the number of current angles available. -
Page 16: Repeat Playback
Repeat Playback You can play a specific title or chapter repeatedly. (Chapter repeat, title repeat, A-B repeat) Repeating a chapter (DVD) You can play the same chapter repeatedly. 1. While the disc is playing, press the REPEAT DISC button until the “ displays on the screen. -
Page 17: Dvd Programmable Playback
• Some DVDs may not include your pre-selected language. In this case, the DVD player automatically displays disc menus consistent with the disc’s initial language setting. by pressing the number buttons. (For example : 01 02, 02 05, 02 11.) It will move to the next... -
Page 18: System Setup
System setup 1. In STOP mode, press the SETUP button. 2. Press the button repeatedly until SYSTEM SETUP appears. 3. Use the button to select the option (Tv Display or Default), then press the Use the button to make adjustments, then press the ENTER button (The screen will change to your selected setting). -
Page 19: Additional Information
Additional Information Troubleshooting The unit does not switch on. • Make sure it is plugged in. • Turn on the unit. The device switches off spontaneously. • The device switches off automatically when it is in STOP mode for more than 30 minutes without any user intervention. -
Page 20: Compatible Formats
This unit is designed and manufactured to respond to the Region Management Information. If the Region number of a DVD does not correspond to the Region number of this DVD player, this player cannot play the disc. The Region number for this DVD player is Region 1. -
Page 21: Precautions
Precautions • If your unit has been stored in a cool place for any length of time during a journey for example, wait for about 2 hours before using • During thunderstorms, we recommend that you isolate the unit from the electrical supply so that it is not damaged by electrical or electromagnetic surges. -
Page 22: Limited Warranty
For more information on other products and services, please visit our web site at www.1800customersupport.com/RCA Important: Also keep your “Bill of Sale” as proof of purchase. - Page 23 IMPORTER AVC Multimedia Markham, Ontario L3R 1E3 © 2008 AVC Multimedia http://www.1800customersupport.com/RCA Printed in China 811-728191W011...