Table of Contents
Advertisement
PLEASE NOTE:
These models do not
display Fault Codes if a
Fault occurs.
Refer to the Fault Finding
details on page 6.
Service
Information
© 2015 Reg. Office: Peterborough PE2 9JB Registered in London: 106725
Indesit Company UK Ltd
5407837 Issue 2
SM003992 ~ C00307711
SWAN brand
Entry Level
ELECTRONIC
CONDENSER
TUMBLE DRYERS
Models Covered:
STCL407WUK
STCL407BUK
STCL408WUK
STCL408BUK
July 2015
87207
87208
87209
87210
Advertisement
Table of Contents

Summary of Contents for Swann STCL407WUK
-
Page 1: Service Information
5407837 Issue 2 July 2015 SM003992 ~ C00307711 SWAN brand Entry Level ELECTRONIC CONDENSER TUMBLE DRYERS Models Covered: STCL407WUK 87207 PLEASE NOTE: STCL407BUK 87208 These models do not STCL408WUK 87209 display Fault Codes if a STCL408BUK 87210 Fault occurs. Refer to the Fault Finding details on page 6. -
Page 2: Safety & Servicing Notes
Indesit Company SAFETY NOTES & GENERAL SERVICING ADVICE 1. This manual is NOT intended as a comprehensive repair/maintenance guide to the appliance. 2. It should ONLY be used by suitably qualified persons having technical competence applicable product knowledge and suitable tools and test equipment. 3. -
Page 3: Table Of Contents
Indesit Company INDEX Safety & Servicing Notes ............2 Serial Number / Industrial Code Explanation . -
Page 4: Model Matrix
Indesit Company Example Energy Information - STCL408W / STCL408B P roduct Data - R egulation 392/2012. Brand Swan Model STCL 408B (UK) STCL 408W (UK) Rated capacity of cotton laundry for the "standard cotton programme" at full load - kg This household tumble drier is a Condenser Energy efficiency class on a scale from A+++ (low consumption) -
Page 5: Specifications
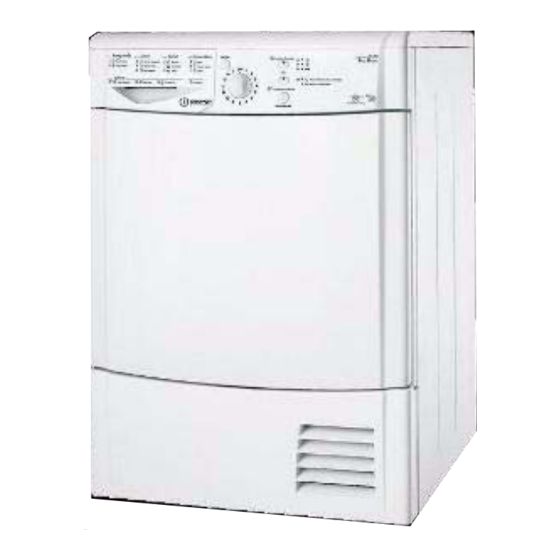
Indesit Company SPECIFICATIONS Introduction Date August 2014 Features Electronically controlled tumble dryer comprising an combined interface and control module fitted to the rear of the dashboard. Country of Origin Dimensions Height 850 mm Width 595 mm Depth 623 mm Net Weight 36.87 kg Colour White... -
Page 6: Fault Finding / Test Cycles
Indesit Company FAULT FINDING FAULT CODES These models DO NOT display Fault Codes when the dryer develops a fault. However an Auto Test feature is available to help diagnose faults. Preliminary Checks: Before performing any tests ALWAYS check that the Water Container is empty and that the Condenser Unit and the Drum Filter are NOT blocked with fluff or lint, as this may be the cause or partial cause of the of the fault. - Page 7 Indesit Company Auto Test Sequence Before Starting the Auto Test, make sure the Water Container is empty, the Filter and Condenser are Clear of fluff or lint. Auto Test - Preparation: If you are including the Conductivity Sensor Test when running the test procedure: Attach the magnetic end of the 270 K ohm test lead to the metal strip conductivity sensor inside the drum.
- Page 8 Indesit Company AUTO TEST - CONDENSER DRYERS SAFETY WARNING ! When performing the Auto Test you will need to remove the top cover of the Dryer while Electrical power is still applied. To avoid the risk of electric shock, during this sequence you MUST make certain no persons have any contact with the LIVE area around the Mains Terminal Block (cable entry position) or main Power module behind the Console.
- Page 9 Indesit Company TEST SEQUENCE - for a CONDENSER DRYER which has a Fault, The Drum rotates clockwise for about 7 to 8 seconds Step Phase: Float switch operation and Drain Pump operation At this point remove the top cover. Remove the Water Bottle and pour 300 ml of water into the Water Bottle support.
-
Page 10: Service Manual Uk English
Indesit Company DRYER OPERATION CHECK - Condenser Models When Checking Heater, Drum Action or Thermistor Operation, you are advised to use a Timed Programme. When Sensor Programmes are used, after the module has estimated the weight of the clothes and the cycle time required to dry the clothes, the Dryer will start to reverse tumble. -
Page 11: Thermistor Table
Indesit Company Thermistor Tables When testing these Thermistors make sure you have selected the CORRECT resistance range on your test meter for the value you expect to see. The resistance value varies with temperature. FRONT THERMISTOR REAR THERMISTOR Temperature Temperature Resistance Resistance KΩ... -
Page 12: Heater Connection Details
Indesit Company Heater Connection Details Heater / Thermistor Connector Plug Always fit a cable tie to secure the Heater connectors together. Cable Colours dynamic/upper heater one shot cycling cut-out thermostat white orange link orange static/lower heater orange brown hot/rear NTC thermistor cycling one shot... -
Page 13: Wiring Diagram
WIRING DIAGRAM - Entry Level CONDENSER Models PSC Motor with protector HARNESS INDESIT CODE DESCRIPTION CONNECTOR ON BOARD WAYS WIRES DESCRIPTION 21023259100 motor drain pump 5 I2C 4 UART BPM motor oat switch front NTC 1 earth Heater cover assy hot NTC 1 sensing strip 4 drain pump - oat switch... -
Page 14: Installation
Indesit Company INSTALLATION The dryer MUST be located away from gas stoves, hobs or heaters. If the dryer is located under a work surface, there 10mm must be a 10 mm gap around any top or above the dryer and a minimum 15 mm space along each side. This is to ensure correct air circulation. -
Page 15: Dryer Care
Indesit Company LOOKING AFTER THE DRYER FLUFF FILTER The fluff filter MUST be cleaned after every use. Never use a Tumble Dryer without the filter in place. Remove the filter from the dryer. Open and clean the filter. WATER CONTAINER Empty the water container after every cycle. - Page 16 Indesit Company CONDENSER UNIT - CONDENSER DRYERS For normal domestic use, the condenser should be cleaned once a month. Open this flap by pulling the handle Release the latches to remove the condenser Remove and Rinse the Condenser Refit the condenser the correct way up over a sink or bath 1.
-
Page 17: Dryer Overview
Indesit Company DRYER OVERVIEW Introduction of Simplified Electronics These Models are fitted with a new Electronic Module, which is fixed to a plastic carrier, located behind the Console. Plastic Water Shield (if fitted) Low End Adaptor Connection point Control Module Fluff Barrier Drum... - Page 18 Indesit Company DRYER OVERVIEW - CONDENSER MODELS These Condenser Auto Tumble Dryers are freestanding with a round door on the front that can be opened to allow the drum to be loaded with clothes. The door is NOT reversible. The facia moulding across the top of the front panel houses the dryer user controls and water container.
- Page 19 Indesit Company Controls Overview The user controls consist of a programme selection knob, option buttons and a Start/Pause button. The control system consists of a user interface and control module, a thermistor mounted at the top of the front air duct and one mounted on the heater assembly and a conductivity sensor. The conductivity sensor is mounted in the front air Drum Support Wheels duct.
-
Page 20: Dryer Function
Indesit Company FUNCTIONS DESCRIPTION The Drying Guide allows you to consult a user friendly table of fabric types and load capacities. The PROGRAMME knob sets the programme: rotate it until the indicator is pointing to the programme you want to select. This will also power the dryer to the ON state. This replaces the On/Off button found on previous models. - Page 21 Indesit Company USING THE DRYER Load the Dryer with Laundry Turn the Power On to the Dryer Turn the Selector Knob to the required Programme - this will turn the Dryer On and select the programme in one action. Set any required options - if available Push the Start/Pause Button to begin the programme.
-
Page 22: Service Manual Uk English
Indesit Company OPTION BUTTONS Note: Some buttons are disabled by software when their selection is not appropriate. Start/Pause This button is used to start every programme or to continue a programme if the door has been opened and then closed, or if there has been a power interruption. Pressing and holding in this button when a programme is running cancels the programme. - Page 23 Indesit Company PROGRESS, ADVICE & WARNING LAMPS Clean Filter / Empty Water Container LED LED On Reminder to empty the water container and clean the filter. The filter must be cleaned after every use. LED flashing and buzzer sounds The water container must be emptied immediately and the dryer restarted.
-
Page 24: Component Description
Indesit Company COMPONENTS Door Rating plate Water The door is constructed of several components, the outer container shell being powder coated metal. Filter And an inner lining consists of a moulding that clips into position on the outer door shell. Model &... - Page 25 Indesit Company This device is a disc type thermostat set to operate at 143°C. It is used as a Safety Device. It is positioned above the element. If this device fails it cannot be reset. Cycling Thermostat ( 120°C +/- 3°C ) The cycling thermostat is mounted adjacent to the one-shot (safety) and is designed to open at 120°C.
-
Page 26: Programme Guide
Indesit Company PROGRAMMES Max. load Cycle Programme Compatible options (kg) duration* 1 Standard Cotton Alarm - Low Heat. 140' 2 Cotton Extra Dry Alarm. 150' 3 Synthetics Alarm. 100' 4 Delicates Alarm. 130’ 5 Jeans Alarm. 90’ 6 Refresh Alarm. 20’... -
Page 27: Control Board Programming
Indesit Company CONTROL BOARD PROGRAMMING for Modules with fixed EEProm NOTE: This board does NOT have a physically replaceable EEProm. Programming a Main Board There are a number of ways the board can be programmed - some of which are not applicable to certain markets. - Page 28 Indesit Company Connection to the Module The Smartcard Reader or Hardware Key (shown below) MUST only be connected to the module using a Low End Adaptor - See method below. The Low End Adaptor edge connector plug connects to CN1 on the Module.
-
Page 29: Dismantling - Condenser
Indesit Company DISMANTLING INSTRUCTIONS - CONDENSER MODELS SAFETY NOTES ENSURE THAT THE APPLIANCE IS UNPLUGGED BEFORE DISMANTLING. BEWARE OF SHARP EDGES ON METAL PANELS AND PRESSED PARTS. A. Top Cover Remove the 2 screws securing the top cover to the back panel. Slide the top cover back and lift clear of the retainers. - Page 30 Indesit Company D. Interface and Control Module Assembly Compress programme knob retaining tabs Remove the top cover as in (A). Remove the console as in (C). Remove the screws securing the Module to the Console Remove the programme knob by compressing the tabs - see photo.
- Page 31 Indesit Company H. Front Bearing Pads / Support Wheels Note: Either may be fitted - depending on production variations. Ha Bearing Support Pads 1. Remove the drum as in (O). 2. Unclip the bearing pads which are located on the front air duct. Bearing Support Pads Hb Drum Support Wheels 1.
- Page 32 Indesit Company K. Pump & Float Switch Depress the 2 pump cover locating tabs and pull the cover clear (Photos 1 and 2). Photo 1 Photo 2 Released Clips Access can now be gained Photo 3 to the pump and float switch.
- Page 33 Indesit Company Motor Slacken the belt as in (E) 1 to 8. Lift the motor clear from the base moulding. Replace in reverse order first positioning the belt over the jockey wheel. It will be necessary to use the motor special tool as a lever on the motor casing (as illustrated) to enable it to be rotated under tension to line up the holes in rear moulding with the fixing holes on the motor casing.
- Page 34 Indesit Company Indesit Company UK Ltd. 2015 Service Manual UK English 34 of 34...