Table of Contents
Advertisement
HD Radio
12-1686
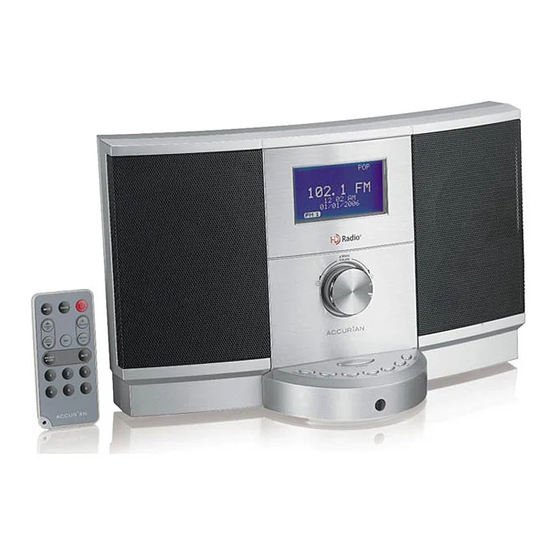
Thank you for purchasing this Accurian HD Radio. Your HD Radio plays
your favorite programming, plus new, expanding choices and amazing
clarity. It enhances audio fi delity for both AM and FM bands, providing
digital-quality sound and simple operation in a compact, tabletop
stereo radio. AM sounds more like current FM, and FM has CD-like audio
quality, virtually eliminating the static, hiss, pops, and fades of today's
analog radios.
HD Radio
FM Antenna
Please read this user's guide before installing, setting up, or using your new HD Radio.
WHAT's INCLUDED
Remote Control
AM Antenna
User's Guide
User's Guide
Power Supply and AC Cord
Advertisement
Table of Contents

Summary of Contents for Accurian 12-1686
- Page 1 WHAT’s INCLUDED HD Radio FM Antenna Please read this user’s guide before installing, setting up, or using your new HD Radio. Remote Control AM Antenna Power Supply and AC Cord User’s Guide...
-
Page 2: Table Of Contents
Content How HD Radio works ... 3 Quick Start ... 4 Connecting Your Radio ... 4 Cable Radio Signals ... 4 Connecting Headphones ... 5 Your Radio Controls ... 5 Your Radio Display ... 6 Your Remote Control ... 8 Replacing the Remote Control Battery ... -
Page 3: How Hd Radio Works
To learn more about HD Radio technology and to fi nd HD Radio Stations, visit www.hdradio.com. -
Page 4: Quick Start
Quick Start Connecting Your Radio To avoid interference, keep the power supply away from the radio while in use. FM ANT Connect FM antenna. Use the “T” shaped antenna in more remote areas. AM Antenna Press down the two spring terminals,... -
Page 5: Connecting Headphones
Connecting headphones mutes the speakers. Note: The headphone jack can be used as stereo output to another system. Your Radio Controls POWER Press to turn the radio on or off. PRESET STORE Lets you save stations in the radio memory. See Saving Preset Stations. -
Page 6: Your Radio Display
Your Radio Display Your HD Radio’s display provides valuable information to help you access the radio’s many features and functions. Frequency Displays the current station’s frequency. A “-1” indicates a station with multicast channels. Band Displays the radio’s band setting: AM1, AM2, FM1, FM2, or the AUX mode. - Page 7 Tune - / + buttons, the radio scans for the next available station. Mode When you change the radio’s mode, the station information appears, or AUX IN for auxiliary input mode. When you set the equalizer levels, the following icons appear in the radio display:...
-
Page 8: Your Remote Control
Your Remote Control To use your remote control the fi rst time, pull the plastic tab out of the battery compartment. Your remote control helps you access your radio’s features from a distance. MODE Press once to select the source: AM1, AM2, FM1, FM2 and AUX. -
Page 9: Replacing The Remote Control Battery
(+) up and carefully close the compartment until it clicks. See the diagram on the remote for more information. Storing Your Remote Control To store your remote control, slide it under the available tabs on the back of your radio. -
Page 10: The Basics
The minutes value starts blinking. 4. Repeat step 3 for the minutes, AM/PM, date, month, and year. After you set the year, the radio display returns to normal with the updated date and time information. Saving Preset Stations To save a frequency in your radio’s memory, complete the following steps: 1. -
Page 11: Beyond The Basics
These additional channels can offer expanded news, talk, and music formats. When your radio tunes in the HD channel, if a number appears on the right side of the station frequency (for example: 89.3-1), this indicates the existence of multicast services. -
Page 12: Faq
This is not an issue with your HD Radio. This is an HD Radio broadcaster’s implementation issue, which the station should correct over time. -
Page 13: Important Safety Instructions
Important Safety Instructions 1. Read these instructions. 2. Keep these instructions. 3. Heed all warnings. 4. Follow all instructions. 5. Do not use this apparatus near water. 6. Clean only with dry cloth. 7. Do not block any ventilation openings. Install in accordance with the manufacturer’s instructions. -
Page 14: Rf Emissions Information
Part 15 of the FCC Rules. These limits are designed to provide reasonable protection against harmful interference in a residential installation. This equipment generates, uses, and can radiate radio frequency energy and, if not installed and used in accordance with the instructions, may cause harmful interference to radio communications. However, there is no guarantee that interference will not occur in a particular installation.