Table of Contents
Advertisement
Quick Links
Download this manual
See also:
User Manual
Advertisement
Table of Contents

Related Manuals for JVC GC-PX10U


Summary of Contents for JVC GC-PX10U
- Page 1 LYT2382-002A HD MEMORY CAMERA GC-PX10U Detailed User Guide...
-
Page 2: Table Of Contents
Contents Attaching the Shoulder Strap ....3 Editing Names of Parts and Functions ....4 Capturing a Required Part in the Video Names of Buttons and Functions on the LCD (TRIMMING) .......... 41 Monitor ............. 6 Copying Files to an SD Card ....42 Deleting Unwanted Files ...... -
Page 3: Attaching The Shoulder Strap
Attaching the Shoulder Strap Shoulder Strap Caution Be careful not to drop this unit during transportation. Do not place the shoulder strap within the reach of young children. Guardians should pay close attention when this unit is being used by children. -
Page 4: Names Of Parts And Functions
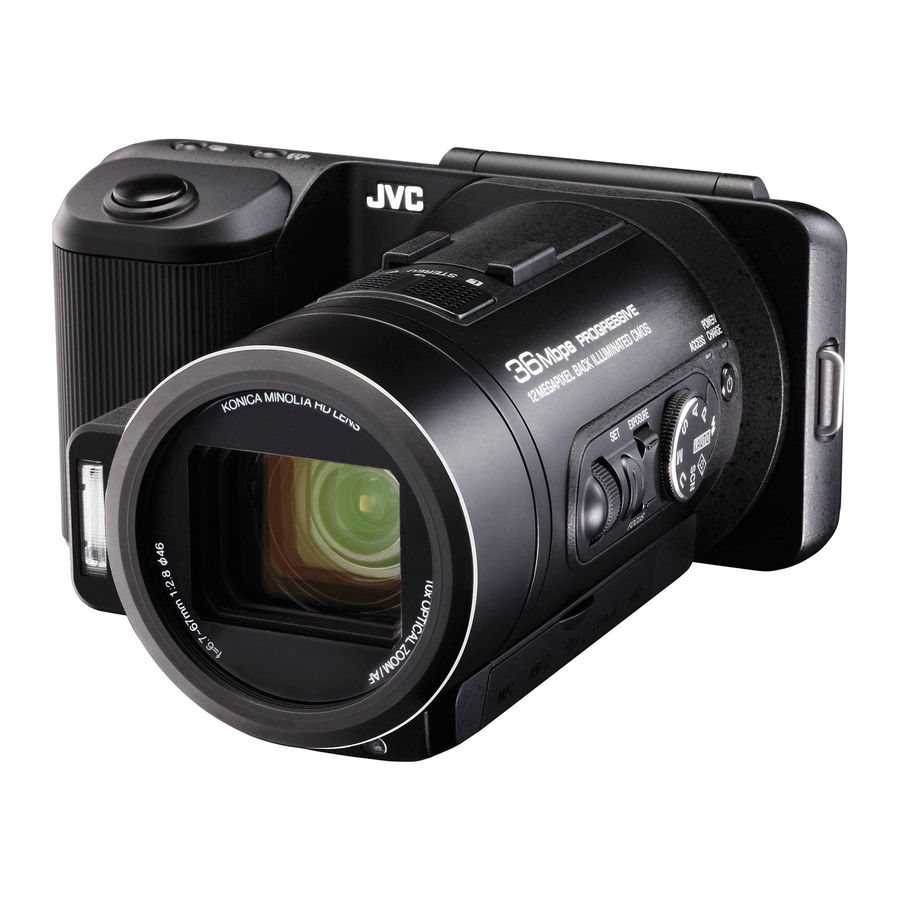
Names of Parts and Functions Stereo Microphone Speaker Shoe AF Assist Beam (p. 52) Enables an optional external microphone SD Card Slot (p. 14) to be attached. Tripod Mounting Hole LCD Monitor Battery Release Lever (p. 9) L (Recording/Playback) Button Switches between recording and playback modes. - Page 5 Flash (p. 19) SET (Set) Button (p. 36) Lens/Electric Lens Cover FOCUS (Focus) Button (p. 22) Control Dial (p. 36) E (Flash) Button (p. 19) EXPOSURE (Exposure) Button (p. 36) M (Power) Button Recording Dial (p. 17, p. 23) Microphone Connector (p. 57) ACCESS (Access) Lamp Headphones Connector/AV Connector Lights up/blinks during recording or...
-
Page 6: Names Of Buttons And Functions On The Lcd Monitor
Names of Buttons and Functions on the LCD Monitor Recording Screen (A / B) 12 13 14 15 16 17 Continuous Shooting Speed (p. 21) Time (p. 11) Backlight Compensation (p. 50)/ Image Stabilizer (p. 53, p. 55) Touch Priority AE/AF (p. 51) Recording Media (p. - Page 7 Playback Screen (B) Recording Screen (B) Still Image Playback (p. 26) Bracketing (p. 21) Slideshow (p. 27) Still Image Recording (p. 17) Folder Number (p. 44) Image Size (p. 52) File Number (p. 44) Image Quality (p. 52) Date/Time (p. 11) FINE : FINE Playback Media (p.
- Page 8 Playback Screen (A) Recording Screen (A) Video Playback (p. 28) Video Recording (p. 23) Video Quality (p. 54)/ Video Quality (p. 54)/ High-speed Recorded Video (p. 31) High-speed Recording (p. 31) Forward/Reverse Search Speed Time-Lapse Recording (p. 56) Playback Operation Gain Up (p.
-
Page 9: Preparations
A Press and hold the lever. B Slide out the battery. Align the mark on the cover with this unit. Caution Be sure to use JVC battery packs. If you use any other battery packs besides JVC battery packs, safety and performance cannot be guaranteed. -
Page 10: Using The Touch Screen
Using the Touch Screen There are two ways to operate the touch screen, namely “tap” and “drag”. The following are some examples. Tap the displayed button (icon) or thumbnail (file) on the touch screen to make selection. Drag the thumbnails on the touch screen to search for the desired file. Recording Screen Playback Screen Index Screen... -
Page 11: Clock Setting
Clock Setting Select the region where you live Press the M button to turn on the and tap “SAVE”. power. CLOCK/AREA SETTING SAVE The city name and time difference are displayed. Tap “YES” when “SET DATE/ Tap “<” or “>” to select the city name. TIME!”... -
Page 12: Using This Unit Overseas
Using this Unit Overseas Charging the Battery Pack Overseas Changing the Display Language The shape of the power outlet varies Press the MENU button. according to countries and regions. To charge the battery pack, you need a converter plug that matches the shape of the outlet. - Page 13 Setting the Clock to Local Time when Setting Daylight Saving Time Traveling When “ON” is selected in “DST SETTING” of Change the date and time display to the local “CLOCK ADJUST”, the time is set 1 hour time by selecting your travel destination in ahead.
-
Page 14: Inserting An Sd Card
Inserting an SD Card Precautions with SD Cards Removing the Card Make use of an SD card with operations Push the SD card inward once, then pull it out confirmed. (p. 15) straight. Turn off the power of this unit before inserting or removing a card. - Page 15 SD Cards with Operations Confirmed To use SD cards that have been used on other devices Using cards from manufacturers other than those specified below may result in recording Format (initialize) the card using “FORMAT failure or data loss. SD CARD” from “COMMON”. All data on the card will be deleted when it is Manufacturer Panasonic, formatted.
- Page 16 When your computer cannot recognize the SDXC card Confirm and update the OS of your computer. Windows XP / Necessary to update to SP2 or higher. Windows XP SP1 Windows XP SP2 / Necessary to download the update software. (KB955704) Windows XP SP3 http://www.microsoft.com/downloads/details.aspx? FamilyID=1cbe3906-ddd1-4ca2-b727-...
-
Page 17: Recording/Playback Taking Still Images In Intelligent Auto Mode
Recording/Playback Taking Still Images in Intelligent Auto Mode You can record without worrying about the Memo setting details by using the Intelligent Auto mode. To return to the recording mode Before recording an important scene, it is from the playback mode, press the recommended to conduct a trial recording. - Page 18 Indications During Still Image Recording Operation Buttons for Still Image Recording 10:10 1/125 [6630] A Shutter Displays the shutter speed. A T/W Allows the same functions Speed (p. 37) Zoom as the zoom lever to be performed. B Image Displays the icon of the Size image size.
- Page 19 Setting the Flash Capturing Yourself (Face-to-face Recording) You can rotate the screen 180 degrees to Press the A/B button to select the capture images of yourself easily. still image mode. Change the setting with the E button. Raise the screen in the direction as shown. To restore the screen, lower it in the opposite direction.
-
Page 20: Taking Group Shots (Self-Timer)
Taking Group Shots (Self-timer) The 10-second self-timer and Face After making sure that everyone is Detection self-timer are convenient functions facing the camera, press the for taking group photos. SNAPSHOT button. The 2-second self-timer is useful for preventing camera shake caused by pressing the shutter button. -
Page 21: Continuous Shooting/Recording With Varying Brightness (Bracketing)
Continuous Shooting/Recording with Varying Brightness (Bracketing) Records still images Press the A/B button to select the continuously while the video or still image mode. SPEED SNAPSHOT button is pressed. Shoots continuously until the Change the setting with the y recording media is full. button. -
Page 22: Adjusting Focus Manually
Adjusting Focus Manually Set this when the focus is not clear in Adjust the focus with the control dial. Intelligent Auto or when manual focusing is desired. Focused subject can be outlined in color for more precise focus by using Focus Assist. (p. -
Page 23: Taking Videos In Intelligent Auto Mode
Taking Videos in Intelligent Auto Mode You can record without worrying about the Memo setting details by using the Intelligent Auto mode. Settings such as exposure and focus This unit turns on immediately if the will be adjusted automatically to suit the power button is pressed within 5 shooting conditions. - Page 24 Capturing Still Images During Video Scenes of Intelligent Auto Recording Display Description Still images can be captured by pressing Icon the SNAPSHOT button while in the video Captures one’s skin mode (standby or recording). beautifully. Allows people to be captured Press fully naturally.
- Page 25 Indications During Video Recording Operation Buttons for Video Recording 10:10 0:00:00 [2:04] A Video Displays the icon of the A T/W Zoom Allows the same functions Quality video quality. (p. 54) as the zoom lever to be performed. B Time Displays the current time.
-
Page 26: Playing Back Still Images
Playing Back Still Images You can select and play back the recorded Use the zoom lever to switch pages. still images from an index screen (thumbnail Tap I/J to select the media for playback. display). Tap u to return to the index screen. Press the A/B button to select the The W button on the index screen is still image mode. - Page 27 Operation Buttons for Still Image Playback During Index Screen Display During Still Image Playback 2011 A Date Moves to the previous/next Continuous playback of date grouped files (such as still images captured by B </> Displays the previous index continuous shooting) screen (thumbnail display) You can perform the Rotates to the left (rotates by...
-
Page 28: Playing Back Videos
Playing Back Videos Capturing a Still Image in the Video During Press the A/B button to select the Playback video mode. You can capture still images of the scenes you like in the recorded videos. During video playback, press the START/STOP button at the scene to MENU capture a still image. - Page 29 Operation Buttons for Video Playback During Index Screen Display During Video Playback 0:01:23 0:12:34 A Timeline Tap on a random position - Moves A Date Moves to the previous/next to the tapped position date Drag playback point to the left or B </>...
-
Page 30: Checking The Exposure Of Still Images (Histogram)
Checking the Exposure of Still Images (Histogram) About the Histogram Press the A/B button to select the A still image with an evenly-distributed graph still image mode. indicates balanced exposure. If the pixels tend toward the right side, the image is too bright (overexposed). MENU Play back a still image. -
Page 31: Slow-Motion (High-Speed) Recording
Slow-motion (High-speed) Recording Returning to Normal Recording You can record videos in slow-motion by increasing the recording speed to Press the O button again such that the emphasize the movements, and play back high-speed recording icon O disappears. the slow-motion video smoothly. This is a handy function for checking movements, such as golf swings. -
Page 32: Shooting According To Location And Condition
Shooting According to Location and Condition Press the A/B button to select the Tap the appropriate scene. video or still image mode. SCENE MODE SPORTS MENU Set the recording dial to “SCN”. Tap “∧” or “∨” to move upward or downward for more selection. - Page 33 Setting Effect PORTRAIT Blurs the background to bring out the people in the picture. SOFT SKIN Captures one’s skin beautifully. LANDSCAPE Focuses at a far distance and captures a sharp image. LANDSCAPE & Focuses on both the subject and background when the zoom PORTRAIT lever is set to the wide angle (W) end.
-
Page 34: Capturing Subjects Clearly (Touch Priority Ae/Af)
Capturing Subjects Clearly (TOUCH PRIORITY AE/AF) “TOUCH PRIORITY AE/AF” is a function that Tap on the subject. adjusts focus and brightness based on a tapped position. Focus and brightness will be adjusted automatically based on the tapped Press the A/B button to select the position (face/color/area). - Page 35 Tap “SMILE LEVEL”. Memo IMAGE To reset, tap the desired position (face/color/area) again. When “FACE TRACKING” is set, some faces may not be detected depending on the shooting SMILE LEVEL environment. If faces are not detected after step 5, the camera returns to the condition in step 2.
-
Page 36: Manual Recording
Manual Recording Change the aperture value with the Recording Dial control dial and press the SET Control Dial button. SET Button Memo Appropriate exposure may not be set even after adjusting the aperture and EXPOSURE Button shutter speed. Correcting the Exposure (Brightness) (Program Auto) Adjusting the Aperture (Aperture Priority) By adjusting the exposure, aperture and... -
Page 37: Correcting The Exposure
Adjusting the Shutter Speed (Shutter Speed Tap “USER DIAL”. Priority) Aperture will be automatically adjusted, and VIDEO appropriate exposure will be set. Set the recording dial to “S”. USER DIAL Change the value with the control dial. Select the desired function. Functions that can be selected 1/4000 1/4000... -
Page 38: Connecting To And Viewing On Tv
Connecting to and Viewing on TV Connecting via the HDMI Mini Connector If you are using an HDTV, you can play back in HD quality by connecting to the HDMI connector. Refer also to the instruction manual of the TV in use. Connect to a TV. -
Page 39: Connecting Via The Av Connector
Connecting via the AV Connector By connecting the supplied AV cable to the AV connector, videos can be played back on a TV. Refer also to the instruction manual of the TV in use. Connect to a TV. Audio Input (R) Audio Input (L) Video Input To AV... - Page 40 Operating in Conjunction with TV via HDMI Connecting this unit to an HDMI-CEC- Operation Method 2 enabled TV using the HDMI cable allows linked operations with the TV to be Turn off the TV. performed. HDMI-CEC (Consumer Electronics This unit turns off automatically. Control) is an industry standard that enables interoperability between HDMI- CEC compliant devices that are...
-
Page 41: Editing
Editing Capturing a Required Part in the Video (TRIMMING) Press the A/B button to select the Tap e to pause playback at the video mode. desired end point, then tap “B”. Press the L button to select the TRIMMING playback mode. 0:01:23 0:12:34 A 0:00:23... -
Page 42: Copying Files To An Sd Card
Copying Files to an SD Card Make sure that there is enough space left in Tap “SET”. the destination medium. Press the A/B button to select the QUANTITY: 2011 video or still image mode. Press the L button to select the playback mode. -
Page 43: Deleting Unwanted Files
Deleting Unwanted Files Delete unwanted videos and still images Tap “SET”. when the space in the recording media is running out. Deleted files cannot be DELETE restored. 2011 Press the A/B button to select the video or still image mode. Press the L button to select the SEL ALL REL ALL... -
Page 44: Computer
Computer Copying to Computer Before making backup, make sure that Disconnecting this Unit from Computer enough free space is left in the computer’s Click “Safely Remove Hardware and hard disk (HDD). Eject Media” (8). Connect the USB cable and the AC adapter. -
Page 45: Using An Eye-Fi Card
Using an Eye-Fi Card Eye-Fi is an SD memory card with wireless Memo LAN function. Using an Eye-Fi card, you can transfer Recorded videos and still images videos and still images to a computer or the are automatically transferred. (The web. -
Page 46: Verifying System Requirements (Guideline)
Verifying System Requirements (Guideline) Right-click on “Computer” (or “My Computer”) in the “Start” menu and select “Properties” to check the following items. Windows Vista/Windows 7 Windows XP Windows Vista/Windows 7 Windows XP A OS Windows Vista 32/64-bit Windows XP Home Basic or Home Premium Home Edition or Professional (Pre-installed versions only) Service (Pre-installed versions only) Service... - Page 47 Operating Conditions for Graphics Intel G45 or higher NVIDIA GeForce 8000 series or higher (except 8800GTX, 8300) ATI Radeon HD2000 series or higher (except 2900) Memo If your computer does not meet the system requirements, operations of the provided software cannot be guaranteed. Graphic cards with H.264 video playback support functions are supported.
-
Page 48: Installing The Provided Software
Installing the Provided Software Load the provided CD-ROM into Copying to Mac Computer your computer. You can play back and edit videos and still Windows Vista / Windows 7 images using Apple’s iMovie’11 (video) or A Click “LoiLoScope FX Install and iPhoto (still image). -
Page 49: Further Information Operating The Menu
Further Information Operating the Menu Operating the Menu Operating the Common Menu Press the MENU button. Press the MENU button. Tap “Q”. The menu differs according to the mode in use. Tap the desired menu. Tap the desired menu. VIDEO COMMON LANGUAGE Tap the desired setting. -
Page 50: Recording Menu (Still Image)
Recording Menu (Still Image) Setting (Position of Recording Details Dial) FOCUS ASSIST Focused subject is outlined in color for more precise focus. A Adjust the focus with the control dial. (M, S, A, P, U, SCN) E: Focuses on a distant subject. p: Focuses on a near subject. - Page 51 Setting (Position of Recording Details Dial) METERING AREA/ TYPE XMULTI-PATTERN (M, S, A, P, U) Adjusts the overall brightness of the screen to achieve the optimum level. VSPOT Adjusts the brightness in the center of the screen to achieve the optimum level. WCENTER-WEIGHTED Adjusts the brightness in the center of the screen and the surrounding area to achieve the optimum level.
- Page 52 Setting (Position of Recording Details Dial) IMAGE SIZE w4000x3000(12M) g2976x2232(6.6M) d1600x1200(1.9M) r640x480(0.3M) v4000x2248(9M) f2976x1672(4.9M) e1920x1080(2M) The sides of still images recorded in 16:9 aspect ratio may be cut off when printed. IMAGE QUALITY kFINE: Enables recording in high picture quality. The number of recordable shots is lesser.
- Page 53 Setting (Position of Recording Details Dial) GAIN GAUTO: Adjusts the ISO level automatically according to the (M, S, A, P) brightness of the subject. oISO100: Uses a sensitivity equivalent to ISO100 film pISO200: Uses a sensitivity equivalent to ISO200 film qISO400: Uses a sensitivity equivalent to ISO400 film sISO800: Uses a sensitivity equivalent to ISO800 film tISO1600: Uses a sensitivity equivalent to ISO1600 film...
-
Page 54: Recording Menu (Video)
Recording Menu (Video) Setting (Position of Recording Details Dial) FOCUS ASSIST For details, refer to “FOCUS ASSIST” in the recording menu (M, S, A, P, U, SCN) (still image). (p. 50) FOCUS ASSIST COLOR For details, refer to “FOCUS ASSIST COLOR” in the recording (M, S, A, P, U, SCN) menu (still image). - Page 55 Setting (Position of Recording Details Dial) ZOOM Zoom ratio varies according to the video quality. VIDEO QUALITY : HD 1080/60p(UHR), HD 1080/60p(HR) 210x/OPTICAL: 1 - 10x 319(18)x/DYNAMIC: 11 - 19x* 464x/DIGITAL: 20 - 64x * Up to 18x when DIS is set to ON(A.I.S.). VIDEO QUALITY : HD 720/60p 210x/OPTICAL: 1 - 10x 327x/DYNAMIC: 11 - 27x...
- Page 56 Setting (Position of Recording Details Dial) TIME-LAPSE fOFF: Deactivates the function. RECORDING A1SEC INTERVAL: Takes a frame at 1-second intervals. B5SEC INTERVAL: Takes a frame at 5-second intervals. C40SEC INTERVAL: Takes a frame at 40-second intervals. During time-lapse recording, video quality is set to “HD 1080/60p(UHR)”...
- Page 57 Setting (Position of Recording Details Dial) MIC LEVEL fOFF: Hides the display. eON: Shows the display of microphone input level. Appropriate volume can be set by adjusting “MIC LEVEL SETTING” such that the display does not turn red. MIC LEVEL SETTING N +2: Increases the microphone input level.
-
Page 58: Playback Menu (Still Image)
Playback Menu (Still Image) Setting Details COPY Copies files from the built-in memory to the SD card. (p. 42) PROTECT/CANCEL Protects files from being deleted accidently. (p. 43) When using an Eye-Fi card, this item can be used to specify the files to transfer. -
Page 59: Common Menu
Common Menu Setting Details CLOCK ADJUST Resets the current time or sets to the local time when using this unit overseas. Clock Setting (p. 11) Setting the Clock to Local Time when Traveling (p. 13) Setting Daylight Saving Time (p. 13) DATE DISPLAY STYLE Sets the order of year, month, day and the time display format (24H/12H). - Page 60 Details UPDATE Updates the functions of this unit to the latest version. For details, refer to the JVC homepage. (When no program to update the software of this unit is available, nothing will be provided on the homepage.) FACTORY PRESET Restarts the unit and returns all settings to their default values.
-
Page 61: Troubleshooting
A Turn off the power. B Remove the AC adapter and battery pack from this unit, reattach them, and turn on this unit. 3 If the above do not solve the problem, consult your nearest JVC dealer or JVC service Center. Trouble... - Page 62 Wipe the lens with a lens cleaning cloth. Set the focus from manual to auto. The focus is not If you are recording in a dark place or a adjusted automatically. subject that has no contrast between dark and light, adjust the focus manually.
- Page 63 This is a feature of the CMOS sensor Flickering and and not a malfunction. horizontal stripes appear under fluorescent lights. White, round spots may be captured White spots are due to reflection of the flash on the dust particles in the air, but this is not a captured on the image.
- Page 64 Fully charge and fully discharge the battery pack, then recharge it again. Remaining battery power is not displayed when the AC adapter is The remaining battery connected. If this unit is used for long periods of time display is not correct. in high or low temperatures, or if the battery pack is repeatedly charged, the amount of remaining battery may not be...
- Page 65 Check the remaining battery power. 18, 25 (When the battery pack is fully charged, the lamp does not flash.) The lamp does not flash When charging in either a hot or cold during battery pack environment, ensure that battery is being charged within the permitted charging.
-
Page 66: Warning Indications
24 hours and set the clock. If you use any other battery packs COMMUNICATION besides JVC battery packs, safety and performance cannot be guaranteed. Be ERROR sure to use JVC battery packs. Set “REC MEDIA FOR VIDEO” in the “COMMON”... - Page 67 Check the operating procedure, and FORMAT ERROR! perform once again. DATA DELETION ERROR Turn off and on this unit again. Turn off and on this unit again. Remove the AC adapter and battery 9, 14 pack, then remove and re-insert the SD card.
-
Page 68: Specifications
Specifications General Power Supply Using AC adapter: DC 11 V Using battery pack: DC 7.2 V Power Consumption 4.8 W (when MONITOR BRIGHTNESS is set to “3”) Dimensions (mm) 131 x 67 x 122 (5-3/16” x 2-11/16” x 4-13/16”) (W x H x D) (excluding shoulder strap) Mass Camera: Approx. - Page 69 GAIN Still image: AUTO, MANUAL (100, 200, 400, 800, 1600, 3200, 6400) Exposure Intelligent Auto (i.A), Program Auto (P), Aperture Priority AE (A), Shutter Speed Priority AE (S), Manual Exposure (M) Exposure correction Video: 13 step, -6 to +6 level Still image: 1/3 EV step, -2 EV to +2 EV Shutter During...
- Page 70 Clock Battery Type Rechargeable battery Still Image Recording Format JPEG standard Extension .JPG Image Size (p. 52) Quality FINE / STANDARD Recording Media Built-in memory (32 GB), SD/SDHC/SDXC card (commercially available), Eye-Fi card (commercially available) Video Signal System Digital HD system Recording/Playback MPEG-4 standard Format...
- Page 71 Recordable Time/Number of Images The approximate recording time and number of shots is only a guide. Values may vary depending on the shooting environment, SD card in use, and the battery condition. Approximate Number of Still Images (Unit: Number of Shots) SDHC Card SDXC Still Image Size with...
-
Page 72: Optional Accessories
Approximate Number of Still Images (Using Battery) Number of Recordable Images with Supplied Battery Pack 270 images Fully Charged The above value is obtained under the following conditions based on the CIPA standard. (CIPA: Camera & Imaging Products Association) Temperature: 25 °C (77°F) Records at 30-second intervals Uses supplied battery pack Flashes once every 2 times... - Page 73 Memo...
-
Page 74: Index
Index Focus ..........22 Adjusting Brightness ...... 36 Focus Assist ........50 AF Assist Beam ......52 Focus Assist Color ......50 AF Movement ......... 52 Format ..........60 AF Point ......... 52 Aperture Priority ......36 G Gain ..........53 Area Select ........ - Page 75 Protect ..........43 Update ........... 60 User Dial ........37 Q Quick Restart ......... 59 User Settings ........37 Rec Media For Image ..... 60 Video Output ........60 Rec Media For Video ..... 60 Video Quality ........54 Recordable Time/Number of Images ... 71 Volume Adjustment ......
- Page 76 © 2011 Victor Company of Japan, Limited 0911AJH-SW-VM...