
Related Manuals for Marshall Amplification M-LYNX-702


Summary of Contents for Marshall Amplification M-LYNX-702
-
Page 1: User Manual
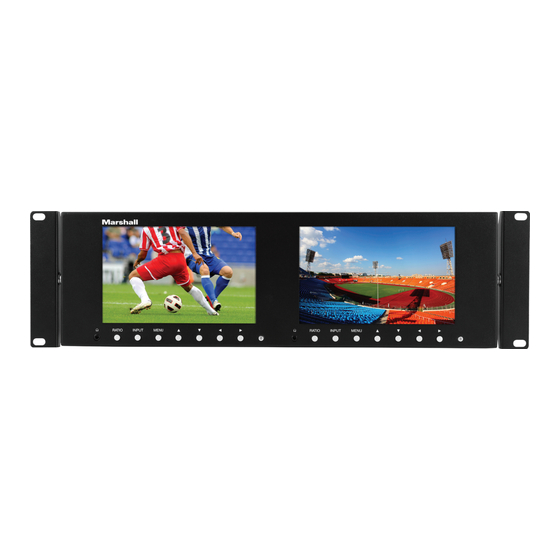
B r o a d c a s t A / V D i v i s i o n M-LYNX-702 V.3 Dual 7” LCD Display User Manual... -
Page 2: Table Of Contents
Table of Contents Table of Contents 1. Package Includes 2. Product Description 2.1 Front Panel 2.2 Rear Panel Connections 3. On-Screen Menu 3.1 Main Menu Categories 3.2 Sub-Menu Descriptions 3.2.1 Video 3.2.2 Audio 3.2.3 Setting 3.2.4 OSD (On-Screen Display) 4. Dimensions 5. -
Page 3: Package Includes
M-LYNX-702 V.3 Manual 1. Package Includes • One M-LYNX-702 Monitor • One universal AC power adapter • One AC power cord • Information card 2. Product Description 2.1 Front Panel Headphone jack (one per screen). Monitor channels 1 and 2 of embedded audio from HDMI or SDI source. -
Page 4: Rear Panel Connections
2.2 Rear Panel Connections Power Input The M-LYNX-702 V.3 monitor can be powered using either the included 12-Volt power supply plugged into the small coaxial connector or standard 12-Volt camera-type power supply connected to the 4-pin XLR connector. It is recommended to connect only one type of power supply at one time. -
Page 5: On-Screen Menu
M-LYNX-702 V.3 Manual LAN Port Ethernet LAN “RJ-45” Connector. The monitor can be operated from a PC using the application provided with the unit. 3. On Screen Menu Access the main menu by pressing the Menu button on the front panel. - Page 6 Audio – Volume, Balance. Setting – Screen Markers, Center Marker, Image Flip, Language, Reset, IP, Com, Ver. OSD – Setup On-Screen Menu Display. Has selections for Horizontal Position, Vertical Position, Menu Transparency, Menu Timeout, and display of Input Format.
-
Page 7: Sub-Menu Descriptions
M-LYNX-702 V.3 Manual 3.2 Sub-Menu Descriptions The default settings shown are the values the unit comes with “out-of-the-box.” In most cases, these are the mid-range settings for a given function and are not intended to be used as “ideal” values or choices. Best settings will depend on the application. -
Page 8: Audio
Check Field (Off = Default) • Default Mono • Picture will be displayed as black & white, all other color information is removed • Only red color information is displayed Green • Only green color information is displayed Blue • Only blue color information is displayed H/V Delay (Only available on SDI signal. -
Page 9: Osd (On-Screen Display)
M-LYNX-702 V.3 Manual Center Marker (OFF = Default) Displays a red “+”mark on the screen to indicate the center position • OFF • ON Image Flip (OFF = Default) • OFF • V - Flips the image vertically • H - Flips the image horizontally •... -
Page 10: Dimensions
4. Dimensions (mm) Continued on Next Page... -
Page 11: Parameters
M-LYNX-702 V.3 Manual 5. Parameters Screen 7” screen x 2 Screen Resolution 1280 x 800 Dot pitch 0.117 (H) x 0.117 (V) Ratio 16:10 Brightness 400 cd/m2 Contrast 800:1 Response Time 14ms Back light View angle 89°/89°, 89°/89° (L/R,U/D) Input... -
Page 12: Network Controls
6. Network Control Please download related Windows application from the Marshall website at: http://www.lcdracks.com/monitors/LYNX/M-LYNX-702.php 1. On the monitor, select Menu/Setting and read the IP address. Note: It is best to connect to the network first then connect power supply. In this way, the monitor will correctly display the IP information. - Page 13 M-LYNX-702 V.3 Manual • After login, Click: Add monitors. 2. Input IP address shown in the monitor Menu under “Setting” option, then click connect. www.marshall-usa.com...
- Page 14 • Select Screen 1 (left) or Screen 2 (right). • Then, select Control to operate basic menu settings.
- Page 15 M-LYNX-702 V.3 Manual • Or, select Function then click on the desired choices. The monitor will immediately respond. www.marshall-usa.com...
- Page 16 Warranty Marshall Electronics warranties to the first consumer that this device will, under normal use, be free from defects in workmanship and materials, when received in its original container, for a period of two years from the purchase date. This warranty is extended to the first consumer only, and proof of purchase is necessary to honor the warranty.