Daikin FFQ09Q2VJU Installation Manual
R410a split series
Hide thumbs
Also See for FFQ09Q2VJU:
- Installation manual (64 pages) ,
- Operation manual (28 pages) ,
- Service manual (23 pages)

Related Manuals for Daikin FFQ09Q2VJU


Summary of Contents for Daikin FFQ09Q2VJU
-
Page 1: Installation Manual
DAIKIN ROOM AIR CONDITIONER INSTALLATION MANUAL R410A Split Series Installation manual Manuel dinstallation Manuel dinstallation Manual de instalación MODELS FFQ09Q2VJU FFQ12Q2VJU FFQ15Q2VJU FFQ18Q2VJU... -
Page 2: Table Of Contents
Contents Safety Considerations ........1 Refrigerant Piping Work ......... 14 1. Flaring the pipe end ............. 14 Before Installation .......... 3 2. Refrigerant piping ............14 Accessories ............. 3 Installation of the Decoration Panel ....16 Choosing an Installation Site ......4 Field Settings .......... - Page 3 Corroding copper pipes or soldered parts may result in is shorted and operated forcibly, or parts other than those refrigerant leakage. specified by Daikin are used, fire or explosion may occur. (c) Near machinery emitting electromagnetic waves. Electromagnetic waves may disturb the operation of the control system and cause the unit to malfunction.
-
Page 4: Before Installation
Before Installation • Leave the unit inside its packaging until you reach the installation site. Where unpacking is unavoidable, use a sling of soft material or protective plates together with a rope when lifting, this to avoid damage or scratches to the unit. When unpacking the unit or when moving the unit after unpacking, be sure to lift the unit by holding on to the hanger bracket without exerting any pressure on other parts, especially on refrigerant piping, drain piping and other resin parts. -
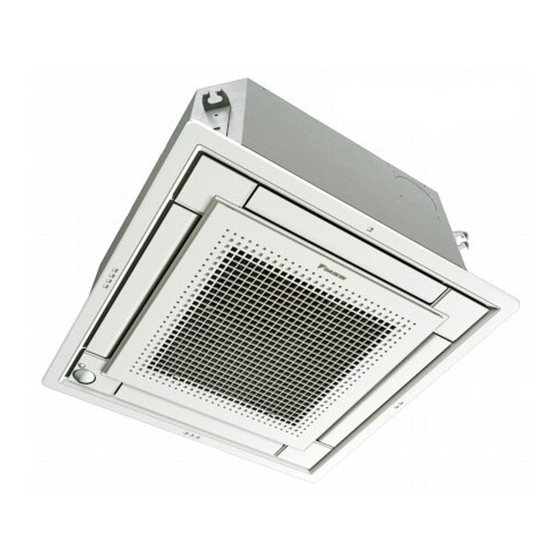
Page 5: Optional Accessories
Optional Accessories • The optional decoration panel and remote controller are required for this indoor unit. Table 1 Optional decoration panel Type A BYFQ60B3W1 Color: White Type B BYFQ60C2W1W Color: White Type B BYFQ60C2W1S Color: Silver • There are 2 types of remote controllers: wired and wireless. Select a remote controller from Table 2 according to customer request and install in an appropriate place. - Page 6 Choosing an Installation Site Installation Space Requirements ≥60 ≥60 (1500) (1500) outlet outlet inlet ≥60 ≥60 (1500) (1500) ≥60 (1500) ≥60 (1500) unit:inch (mm) • Leave 8 inch (200mm) or more space where marked with the , on sides where the air outlet is closed. Air flow direction • The air direction shown is an example.
-
Page 7: Indoor Unit Installation
Indoor Unit Installation Relation of ceiling opening to unit and suspension bolt position For decoration panel type A For decoration panel type B Top view Top view Refrigerant Refrigerant piping piping Suspension Suspension bolt (×4) bolt (×4) 21 (533) 21 (533) Suspension bolt pitch Suspension bolt pitch 2-1/2... -
Page 8: Make The Ceiling Opening Needed For Installation Where Applicable (For Existing Ceilings)
Depending on the field conditions, it may be easier to install optional accessories before the indoor unit is installed. However, for existing ceilings, always install fresh air intake kit before installing the unit. As for the parts to be used for installation work, be sure to use the provided accessories and specified parts designated by Daikin. For new ceilings 1) Install the indoor unit temporarily. -
Page 9: Drain Piping Work
CAUTION If the unit is tilted against condensate flow, the float switch may malfunction and cause water to drip. 4) Check the unit is horizontally level. Maintaining horizontality • The indoor unit is equipped with a built-in drain pump and float switch. Verify that it is level by using a water level or a water-filled vinyl tube. 5) Remove the E template. Water level Vinyl tube Vinyl tube For existing ceilings 1) Install the indoor unit temporarily. • Attach the hanger bracket to the suspension bolt. - Page 10 Indoor Unit Installation • Tighten the B clamp metal as indicated in the Drain socket illustration. Clamp metal View A • After the testing of drain piping is finished, attach the Sealing pad (large) Sealing pad drain J sealing pad (large) supplied with the unit (large) over the uncovered part of the drain socket (= between Clamp metal drain hose and unit body).
- Page 11 2. After piping work is finished, check if drainage flows smoothly • Add approximately 1/4 gal of water slowly from the air outlet and check drainage flow. Method of adding water Drain pipe Drain socket (water flow view point) Drain pump location Service drain outlet (with rubber plug) Use this outlet to drain water from the drain pan.
-
Page 12: Wiring
Indoor Unit Installation Wiring Refer also to the installation manual for the outdoor unit. WARNING • Do not use tapped wires, extension cords, or starburst connections, as they may cause overheating, electric shock, or fire. • Do not use locally purchased electrical parts inside the product. (Do not branch the power for the drain pump, etc., from the terminal block.) Doing so may cause electric shock or fire. - Page 13 Precautions for power supply wiring Use a round crimp-style terminal for connection to the terminal block for power supply. If it cannot be used due to unavoidable reasons, be sure to observe the following instructions: • In wiring, make certain that prescribed wires are used, carry out complete connections, and fix the wires so that external forces are not applied to the terminals. Wiring Attach insulation sleeve Round crimp-style terminal...
- Page 14 Indoor Unit Installation Connection of wiring between units, ground wire and remote controller wiring Wiring between units and ground wire 1) Remove the electrical wiring box cover (2 screws). Screws Electrical wiring box cover 2) Insert the wires including the ground wire into the conduit, and secure the conduit to the hole in the electrical wiring box using a lock nut and the N washer for conduit, as shown in the illustration.
-
Page 15: Refrigerant Piping Work
Refrigerant Piping Work Refer also to the installation manual for the outdoor unit. WARNING • Do not apply mineral oil on flared part. • Prevent mineral oil from getting into the system as this would reduce the service life of the units. • Never use piping which has been used for previous installations. Only use parts which are delivered with the unit. • Never install a dryer to this R410A unit in order to guarantee its service life. - Page 16 Refrigerant Piping Work Cautions on piping handling • Protect the open end of the pipe from dust and moisture. Be sure to Wall place a cap. • All pipe bends should be as gentle as possible. Use a pipe bender for bending.
-
Page 17: Installation Of The Decoration Panel
Installation of the Decoration Panel With the wireless remote controller, field setting and trial operation cannot be performed without attaching the decoration panel. Read “Trial Operation and Testing” before making a trial operation without attaching the decoration panel. Refer to the installation manual attached to the decoration panel. After installing the decoration panel, ensure that there is no space between the unit body and decoration panel. -
Page 18: When Implementing Group Control
Field Settings When implementing group control • When using as a pair unit, you may control up to 16 units Outdoor unit 1 Outdoor unit 2 Outdoor unit 3 with the remote controller. Indoor unit 1 Indoor unit 2 Indoor unit 3 • In this case, all the indoor units in the group will operate in accordance with the group control remote controller. - Page 19 Basic screen For wired remote controller 1) Set to COOL or HEAT operation using the remote Cool Set to controller. Cool Press and hold Cancel 2) Press and hold Cancel button for 4 seconds or longer. button for 4 seconds or Service settings menu is displayed. Return Clean the filter longer during backlight lit. 3) Select Test Operation in the service settings menu, and press Menu/OK button.
-
Page 20: Test Items
Trial Operation and Testing For wireless remote controller MODE 1) Press and select the COOL or HEAT operation. /TEST 2) Press twice. “Test” is displayed. ON OFF 3) Press within 10 seconds, and the test operation starts. Monitor the operation of the indoor unit for a minimum of 10 minutes. During test operation, the indoor unit will continue to cool/heat regardless of the temperature setpoint and room temperature. -
Page 21: How To Diagnose For Malfunction
Note to the installer Be sure to instruct customers how to properly operate the unit (especially cleaning the filter, operating different functions, and adjusting the temperature) by having them carry out operations while looking at the manual. How to diagnose for malfunction • If the air conditioner does not operate normally after installing the air conditioner, a malfunction shown in the table below may happen. - Page 22 Two-dimensional bar code is a manufacturing code. 3P436085-1 M15B215 (1607) HT...