Table of Contents
Advertisement
Advertisement
Table of Contents

Related Manuals for JVC UX-N5


Summary of Contents for JVC UX-N5
- Page 1 Compact Component System UX-N5 INSTRUCTIONS LVT2389-001B...
-
Page 2: Introduction
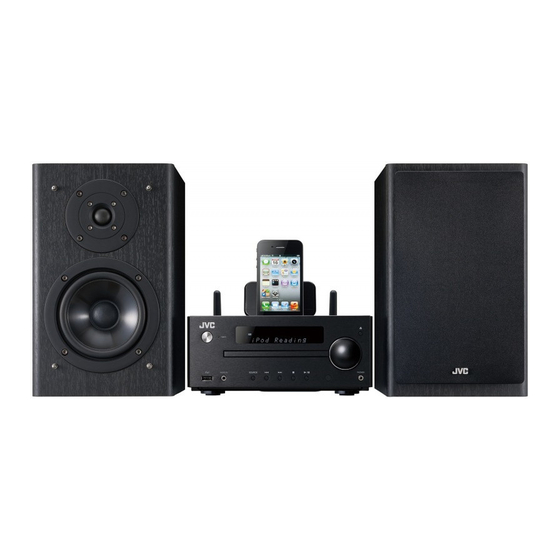
Introduction Precautions UX-N5 Compact Component system consists of the main unit (CA-UXN5) and the speaker system (SP- Do not cover the ventilation openings. Doing so keep UXN5). the heat to remain inside of the unit, which may cause Auto Power Save function (APS) fire. -
Page 3: Table Of Contents
Contents Introduction ........2 Listening to the USB Mass Storage Device ..........29 Precautions ............2 Accessories ............2 Playing back the USB Mass Storage Device ..29 Advanced USB Playback ........31 Controls and Indicators ....4 Listening to the Radio ....32 Front Panel ............ -
Page 4: Controls And Indicators
Controls and Indicators Front Panel Explanations can be found in the page indicated in parentheses. Top of the main unit Wi-Fi aerial (p. 7) SOURCE (Function) Button (p. 8, 11, A Button (p. 10, 12, 14-16, 21, 23, 21, 29, 41) 33, 39-44) S Button (p. -
Page 5: Display
Display USB Indicator (p. 29) TP Indicator (p. 34) iPod Indicator (p. 19) TA Indicator (p. 34) CD Indicator (p. 23) MUTING Indicator (p. 10) MP3 Indicator (p. 26, 27) TITLE Indicator (p. 28) WMA Indicator (p. 26, 27) ARTIST Indicator (p. 28) RDM Indicator (p. -
Page 6: Remote Control
Remote Control Remote Control Transmitter (p. 9) A Button (p. 10, 12, 14-16, 21, 23, 33-39, Numeric Buttons (p. 25, 26, 40) BASS/TREBLE Button (p. 10) HBS Button (p. 10) iPod MENU/Wi-Fi SET UP Button (p. 14-16, 18, 21, 22) J PRESET + Button (p. -
Page 7: Preparation For Use
Preparation for Use System Connections After checking all the connections have been made correctly, plug the AC power lead of this unit into the wall socket. Connecting the speaker code Without black cord With black cord FM aerial Wi-Fi aerial Wi-Fi aerial To video input socket Video cable... - Page 8 Removing saran nets Connecting to the external devices (TV, etc.) Saran nets are removable. This unit can output sound from external devices, such as TV, etc. Connect to the TV using an audio cable. To audio output sockets Audio cable (commercia Subwoofer pre-out connection lly available)
-
Page 9: Remote Control
Operating range of the remote control Remote Control Point the remote control directly at the remote sensor on the unit. Battery installation The remote control can be used within the range shown below: Open the battery cover. Remote sensor 0.2 m - 6 m Insert the included battery according to the terminal indicated in the battery compartment. -
Page 10: Basic Operation
Basic Operation Volume up/down DIMMER/ NETWORK STANDBY BASS/ TREBLE Turn the volume knob (on main unit) or press [VOLUME+/-] (on remote control) to increase MUTING or decrease the volume. Volume auto fade-in If you turn off and on the main unit with the volume set VOLUME to 27 or higher, the volume starts at 16. -
Page 11: Selecting A Source
CLOCK/TIMER Auto Power On function DIMMER/ NETWORK STANDBY ENTER During Network Standby, if UX-N5 is selected by AirPlay/DLNA device and playback is started, this unit turns on the power automatically and the music is AUDIO IN/ USB/iPad output from the speaker of this unit. -
Page 12: Clock Setting (Remote Control Only)
To readjust the clock Clock Setting (Remote Control Only) Perform step 1 at “Setting the clock (Remote control only)”. Press the [A] button to turn on the power. Step 5 (selecting 24-hour or 12-hour display) will Press the [CLOCK/TIMER] button. be skipped. -
Page 13: Using Airplay / Dlna
Using AirPlay / DLNA There are two ways to connect this unit and your About DLNA AirPlay/DLNA device, wireless connection (direct wireless connection) and wireless connection via With DLNA technology, this unit can play back music wireless LAN router. which is stored on your PC and/or mobile devices via wireless connection. -
Page 14: Direct Connection To The Main Unit (Direct Wireless Connection)
(UX-N5 xxxxxx). When using DLNA application, specify the files Press the [K / J] button to select “Direct”, to play back, and select “UX-N5” as the audio and then press the [ENTER] button. output device. Wait until the display shows “Direct Ready”... -
Page 15: Connection Via Wireless Router With Wps
Make sure that a wireless LAN router is connected to When using DLNA application, specify the files the mobile device or PC. to play back, and select “UX-N5” as the audio output device. Press the [A] button. Operations may vary depending on the applications you are using. -
Page 16: Connection Via Wireless Lan Router Without Wps Function (Ssid Connection)
Perform the same operation for the Android device/PC. Type 192.168.1.1 at the address bar, and press the [GO] button. The UX-N5 configuration page is displayed. Tap or click “OK” to confirm your settings. “Successfully connected to [network name]” UX-N5 N“Network” will be displayed on the main unit. -
Page 17: Adding Airplay / Dlna Devices To The Same Wi-Fi Network As The Main Unit
Tap or click the AirPlay icon (M) to select the speaker (UX-N5 xxxxxx). When using DLNA application, specify the files to play back, and select “UX-N5” as the audio output device. Operations may vary depending on the applications you are using. Refer to the help page of your application for further detail. -
Page 18: Navigating The Airplay/Dlna Devices
同期 Next/ previous track 6 Song for you 3:20 Mute MUTING Repeat Click the “Remote” icon, and select the speaker (UX-N5 xxxxxx). Shuffle Audio is output from the speaker. Windows Media Player 再生 書き込み 同期 Note UX-N5_xxxxxx Display content can be changed by pressing the [iPod DISPLAY / TV OUT] button. -
Page 19: Listening To Ipod/Iphone/Ipad
Listening to iPod/iPhone/iPad Note Connecting iPod/iPhone/iPad iPod/iPhone/iPad is charged in the following conditions: Supporting iPod/iPhone/iPad iPod touch (4th generation) Connection Connection via Condition via iPod/ USB/iPad iPod touch (3rd generation) iPhone dock Terminal iPod touch (2nd generation) When USB is ○... - Page 20 Connecting iPod/iPhone/iPad via USB/ Connecting iPod/iPhone to the dock for iPad terminal iPod/iPhone Caution Caution Do not connect or disconnect iPod/iPhone/iPad when Do not connect or disconnect iPod/iPhone when the the unit is turned on. unit is turned on. Remove all the accessories before connecting iPod/ Insert a connector to iPod/iPhone/iPad.
-
Page 21: Playing Back Ipod/Iphone/Ipad
Playing back iPod/iPhone/iPad Note [o] is not active while playing back iPod/iPhone/ iPad. SOURCE Display content can be changed by pressing the [iPod DISPLAY/TV OUT] button. (About iPhone) iPod MENU Incoming calls will pause the playback. Conversations on the phone is only output from the USB/iPad PRESET iPhone speaker. - Page 22 Navigating iPod/iPhone/iPad from the main unit Only iPod/iPhone can be connected to the dock. iPod/iPhone/iPad can be connected via USB connection. Main unit Remote control Dock Dock connection USB connection Operation Note connection/USB connection Play/pause Press in the pause mode. Pause Press in the playback mode.
-
Page 23: Listening To Cd, Mp3/Wma Discs
Listening to CD, MP3/WMA discs Disc Playback Press the [A] button to turn on the power. Press the [SOURCE] button on the remote control or [CD] button repeatedly on the main unit to select CD function. To open the disc tray, press the [OPEN/ CLOSEM] button on the remote control, or [M] on main unit. -
Page 24: Various Disc Functions
Depending on the recording condition and encoding Caution method, some CD-R or CD-RW may not be played Do not place two discs in one disc tray. back. Do not play discs of special shapes (heart, octagon, etc). It may cause malfunctions. Note Do not push the disc tray while it is moving. -
Page 25: Useful Functions For Disc Playback
Repeat play Useful Functions for Disc Playback Repeat play can play one track, all tracks or a programmed sequence continuously. REPEAT To repeat one track RANDOM Press the [REPEAT] button repeatedly until “Repeat One” appears. CANCEL Press [CD/USB I/W] button on the remote control, or [I/W] on main unit. - Page 26 Shuffle Repeat step 2 for other tracks. The tracks on the disc can be played in random order Press the [PROGRAM/MEMORY] button automatically. repeatedly to check the programmed tracks. Programme can be cancelled by pressing the To random play all tracks [CANCEL] button.
-
Page 27: About The Files
To add tracks in the programmed order MP3/WMA Folder Mode (Only for MP3/WMA Files) Press the [PROGRAM/MEMORY] button. “MEM” indicator flashes if the previous You can select the folder that contains the music you programme is stored. want to listen. Repeat step 2 for other tracks. -
Page 28: About Folder Playback Order
About folder playback order Press the [CD/USB I/W] button on the When playing back MP3/WMA files, tracks in the Root remote control, or [I/W] on main unit. folder are played back. Title, Artist and Album name are displayed if The following figure illustrates the order of audio files they are recorded on the disc. -
Page 29: Listening To The Usb Mass Storage Device
Listening to the USB Mass Storage Device Caution USB function is disabled when iPod or iPhone is connected to the iPod/iPhone dock. Remove iPod/ iPhone from the dock to play music via USB connection. FOLDER To pause playback PRESET ENTER Press the [CD/USB I/W] button on the remote control, or [I/W] on main unit. -
Page 30: To Remove Usb Memory Device
Navigating the USB device from the main unit Operation Main unit Remote control Note Play Press in the stop mode. Stop Press in the playback mode. Pause Press in the playback mode. Press the [I/W] button to resume playback from the paused point. Track up/down Press in the playback or stop mode. -
Page 31: Advanced Usb Playback
Advanced USB Playback Note For the following features, operation methods are AAC files cannot be played back. the same as these for the disc. DRM files cannot be played back. “Direct track search” (p. 25) This product can play WMA and MP3 files. It will “Repeat play”... -
Page 32: Listening To The Radio
Listening to the Radio Connect the aerial in advance. (p. 7) Note In case of poor reception of radio wave, auto tuning may stop. Auto scan tuning will skip stations remitting weak signal. To stop the auto tuning, press the [S/T] button PROGRAM again. -
Page 33: Memorising The Broadcasting Stations
To scan the preset stations Memorising the Broadcasting Stations Stations saved in the memory can be scanned automatically. (Preset memory scan) You can store 40 stations in memory. Press the [PRESET +/PRESET -] button for Tune in to a station you want to preset. more than 0.5 seconds. -
Page 34: Radio Data System
Radio Data System When tuning in to a station other than an Radio Data Using Radio Data System System station or to an Radio Data System station which sends weak signal, the display will change in the Increasing number of FM stations has started following order: providing the Radio Data System service. -
Page 35: Notes For Radio Data System Operation
Programme Type (PTY) Search Note To specify programmed types and select If the same station is broadcasting on different stations (PTY search) frequencies, the strongest frequency will be stored in memory. You can search a station by specifying the programme type (news, sports, traffic programme, etc. - Page 36 If you select the traffic programme: Note If you select the traffic programme (TP) in step 3, “TP” If the display has stopped flashing, start again from will appear. step 2. If the unit finds a desired programme type, the corresponding channel number will lit for about (This does not mean that you can listen to the traffic 8 seconds, and then the station name will remain it.
- Page 37 CHILDREN For programmes targeted at a young audience, primarily for entertainment and interest, rather than where the objective is to educate. SOCIAL Programmes about people and things that influence them individually or in groups. Includes: sociology, history, geography, psychology and society. RELIGION Any aspect of beliefs and faiths, involving a God or Gods, the nature of existence and ethics.
-
Page 38: Using The Timer
Using the Timer Press the [S/T] button to select the timer CLOCK/TIMER playback source (CD, TUNER, USB, iPod, AUDIO IN, AUX), and then press the [ENTER] button. After selecting “TUNER”, press the [S/T] repeatedly to select the preset broadcasting channel, and then press the [ENTER] button. “No Preset”... - Page 39 Using Once timer and Daily timer To cancel the timer setting together Press the [A] button, and then press and For example, Once timer can be used to listen to the hold the [CLOCK/TIMER] button. radio, and Daily timer can be set as an alarm. Within 10 seconds, press the [S/T] Press the [A] button to turn on the power.
-
Page 40: Sleep Operation
Sleep Operation Using the Timer and the Sleep Operation Together This unit will enter the standby mode after the set time has elapsed. Sleep and timer playback Play back the desired sound source. For example, you can fall asleep listening to the radio and wake up to CD in the next morning. -
Page 41: Connecting Other Devices And Headphones
Connecting Other Devices and Headphones Headphones and connection code are not included in To listen by using headphones this unit. Connect the headphones to the PHONE terminal Be sure to turn down the volume before connecting or putting on the headphones. Connecting the headphones deactivates the speakers. -
Page 42: Troubleshooting
Troubleshooting If you are having a problem with your unit, check this iPod/iPhone/iPad won't be charged. list for a possible solution before calling for service. iPod/iPhone/iPad is not making full contact with the connector. If the following operations won’t resolve Your iPod may not be supported by the main unit. -
Page 43: Resetting The Network Setup
CD Player Wi-Fi Connection Playback does not start. Playback stops in the Wi-Fi network connection failed. middle or is not performed properly. Is your router Wi-Fi certified? The disc is placed upside down. WPS Pin and WPS-PBC routers is not supported by this unit. -
Page 44: Other
Other Do not play discs of special shapes (heart, flower, Factory Reset, Clearing All Memory etc). It may cause malfunctions. Do not wipe it with thinner or benzine. Press the [A] button of this unit to turn off If a CD is dusty, clean it with a soft, dry cloth and the power. -
Page 45: About Dlna Devices
Wi-Fi CERTIFIED logo is a certification mark of Wi- About DLNA Devices Fi Alliance. About the Digital Media Server (DMS) Wi-Fi Protected Setup mark is a trademark of Wi-Fi Alliance. - Files stored in the Network Attached Storage (NAS) or PC can be played back by the Digital Wi-Fi and Wi-Fi Protected Setup are trademark and Media Renderer (DMR) being connected to the registered trademark of Wi-Fi Alliance. -
Page 46: Specifications
Specifications Main unit (CA-UXN5) General Power source AC 230 V, 50 Hz Power consumption Power on: 40 W Power standby: 0.4 W (*) Dimensions Width: 223 mm Height: 96 mm 136 mm (with Wi-Fi aerial upright) Depth: 338 mm Weight 2.9 kg (*) This power consumption value is obtained when NETWORK STANDBY is cancelled in the power standby mode. - Page 47 USB (MP3 / WMA) USB host interface Complies with USB 1.1 (Full Speed)/2.0 Mass Storage Class. Support Bulk only and CBI protocol. Support file MPEG 1 Layer 3(MP3) WMA (Non DRM) Bitrate support MP3 (32 - 320 kbps) WMA (64 - 160 kbps) Other Maximum total number of MP3/WMA files is 65025.
- Page 48 V EN © 2012 JVC KENWOOD Corporation 0912KMYSANSHA...