Table of Contents
Advertisement
Quick Links
CUSTOMER
Order toll-free in the U.S. 24 hours, 7 A.M. Monday to midnight Friday: 877-877-BBOX
SUPPORT
FREE technical support, 24 hours a day, 7 days a week: Call 724-746-5500 or fax 724-746-0746
INFORMATION
Mail order: Black Box Corporation, 1000 Park Drive, Lawrence, PA 15055-1018
Web site:
The HD View
www.blackbox.com
• E-mail:
info@blackbox.com
JULY 2007
AC3000A
AC3008A
AC3016A
AC3003A
AC3004A
AC3001A
AC3002A
Advertisement
Table of Contents

Related Manuals for Black Box AC3000A


Summary of Contents for Black Box AC3000A
- Page 1 Order toll-free in the U.S. 24 hours, 7 A.M. Monday to midnight Friday: 877-877-BBOX SUPPORT FREE technical support, 24 hours a day, 7 days a week: Call 724-746-5500 or fax 724-746-0746 INFORMATION Mail order: Black Box Corporation, 1000 Park Drive, Lawrence, PA 15055-1018 Web site: www.blackbox.com • E-mail:...
- Page 3 FCC STATEMENT FEDERAL COMMUNICATIONS COMMISSION CANADIAN DEPARTMENT OF COMMUNICATIONS RADIO FREQUENCY INTERFERENCE STATEMENTS This equipment generates, uses, and can radiate radio frequency energy and if not installed and used properly, that is, in strict accordance with the manufacturer’s instructions, may cause interference to radio communication.
- Page 4 HD VIEW Normas Oficiales Mexicanas (NOM) Electrical Safety Statement INSTRUCCIONES DE SEGURIDAD 1. Todas las instrucciones de seguridad y operación deberán ser leídas antes de que el aparato eléctrico sea operado. 2. Las instrucciones de seguridad y operación deberán ser guardadas para referencia futura.
- Page 5 NOM STATEMENT 11. El aparato eléctrico deberá ser connectado a una fuente de poder sólo del tipo descrito en el instructivo de operación, o como se indique en el aparato. 12. Precaución debe ser tomada de tal manera que la tierra fisica y la polarización del equipo no sea eliminada.
- Page 6 HD VIEW...
-
Page 7: Table Of Contents
CONTENTS Contents 1. Specifications................. 7 2. Introduction ................... 9 2.1 Features ..................9 3. HD View components ..............10 3.1 HD View Transmitter .............. 10 3.2 HD View Receivers..............11 3.3 HD View Line Splitters............12 3.4 LEDs ..................13 3.5 HD View Video Tuner ............. - Page 8 HD VIEW 7.4.1 Selecting the ports to command ......... 29 7.4.2 Sending commands............29 7.5 Tuning Receivers - LR (or Line Splitters) via the Service Utility ...................... 30 7.6 Remote Tuning ................ 33 7.7 Service..................36 7.7.1 Firmware ................37 7.7.2 Display Data Channel (DDC) hotkey .........
-
Page 9: Specifications
CHAPTER 1: Specifications 1. Specifications HDTV up to 1080p. Up to 1920x1440 @ 60Hz. Resolution Depending on the cable length and quality Input/Output video signals Analog signal red, green, blue 0.7v, p-p 75 Ohm Sync TTL compatible Horizontal/Vertical sync Positive/Negative polarity CATx(5/5e/6/7) UTP/ FTP 2x4x24 AWG solid System cable... - Page 10 HD VIEW HD View Transmitter (1, 8, 16 ports) HD View Line Splitter/Line Splitter - LR Cables VGA In - HDD15M System In - RJ45 & Connectors VGA Local - HDD15F System Out - RJ45 Stereo audio In/Out – Jack PL 3.5mm Control –...
-
Page 11: Introduction
CHAPTER 2: Introduction 2. Introduction The HD View system from Black Box is an out-of-band solution for the last step in a digital signage network. HD View combines video, stereo/audio and serial functions for distributing real-time multimedia content from player to multiple screens up to 300m/1,000ft away. -
Page 12: Hd View Components
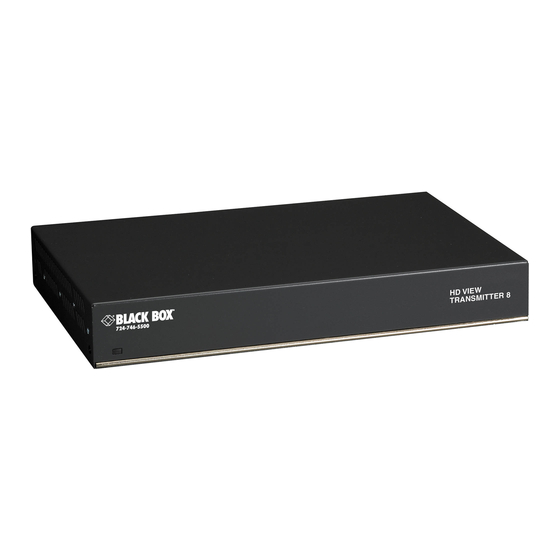
CD containing Video Service Utility 3.1 HD View Transmitter The HD View Transmitter comes in the following models: · HD View Transmitter – p/n AC3000A · HD View Transmitter 8 port - p/n AC3008A · HD View Transmitter 16 port - p/n AC3016A The figure below illustrates the Transmitter 8 port model. -
Page 13: Hd View Receivers
CHAPTER 3: HD View components 3.2 HD View Receivers The HD View Receivers come in the following models: · HD View Receiver - p/n AC3003A. Can be up to 110m/360ft from the Transmitter · HD View Receiver - LR - p/n AC3004A. Can be up to 300m/1,000ft from the Transmitter The figures below illustrates the Receiver and Receiver - LR ports To speakers... -
Page 14: Hd View Line Splitters
HD VIEW 3.3 HD View Line Splitters Add Line Splitters / Line Splitters - LR to use for clusters or to increase the number of Receivers in the system up to 128 – When using the Transmitter 16 port. The Line Splitters come in the following models: ·... -
Page 15: Leds
CHAPTER 3: HD View components 3.4 LEDs The table below explains the functions of all the LEDs of the units in the system. Unit Function Transmitter Front panel - Green Power indicator Green - Power indicator Yellow solid – unit is connected to the system. -
Page 16: Hd View Applications
HD VIEW 4. HD View applications The figures below illustrate the versatility of the HD View system. Figure 7 shows a basic installation with a Receiver and Receiver - LR. Receivers can be up to 110m/360ft away from the Transmitter. Receiver - LR can be up to 300m/1,000ft away from the Transmitter. - Page 17 CHAPTER 4: HD View applications Figure 10 and Figure 11 show different mixed installations with different combinations of Line Splitter and Line Splitter - LR and Receiver and Receiver - LR. Receiver Player 10m/33ft 100m/330ft 200m/660ft Line Splitter Receiver - LR Transmitter Figure 10 Mixed installation 1 Receiver...
-
Page 18: Installing The System
HD VIEW 5. Installing the system 5.1 Pre-installation guidelines Place cables away from fluorescent lights, air conditioners, and machines that are likely to generate electrical noise. 5.2 The HD View cables The HD View cables are illustrated below. Video cable Serial Download cable Serial Extender cable Stereo Audio cable... - Page 19 CHAPTER 5: Installing the system (Optional) Connect a monitor to the Transmitter Video Out port. (Optional) Connect speakers to the Transmitter Audio Out port. Receiver /Receiver - LR connections Connect the screen to the Video port. Connect the audio/speakers to the Audio port/s. Where the audio/speakers have one connector, connect it to the L&R port.
-
Page 20: Connecting To The Power Supply
HD VIEW Serial Download cable To Serial port HD View To Audio Out Transmitter To Serial port AUDIO OUT To Mic. port VIDEO OUT LOCAL 5VDC CONTROL VIDEO IN SERIAL AUDIO IN CATx cables to To Audio In Receivers or Serial Line Splitters Stereo Audio cable... -
Page 21: Adjusting The Picture Quality
Connect the Video Tuner to the Tuning port of the Receiver – LR / Line Splitter, using the supplied cable. Once connected, Black Box HD View appears in the LCD. Press the Menu key to repeatedly scroll between the following functions: ·... -
Page 22: Downloading A Video Table
HD VIEW 6.1 Downloading a video table To download a video table: Scroll to Preset tables Use the arrow keys to browse through all the predefined tables. When you reach the desired table, press the Menu key. MNU=SAVE appears in the LCD and the table downloads. During downloading the LCD message blinks. -
Page 23: Hd View System Management
CHAPTER 7: HD View system management 7. HD View system management The HD View system comes with a Service utility to configure and control the system. Use the Service utility to: · Define up to 16 Groups of monitors – (a specific monitor may belong to several Groups). -
Page 24: Connecting The Serial Download Cable
HD VIEW For full functionality of the Service utility the HD View system (Transmitter, Line Splitters and Receivers) must be connected and switched on. You can however configure the system topology manually even when the system is not operational. 7.2 Connecting the Serial Download cable Connect the Serial Download cable to the Control port of the Transmitter and a Serial port of the computer which has the Service Utility installed. -
Page 25: Com Port
CHAPTER 7: HD View system management 7.3.1 Com port Choose Tools/Options. The Preferences window appears see Figure 16. In the Com port field select the Com port to which the Serial Download cable is connected to. Figure 16 Preferences window 7.3.2 Topology To utilize the Service Utility functions you must configure the system topology. -
Page 26: Auto-Detect
HD VIEW 7.3.3 Auto-detect Note! Auto-detection only works if the Service Utility is online. Check the Title line of the Service Utility window, see Figure 17. When offline, connect to the system by choosing File/Connect. To auto-detect the topology, click and when prompted click Yes. -
Page 27: Check
CHAPTER 7: HD View system management 7.3.4 Check When units have been connected or disconnected since last detecting the topology you can check for any changes to the topology. To do so: Click . Any new units detected appear as an connected but undefined . -
Page 28: Naming A Port
HD VIEW see which ports have devices connected. In Figure 19 a device is connected to port 4. Figure 19 Manually displayed topology To define the units connected to the ports, click the checkbox of a port or a number of ports that have the same device connected. Click . -
Page 29: Saving A Group
CHAPTER 7: HD View system management To restore the topology choose File/Restore. Find the saved topology and click Open. The stored topology appears. Note! The most recent saved topologies appear in the File menu. 7.3.8 Saving a Group You can save a Group to include particular ports. Once defined, you can send instructions to the defined Group without needing to choose the individual ports. -
Page 30: Deleting A Group
HD VIEW 7.3.9 Deleting a Group To delete a Group: Select the Group and click 7.4 Controlling the system To control the system: Click the Control tab or choose View/Control, the Control window appears, see Figure 21. Control icons Connected devices appear here Topology... -
Page 31: Selecting The Ports To Command
CHAPTER 7: HD View system management 7.4.1 Selecting the ports to command You can select the ports to command in any of the following ways. From the topology on the left hand side: Tick the individual checkboxes of the units you want to send a command. Or tick the desired Group –... -
Page 32: Tuning Receivers - Lr (Or Line Splitters) Via The Service Utility
HD VIEW Sending/blocking a Serial command Click to toggle between sending and blocking a Serial command. When sending a Serial command the device icons appear with an arrow like this: Sending/blocking a bi-directional Serial command When sending a Serial command, you can send a bi-directional Serial command to a single Receiver / Receiver - LR. - Page 33 CHAPTER 7: HD View system management 5VD C SYSTEM TUNING To computer’s Serial port Transmitter Serial Download cable Figure 22 Connecting the Serial Download cable to the Receiver - LR Open the test card located on our ftp Site ftp://ftp.blackbox.com in the Communication folder in a sub-folder named, “HD View Test Card”.
- Page 34 HD VIEW Figure 24 Tuning window The Drop-down menu contains preset tuning configurations for distances of between 1m and 300m. Note! These presets were made using a test cable which may not be an exact match for the cable that you are using. Choose the preset distance that is closest to the actual distance in meters between the Player and remote screen.
-
Page 35: Remote Tuning
CHAPTER 7: HD View system management Faster Green Blue Slower Figure 25 RGB signals Once you have a satisfactory image, press Store to keep the present tuning configuration. Click Save Preset to save the tuning configuration for future use. The Enter Name box appears. Type a name for the preset and click OK. - Page 36 HD VIEW http://192.168.111.132 Remote tuner at the screen Service Utility Receivers installed here Transmitter Line Splitter Player - IP: 192.168.111.132 Figure 26 Remote tuning At the player the setup is done as follows: Connect the Serial Download cable to the Transmitter and player.
- Page 37 CHAPTER 7: HD View system management Figure 27 Select device web page Select a unit and press Submit. The tuning page appears, see Figure 28. Figure 28 Remote tuning web page Adjust the setting until you have a satisfactory picture. Press Submit to activate the new values.
-
Page 38: Service
HD VIEW Select another device to tune by clicking Select another device or close the webpage. Figure 29 gives an overview of the remote tuning. Digital Signage Digital Signage Digital Signage Digital Signage The Service Utility is running in Www.too-high-to-reach.com Www.too-high-to-reach.com Www.too-high-to-reach.com Www.too-high-to-reach.com... -
Page 39: Firmware
CHAPTER 7: HD View system management Figure 30 Service window 7.7.1 Firmware Upgrade firmware to improve functionality and fix bugs. Firmware updates can be found on our ftp Site ftp://ftp.blackbox.com in the Communication folder in a sub-folder named, “HD View firmware”. Save the firmware update on your hard drive. -
Page 40: Service
HD VIEW To update the DDC: Select a Receiver and press Get DDC to read the DDC from the monitor attached to it and save it to file. Select the Transmitter and press Set DDC to read from the saved file and upload it to the Transmitter. - Page 41 CHAPTER 7: HD View system management Figure 31 Security window Here you can set up a password to require password access to the service Utility.
- Page 42 HD VIEW © Copyright 2007. Black Box Corporation. All rights reserved. 1000 Park Drive Lawrence, PA 15055-1018 724-746-5500 Fax 724-746-0746...