
Summary of Contents for ALDI EDR050BAUW
- Page 1 User Manual Manual del usuario 50 PINT DEHUMIDIFIER DESHUMIDIFICADOR DE 24 LITROS English.... 1 Español..23 2017.01.20...
-
Page 2: Table Of Contents
Contents CONTENTS / ÍNDICE TO OBTAIN WARRANTY SERVICE YOU MUST PROVIDE A VALID PROOF OF PURCHASE. Important safety information ....2 PLEASE STAPLE YOUR RECEIPT TO THIS Electrical requirements ....... 3 PAGE FOR FUTURE REFERENCE. Grounding instructions......4 Safety precations ........ 5 Model Number: Serial Number: Installation instructions ...... -
Page 3: Important Safety Information
Safety Safety Important safety information Important safety information Read and follow all safety instructions Read and follow all safety instructions Electrical requirements To reduce the risk of fire, electric shock, or person- To prevent injury to the user or other people al injury, all wiring and grounding must conform to and to prevent property damage, the following the latest edition of Local and National Electrical... -
Page 4: Grounding Instructions
Safety Safety Important safety information Important safety information Read and follow all safety instructions Read and follow all safety instructions Grounding instructions Safety precautions Improper connection of the equipment-grounding When using this dehumidifier, always follow basic conductor can result in a risk of electrical shock. safety precautions, including the following: Check with a qualified electrician or serviceperson if you are in doubt as to whether your appliance... -
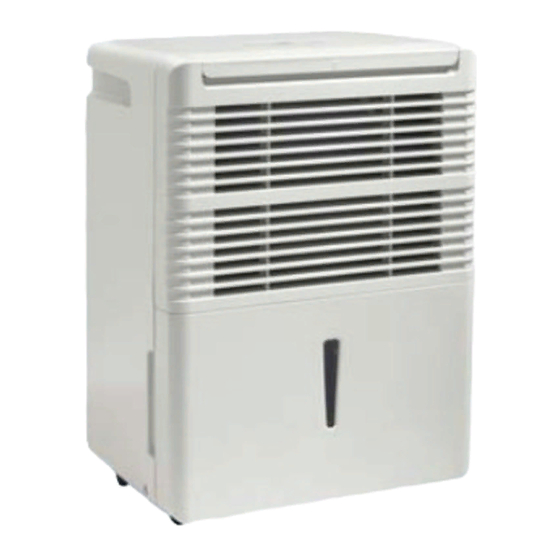
Page 5: Features
Safety Installation Important safety information Features Read and follow all safety instructions Safety precautions Front: Control panel • If the receptacle does not match the plug, the Air intake grill receptacle must be changed out by a qualified Air outlet grill electrician. -
Page 6: Location
Installation Installation Location Location • Select a suitable location, making sure you have easy access to an electrical outlet. DO NOT USE EXTENSION CORDS. • Make sure there are no obstructions restrict- ing airflow through the front air intake grill. Maintain a minimum clearance of at least 20 cm (8”) between adjacent walls and the back of the unit, to allow for proper air circulation... -
Page 7: Control Panel Instructions
Operating Operating Control panel instructions Error codes AS - Humidity sensor error ES - Temperature sensor error P2 - Bucket is full or the bucket is not in correct position EC - Ensure that the room ambient temperature match- es the recommended operating temperature for the unit, Filter 5°C (41°F) - 35°C (95°F). -
Page 8: Timer Functions
Operating Operating Timer functions Water tank operation Follow these steps to program the Auto-on or Auto-off The water tank holds accumulated condensed water feature using the control panel: and, by means of a safety switch, controls both the wa- ter level and operation of the dehumidification process. Auto-off: When the unit is on and the timer button is pressed, When the water tank is full and/or accidentally displaced... -
Page 9: Removing Collected Water
Operating Operating Dehumidifying mode instructions Removing the collected water There are two ways to remove collected water: When the power button is pressed, the power light turns on and the dehumidifier automatically defaults to: Use the bucket When the bucket is full, the compressor turns off and the Display: Current ambient room humidity (RH%) fan turns off after drying the water off the condenser for 30 Humidity Setting: 40% RH... -
Page 10: Care And Maintenance
Operating Care and maintenance Continuous draining: Cleaning Drain hose Clean the grill and case Adaptor A Water can be automatically emptied Use water and a mild detergent. Do not use bleach or into a floor drain by attaching the abrasives. Do not splash water directly onto the main unit. unit to an ID ≥... -
Page 11: Air Fi Lter
Care and maintenance Troubleshooting Air fi lter Consumer Service: 1-800-263-2629 Your dehumidifi er features a removable Air Filter. This PROBLEM POSSIBLE CAUSE SOLUTION fi lter is located at the front of the unit (behind the air • The dehumidifi - •... -
Page 12: Warranty
• Hose connec- • Check the hose connec- Water on Guelph, Ontario 06/2017 tion may be tion. See “Continuous MODEL: EDR050BAUW Canada fl oor loose Drain” section N1H 6Z9 Hotline: 1-800-263-2629 Call charges from your regular • Bucket used to •... - Page 13 Índice ALDI INC. FULL WARRANTY CONDITIONS Dear Customer: The ALDI warranty is a full warranty offering you the following benefi ts: Instrucciones de seguridad importantes.25 Requisitos eléctricos........ 26 2 years from date of purchase for unit. Warranty Period: Instrucciones de conexión a tierra ... 27...
- Page 14 Seguridad Información importante de seguridad PARA OBTENER SERVICIO DE GARANTÍA, Lea y siga todas las instrucciones de seguridad DEBE PROVEER UN RECIBO ORIGINAL. POR FAVOR ENGRAPE SU RECIBO A ESTA Para evitar heridas al usuario u PÁGINA EN CASO QUE NECESITE HACER otras personas y para evitar los UNA RECLAMACIÓN EN EL FUTURO.
-
Page 15: Requisitos Eléctricos
Seguridad Seguridad Información importante de seguridad Información importante de seguridad Lea y siga todas las instrucciones de seguridad Lea y siga todas las instrucciones de seguridad Instrucciones de conexión a tierra Requisitos eléctricos Una conexión inadecuada del conductor de conex- Para reducir el riesgo de incendio, descarga ión a tierra del equipo puede dar como resultado eléctrica o lesión personal, todo la instalación... -
Page 16: Precauciones De Seguridad
Seguridad Seguridad Información importante de seguridad Información importante de seguridad Lea y siga todas las instrucciones de seguridad Lea y siga todas las instrucciones de seguridad Precauciones de seguridad Precauciones de seguridad Al usar este deshumidificador, siga siempre las • Apague el deshumidificador y desenchúfelo precauciones de seguridad básicas, incluidas las antes de limpiarlo. -
Page 17: Caracteristicas
Instalación Instalación Caracteristicas Ubicación • Escoja una ubicación apropiada, asegurándose de que tenga fácil acceso a un tomacorriente. NO Parte frontal: USE CABLES DE EXTENSIÓN. Panel de control • Verifique que no haya obstrucciones que restrinjan Rejilla de entrada el flujo de aire por la rejilla delantera de entrada. de aire Mantenga una separación mínima de por lo Rejilla de salida de... -
Page 18: Instrucciones Del Panel De Control
Instalación Operación Ubicación Instrucciones del panel de control Filter 16 pulgadas o más Power Continuous Operation Rejilla de salida de aire Timer Cada vez que presione el botón para cambiar el modo de funcionamiento, la unidad emitirá un pitido para indicar que está cambiando de modo. -
Page 19: Códigos De Error
Operación Operación Códigos de error Funciones del temporizador AS - Error del sensor de humedad Siga estos pasos para programar las funciones de ES - Error del sensor de temperatura encendido o apagado automático usando el panel de P2 - Tanque lleno o mal colocado control. -
Page 20: Funcionamiento Del Tanque De Agua
Operación Operación Funcionamiento del tanque de agua Instrucciones del modo deshumidificador Al presionar el botón de encendido, se enciende la luz de encendido y el deshumidificador entra en el modo El tanque de agua acumula el agua de siguiente de forma predeterminada: condensación y, mediante un interruptor Pantalla: Humedad actual del ambiente (RH%) de seguridad, controla el nivel de agua y el... -
Page 21: Eliminación Del Agua Recogida
Operación Operación Eliminación del agua recogida Drenaje continuo: Existen dos formas de hacerlo: Se puede drenar automáticamente el agua Manguera de drenaje Adaptador A Adaptor A en un desagüe del piso colocando una Use el tanque manguera de agua de diámetro interno ≥ Cuando se llena el tanque, se apaga el compresor y el 5/16”... -
Page 22: Cuidado Y Maintenimiento
Cuidado y maintenimiento Cuidado y maintenimiento Limpieza Filtro de aire Limpie la rejilla y el exterior de la unidad Use agua y un detergente suave. No use blanqueador ni Su deshumidifi cador tiene un fi ltro de aire extraíble. productos abrasivos. No salpique agua directamente sobre la Este fi... -
Page 23: Resolución De Problemas
Resolución de problemas Resolución de problemas Servicio al consumidor: 1-800-263-2629 Servicio al consumidor: 1-800-263-2629 PROBLEMA CAUSA POSIBLE SOLUCIÓN • Necesita reiniciar el • Ajuste a 40% HR. Permita que • El deshumidifi cador • Asegúrese de que el enchufe controlador el tanque se llene y luego vacíe deshumidifi... -
Page 24: Garantía
ALDI INC. CONDICIONES DE LA GARANTÍA TARJETA DE GARANTÍA Estimado cliente: La garantía de ALDI es una garantía completa que le ofrece los siguientes benefi cios: DESHUMIDIFICADOR DE 24 LITROS 2 años a partir de la fecha de compra. Período de garantía:... - Page 25 DISTRIBUTED BY • DISTRIBUIDO POR: ALDI INC., BATAVIA, IL 60510 WWW.ALDI.US AFTER SALES SUPPORT • 52494 SERVICIO POSVENTA 1-800-263-2629 consumerservice@danby.com YEAR WARRANTY MODEL/NO DEL MODELO: 06/2017 AÑOS DE GARANTÍA EDR050BAUW Printed in China Impreso en China...