Table of Contents
Advertisement
Quick Links
Advertisement
Table of Contents

Related Manuals for Pyle PLDVD65IN


Summary of Contents for Pyle PLDVD65IN
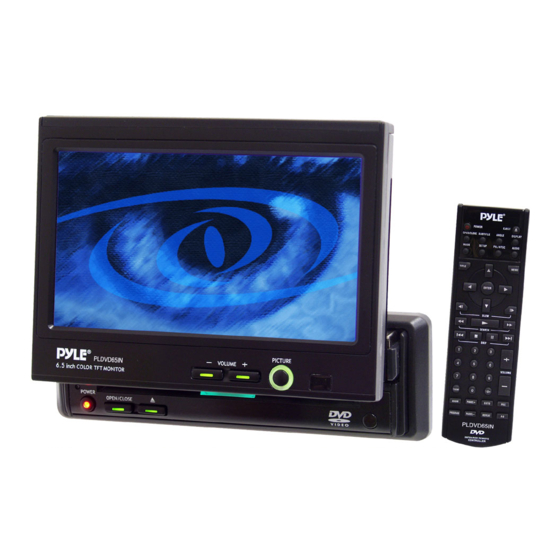
- Page 1 PLDVD65IN OWNER'S MANUAL Mobile Video System Vertical Adjustable And Horizontal Rotatable Panel 6.5 Inch Color TFT Monitor DVD/CD/MP3 Multi-subtitle Languages Function Multi-audio Languages Function Multi-angle Function Parental Control Remote Control www.pyleaudio.com...
-
Page 2: Table Of Contents
CONTENTS Safety Information ... 4 Disc Notes ... 5 Installation ...6 The Player... 9 Front View ... 9 Back View ...10 Electrical Connection ...11 Remote Control ...12 Location and Function of Keys ...12 Preparing the Remote Control ...14 Loading/ Ejecting a disc ...15 Loading a disc ...15 Ejecting a Disc ... - Page 3 FEATURES Compatible with NTSC DVD (Video CD) This player can play discs recorded in either NTSC format. A single LSI chip now integrates all major DVD playback circuit functions including MPEG2 decoder, video D/A converter, and audio decoders. L/R stereo analog audio outputs for connection to existing head unit aux inputs.
-
Page 4: Safety Information
SAFETY INFORMATION CAUTION: MOBILE DVD PLAYER IS A CLASS I LASER PRODUCT. HOWEVER THIS MOBILE DVD PLAYER USES A VISIBLE/INVISIBLE LASER BEAM WHICH COULD CAUSE HAZARDOUS RADIATION EXPOSURE IF DIRECTED. BE SURE TO OPERATE THE MOBILE DVD PLAYER CORRECTLY AS INSTRUCTED. -
Page 5: Disc Notes
DISC NOTES Disc formats supported by this player 12 cm disc (Single-sided disc only) VIDEO CD 12 cm disc 12 cm disc 12 cm disc Discs which cannot be played with this player DVD-ROM DVD-R/DVD-RAM CD-G Handling and Cleaning Dirt, dust, scratches and warping disc will cause misoperation. -
Page 6: Installation
INSTALLATION Notes: Choose the mounting location where the unit will not interfere with the normal driving function of the driver . Before finally installing the unit, connect the wiring temporarily and make sure it is all connected up properly and the unit and the system work properly. - Page 7 INSTALLATION Dashboard Tabs Screwdriver Sleeve 6. Reconnect the wire harness and the antenna and be careful not to pinch any wires or cables. 7. Slide the unit into the sleeve until it locks into place. 8. To further secure the unit, use the supplied metal strap to secure the back of the unit in place.
- Page 8 INSTALLATION DIN FRONT-MOUNT (Method B) 1. Factory radio mounting bracket 2. Car radio mounting bracket 3. Screw 4. After aligning the car radio mounting bracket with the factory radio mounting bracket, tighten the screws (5x5mm) at 2 places on each side. 5.
-
Page 9: The Player
THE PLAYER FRONT VIEW When the monitor stretching out: 1. POWER 2. Remote sensor (on the front panel) 3. OPEN/CLOSE (EJECT) 5. Disc Slot 6. Reset Button PICTURE VOLUME - VOLUME + Remote sensor (on the monitor panel) 6.5 INCH COLOR TFT MONITOR... -
Page 10: Back View
THE PLAYER BACK VIEW 13 14 AUDIO/VIDEO INPUT 1 13. RGB SYSTEM 14. REMOTE SOCKET 15. AUDIO/ VIDEO INPUT 2 16. DIGIT AL AUDIO 17. AUDIO/ VIDEO OUTPUT 18. DC 12V IN... -
Page 11: Electrical Connection
ELECTRICAL CONNECTION AUDIO/VIDEO INPUT REMOTE RGB SYSTEM AUDIO/VIDEO AUDIO/VIDEO DIGITAL OUTPUT INPUT AUDIO DC 12V IN... -
Page 12: Remote Control
REMOTE CONTROL LOCATION AND FUNCTION OF KEYS... -
Page 13: Remote Control
REMOTE CONTROL POWER Press POWER to turn the unit ON or OFF. EJECT Press to eject the disc. OPEN/CLOSE Press to open/close the monitor . SUBTITLE Changing of the SUBTITLE language on multi-subtitle language DVD disc. ANGLE Changing of the view angle on multi-angle DVD disc. DISPLAY Display statistical disc information during playback. -
Page 14: Preparing The Remote Control
REMOTE CONTROL Preparing the Remote Control Inserting the Batteries 1. Open the battery compartment cover. 2. Insert the new batteries. Make sure that the positive and negative terminals of the batteries are oriented as indicated. 3. Close the cover Battery: Two AAA size battery. Using the Remote Control Point the remote contr ol towards the remote control signal receiver on the... -
Page 15: Loading/Ejecting A Disc
LOADING/EJECTING A DISC Loading a Disc 1. Turn the ignition on the accessory position. 2. Press the POWER button (1). 3. Insert the disc with printed side facing up into the disc slot (2). 4. The player starts playback automatically. Ejecting a Disc Press (EJECT) button (3) to eject the... -
Page 16: Operation
OPERATION BASIC OPERATION Turnig the player on/off Press the POWER button on the front panel or (POWER) button on the remote control to turn the player on or off. Open/Close the Monitor and Angle Adjustment Press OPEN/CLOSE button on the front panel or point the remote control to the remote sensor on the front panel and press OPEN/CLOSE button on the... - Page 17 OPERATION Remote Sensor There is a remote sensor on the front panel. On the monitor, there is another remote sensor to receive remote control signal. You can point the remote control handset to the remote sensor on the front panel (when the monitor doesn't stretch out) or the remote sensor on the monitor panel (when the monitor stretches out) and press function keys on the remote...
-
Page 18: Disc (Dvd, Vcd, Cd, Mp3) Operation
OPERATION DISC (DVD, VCD, CD, MP3) OPERATION Switching to DVD mode press MODE button on remote to select DVD mode. Stopping Play - Briefly press the (Stop) button to stop the unit playback, when the (Play) button is pressed, normal playback will continue. - Page 19 OPERATION Disc Search (GOTO) FOR DVD Press GOTO button twice, the screen will display the following message: TITLE 01/01 TIME -- : -- : -- 00:00:25 You can select the item you want to watch through TIME setting by using numeric buttons and ENTER key.
- Page 20 OPERATION (5) Press DISPLAY for the fifth time: The message on the screen will be cleared. VCD: (1) Press DISPLAY for the first time: SINGLE ELAPSED 00:00:25 (2) Press DISPLAY for the second time: SINGLE REMAIN 00:03:15 (3) Press DISPLAY for the third time: TOTAL ELAPSED 00:00:25 (4) Press DISPLAY for the fourth time:...
- Page 21 OPERATION Multi-audio Language Function For DVD: Press AUDIO on the remote control during playback. Each time the button is pressed, the audio soundtrack language changes on sequential order. Notes: - The language number is different according to the disc. - Some disc only contain one language soundtrack.
-
Page 22: Rgb Operation
OPERATION Smart navigation MP3 Disc Play MP3 disc is playing as the format of FOLDER. For example: SMART NAVI ROO T CD01 MP3 001 PLUMT CD02 MP3 002 RZID CD03 MP3 003 ASCIS CD04 MP3 004 DCYI CD05 MP3 005 BFZ DISC PLAY MODE In stop mode, Use... -
Page 23: Setup
SETUP INITIAL SETUP SETUP MENU --- MAIN PAGE GENERAL SETUP SPEAKER SETUP AUDIO SETUP PREFERENCES EXIT SETUP Press SETUP on the remote control in the STOP mode. (Press the twice to ensure that the player is in STOP mode.) 2. The initial SETUP menu is displayed. 3. - Page 24 SETUP --- GENERAL PAGE --- TV DISPLAY PIC MODE AUTO ANGLE MARK HI-RES OSD LANG N-FLICKER CAPTIONS SCR SAVER MAIN PAGE PIC mode setup Select AUTO, the player PIC mode will depend on DVD disc. Select HI-RES format for best image resolution.
-
Page 25: Speaker Setup
SETUP --- GENERAL PAGE --- TY DISPLAY PIC MODE ANGLE MARK OSD LANG CAPTIONS SCR SAVER MAIN PAGE SCR SAVER setup Select the SCR SAVER ON/OFF . SPEAKER SETUP --- SPEAKER SETUP P AGE --- DOWNMIX LT/RT STEREO MAIN PAGE This is to activate the audio output from DOLBY AC3 5.1 DOWNMIX to 2 channel mode. -
Page 26: Preferences Setup
SETUP --- AUDIO SETUP --- AUDIO OUT FULL OP MODE DYNAMIC LPCM OUTPUT MAIN PAGE Dynamic Range Control Select DYNAMIC and adjust the dynamic range of a Dobly Digital encoded program. There are 8 steps between full compression and off compression. --- AUDIO SETUP --- AUDIO OUT OP MODE... - Page 27 SETUP --- PREFERENCES PAGE --- TV TYPE AUDIO ENGLISH SUBTITLE FRENCH DISC MENU SPANISH PARENTAL CHINESE PASSWORD JAPANESE DEFAULTS GERMAN SMART NAV MAIN PAGE SUBTITLE language setup Select the preferred SUBTITLE language by using the cursor buttons. --- PREFERENCES PAGE --- TV TYPE AUDIO SUBTITLE...
- Page 28 SETUP --- PREFERENCES PAGE --- TV TYPE AUDIO SUBTITLE DISC MENU PARENTAL PASSWORD DEFAULTS RESET SMART NAV MAIN PAGE DEFAULTS Select reset to revert to factory initial settings. --- PREFERENCES PAGE --- TV TYPE AUDIO SUBTITLE DISC MENU PARENTAL PASSWORD DEFAULTS NO MENU SMART NAV...
-
Page 29: Defaults Table
SETUP DEFAULTS TABLE General Setup TV Display PIC Mode Angle Mark OSD Language Captions SCR Saver Speaker Setup Downmix Audio Setup Audio Out OP Mode Dynamic LPCM Output Preferences TV T ype Audio Subtitle DISC Menu Parental Password Smart NAV Normal/LB AUTO English... -
Page 30: Trouble Shooting
TROUBLE SHOOTING If it appears that your DVD unit is faulty, first consult this checklist. It may be that something simple has been overlooked. Under no circumstances should you try to repair the player yourself, as this will invalidate the warranty. Only qualified service personnel can remove the cover or service this player. - Page 31 TROUBLE SHOOTING Check if the audio format of the selected audio language matches your receiver's capabilities. BUTTONS DO NOT WORK Turn the player off and on with the power on/off button on the front of the player. Press Reset button on the front of the DVD unit.
-
Page 32: Specifications
SPECIFICATIONS Supply voltage : 12V DC (11V -15V), test voltage 14.4V , negative ground Current consumption : Less than 2A Signal system : Compositive video 1.0Vp-p 75 Discs played : (1) DVD-VIDEO disc (2) Compact disc (CD-DA/CD-R/CD-RW/MP3) (3) 5" (12 cm) Video CD Audio output level : 10k Audio signal output... - Page 33 www.pyleaudio.com 88-V1952-02...