Table of Contents
Advertisement
Advertisement
Table of Contents

Related Manuals for Motorola CT111I

Summary of Contents for Motorola CT111I
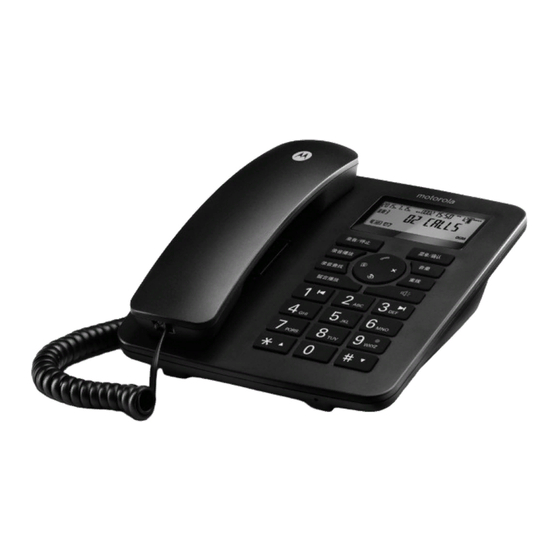
- Page 1 Corded Telephone with Digital Answering Machine Model: CT111I...
- Page 2 Call Timer the display will automatically time the duration of all external calls. Need help? If you have any problems setting up or using your CT111I, please contact Customer Services on 1800 2700 361. Alternatively, you may find the answer in the ‘Help’ section at the back of this guide.
- Page 3 This user guide provides you with all the information you need to get the most from your phone. To set up your phone, follow the simple instructions in ‘Getting Started’, on the next few pages. IMPORTANT Only use the telephone line cord supplied. Got everything? •...
-
Page 4: Table Of Contents
1. Getting started ..............6 2. Getting to know your phone ..........8 3. Using the phone ..............12 Calls .......................12 3.1.1 Make a call ..................12 3.1.2 Pre-dial ....................12 3.1.3 End a call ....................12 3.1.4 Receive a call ..................12 Last number redial ..................12 4. - Page 5 13. Calls list and redial list............22 13.1 Enter the calls list ...................22 13.2 Enter the redial list ..................22 13.3 Dial a number from the calls list or redial list ..........22 13.4 Delete a number from the calls list or redial list ..........22 13.5 Delete all numbers from the calls list or redial list ..........22 14.
-
Page 6: Getting Started
Installing and using the Micro SD card A Micro SD card reader The CT111I supports an Micro SD card, as the card is very small please be careful when inserting and removing to avoid damage. Press and release the card to remove it. -
Page 7: Overview Of Your Handset
Overview of your handset A Earpiece To listen to your caller. Microphone To speak to your caller. C Curly cord socket Where you plug in your curly cord. Setting the date and time If you have subscribed to a FSK type Caller ID Service, the date and time can set automatically when you receive your first call. -
Page 8: Getting To Know Your Phone
2. Getting to know your phone Overview of the base Hook switch Hangs up a call when pressed or when you replace the handset. Record / Stop In stand-by mode press to record a memo, press again to stop recording. With handset lifted press to record the conversation, press again to stop recording. - Page 9 Skip backwards Press to skip back 10 seconds during message playback. * / Scroll up Press to dial a *. Press to scroll up through lists and menus. Display See page 10 for an overview of display icons. Menu / OK Press to enter the menu.
- Page 10 Display Record Message Incoming calls Outgoing calls Card Capacity Auto Conversation Recording Memo Week Please wait Alarm Please enter the serial number Please enter the number Please enter dates Recording Play Play Pause Message Play Getting to know your phone...
- Page 11 Navigating the menu 1. Press and the display shows - 0123456789 -. 2. Press the relevant number key to enter the required set up menu. 1 - Date and time 2 - Area code 3 - PABX access code 4 - Alarm setting 5 - Ringtone setting 6 - Flash time 7 - Contrast...
-
Page 12: Using The Phone
3. Using the phone Calls 3.1.1 Make a call Lift the handset, when you hear the dial tone, dial the number. 3.1.2 Pre-dial 1. Enter the phone number (maximum 32 digits). If you make a mistake press X. 2. Press to dial the phone number entered over hands-free. -
Page 13: Micro Sd Card
4. Micro SD Card Inserting the Micro SD card The CT111I supports an Micro SD card, as the card is very small please be careful when inserting and removing to avoid damage. Press and release the card to remove it. Unplug the power adaptor from the base before removing or inserting the Micro SD card. -
Page 14: Date And Time
5. Date and Time If you have subscribed to a FSK type Caller ID Service, the date and time can set automatically when you receive your first call. If you do not have a FSK Caller ID service, you can set the date and time manually. Setting the date and time 1. -
Page 15: Area Code
6. Area code You can set your local area code into the phone. When a number from that area code calls only the local number will be displayed and stored. The area code can be up to 5 digits. To store the area code 1. -
Page 16: Pabx Access Code
When the filter is on and the CT111I receives a call form a number including the access code, this code can be filtered by the CT111I. When the filter is off the PABX access code will be ignored and if that number is in the blocked calls list with the access code in front of the number it will be treated as a blocked call. -
Page 17: Alarm
8. Alarm The CT111I has the option of 3 alarms, all alarms once set will sound every day unless turned off. To set the alarm 1. Press 2. Press , the display shows 123. 3. Using the keypad select the alarm you require e.g 1 for alarm 1. -
Page 18: Ringtone
9. Ringtone The CT111I has one pre recorded ringtone or you can select from music stored to the Micro SD card. To set the ringtone 1. Press 2. Press , the display shows and the number of the current ringtone selected. A sample of the ringtone is played. -
Page 19: Flash Time
Depending on your country and network operator, your phone has the flash time set as 1000 ms. It is unlikely that you need to change this setting unless advised to do so. Your CT111I can be set to 100/300/600ms. 10.1 To change your flash time setting 1. -
Page 20: Display
11. Display You can change the contrast of the display, there are 4 levels to choose from. 11.1 To change the display contrast 1. Press 2. Press , the display shows the current setting. 3. Press to the setting you require and press 4. -
Page 21: Play Recording Password
12. Play recording password You can set a password on your CT111I, once set this will need to be entered before recordings can be played back. 12.1 To set the play recording password 1. Press PASS _ 2. Press , the display shows 3. -
Page 22: Calls List And Redial List
13. Calls list and redial list If you have subscribed to a Caller ID service, and provided the identity of the caller is not withheld, the number of the caller will be displayed, together with the date and time of the call (if provided by the network). -
Page 23: Blocked Calls List
14. Blocked calls list When you receive a call from a number stored in the Blocked calls list the phone will not ring and the caller will not be able to leave a message. Up to 20 numbers can be stored in the list. -
Page 24: Answering Machine, Recorded Conversations And Memos
15. Answering machine, recorded conversations and memos You can set you CT111I to answer a call and record an ICM (incoming message), this feature can be turned on and off and you can set it to answer between 3 and 9 rings. You can also record a conversation or memo, the length the recording depends on the space left in the memory. -
Page 25: Recording Conversations And Memos
< 2. To end recording press 15.2.3 Record a memo You can record a memo which is stored on your CT111I and can be played back. < 1. In standby mode press , the display will show the length of the recording. -
Page 26: Search Recordings
16. Search recordings There are three ways to search recordings: serial number search, phone number search or date search. 16.1 To chose the search criteria and play recordings 1. Press to enter. Conversation recording, ICM (Incoming message) and Memo are displayed on the LCD. 2. -
Page 27: Help
17. Help No dial tone • Use only the telephone line cord supplied. • Check that the telephone line cord is connected properly. • Check that the mains power is connected properly and switched on. No display • Reset the base by and disconnecting the mains power. Wait for around 15 seconds before connecting it again. -
Page 28: General Information
18. General information IMPORTANT This product is intended for connection to analogue public switched telephone networks and private switchboards within India. Important safety instructions Follow these safety precautions when using your phone to reduce the risk of fire, electric shock, and injury to persons or property: •... -
Page 29: Product Disposal Instructions
Consumer Products and Accessories Warranty Thank you for purchasing this Motorola branded product manufactured under license by Suncorp Technologies Limited, 3001-3005 China Resources Building, 26 Harbour Road, Wan Chai, Hong Kong. (“SUNCORP”) - Page 30 WARRANTY IS THE EXCLUSIVE REMEDY OF THE CONSUMER, AND IS PROVIDED IN LIEU OF ALL OTHER WARRANTIES, EXPRESS OF IMPLIED. IN NO EVENT SHALL MOTOROLA OR SUNCORP BE LIABLE, WHETHER IN CONTRACT OR TORT (INCLUDING NEGLIGENCE) FOR DAMAGES IN EXCESS OF THE PURCHASE PRICE...
-
Page 31: Connecting To A Switchboard
Motorola or SUNCORP, are excluded from coverage. Use of Non-Motorola branded Products and Accessories. Defects or damage that result from the use of Non-Motorola branded or certified Products or Accessories or other peripheral equipment are excluded from coverage. Unauthorized Service or Modification. Defects or damages resulting from service,... - Page 32 Manufactured, distributed or sold by Suncorp Technologies Ltd., official licensee for this product. MOTOROLA and the Stylized M Logo are trademarks or registered trademarks of Motorola Trademark Holdings, LLC. and are used under license. All other trademarks are the property of their respective owners.