Advertisement
Installation and Programming Instructions
®
FAILURE TO FOLLOW THESE INSTRUCTIONS COULD RESULT IN DAMAGE
TO THE PRODUCT AND VOID THE FACTORY WARRANTY
P/N
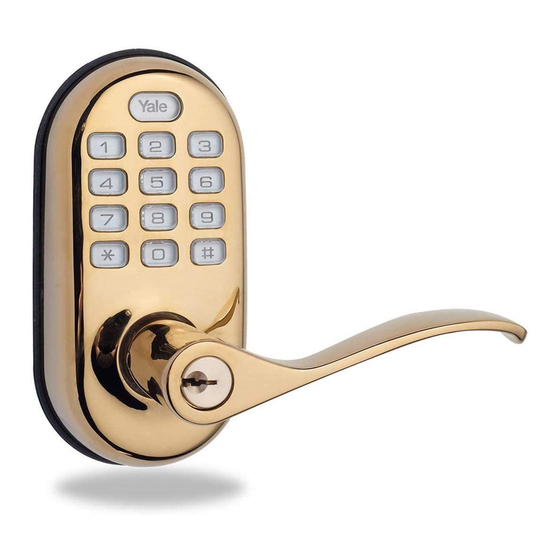
Yale Real Living Push Button Lever
®
(YRL210)
1
AYRL
-210-
INST FUL
-
Rev D
x4
M4 x 8mm
pan head machine
screws
x2
M4 x 25.4mm
pan head machine
screws
x2
Set screws
x4
#7 wood & #8-32
machine x 20mm
Combination screws
x1
Hex key
Advertisement
Table of Contents
Troubleshooting

Related Manuals for Yale Real Living YRL210


Summary of Contents for Yale Real Living YRL210
- Page 1 Yale Real Living Push Button Lever ® Installation and Programming Instructions ® (YRL210) M4 x 8mm pan head machine screws #7 wood & #8-32 machine x 20mm M4 x 25.4mm Combination screws pan head machine screws Set screws Hex key...
-
Page 2: Preparing To Install
Preparing to Install #2 Phillips Screwdriver 2-3/8" through bolt posts default 2-3/4" through bolt posts optional Note: Adjustment based on backset AYRL -210- INST FUL Rev D... - Page 3 Determining Lever Handing Left Hand Options The hand of a door is determined from the secure side of the door. The term "secure" means the side from which you initially unlock and enter. Left Hand Left Hand Reverse Hinges Left. Hinges Left.
- Page 4 Determining Lever Handing Right Hand Options The hand of a door is determined from the secure side of the door. The term "secure" means the side from which you initially unlock and enter. Right Hand Right Hand Reverse Hinges Right. Hinges Right.
- Page 5 Installing Latch & Strike Plate Left Hand Installation Shown Outside of Door Frame Outside of Door Frame AYRL -210- INST FUL Rev D...
- Page 6 Installing Exterior Keypad Escutcheon Left Hand Installation Shown Do not remove clip until Step 6 Outside of Inside of Left Hand Door Left Hand Door AYRL -210- INST FUL Rev D...
- Page 7 Installing Interior Mounting Plate Left Hand Installation Shown Loosen screw to remove cover. Inside of Left Hand Door Inside of Left Hand Door Outside of Left Hand Door AYRL -210- INST FUL Rev D...
- Page 8 Attaching the Cable Assembly Left Hand Installation Shown Inside of Left Hand Door Inside of Left Hand Door AYRL -210- INST FUL Rev D...
- Page 9 Installing Interior Escutcheon Left Hand Installation Shown Inside of Left Hand Door AYRL -210- INST FUL Rev D...
- Page 10 Installing Exterior Lever Remove clip. Do not rotate internal cam (marked red). Red mark must remain on top and in position. Outside of Left Hand Door Do Not Do Not Overtighten Overtighten Do Not Turn Do Not Turn Counter Counter Clockwise Clockwise Outside of...
- Page 11 Installing Exterior Lever con't Outside of Outside of Left Hand Door Right Hand Door AYRL -210- INST FUL Rev D...
- Page 12 Installing Exterior Lever con't Do Not Do Not Overtighten Overtighten Outside of Outside of Left hand Door Right Hand Door Outside of Outside of Left Hand Door Right Hand Door AYRL -210- INST FUL Rev D...
-
Page 13: Testing Operation
Testing Operation Inside of Door Left Hand Door Shown Outside of Outside of Left Hand Left Hand Door Door Right Hand Door Shown Outside of Outside of Right Hand Right Hand Door Door AYRL -210- INST FUL Rev D... - Page 14 Installing Interior Lever Inside of Inside of Left Hand Door Right Hand Door Do Not Do Not Overtighten Overtighten Inside of Inside of Left Hand Door Right Hand Door AYRL -210- INST FUL Rev D...
- Page 15 Installing Interior Lever con't Inside of Left Hand Door Do Not Overtighten Inside of Right Hand Door Do Not Overtighten AYRL -210- INST FUL Rev D...
- Page 16 Testing Final Operation Inside of Door Outside of Left Hand Door AYRL -210- INST FUL Rev D...
- Page 17 Testing Final Operation Inside of Door Inside of Door Inside of Left Hand Door AYRL -210- INST FUL Rev D...
- Page 18 Testing Final Operation Inside of Door Outside of Left Hand Door AYRL -210- INST FUL Rev D...
- Page 19 "Welcome to Tighten screw to replace cover. Yale Real Living." Inside of Left Hand Door Congratulations, you've installed the Yale Real Living Push Button Lever (YRL210)! ® Continue with Programming Instructions to customize your product. AYRL -210- INST FUL Rev D...
-
Page 20: Hardware Troubleshooting
Hardware Troubleshooting Cycle lock in both the locked and unlocked positions. If problems are found: Door is binding a. Check that door and frame are properly aligned and door is free swinging. b. Check hinges: They should not be loose or have excessive wear on knuckles. Latch will not deadlock a. -
Page 21: Programming Instructions
Programming Instructions Low Battery Warning- Flashes RED Lock-out Mode- Keypad Flashes Master Code must be created before any further programming. Max User Codes = 250 with Network Module. Max User Codes = 25 without. AYRL -210- INST FUL Rev D... - Page 22 Creating Master Code Press Press Press Enter 4-8 digit Master Code. Press AYRL -210- INST FUL Rev D...
-
Page 23: Creating User
Creating User Codes Master code must be created first. *Max user codes = 250 with Network Module. Max user codes = 25 without. Enter Master code Press Press Press Press Enter User number (1-25) or (1-250)* Press Press Enter 4-8 digit code Press AYRL... -
Page 24: Code Chart
Unlocking Door with Code Enter PIN Press "Unlock" Code Chart Duplicate if necessary PIN Code Management (With Network Module - Up to 250 Users) User Type User Name User # PIN Code Master User ___ User ___ User ___ Factory Settings Settings Factory Setting Registration required*... - Page 25 Definitions All Code Lockout Mode: This feature is enabled by the Master code. When enabled, it restricts all user (except Master) code access. When attempting to enter a code while the unit is in Lockout, the keypad flashes 8 times and the lock beeps 3 times as well. Audio Mode: Choosing Disable (3)
- Page 26 Feature Programming Through Menu Mode Using Master code* key. 1. Enter the 4-8 digit Master PIN code followed by the 2. Enter digit corresponding to the function to be performed followed by the key. *The Master code must be registered prior to any other programming of the lock.
-
Page 27: Programming Troubleshooting
Programming Troubleshooting Symptom Suggested Action • Press each keypad button for response when pressed. • Check batteries are installed and oriented correctly (polarity) Lock does not respond – in the battery case. door is open and • Check batteries are in good condition; replace batteries* accessible. -
Page 28: Resetting Lock To Factory Default
ASSA ABLOY Group company. All rights reserved. Reproduction in whole or in part without the express written permission of Yale Security Inc. is prohibited. YALE, with its unique global reach and range of products, is the world's favorite lock – the preferred solution for securing your home, family and personal belongings. - Page 29 Yale Real Living Z -Wave Module ® ® ® Installation and Programming Instructions Installing the Z -Wave Module ® IMPORTANT: the batteries must be removed prior to removing and/or inserting the network module: • Remove battery cover. • Remove batteries.
- Page 30 Copyright © 2017, Yale Security Inc., an ASSA ABLOY Group company. All rights reserved. Reproduction in whole or in part without the express written permission of Yale Security Inc. is prohibited. YALE, with its unique global reach and range of products, is the world's favorite lock –...
- Page 31 Yale Real Living ZigBee Module ® ® ® Installation and Programming Instructions Installing the ZigBee Module ® IMPORTANT: the batteries must be removed prior to removing and/or inserting the network module: • Remove battery cover. • Remove batteries. • Remove and/or insert network module.
- Page 32 Copyright © 2017, Yale Security Inc., an ASSA ABLOY Group company. All rights reserved. Reproduction in whole or in part without the express written permission of Yale Security Inc. is prohibited. YALE, with its unique global reach and range of products, is the world's favorite lock –...