Table of Contents
Advertisement
Quick Links
Download this manual
See also:
User Manual
Advertisement
Table of Contents

Related Manuals for EverFocus EFC304

Summary of Contents for EverFocus EFC304
- Page 1 EFC302 / EFC304 / EFC306 / EFC308 NAV IP Access Controller User’s Manual Copyright © EverFocus Electronics Corp. Release Date: February, 2017...
- Page 2 EFC308 User Manual 1995~2017 EverFocus Electronics Corp. www.everfocus.com.tw All rights reserved. No part of the contents of this manual may be reproduced or transmitted in any form or by any means without written permission of the EverFocus Electronics Corporation.
-
Page 3: Table Of Contents
NAV IP Access controller Contents Introduction ........................1 1.1 Features ......................... 2 1.2 Overview ........................3 1.3 Specification ......................... 5 1.4 Packing List ........................6 1.5 Optional Device ....................... 6 1.6 Definitions of Terminal Block and LEDs ................7 1.6.1 Terminal Block and LEDs on Main Module ................. - Page 4 NAV IP Access controller 5.3.3 Display Firmware Version ......................... 29 5.3.4 Display the Number of Installed Modules ..................30 5.3.5 Display the Current Card and Event Number ................... 30 5.3.6 Display the Controller IP Address ..................... 30 5.4 Level One System Configuration Items ................. 30 5.5 System Setting ......................
- Page 5 NAV IP Access controller 5.12.2 Disarm the Systemusing the Controller Keypad ................59 5.12.3 Reset Alarm ............................ 60 5.12.4 Arm/Disarm the Systemusing aKeypad Reader ................60 5.12.5 Arm/Disarm the Systemusing aLCDReader ..................61 5.13 Use Reader as Keypad ....................61 Software Introduction ....................
- Page 6 NAV IP Access controller 9.1.3 Delete a Cardholder.......................... 90 9.1.4 Export Cardholder Information ......................90 9.1.5 Print Cardholder Information ......................90 9.1.6 Search Cardholders........................... 90 9.3 Import Cardholders ....................... 91 10. Real-Time Monitoring....................... 92 10.1 Real-Time Event ......................92 10.1.1 Remote Operation .......................... 93 10.2 Edit the Electrical Map ....................
- Page 7 NAV IP Access controller 13.5.1 Add a Group Schedule ........................116 13.5.2 Delete a Group Schedule ......................117 13.5.3 Edit a Group Schedule ........................117 13.5.4 Save As a New Schedule ....................... 118 14. Card ..........................119 14.1 Card Setting ....................... 119 14.1.1 Add a (Batch) Card ........................
- Page 8 NAV IP Access controller Federal Communication Commission Interference Statement This equipment has been tested and found to comply with the limits for a Class B digital device, pursuant to Part 15 of the FCC Rules. These limits are designed to provide reasonable protection against harmful interference in a residential installation.
-
Page 9: Introduction
/ readers. Or you can add one alarm module to the NAV controller to manage up to 10 alarm inputs and 18 alarm outputs. Moreover, each NAV controller can connect up to 31 EverFocus’ Flex series controllers to expand the control scale of up to 256 doors / readers. You can connect to the NAV controller... -
Page 10: Features
Modular design for easy expansion of the system, and auto-detection on expansion modules Manage up to 31 EverFocus’ Flex Series controllers Secure access through the Web browser is guaranteed by SSL (Secure Socket Layer) Network automatic backup and upgrade ... -
Page 11: Overview
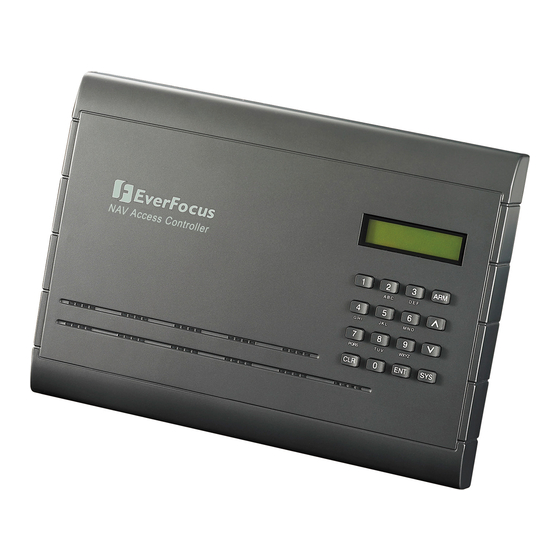
NAV IP Access Controller Supports 4 x 4 lock level, achieves 4 teams x 4 multi cards access setting on each door Each door supports 10 different independent day setting (Sunday to Monday, and 3 kinds of custom day setting). Each day can take 10 time zones with minimum 1 minute duration Supports comprehensive access features including interlock, area-based anti ... - Page 12 NAV IP Access Controller Main Module The main module controls the fundamental functions of the controller, including the built-in browser-based software, the system management, the power supply, event records, built-in Ethernet port, and communication via RS-485 port, two alarm inputs and two alarm outputs.
-
Page 13: Specification
NAV IP Access Controller 1.3 Specification System Operating System Linux embedded Database Built-in Memory 512M Management Software Built-in browser-based software, EFS2000, ENS2000 Supports system management, device configuration, Built-in Software live event list view and map view, CCTV integration Operation Maximum Card Amount 100,000 Maximum Even Records 1,000,000... -
Page 14: Packing List
Note: Contact the shipper if any items appear to have been damaged in the shipping process. If any items are missing, notify your EverFocus Electronics Corp. Sales Representative or Customer Service Branch. Please also keep the shipping carton for possible future use. -
Page 15: Definitions Of Terminal Block And Leds
NAV IP Access Controller 1.6 Definitions of Terminal Block and LEDs 1.6.1 Terminal Block and LEDs on Main Module 1 2 3 4 5 6 7 8 9 10 11 12 13 14 15 16 Figure 1-3 Terminal Block Definitions Terminal Name Function No. -
Page 16: Terminal Block And Leds On Alarm Module
NAV IP Access Controller LED Definitions No Description Description The power is on when the light The data is received when the light is on. is on. The fire alarm is triggered The data is transmitted when the when the light is on. light is on. -
Page 17: Terminal Block And Leds On Door Module
NAV IP Access Controller Alarm 4 output in Alarm 8 output in Alarm4_ COM Alarm8_ COM common common Alarm4_ NC Alarm 4 output for NC Alarm8_ NC Alarm 8 output for NC 1 2 3 4 5 6 7 8 Figure 1-6 LED Definitions No Description... - Page 18 NAV IP Access Controller The request-to-exit The request-to-exit Door1_ Button Door2_ Button button for Door 1 button for Door 2 Door1_GND GND for terminal 8 & 10 Door2_GND GND for terminal 24 & 26 Door sensor input for Door sensor input for Door1_ Sensor Door2_ Sensor Door 1...
-
Page 19: Installation
NAV IP Access Controller Chapter 2. Installation The Installation has three procedures described as below. Each procedure will be introduced in the following sections in detail. Step 1: Installation Preparation • Obtain a floor plan • Determine the hardware and location •... -
Page 20: Obtain A Floor Plan
NAV IP Access Controller 2.1.1 Obtain a Floor Plan Obtain a floor plan of the building in which the access control system is to be installed. Obtaining a floor plan helps the installer determine what components need to be installed, and where. It also is essential in determining the length of cable needed to connect readers to the controller. -
Page 21: Determine The Number Of Controllers/ Modules According To System Structure
NAV IP Access Controller • One Set of NAV Controller+ Two Readers – Control of both Entry and Exit When the security grade is relatively high or the administrator requires the card holders to get in or out at fixed time or date through specific door, two sets of EFC301 are needed. Additional installation of one set of EFC301 on the side of the door requires the card holders to swipe the card when exiting and entering. - Page 22 NAV IP Access Controller Note: If the screw holes of the controller do not line up properly with the enclosure, some filling may be required for adjustment. 1. Use the supplied mounting template to position the holes for the support frames and then mount the two support frames on a wall.
- Page 23 NAV IP Access Controller 3. Install and mount additional door modules or the alarm module. Note: The controller can hook up to 4 door modules and only 1 alarm module. Each door module is cascaded to its left side module till the main module. The door modules and the alarm module can be placed in any sequence.
- Page 24 NAV IP Access Controller The Reader / Door Index Conversion The index conversion of readers is displayed as below. The readers / doors are counted 1 to 8 from right to left. Figure 2-6 4. Placing back the cover of controller. The cover has two latches on the interior of the top horizontal edge.
-
Page 25: Installing And Connecting The Readers
NAV IP Access Controller Figure 2-8 2.2.2 Installing and Connecting the Readers The readers must be mounted near each door and connected directly to the door module(s) in the controller. Each door module can control up to two readers. The supported reader formats are Wiegand and RS-232. -
Page 26: Connecting To The Door Lock, Sensor And Open Button
NAV IP Access Controller Reader_Data0 Green Brown Reader_Data1 +12V Black D E F A B C Reader Ctrl Yellow G H I J K L M N O T U V WXYZ PQRS Ever Access Door module Figure 2-8 Each door module can provide +12V voltage for two readers. Twisted cable is recommended to connect the controller and readers. - Page 27 NAV IP Access Controller Door module Figure 2-9 • Magnetic Lock Connect the wires from the magnetic lock to the terminal block on the door module. You can either connect the wires to Pin 12 and 13 (Door 1) or Pin 28 and 29 (Door 2) on the terminal block.
-
Page 28: Connecting To The Fire Alarm/ Alarm Input
NAV IP Access Controller Connecting to the Door Open Button Connect the wires from the door open button to the terminal block on the door module. You can either connect the wires to Pin 8 and 9 (Door 1) or Pin 24 and 25 (Door 2) on the terminal block. -
Page 29: Connecting To The Fire Alarm/ Alarm Output
NAV IP Access Controller 2.2.5 Connecting to the Fire Alarm/ Alarm Output The alarm modules provide 8 alarm outputs. You can assign the corresponding relay status to the different events. There are three terminals: COM, NO and NC. The wiring depends on the alarm device. -
Page 30: Mounting A Backup Battery In The Enclosure (Optional)
NAV IP Access Controller 2.2.7 Mounting a Backup Battery in the Enclosure (Optional) You can optionally connect a backup battery in the enclosure to provide backup power to the controller. Once the battery is installed, it will charge off the external power until it is needed, at which time it will automatically be used to power the system. -
Page 31: 3. System Architecture And Connections
NAV IP Access Controller Chapter 3. System Architecture and Connections EverAccess® NAV Controller runs the embedded Linux and includes the built-in browser-based management software. No dedicated computer needs to be running to capture and store the events. Users can access and manage the controller or the system from any computer on the network. This chapter introduces the 3 types of system architectures in order of system scale. -
Page 32: System For More Then 256 Doors
NAV IP Access Controller EverAccess EverAccess EverAccess EverAccess EverAccess F le x I I A cc es s C o n tr o ller A R M AR M A R M AR M AR M D EF D EF D EF DE F D EF... - Page 33 NAV IP Access Controller In order to correctly transfer data, the controllers on the RS485 bus must be connected in a daisy chain format, as shown in Figure 3.5. EverAccess EverAccess EverAccess A B C D E F A B C D E F A B C D E F...
-
Page 34: 4. Starting Up The Controller
NAV IP Access Controller Chapter 4. Starting Up the Controller 4.1 Connecting to Power You can power the NAV controller by connecting the power source to Pin 13 and 14 on the terminal block on the main module. Main Module 13 14 V+ V- Figure 3-1... -
Page 35: Restoring The Controller
NAV IP Access Controller 4.2 Restoring the Controller To restore the controller to the factory default settings, switch the power on while holding the Reset button on the main module. Reset Button Figure 4-2 4.3 Before First Use Before first use, please follow the instructions below: 1. -
Page 36: 5. Controller Configuration And Operation
NAV IP Access Controller Chapter 5. Controller Configuration and Operation This chapter introduces system functions and their corresponding operations. Most basic operations can be performed on EverAccess® NAV Controller keypad. Some advanced functions require the built-in browser-based management software. Please refer to the later chapters for more details. 5.1 General Operation Guideline The Controller’s 4x4 Keypad is shown above: Press... -
Page 37: Direct Operations From Keypad
NAV IP Access Controller 5.3 Direct Operations from Keypad This section introduces the functions that can be accessed directly from the keypad on the NAV Controllers. 5.3.1 Enter System Configuration Press on the keypad will bring up a prompt to enter a password, as shown below: Input SYS Password: ________ Input the system password and press... -
Page 38: Display The Number Of Installed Modules
NAV IP Access Controller Version: 1.0.0-0 5.3.4 Display the Number of Installed Modules Press to show the number of installed door modules and alarm modules. For example, 4 door modules and 1 alarm module are installed in the controller. The example window is shown below: 04-Door Modules 01-Alarm Modules 5.3.5 Display the Current Card and Event Number... -
Page 39: System Setting
NAV IP Access Controller Address Setting Menu Address Setting Once the desired item is displayed, press to enter into the corresponding menu. And press the corresponding menu to return the level one menu. 5.5 System Setting In the System Setting menu, the user can set basic functions, including date format, system date, time, password, auto daylight saving, system PIN, arm PIN, language, backlight, event erasing and load factory default. -
Page 40: Set Time
NAV IP Access Controller SetDate(MM-dd-YYYY) __-__-20__ The date and time can be set either at the controller or from the built-in management software remotely. 5.5.4 Set Time Press at the below window to set the time. Set Time The LCD will display the following menu. Use the numerical keys to input the current time as a six-digit number (HH: MM: SS). -
Page 41: Set Arm Pin
NAV IP Access Controller Input SYS Password ________ Enter a new system PIN. Enter it a second time to confirm. Press to set the new system PIN. Pressing at any time will exit the menu without changing the system PIN. 5.5.7 Set Arm PIN Arm PIN must be entered before the controller can be armed or disarmed via controller keypad. -
Page 42: System Maintanence
NAV IP Access Controller 5.5.10 System Maintanence NAV Controller supports two ways to update firmware, backup and restore database: via USB drive or FTP. This section introduces how to use system maintenance with a USB drive. Press at the below window to enter to the system maintenance menu. System Maintanence 5.6.4.1... -
Page 43: Erase All Events
NAV IP Access Controller 5.6.4.4 Unmount USB storage USB drive can be hot swapped, but sometime the data will be loss caused by pulling out directly. It is safer that removed from the controller. Press under the below screen to unmount the USB drive when finishing backup and restoring the database from the backup file on USB drive: Umount usb storage If no USB drive presented when the menu item is selected. -
Page 44: Card Setting
NAV IP Access Controller 5.6 Card Setting Card setting can be configured using either the controller or the built-in management software. Using the built-in management software is the easiest way to enroll cards. However, enrolling at the controller can be useful if the controller is offline. The process is described below. 5.6.1 Enter Card Setting Menu Under the System Menu, press once to bring up the following window:... -
Page 45: Set Card Properties
NAV IP Access Controller Delete Cards Press to enter to the submenu for the following two methods of deleting cards. 5.6.4.5 Delete a Card The controller can delete a card according to its serial number, which is printed on the face of each card. At the following window: Delete a Card Press... - Page 46 NAV IP Access Controller Press and system will prompt the user to enter serial number, as shown below: Input Card Serial card#:___________ After entering the serial number, press to enter to the submenu for setting card properties. Each card has 6 properties that can be modified. Use to choose desired properties.
- Page 47 NAV IP Access Controller next time the card can only be allowed to exit that door. If cardholder attempts to access the same door again without first swipe the card to exit the door, access is denied and the door will not open. At the following submenu, press to enter Anti Passback setting: APB Setting...
-
Page 48: Show Card Number
NAV IP Access Controller Input new ID: ________ The user can either swipe the card through a system reader to get a new ID, or input it manually. Press to confirm the input of new ID. If input ID already exists, the system will prompt: Card already existed Otherwise, system will show the below information: Card Property Updated... -
Page 49: Door Setting
NAV IP Access Controller 5.7 Door Setting Every door module controls two door relays. NAV Controller can control up to 8 doors in total, defined as door 1 to 8 from right to left. According to reader setting above, users can allocate multiple readers to one single door. - Page 50 NAV IP Access Controller InputDoor Index: _ After the door number is entered, press to toggle among all available door verification modes. The modes followed with a star “*” mark is the currently selected mode. All the door verification modes are listed below: Card Only *Yes...
-
Page 51: Open Time Setting
NAV IP Access Controller 5.7.4 Open Time Setting This sets the door open time when the card is swiped or request-to-exit button is pushed. The default time is 3 seconds. The maximum door open time supported by the controller is 999 minutes and 59 seconds. -
Page 52: System Reader Setting
NAV IP Access Controller Reader Setting Press to enter Reader Setting menu. Use to choose from different menu options. All menu options under Reader Setting are introduced below: 5.8.2 System Reader Setting System reader can be used to acquire the card’s serial number when controller configures the card. User can set any reader that connects to the controller as the system reader. -
Page 53: Reader To Door Allocation
NAV IP Access Controller 5.8.4 Reader to Door Allocation NAV Controller can be flexibly configured. Readers can be allocated to different doors, and can be set as ENTER only or EXIT only. By default, each reader is allocated as ENTER only to the door with the reader’s number. -
Page 54: Set Card Format
NAV IP Access Controller Press any of the 1-8 numeric keys to change the format setting of each reader. Press to exit. NOTE: LCD format will display more information, include current time, card serial number, employee full name (if value is set), success or failure of current access verification. The screen of the reader must be an LCD, shown as following: 2010-06-18 FRI 09:38 000005398787... -
Page 55: Alarm Configuration Basics
NAV IP Access Controller These three types of modules are all equipped with alarm function. The main module has 2 alarm inputs and 2 alarm outputs, called Main Alarm Output and Auxiliary Alarm Output respectively. Each door module has 2 alarm outputs, which usually react to alarm events on the corresponding door. However, it can be set to react to other alarm events as well. -
Page 56: Alarm Setting Menu Structure
NAV IP Access Controller 5.9.4 Alarm Setting Menu Structure There are two submenus under Alarm Setting, as shown below: Alarm Setting Alarm Input Setting Select an alarm input Alarm Input Mode Setting Alarm Output Mode Setting Fire Alarm Setting Alarm Action Setting Alarm Act Setting on Main Module Alarm Act Setting on Door Module Alarm Act Setting on Extern Module... - Page 57 NAV IP Access Controller 5.9.5.1 Alarm Input Mode At the above window, press to enter to the setting for alarm input #1. The 1 submenu is the alarm input mode submenu, use to switch to other submenus. Alarm Input Mode Three alarm input modes are available: N.O., N.C, and Invalid.
- Page 58 NAV IP Access Controller Fire alarm setting is used to configure other alarm inputs as the fire alarm input. Fire alarm input does not follow the arm delay time, it has the highest priority. It is triggered as long as the alarm input defined as fire alarm is configured.
- Page 59 NAV IP Access Controller 5.9.5.5 Door Act Setting On Fire The controller allows the user to choose one of two behaviors to occur when a fire alarm is triggered: fail-safe or fail-secure. Door fail-safe at fire alarm means the door will be kept unlocked when there is a fire alarm input.
-
Page 60: Alarm Event Setting
NAV IP Access Controller 5.9.5.7 Alarm Out Time Setting As described in alarm input mode, alarm timeout defines the duration of alarm output being presented (alarm relay energized), when triggered by the specified alarm input and if the alarm output mode is configured as “Latched”... - Page 61 NAV IP Access Controller ARM PIN Fail User is required to enter PIN when pressing ARM key to arm or disarm the system. An ARM PIN Fail event will be generated when a wrong PIN is entered three times consecutively. Please refer to the section “ARM/DISARM”.
- Page 62 NAV IP Access Controller Press numeric keys to input the specified alarm time for event of Invalid Card. Press to confirm and press to discard the change just made. Invalid Door Each door on the controller can be set its own access schedule, when a card is swiped on the reader. An Invalid Door event will be generated when a card is swiped at any door it can’t gain access to system by the access schedule.
- Page 63 NAV IP Access Controller Press numeric keys to input the specified alarm time for the event. Press to confirm and press to discard the change just made. Door Forced Open A Door Forced Open event will be generated when controller detects that a door is opened from the door sensor without any legitimate swipe card or door open button push operation taking place.
- Page 64 NAV IP Access Controller Panic Open 000Min 10Sec Press numeric keys to input the specified alarm time for the event. Press to confirm and press to discard the change just made. 5.9.6.2 Event Alarm Action Setting Press at the below screen to configure event alarm action setting. EventAlarm action Setting The event alarm action defines which alarm output can be triggered by the event.
-
Page 65: Network Setting
NAV IP Access Controller Remote Alarm Remote Alarm NNNNNNN Unknown Card Unknown Card NNNNNNN Expired Card Expired Card NNNNNNN Inavid Card Invalid Card NNNNNNN Invalid Door Invalid Door NNNNNNN Invalid Time Invalid Time NNNNNNN APB Failed APB Failed NNNNNNN Card PIN Failed Card PIN Failed NNNNNNN Door Forced Open... -
Page 66: Set Ip Address
NAV IP Access Controller When DHCP is enabled, press to exit and NAV Controller will update the IP address from DHCP server and show the below screen, indicating the controller is getting IP address: Getting IP... After the IP address has been obtained, controller shows the IP address in the below window: IP Address: 192:168:000:106 At this window, press... -
Page 67: Arm/Disarm
NAV IP Access Controller 5.12 Arm/Disarm After an alarm module is installed, it defines 10 arm zones for its 10 alarm inputs (including the 2 alarm inputs on main module). NAV Controller can treat alarm inputs in 10 arm zones in a very flexible manner. These 10 arm zones can be armed or disarmed on the controller as described below. -
Page 68: Reset Alarm
NAV IP Access Controller System Disarmed [ENT] to Arm Press to exit. 5.12.3 Reset Alarm When system is generating an active, ongoing alarm output, follow the procedure below to reset the alarm. At the window showing the system time, press on the keypad. -
Page 69: Arm/Disarm The Systemusing Alcdreader
NAV IP Access Controller 5.12.5 Arm/Disarm the System using a LCD Reader New model of readers, ERL-871 in EverAccess series was released to provide a more intuitive user interface to interact with the system. ERL-871 provides a large LCD to show more information from controller. -
Page 70: Software Introduction
NAV IP Access Controller Chapter 6. Software Introduction 6.1 Main Feature EverAccess® NAV Controller not only can do basic setting configurations on it, but also can login through the browser (Here and later referred to as “Software”) for system setting configurations. -
Page 71: Based On Tcp/Ip Access Conttrol System Architecture
NAV IP Access Controller Support Chinese, English, Russian Software Features Real-time monitoring of controllers, doors, arm zones, alarm input/output and fire alarm on electrical maps, allowing operators to directly monitor system status and responds accordingly. Support remote control of controllers, doors, arm zones and alarms. ... -
Page 72: Start To Use
NAV IP Access Controller Chapter 7. Start to Use This chapter will instruct how to rapidly set the EverAccess® NAV Controller through the browser using the identity of a super administrator and how to realize door open by swiping a card. For a more comprehensive understanding of each function, refer chapters on related topics. -
Page 73: A Variety Of Ways To Add Cards
NAV IP Access Controller 7.1.1.3 Set Access Door Click on the menu bar “Access Control” “Access Rule” “Access Door”, enter Access Door Setting page. (for details, please refer to 13.5) Steps: 1) Select a door schedule for each door location of controller. 2) Completed setting of door schedule for each door, click the “Save”... - Page 74 NAV IP Access Controller The default control group is “Full Granted” and the default password is “000000.” First, select a format of the card to be added. 7.1.2.1 Rapid Card Addition When a user logs in to the software and swipes a card on the controller, the card swiping record will be displayed in the system event records and can be copied (for details, please refer to 7.3.5.1).
-
Page 75: Setup And Cardholder
NAV IP Access Controller 1) Export the card report file (.csv) to your computer. Go to ”Access Control” “Report” “Card report”, and then click the “Export” button. 2) Open and then edit the card file. Ensure to save the file in .xls format. 3) On the Import Cards page, click the “Browse”... - Page 76 NAV IP Access Controller Click the “Export” button in any of the pages to export the data in csv format, then the file save dialog box will pop up. See the figure below: Figure7-2 Export Click the “Save” button; select a path to save the exported document, shown as following: Figure7-3 Save Select the path and click “Save”...
-
Page 77: Print Function
NAV IP Access Controller Figure 7-4 Convert the Exported File 3) In the dialog box, select Save as type “All Files”, select encoding “UTF-8”. 4) Click the “Save” button, the conversion is completed. 5) Open the converted file via Excel, the Chinese characters are normally displayed. 7.1.6 Print Function Most setting pages in the system provide a “Print”... -
Page 78: Login
NAV IP Access Controller 7.2 Login Open browser and input the IP address of the controller in the address bar. If the user does not carry out any settings for the IP address, the default IP address of the controller will be 192.168.1.200. -
Page 79: Get Familiar With The Browser Page
NAV IP Access Controller If the username or password is wrong, a dialog box indicating illegal login will pop up. See Figure 7-7: Figure7-7 Illegal Login 7.3 Get Familiar with the Browser Page 7.3.1 Main Page Introduction The page adopts a humanized design concept to ensure users get familiar with it as soon as possible. -
Page 80: Control Pannel
NAV IP Access Controller Figure7-6Menu If a login user has no access authority to a certain module function, the function will not be displayed on the menu bar. 7.3.3 Control Pannel Click below the menu, then the “Control Panel” on the left side of the main page will be hidden (see Figure 7-11). -
Page 81: Real-Time Monitoring
NAV IP Access Controller 7.3.3.2 Device List This area displays effective devices which have been configured by the software. If controller have been added or deleted or revised, it will be showed in this area. Figure 7-9 Device List 7.3.4 Real-time Monitoring This feature displays real-time electronic map status, users can click on “Electronic list”... - Page 82 NAV IP Access Controller 7.3.5.2 Access Denied This type of record includes Unknown card, Expired card, Invalid card, Password retry failed, Enter with panic PIN, Insufficient multi-card access, Invalid time,. Invalid door, APB fails, No PIN inputted, Man trap violation, Access denied due to unknown card PIN. Figure7-12 Access Denied 7.3.5.3 Operation Record This type of record includes the records of the remote operation of the controller in the...
-
Page 83: Basic Setting
NAV IP Access Controller Chapter 8. Basic Setting This chapter will introduce the Basic Setting of the EverAccess® NAV controller in detail, which includes changing passwords, User Group, User Setting, Local Server, system upgrade and central server configuration. Change password: Change login password. User Group: Add, delete and change the User Groups in the software. -
Page 84: Set Up User Group And User
NAV IP Access Controller 8.2 Set up User Group and User In the system, one user means one person who operates the software. Due to different authorities, the used pages may be different. Each user is defined by four attributes: Name, login name, password and authority. - Page 85 NAV IP Access Controller Data Backup √ √ Data Recovery √ √ Purge Out-of-date √ √ Data Controller Setting √ √ Date Type Setting √ √ Access Door Setting √ √ Door Schedule √ √ Setting Access Group Setting √ √...
-
Page 86: User Group
NAV IP Access Controller 8.3 User Group In the User Group page, the current User Group list in the system is displayed on the left side. The user who has the authority of User Group can carry out User Group creation, change and deletion operations in this page. -
Page 87: User Setting
NAV IP Access Controller 8.4 User Setting User Setting are used to create, change and delete users and define the authority types of these users. The user herein actually refers to the account which can log in to and use the software. -
Page 88: Edit A User
NAV IP Access Controller Password: Any combination of figures, letters, spaces, Chinese characters and other displayable characters. The longest login name is 20 bits and any character occupies 1 bit. The letters of the login name are case sensitive. Repeat: Must be the same as the input content of the password. If the two passwords input are not consistent with each other, the system will prompt that “Input Password Do Not Match.”... -
Page 89: Export Users
NAV IP Access Controller 8.4.4 Export Users Click the “Export” button to export all user information in the system in the csv format, then the file save dialog box pops up. Select the path to save the file and click “OK.” For detailed operation procedures, please refer to 7.1.7. -
Page 90: Local Server
NAV IP Access Controller 8.5 Local Server The Local Server can set the IP, time, data and time zone of the currently logged-in controller. Click the system main menu “System” “Basic Setting” “Local Server” to enter the Local Server page. Figure8-8 Local Server Click the IP type as in the above figure, select static or dynamic type, input IP, subnet mask and gateway in the textbox, confirm and click the “OK”... - Page 91 Example and below column fields which cannot be modified. Note: If you also adopt EverFocus’ ENS2000 software for central management, you can edit or add new card formats to the controller through ENS2000. For more details, please refer to 4.3.1 Card Format in ENS2000 User’s Manual.
-
Page 92: System Upgrade
NAV IP Access Controller 8.6 System Upgrade The firmware of controller and built-in software can be upgraded to the latest version as the user needs by the operation. There are two ways including remote on-line system update and local update. Click system main menu “System”... -
Page 93: Cardholder
NAV IP Access Controller Chapter 9. Cardholder This chapter will introduce the Cardholder Setting of the NAV Controller in detail, including setting up employee number, name and other information of a Cardholder, and allocate one or more card for Cardholder and set the attributes. 9.1 Cardholder Setting Click on the menu bar “System”... -
Page 94: Add A Cardholder
NAV IP Access Controller 9.1.1 Add a Cardholder Click the “Add” button and the Cardholder Setting registration page pops up; see the figure below: Figure9-3 Add a Cardholder 1) Cardholder Information Area: This area is setting cardholder’s basic information. Employee number: can be any printable character, it is a unique number for a cardholder. If new member joined, the new number cannot be same as existing number. - Page 95 NAV IP Access Controller Figure 9-2Pop-up the Calendar Box Email: input the cardholder’s email address. ! Note: The employee number and name of Cardholder must be filled in; other parameters are optional. However, we recommend that you fill in all information so as to display more visual information in case of querying.
- Page 96 NAV IP Access Controller All the properties of a card are shown as below. Check or uncheck the boxes to enable or disable the functions. Valid: Indicates whether the registered card is activated. Check this item to activate the card. The other attributes of the card may not act until the card is activated. The card will be invalid in case of not checking.
-
Page 97: Edit A Cardholder
NAV IP Access Controller Figure9-4Card Schedule Setting Select different access schedule for different door zone. Different access schedule will specify the card which has one kind entry rule for each door zone. Note: All cards in one group can be assigned to different access group in different controller. -
Page 98: Delete A Cardholder
NAV IP Access Controller 9.1.3 Delete a Cardholder Select a cardholder in the cardholder list to be deleted, click the “Delete” button, op-up as below: Figure 9-6Confirm to Delete a Cardholder Click the “OK” button to confirm. In case of deleting the information of several Cardholder members, press “Shift” on the keyboard while selecting the columns of the Cardholder to be deleted and click the “Delete”... -
Page 99: Import Cardholders
NAV IP Access Controller 9.3 Import Cardholders You can import multiple cardholder information together with card information to the controller through csv file. Please follow the steps below: Steps: 1) Export the excel format from “Card Setting” page (Access Control < Card < Card Setting). -
Page 100: Real-Time Monitoring
NAV IP Access Controller Chapter 10. Real-Time Monitoring 10.1 Real-Time Event Click on system menu bar “System” “Real-time Monitoring” “Real-time Event”, to enter the Real-time events page; see figure below: Figure10-1Real-time Event As shown in the above figure, the real-time monitoring page is divided into three areas: Control Panel: The Map list and device list located on the left side Control Panel, which contains the map list, controllers and doors, arm zones, DVR, CAM and View. -
Page 101: Remote Operation
NAV IP Access Controller 10.1.1 Remote Operation Left-click a controller node in the Device List and its corresponding function menu pops up. You can remotely operate the functions from the menu, such as arm, disarm, reset alarm and add map etc. Left-click a door node in the Device List and its corresponding function menu pops up. -
Page 102: Add An Electronic Map
NAV IP Access Controller 10.2.1 Add an Electronic Map Click the “Add” button, the below window pops-up: Figure10-3 Add an Electronic Map Map name: name for a new electronic map. Back Image: click the “Browse” button to add a floor plan image to this map. After loading an image, click the “Upload”... -
Page 103: Report
NAV IP Access Controller There are 5 operating buttons in the edit area: Change Backimage, Save, Delete, Cancel and Return. See figure below: Figure 10-5 Operating Button To change a floor plan image: Click the Change “Backimage” button, click the “Browse” button to add a floor plan image to this map. -
Page 104: Export Cardholder Information
NAV IP Access Controller to get back to the all cardholder list. The query is exact and the results listed will fully match the keyword. For example, employee numbers “ef-001” and “ef-002” are available in the system. If you want to query “ef-001,” select “employee number” as a query condition, input “ef-001” in the keyword input box and Click the “Search”... -
Page 105: Maintenance
NAV IP Access Controller Chapter 11. Maintenance 11.1 Backup Click the menu “System” “Maintenance” “Backup” to enter the backup page; shown as below: Figure11-1Backup 11.1.1 Manual Backup Manual backup refers to backup of system data in the local server through the operation of the administrator. -
Page 106: Auto Backup
5) Click the “Save” button to finish operation. 11.1.3 Exception Backup The Exception Backup is for EverFocus’ technical team to analyze system data. If you encounter some problems required EverFocus technical team to help, you can contact EverFocus along with this Exception Backup file. -
Page 107: Restore
NAV IP Access Controller 11.2 Restore Click “System”→ “Maintenance” → “Restore” to enter the page to restore data. The system provides two methods: Restore the database from a FTP server, or from the local computer. 11.2.1 Restore from a FTP Server Figure11-4 Restore the Databasefrom a FTP Server Steps: 1) Fill in the username and password to log in to the FTP server. -
Page 108: Purgeout-Of-Date Data
NAV IP Access Controller 11.3 PurgeOut-of-date Data Click on the menu bar “System” “Maintenance” “Purge Out-of-date Data”, to enter the purge page. Select the event type and cut-off date of data and click the “Clean” button, then the system will completely clear all the events with the selected event type category according to the selection time. -
Page 109: Controller
NAV IP Access Controller Chapter 12. Controller This chapter describes how to set up controller. In this chapter you will learn: How to configure the controller settings. How to download data to the controller. 12.1 Controller Setting You can configure the controller settings through this page. Click “Access Control” → “Controller”... -
Page 110: Reader
NAV IP Access Controller You can set up the door location, door unlocks time and door held open time here. Door Location: indicates the location of the door. Input a desired location name of the door. Unlock Duration: Set the door open time when a valid card is swiped or the Request-to-Exit button is pressed. -
Page 111: Alarm Input
NAV IP Access Controller Name: input a name for the reader. Door location: indicates the location of the reader. Input a desired location name of the reader (corresponding to the assigned door). Input time: set up a max waiting time for inputting the password when the verification needs to input a password. -
Page 112: Alarm Action
NAV IP Access Controller Input Mode: indicates the alarm input mode. Disabled: the defence alarm input is invalid. Normally Open: this input opened in normal state, alarm input enabled after closing. Normally Close: this input closed in normal state, alarm input enabled after being opened. Output Mode: the mode that the alarm output responds to the input when an alarm occurs. - Page 113 NAV IP Access Controller A NAV controller consists of two basic components: the main module and the door module. User can install up to 4 door modules and 1 alarm module. These three types of module are all equipped with alarm function. Main module has 2 alarm inputs (figure 12-5 fire-1 and Zone-1), they response for fire alarm and tamper alarm.
- Page 114 NAV IP Access Controller • Fire Alarm: A fire alarm event is generated when there is a fire alarm input. The controller generates an alarm output according on the setting in the “Fire Alarm” column. • Zone Alarm: The zone alarm reacts to 8 alarm inputs on the alarm module. Any events in the arm zone may trigger a zone alarm event.
- Page 115 NAV IP Access Controller • Invalid Time: Each card belongs to an access group. For each group, the system can assign access rights to certain doors for certain time zones. An invalid time event will be generated if a card is swiped during a time period in which it does not have the right to pass.
-
Page 116: Alarm Time
NAV IP Access Controller 12.1.5 Alarm Time On the alarm time setting page, users can set the alarm duration time for the specified controller. Click the “Alarm Input” tab, the setting page appears as below: Figure12-6Alarm Time Steps: 1) Click the “Alarm Time” tab. 2) Select an alarm to be set in alarm list. -
Page 117: Other Setting
NAV IP Access Controller Steps: 1) Click the “APB area” tab. 2) Select an area to be set. 3) Input area information. 4) Click the “Save” button and save the changes. 12.1.7 Other Setting You can configure the overall settings on the page. Click the “Other” tab and the page below appears: Figure12-8Other Setting •... -
Page 118: Access Rule
NAV IP Access Controller Chapter 13. Access Rule 13.1 Date Type Click “Access Control” “Access Rule” “Date Type” to enter the page below: Figure13-1Date Type 13.1.1 Add a Date In the date type page, click the “Add” button and will pop-up below screen: Figure13-2Add a Date Controller supports 10 date types, including: Sunday to Saturday (7 types), custom 1-3. -
Page 119: Delete A Date
NAV IP Access Controller Software allows set the holiday flexibility in accordance with the standard set of three different Holiday. There three types of cycles are as following: One-time holiday: A one-time holiday is a holiday that will occur once, and will not recur in subsequent years. -
Page 120: Access Door
NAV IP Access Controller 13.2 Access Door Click on the menu bar “Access Control” → “Access Rule” → “Access Door” to enter the below page: Figure 13-3 Access Door Steps: 1) Select a door schedule for each door. 2) After completed, click the “Save” button. It will display a “Modify successfully” message when completed. -
Page 121: Add A Door Schedule
NAV IP Access Controller 13.3.1 Add a Door Schedule On the door schedule setting page, click the “Add” button to enter to the setting page. Figure13-5 Add a Door Schedule Steps: 1) Input a new schedule name in the text box. 2) Click on one cell in the column “Day setting”, a pop-up box appears. -
Page 122: Edit A Door Schedule
NAV IP Access Controller 13.3.3 Edit a Door Schedule Select a door schedule and click the “Edit” button to enter the door schedule setting page: Figure13-6 Edit a Door Schedule The default entry/exit mode is “Card only”, if you need to set the mode in different time sections, click the time bar to enter the “Modify Schedule”... -
Page 123: Save As A New Schedule
NAV IP Access Controller 13.3.4 Save As a New Schedule A door schedule can be edited and it can be saved as a new schedule. This feature is used to add a similar setting for other door schedules. Steps: 1) Edit the schedule name on the box or not. 2) Click “Save as”... -
Page 124: Delete An Access Group
NAV IP Access Controller 13.4.2 Delete an Access Group Steps: 1) Select one or more access group to be deleted. 2) Click the “Delete” button. 3) Confirm deletion. 4) Click “OK”. 13.5 Group Schedule Click on the menu bar, select “Access Control” → “Access Rule” → “Group Schedule” to enter the Group Schedule page: Figure13-11User Group Schedule 13.5.1 Add a Group Schedule... -
Page 125: Delete A Group Schedule
NAV IP Access Controller 2) Click on one cell in the column “Day setting”, a pop-up box appears. You can set the time sections and entry/exit mode, shown as Figure13-14. 3) After completed, click the “Save” button and the new group schedule have been created. -
Page 126: Save As A New Schedule
NAV IP Access Controller Input the start and end time, select the entry/exit mode for current time section, and click the “Apply” and “Save” button. Click “Return” back to group schedule setting page. After back to the page, click “Save” button, group schedule have been saved, shown as following: Figure13-15 Data Updating After the current date type is set, the user want to be set the other date as same, just need... -
Page 127: Card
NAV IP Access Controller Chapter 14. Card This section describes how to add, edit cards, through this section you will learn: • How to add, delete and edit one or more cards. • Import cards to the controller 14.1 Card Setting Click on the menu bar “Access Control”... -
Page 128: Add A (Batch) Card
NAV IP Access Controller 14.1.1 Add a (Batch) Card In the card setting page, click the “Add” button and a pop-up window appears Figure14-2Add a (batch) Card Steps: 1) In the window, input the card number, if users want to add more than one card that its serial number is consecutive, please check the “Mass Cards”... -
Page 129: Edit A (Batch) Card
NAV IP Access Controller • The card can be added to the controller by the system reader in the controller’s menu. If the added cards’ quantity is more one which number is continual, input the starting number and quantities to batch add. 14.1.2 Edit a (Batch) Card Edit a Card: In the card setting page, click the card which needs to be edited and a pop-up window appears, shown as following:... -
Page 130: Export Cards
NAV IP Access Controller 14.1.4 Export Cards Click the “Export” button, a pop-up download file window appears. All cards will be exported to CSV format. Select a path to save the file. Click “OK” to confirm. Please see 7.1.7 Export Function. 14.1.5 Print Cards Click the “Print”... - Page 131 NAV IP Access Controller You can import multiple card information together with cardholder information to the controller through csv file. Please follow the steps below: Steps: 1) Export the excel format from “Card Setting” page (Access Control < Card < Card Setting).
-
Page 132: Report
NAV IP Access Controller Chapter 15. Report This chapter describes how to query, print the cards, and access events. 15.1 Card Report Click on the menu bar “Access Control” “Report” “Card Report” to enter the below page: Figure15-1 Card Report 15.1.1 Search Cards Steps: 1) In the search drop-down menu, select a field, including card number, employee... -
Page 133: Print Cards
NAV IP Access Controller 15.1.3 Print Cards Click the “Print” button to enter the printing page, the specific operation method see 7.1.8 Print Function. 15.2 Card-dependent Event Click on the menu bar “Access” → “Report” → “Card-dependent Event” to enter the card- dependent event home page, shown as following: Figure15-2Card-dependent Event 15.2.1 Search Events... -
Page 134: Card-Independent Event
NAV IP Access Controller 15.3 Card-independent Event Click on “Access Control” → “Report” → “Card-independent Event” to enter the card- independent event page. Figure15-3 Card-independentEvent 15.3.1 Search Events Steps: 1) Select the field “event type”. 2) Input the search criteria in the “keyword” text box. 3) Click the “Search”... - Page 135 FAX: +81 3 5625 8189 sales@everfocus.com www.everfocus.co.jp info@everfocus.co.jp Ihr EverFocus Produkt wurde entwickelt Your EverFocus product is designed and und hergestellt mit qualitativ manufactured with high quality materials hochwertigen Materialien und and components which can be recycled Komponenten, die recycelt und wieder and reused.