Table of Contents
Advertisement
Advertisement
Table of Contents

Related Manuals for Profoto D2 1000 AirTTL

Summary of Contents for Profoto D2 1000 AirTTL
-
Page 1: User Guide
User guide Profoto D2 For other languages visit: www.profoto.com/support... - Page 2 www.profoto.com...
- Page 3 Unless it complies with the specified performance, quality and safety, it is a no-go. As a result, we are confident that your new Profoto product will stay with you for years and help you grow as a photographer. But getting the product is only the beginning of that journey.
-
Page 4: Safety Precautions
Equipment contains electrical and electronic components that could be harmful to the environment. Equipment may be returned to Profoto distributors free of charge for recycling according to WEEE. Follow local legal requirements for separate disposal of waste, for instance WEEE directive for electrical and electronic equipment on the European market, when product life has ended! www.profoto.com... -
Page 5: Table Of Contents
Special settings ....................17 Automatic safety functions ................. 18 Handling ..........................19 Stand mounting ....................19 Mounting Profoto Light Shaping Tools ........... 19 Replacing the front glass ................20 Changing the flash tube and/or modeling lamp ........ 20 Changing the built-in fuse................21 Additional information ....................22... - Page 6 www.profoto.com...
-
Page 7: Nomenclature
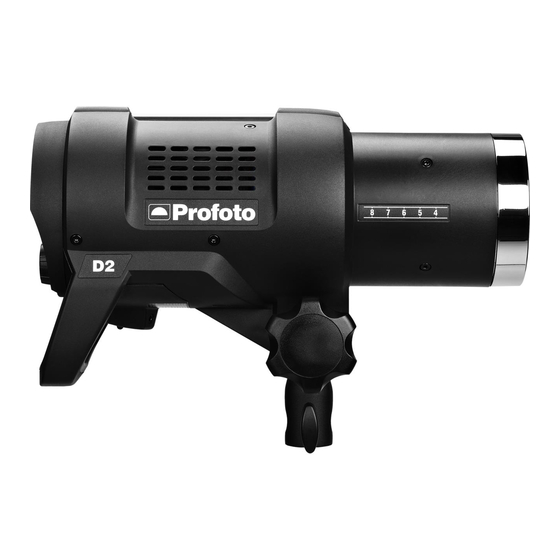
Nomenclature Display 5. Dial 2. MODEL button 6. SETTINGS button 3. Power supply indicator Test button and Ready lamp 4. ON button www.profoto.com... - Page 8 8. Umbrella holder 11. Tilt-lock knob 9. Zoom scale 12. Stand adapter 10. Front glass 13. Clamp screw www.profoto.com...
- Page 9 14. Sync input 17. Fuse holder 15. IR slave/Photocell 18. Power supply (AC) input 16. Micro USB port www.profoto.com...
-
Page 10: Operation
4. Push the ON button [4]. 5. Set the flash light output by using the dial [5] or use the optional Profoto Air Remote TTL to set the output. 6. Release a test flash by pushing the test button [7]. -
Page 11: Change Settings
5. Release the dial [5] to select the currently highlighted setting option. 6. Push the SETTINGS button [6] to return to the main menu. Otherwise, the display will automatically return to the main menu after a few seconds. www.profoto.com... -
Page 12: Power Supply
Technical data section. Most gas generators with an output of 800 W constant load, or more, can power the D2 unit. No Profoto ProGas unit is needed. WARNING Never use ordinary household extension cords to elongate the power cable. They may overheat. -
Page 13: Modeling Light
There are three sync setting options: • AIR: The built-in Profoto Air transceiver is activated. The D2 unit is set to be triggered and/or controlled from any of the optional Profoto Air transceivers. •... - Page 14 The TTL function can only be enabled in group A-C. The D2 unit supports all available Air accessories offered by Profoto, including those listed in the table below. (For operating instructions, refer to the user guide of respective accessory).
- Page 15 Sync) Air Remote TTL* Air Remote** Air Sync** Air USB*** *Optional camera mounted transceiver. Check Profoto.com for TTL supported cameras. **Optional camera mounted transceiver. *** USB device for using Profoto Air Software. Slave sync operation With the SLAVE sync setting, the D2 unit senses the flash release, as well as IR signals from most IR sync transmitters.
-
Page 16: Ready Signaling
This alarm indicates that the flash light does not fully correspond to the set value. The D2 unit will always flash even if the set light output cannot be met, as the image may still be usable if the catch of the moment was perfect. www.profoto.com... -
Page 17: Quick Burst
3. Push and hold the dial [5] to show the available options for the selected setting. 4. While pushing the dial [5], turn the dial [5] to change the setting option. 5. Release the dial [5] to select the currently highlighted setting option. www.profoto.com... -
Page 18: Automatic Safety Functions
Reduced recycling speed should be enabled when the D2 unit is connected to a weak power supply network or appliance, for example a battery inverter like the Profoto BatPac. Automatic safety functions The D2 unit is equipped with an efficient cooling and safety system. -
Page 19: Handling
All tools with standard reflector mount (rubber collar with clasp) Most reflectors are equipped with Profoto’s unique clamp mechanism, which makes them easy to mount and allows you to shape the light by simply sliding the reflector back and forth along the zoom scale [9]. -
Page 20: Replacing The Front Glass
The front glass [10] can be replaced with optional front glass or glass domes. Domes can be used to enhance the “zoom effect”, if using any of Profoto’s “zoomable” reflectors. IMPORTANT: Make sure that the D2 unit is turned off and that the power cable is not connected. -
Page 21: Changing The Built-In Fuse
3. Pull out the fuse holder [17] from the unit and remove the old fuse. 4. Push the new fuse all the way into the fuse holder [17]. Only use recommended fuse, see section Technical data. 5. Fit the fuse holder [17] in place, by gently pushing until the holder snaps in place. www.profoto.com... -
Page 22: Additional Information
• Your Air Remote TTL may require a firmware update in order to use the HSS feature. The latest updates and a list of compatible cameras are available on profoto.com/ myprofoto. Create your personal account and login to access all new upgrades. -
Page 23: Color Temperature
D2 unit. To access the latest free upgrades, create your personal account on profoto.com/myprofoto. Once you have an account you can also choose to register your products and be sure you get noticed when new upgrades are released. -
Page 24: Technical Data
+-1200 K over range. +-1200 K over mode +-100 K flash to flash range. +-100 K flash to flash Modeling lamp Max 300 W Max 300 W (Halogen) (Halogen) Modeling light modes Max, Prop, Free, Off Max, Prop, Free, Off www.profoto.com... -
Page 25: Warranty
Storage temperature -20 C to +60 C -20 C to +60 C All data are to be considered as nominal and Profoto reserves the right make changes without further notice. Warranty All Profoto generators and heads are individually tested before they... -
Page 26: Regulatory Information
SRD (Short Range Devices). This band may be used in most parts of the world. Regional restrictions may apply. NOTE Refer to national regulations for the region where the Profoto Air Sync or Profoto Air Remote transceiver shall be operated and make sure that they are followed. Unites States and Canada F.C.C. - Page 27 Profoto AB Transmitter / Receiver MODEL: Profoto Air Sync PRODUCT NO: PCA5108-0000 MODEL: Profoto Air Remote PRODUCT NO: PCA5102-0000 MODEL: Profoto Air USB PRODUCT NO: PCA5104-0000 FCC ID: W4G-RMI IC: 8167A-RMI Made in Sweden Japan The module has been granted modular approval for sale and operation in Japan.
- Page 28 Profoto AB Sweden +46 (0) 8 447 53 00 info@profoto.com www.profoto.com...