Table of Contents
Advertisement
Advertisement
Table of Contents

Related Manuals for AEG FAVORIT 77000


Summary of Contents for AEG FAVORIT 77000
- Page 1 EN DISHWASHER FAVORIT 77000 USER MANUAL...
- Page 2 FOR PERFECT RESULTS Thank you for choosing this AEG product. We have created it to give you impeccable performance for many years, with innovative technologies that help make life simpler – features you might not find on ordinary appliances. Please...
-
Page 3: Table Of Contents
Contents CONTENTS 4 Safety information 6 Product description 7 Control panel 9 Use of the appliance 10 Setting the water softener 11 Use of dishwasher salt 12 Use of detergent and rinse aid 13 Multitab function 14 Loading cutlery and dishes 15 Washing programs 16 Setting and starting a washing program... -
Page 4: Safety Information
Safety information SAFETY INFORMATION For your safety and correct operation of the appliance, read this manual carefully before installation and use. Always keep these instructions with the appliance even if you move or sell it. Users must fully know the operation and safety features of the appliance. Correct use •... -
Page 5: Child Safety
Safety information Child safety • Do not let persons, children included, with reduced physical sensory, reduced mental functions or lack of experience and knowledge use the appliance. They must have super- vision or instruction for the operation by a person who is responsible for their safety. •... -
Page 6: Product Description
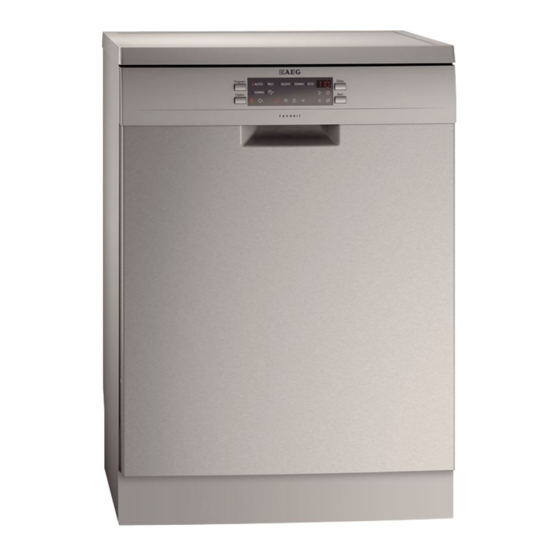
Product description PRODUCT DESCRIPTION Upper basket Air vent and water hardness dial Salt container Detergent dispenser Rinse aid dispenser Rating plate Filters Lower spray arm Upper spray arm Top spray arm Worktop... -
Page 7: Control Panel
Control panel CONTROL PANEL A B C On/off button Program guide Program button Program indicators Display Delay button Start button Indicators Option button Indicators Multitab It comes on when you activate the multitab function. Refer to 'Multitab func- tion'. Extra-Hygiene It comes on when you activate the Extra-Hygiene function. -
Page 8: The Display
Control panel Indicators Rinse aid It comes on when it is necessary to fill the rinse aid dispenser. Refer to 'Use of rinse aid'. The rinse aid indicator does not come on while a washing program operates even If the rinse aid dispenser is empty Salt It comes on when it is necessary to fill the salt container. -
Page 9: Use Of The Appliance
Use of the appliance Option button Press this button, once or more times, to set the required functions. When a function is activated, the related indicator comes on. Option button Multitab function Extra-Hygiene function Press once ACTIVATED DEACTIVATED Press twice DEACTIVATED ACTIVATED Press three times... -
Page 10: Setting The Water Softener
Setting the water softener 2. Fill the salt container with dishwasher salt. 3. Fill the rinse aid dispenser with rinse aid. 4. Load cutlery and dishes into the appliance. 5. Set the correct washing program for the type of load and soil. 6. -
Page 11: Use Of Dishwasher Salt
Use of dishwasher salt 2. Turn the water hardness dial to position 1 or 2 (refer to the chart). 3. Put back the lower basket. Electronic adjustment The appliance is factory set at level 5. 1. Switch on the appliance. Make sure that the appliance is in setting mode. 2. -
Page 12: Use Of Detergent And Rinse Aid
Use of detergent and rinse aid 3. Use the funnel to fill the salt container with salt. 4. Remove the salt around the opening of the salt container. 5. Turn the cap clockwise to close the salt container. It is normal that water overflows from the salt container when you fill it with salt. -
Page 13: Multitab Function
Multitab function Different brands of detergent dissolve in different times. Some detergent tablets do not have the best cleaning results during short washing programs. Use long washing programs when you use detergent tablets to fully remove the detergent. Use of rinse aid CAUTION! Only use rinse aid specified for dishwashers. -
Page 14: Loading Cutlery And Dishes
Loading cutlery and dishes To activate the multitab function 1. Press the Option button, until the multitab indicator comes on. The function is activa- ted. To deactivate the multitab function and use separately detergent, salt and rinse aid 1. Press the Option button, until the multitab indicator goes off. The function is deactiva- ted. -
Page 15: Washing Programs
Washing programs WARNING! Always close the door after you load or unload the appliance. An open door can be danger- ous. WASHING PROGRAMS Program Type of soil Type of load Program description Function Crockery, cut- Prewash Extra-Hygiene lery, pots and Wash 45 °C or 70 °C pans Rinses... -
Page 16: Setting And Starting A Washing Program
Setting and starting a washing program Energy (kWh) Water (litre) Program 0.67 - 0.81 9.6 - 11.6 1.0 - 1.2 10 - 11 0.05 1) The display shows the program time. The water pressure and temperature, the variations of the mains supply and the quantity of dishes can change the consumption values. -
Page 17: Interrupting A Washing Program
Setting and starting a washing program Cancelling the delay start The countdown has not yet started 1. Press the Delay button repeatedly until the display shows the time of the washing pro- gram. • The phase indicators of the program come on. 2. -
Page 18: Care And Cleaning
Care and cleaning CARE AND CLEANING To remove and clean the filters WARNING! Switch the appliance off before you carry out any cleaning operation. Dirty filters decrease the washing results. Although the maintenance is very low with these filters, we recommend that you regularly check the filters and clean them if necessary. 1. -
Page 19: Cleaning The Spray Arms
What to do if… Cleaning the spray arms Do not remove the spray arms. If the holes in the spray arms become clogged, remove remaining parts of soil with a thin pointed object. External cleaning Clean the external surfaces of the appliance and control panel with a damp soft cloth. Only use neutral detergents. -
Page 20: The Washing Results And Drying Results Are Not Satisfactory
What to do if… Malfunction Possible cause Possible solution The appliance does The water tap is closed. Open the water tap. not fill with water The filter in the water inlet hose is Clean the filter. blocked. The installation of the water inlet Make sure that the installation is hose is not correct. - Page 21 What to do if… Problem Possible cause Possible solution The baskets were not loaded Load the baskets correctly. correctly, water did not touch all surfaces. The spray arms could not turn Make sure that an incorrect ar- freely because of incorrect ar- rangement of the load does not rangement of the load.
-
Page 22: Technical Data
Technical data • The display shows the setting of the rinse aid dispenser. Rinse aid dispenser deactivated Rinse aid dispenser activated 5. Press button Option to change the setting. The display shows the new adjustment. 6. Switch off the appliance to confirm. TECHNICAL DATA Dimensions Width... -
Page 23: Installation
Installation INSTALLATION Fitting under a kitchen counter WARNING! Make sure that the mains plug is disconnected from the mains socket during installation. Put the appliance adjacent to a water tap and to a water drain. The plinth of a freestanding appliance is not adjustable. Do not remove the worktop of the appliance if you want to use it as a freestanding unit. -
Page 24: Water Connection
Water connection Lift the worktop and move it from the front slots (3). Level the appliance using the adjustable feet. Install the appliance under the kitchen counter. Be careful not to bend or squash the water hoses and the mains cable. -
Page 25: Water Drain Hose
Water connection WARNING! • The mains cable is in the double-walled inlet hose. Do not immerse the water inlet hose or the safety valve in water. • Do not attempt to shorten the inlet hose. • If the water inlet hose or the safety valve is damaged, immediately turn off the power and remove the mains plug from the mains socket. -
Page 26: Electrical Connection
Electrical connection CAUTION! Make sure that the water couplings are tight to prevent water leakage. Ensure that hoses are not bent or squashed under or behind the appliance. Once connected the inlet hose to the water tap, turn the tap on and check that there are no leaks. ELECTRICAL CONNECTION WARNING! •... -
Page 27: Old Appliance
Environment concerns please contact your local council, your household waste disposal service or the shop where you purchased the product. The packaging materials are environmentally friendly and can be recycled. The plastic com- ponents are identified by markings, e.g. >PE<, >PS<, etc. Discard the packaging materials in the applicable container at the community waste disposal facilities. -
Page 28: Warranty
(and does not exclude, restrict, or modify in any way) any non-excludable statutory warranties in Australia or New Zealand. During the Warranty Period AEG or its ASC will, at no extra charge if your Appliance is readily accessible for service, without special equipment and subject to these terms and conditions, repair or replace any parts which it considers to be defective. - Page 29 You will bear the cost of transportation, travel and delivery of the Appliance to and from AEG or its ASC. If you reside outside of the service area, you will bear the cost of: a) travel of an authorised representative;...
- Page 30 (eg an invoice) available; d) telephone the numbers shown below. 14. You accept that if you make a warranty claim, AEG and its ASC may exchange infor- mation in relation to you to enable AEG to meet its obligations under this warranty.
- Page 32 117932282-A-192012...