Table of Contents
Advertisement
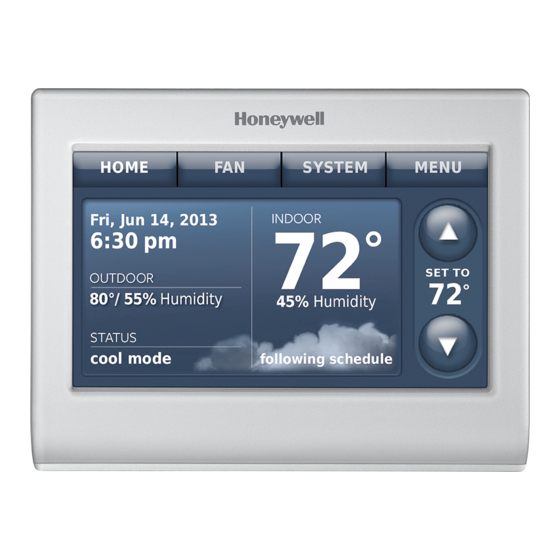
Wi-Fi Colour
Touchscreen
Programmable
Thermostat
User Guide
Read and save these
instructions.
For help please visit
getconnected.honeywell.com/me
In the box you will find
• Thermostat
• Wallplate
• Screws and anchors
• Quick Start Guide
Features of your Wi-Fi thermostat
With your new thermostat, you can:
• Connect to the Internet to monitor and control your heating/cooling system.
• View and change your heating/cooling system settings.
• View and set temperature and schedules.
• Receive alerts via email and get automatic upgrades.
• View outdoor temperature and humidity (requires Wi-Fi set up and registration).
RTH9580
Wi-Fi Series
• Thermostat ID Card
• Wire labels
• User Guide
Advertisement
Table of Contents

Related Manuals for Honeywell RTH9580


Summary of Contents for Honeywell RTH9580
-
Page 1: User Guide
RTH9580 Wi-Fi Colour Touchscreen Programmable Wi-Fi Series Thermostat User Guide Read and save these instructions. For help please visit getconnected.honeywell.com/me In the box you will find • Thermostat • Thermostat ID Card • Wallplate • Wire labels • Screws and anchors •... - Page 2 NOTICE: To avoid possible compressor damage, do not run air conditioner if the outside temperature drops below 50°F (10°C). Need help? Visit getconnected.honeywell.com/me or call +971 4 450 5800 for assistance before returning the thermostat to the store. 69-2715EF—07...
-
Page 3: Table Of Contents
Table of contents About your new thermostat Initiating occupancy mode–business .. 22 Customizing screen colour ....23 Home screen quick reference ....1 Setting preferences ......23 Business screen quick reference ..2 Cleaning the thermostat screen ..24 Installation Adjusting security settings .... -
Page 4: Business Screen Quick Reference
Connect it to your home wireless network. Register online for remote access. Before you begin, you may want to watch a brief installation video. Use the QR Code at the front of this guide, or go to ® getconnected.honeywell.com/me 69-2715EF—07... -
Page 5: Installing Your Thermostat
2b If no wire is connected to a terminal labelled C or no C terminal exists on the old thermostat, view the Alternate Wiring videos at getconnected.honeywell.com/me Terminal M33823A designation Important! C wire is required and is the power source for your thermostat. - Page 6 Installing your thermostat 3 Label the wires. Use the supplied sticky tags to label each wire as you Sticky tag disconnect it. Label wires according to the old thermostat terminal designations, not by wire colour. Blank tags Note: If no tag matches a terminal designation, write the appropriate letter on a blank sticky tag.
- Page 7 Note: Not all heating/cooling systems label the 24 VAC common C. Check your system manual or contact the manufacturer to find out which terminal is the 24 VAC common. View the Alternate Wiring videos at getconnected.honeywell.com/me Wiring conventional heating/cooling systems (natural gas, oil or electric furnace, air conditioner), see page 5.
- Page 8 Installing your thermostat Wiring (Conventional System Important! continued) Check the box for each wire you connect. You will need c In the image on the right, check the this information in Step 9. box next to each connection. You will use this checklist in Step 9.
- Page 9 Installing your thermostat Wiring (Heat Pump System Important! continued) Check the box for each wire you connect. You will need c In the image on the right, check the this information in Step 9. box next to each connection. You will use this checklist in Step 9.
- Page 10 Installing your thermostat Alternate wiring (Heat Pump System) Use this if your wire labels don’t match the terminal labels. Note: You must have a C wire or equivalent. See page 5. MCR34542 Alternate wiring key (Heat Pump System) Do not use K terminal. For future use. Leave jumper loop in place.
- Page 11 Installing your thermostat 8 Switch heating/cooling system ON. Important! 8a Verify that the C wire is connected at the thermostat and at the heating/cooling system. 8b Make sure the heating/cooling system door is firmly secured. 8c Switch power back ON for your heating/cooling system at the Circuit Heating/cooling...
-
Page 12: Connecting To Your Wi-Fi Network
Installing your thermostat 9e Select your system type and touch Next . The system type determines other selections for completing initial setup. Use the checklist from Step 6d when making selections. Next 9f Touch after making selections Next on each screen. Done 9g Touch on the last screen. - Page 13 Connecting to your Wi-Fi network 2b Using the keyboard, touch the characters that spell out your home network password. Done 2c Touch . The thermostat displays “Connecting to your network. Please wait...” then shows a “Connection Successful” screen. Done Next 2d Touch to display the registration information screen.
- Page 14 Disconnecting your Wi-Fi network MENU 1 Touch MENU Wi-Fi Setup 2 Select Wi-Fi Setup Disconnect from Network 3 Touch . The thermostat will display a question to confirm your selection. 4 Touch to confirm that you want to disconnect from the network. The thermostat will display the Wi-Fi Setup screen.
-
Page 15: Registering Your Thermostat Online
To view and set your Wi-Fi thermostat remotely, you must have a Total Connect Comfort account. Use the following steps. 1 Open the Get Connected website. Go to getconnected.honeywell.com/me View the Wi-Fi Thermostat Registration video at getconnected.honeywell.com/me 2 Login or create an account. - Page 16 After adding your Utilice la identificación MAC y la identificación CRC para inscribir este producto en mytotalconnectcomfort.com thermostat location, you must ® U.S. Registered Trademark. © 2012 Honeywell International Inc. enter the thermostat’s unique 69-2723EFS—01 M.S. 04-12 69-2723EFS-01 Printed in U.S.A. identifiers:...
-
Page 17: Setting The Time/Date
Setting the time/date 1 Touch the current time. The screen displays Set Time/Set Date. Fri, Jun 14, 2013 Set Time Set Date 2 Touch 6:30 pm 3 Touch until the proper time/date is displayed. Done Cancel 4 Touch to save or to ignore changes. -
Page 18: Selecting System Mode
Setting system mode SYSTEM 1 Touch to display system settings. SYSTEM 2 Touch desired option: Heat: Thermostat controls only the heating Done system. Cool: Thermostat controls only the cooling system. Off: Heating/cooling systems are off. Automatic: Thermostat selects heating or cooling as needed depending on the indoor temperature. -
Page 19: Adjusting Program Schedules
Adjusting program schedules MENU 1 Touch MENU Create/Edit Schedule 2 Select View/Edit • Touch to view the Create Edit Schedule full schedule and make a quick adjustment. Guide Me • Touch to create a schedule by answering simple questions. I’ll do it myself •... -
Page 20: Overriding Schedules-Home
Overriding schedules: home use 1 Touch to adjust the temperature (right side of screen) and the Hold Until time (left side). The schedule will resume when the Hold Until time expires. Switch to Permanent Hold 2 Touch to keep Switch To Permanent Hold the same temperature until you change it or resume the program schedule. -
Page 21: Viewing Equipment Status
Viewing equipment status MENU 1 Touch MENU Equipment Status 2 Select 3 Touch to view the status of all the equipment your thermostat is controlling. Depending on how your thermostat was installed, the Equipment Status screen can report Equipment Status data about the following systems: •... -
Page 22: Setting Holiday/Event Schedules- Business
Setting holiday/event schedules: business use This feature helps you conserve energy MENU when the workplace is unoccupied for special events and holidays. Holiday Event Scheduler MENU 1 Touch Holiday/Event Scheduler 2 Select 3 Select the item you want to schedule. Custom events •... -
Page 23: Setting Holiday Schedule-Business
Setting custom events: business use Create a new event 2 Select Specific Date Month/Weekday 3 Select Specific Date • For , you are prompted to select the start date, settings, end date, and frequency for the event. Next Month/Weekday • For , you are prompted to select the month, day of the week, week of the month, settings,... -
Page 24: Setting Holiday Override-Business
Setting holiday override: business use This feature lets you customise temperature MENU settings to be maintained from now until a specified date. The thermostat resumes normal scheduling on the date you select. Holiday Mode MENU 1 Touch Holiday Mode 2 Select to display temperatures while you are away on holiday. -
Page 25: Customizing Screen Colour
Customizing screen colour You can customise your thermostat display MENU to match your décor. 1 Touch Menu. Color Themes Colour Themes. 2 Touch 3 Select the name of a colour to use a predefined background, or select Custom to define you own background colour and text. -
Page 26: Cleaning The Thermostat Screen
Cleaning the thermostat screen When you select the Clean Screen option, MENU the screen is locked so you don’t accidentally change settings while you clean. Clean Screen MENU 1 Touch Clean Screen 2 Select . A prompt asks if you want to clean the screen for 30 seconds. -
Page 27: Software Updates
Updates occur in the early morning. After your thermostat receives the software, it reboots, briefly displaying the Honeywell logo. The screen then shows “Updating software…” with a green progress bar. When the update is complete, your home screen will appear as usual. -
Page 28: Pre-Occupancy Purge
Pre-occupancy purge This business use feature turns on the fan 1 to 3 hours before each “occupied” time period, to provide a comfortable work environment when you arrive. Compressor protection The thermostat keeps the compressor off for a few minutes before restarting, to prevent equipment damage. -
Page 29: Setting Advanced Preferences
Setting advanced preferences You can change options for a number of system MENU functions. Although many options, such as language and temperature indication settings Preferences are the same for all set-ups, others depend on the type of system you have. MENU 1 Touch . -
Page 30: Changing System Setup
Setting advanced preferences Advanced Preferences Options (concluded) Screen Title Settings and Options Select No to begin recovery on schedule or Yes to ramp up Early Recovery for Heating temperature early. Select No to begin recovery on schedule or Yes to ramp down Early Recovery for Cooling temperature early. - Page 31 Changing system setup Note: Touch the orange Help button on any screen for more information. System Setup Options (MENU > System Setup) Screen Title Settings and Options Language English/Français/Español. Thermostat installed Home/Business (Thermostat is used in a residential (default) or commercial setting).
-
Page 32: Frequently Asked Questions
: A Check for the email in your Junk or Deleted folder. Q Is there a way to extend the signal strength? : A Most standard routers can be set up to be a repeater. You can also purchase and install a Wi-Fi repeater. For more FAQs, see getconnected.honeywell.com/me 69-2715EF—07... -
Page 33: Getting Help And Responding To Alerts
Getting help and responding to alerts Your thermostat offers two types of assistance, if these assistance options do not answer your questions, review the FAQs (page 30) and troubleshooting Help tips (page 32). On screen help Most displays include an orange Help button. -
Page 34: Troubleshooting
Troubleshooting If you have difficulty with your thermostat, please try the following suggestions. Most problems can be corrected quickly and easily. Display is • Check circuit breaker and reset if necessary. blank • Make sure power switch at heating and cooling system is on. •... -
Page 35: Glossary
This warranty does not cover removal or re-installation costs. This warranty shall not apply if it is shown by Honeywell that the defect or malfunction was caused by damage which occurred while the product was in the possession of a consumer. - Page 36 P.O. Box 232362, Dubai, UAE getconnected.honeywell.com/me ® U.S. Registered Trademark. Apple, iPhone, iPad, iPod touch and iTunes are trademarks of Apple Inc. All other trademarks are the property of their respective owners. © 2015 Honeywell International Inc. 33-00167-01 M.S. 10-15 Printed in U.S.A.