
Related Manuals for Pentair GREAT WHITE II


Summary of Contents for Pentair GREAT WHITE II
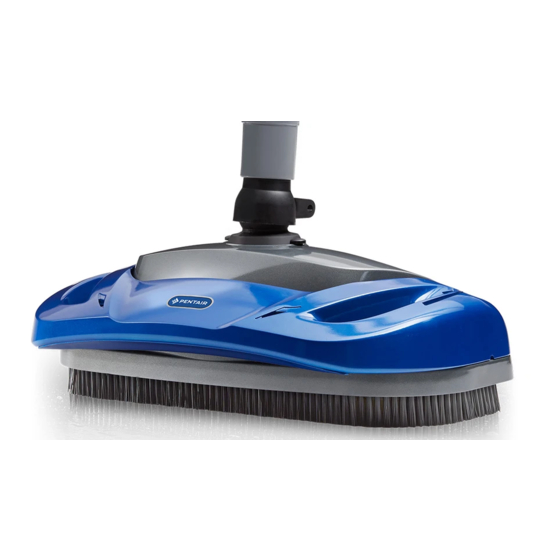
- Page 1 GREAT WHITE ® AUTOMATIC POOL CLEANER INSTALLATION AND USER’S GUIDE IMPORTANT SAFETY INSTRUCTIONS READ AND FOLLOW ALL INSTRUCTIONS SAVE THESE INSTRUCTIONS...
-
Page 2: Table Of Contents
CUSTOMER SERVICE / TECHNICAL SUPPORT If you have questions about ordering Pentair Aquatic Systems replacement parts, and pool products, please use the following contact information: Customer Service (8:30 A.M. to 5:00 P.M. Australia Technical Support wide) Dandenong South (8:30 A.M. to 5:00 P.M. EST) -
Page 3: Important Warning And Safety Instructions
The cleaner may get stuck in these areas which can suction port (“vac port”) for vacuuming or for an result in damage to the pool finish or vinyl liner. Pentair disclaims any automatic pool cleaner, it must be covered when liability for repairs or replacement to any of these structures or components not in use. - Page 4 IMPORTANT WARNING AND SAFETY INSTRUCTIONS Disclaimer of Liability About your Pool and Cleaner There are a multitude of factors that contribute to the life of your pool. The pool cleaner is a very passive product that will have no impact on pool life. Please be aware that over time, deterioration, discoloration and brittleness of any pool finish can be caused separately by, or in combination with, age, an imbalance in pool water chemistry, improper installation and other...
-
Page 5: Pool Preparation
POOL PREPARATION Congratulations on your purchase of the Great White II Automatic Pool Cleaner! Nothing quite compares to the Great ® White II’s ability to make dirt disappear. With its 38cm cleaning path and unique bristle drive, your Great White ®... -
Page 6: Assembling The Cleaner
(Figures 7 and 8). Failure to use this leader hose section to attach the hose to the cleaner’s swivel assembly will hinder your cleaner’s performance. If additional hose is needed, use only hoses from your Pentair dealer (order replacement part No. 41200-0131). Use of another manufacturer’s hose will hinder cleaner coverage. -
Page 7: Figure 9
Both the standard in-skimmer installation and optional vac port installation are covered below. If your pool configuration is unlike any of the examples, contact your Pentair dealer for assistance, or call Pentair at 1300 137 344. -
Page 8: Standard Installation
Standard Installation (Continued) Disc Indicator 5. Check Flow With the main drain closed, and one end of the hose attached to the regulator installed in the skimmer, insert the flow gauge into the other end of the hose. Keep the hose and flow gauge underwater. Turn on the pump. With the pump running, adjust the vacuum regulator (in your skimmer) until the indicator on the flow gauge is between minimum and maximum flow (Figure 12). -
Page 9: Optional Installation
OPERATION This section contains information describing the movement and operation of your Great White II Automatic Pool ® Cleaner, as well as tips for “fine-tuning” your pool’s valves and connections to optimize the cleaner’s cleaning ability. Cleaner Operation and Movement Clicking sound This is the sound of the oscillator moving back and forth in the oscillator chamber. -
Page 10: Fine-Tuning Valves And Connections
Fine-tuning Valves and Connections Pool pump suction is hazardous and can cause entrapment with severe personal injury or drowning. Use vacuum regulator (see instructions below) in pool cleaner system at all times. NOTICE: Each pool’s hydraulic system and vacuum connections are different. Be sure you have installed the vacuum regulator before you “fine-tune”... -
Page 11: In-Line Leaf Caniters
In-Line Leaf Canisters If your pool is exposed to large quantities of leaves, we suggest purchasing and installing an in-line leaf canister (part no. R211084K). A leaf canister will provide more debris-loading capacity and also provides a water by-pass when the canister is full. -
Page 12: Maintenance
MAINTENANCE This section describes the service and maintenance of the Great White II Automatic Pool Cleaner. ® Hazardous suction. Stop pump before attempting to clean pool cleaner. • Keep skimmer basket and pump strainer basket clean and free of debris. •... -
Page 13: Disassembly
Disassembly Swivel "Click" at 1. Remove swivel assembly (Figure 15) from the assembly this point top of the Great White II Automatic Pool Cleaner ® by turning it 1/4-turn counterclockwise and pulling straight up on it. 2. Turn cleaner upside down. Remove 6 screws and remove lower body assembly from shroud. -
Page 14: Reassembly
Reassembly 1. Put both white seals in the oscillator; hold them in place. 2. Install the oscillator on the long gear shaft. Install the ratchet gear on the shaft so that the teeth engage the ratchet on the oscillator. Install the spring, ratchet drum, pinion gear (large gear first), and cam (gear end first) on the shaft (see Figure 22). -
Page 15: Illustrated Parts List
Illustrated Parts List Item Description Part No. Swivel Assembly GW9012 Bumper 360152 Bumper Insert Kit (Incl. 2 Bumper Inserts 360154 and 4 Bumper Insert Screws) Screw Kit (6 short, 2 long) GW9504 Brush Ring GW9505 Oscillator Chamber Cap GW9506 Cam Kit (2 & 3 Leg Cams) GW9507 Idler Gear Kit (Incl. -
Page 16: Troubleshooting
TROUBLESHOOTING SITUATION SOLUTIONS: Cleaner does not move Backwash and/or clean filter. Empty all baskets. This should help your cleaner attain the desired Oscillator is very slow oscillation. Correct oscillator speed can be determined by using the flow gauge provided with the cleaner (see page 4). - Page 17 MANUAL MODE WITH TELESCOPIC POLE Vacpole GREAT WHITE II Automatic Pool Cleaner Installation and User’s Guide ®...
- Page 18 NOTES: NOTES GREAT WHITE II Automatic Pool Cleaner Installation and User’s Guide ®...
- Page 19 NOTES: NOTES GREAT WHITE II Automatic Pool Cleaner Installation and User’s Guide ®...
- Page 20 Pentair. Those names and brands may be the trademarks or registered trademarks of those third parties. Because we are continuously improving our products and services, Pentair reserves the right to change specifications without prior notice.