Table of Contents
Advertisement
Quick Links
Advertisement
Table of Contents

Related Manuals for Ematic EGQ178


Summary of Contents for Ematic EGQ178
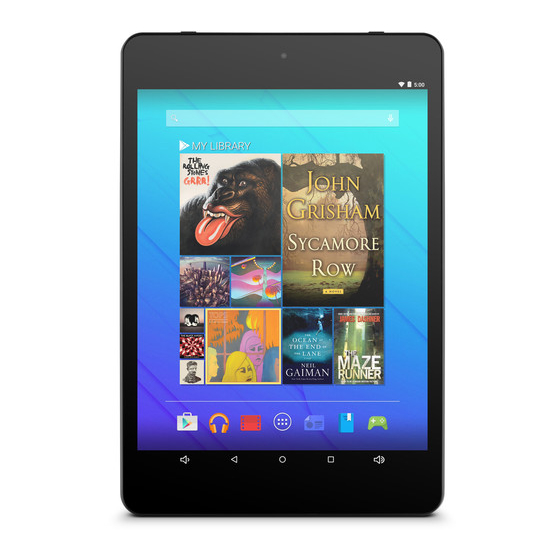
- Page 1 User’s Manual Ematic 7.9” HD Quad-Core Tablet with Android™ 5.0, Lollipop EGQ178...
- Page 2 Since the tablet software updates regularly, the user manual may not cover all aspects of new features. Important Notices The new battery will be in its best condition after being fully charged and discharged 2-3 times. While using earphones, if the volume is excessively high it may cause hearing damage.
-
Page 3: Table Of Contents
Section 1: Tablet Overview Tablet Overview Screen Basics Touch Screen Basics Section 2: Initial Setup Charging Turn on Setting up your Google™ Account Getting Started Section 3: Your Home Screen Icons Adding Icons Moving Icons Removing Icons Take a Screenshot Sleep Mode Change the Wallpaper Section 4: Network Connection... - Page 4 Google Play™ Google Play recommendations Google Play Store app Section 9: Google Now Google Now Cards Location Access Google Now Settings Section 10: Voice Actions Voice Commands Section 11: Tablet Settings Extending Battery Life Reset/Restore Troubleshooting Customer Support Limitations of Liability Statement...
-
Page 5: Section 1: Tablet Overview
Tablet Overview Camera Camera Speaker MicroSD card slot Hold for 2 seconds to turn on/off. Press to sleep/wake up. Hold for 6-10 seconds to reset device. Microphone Micro USB connection 3.5mm audio jack Reset Back... -
Page 6: Screen Basics
Screen Basics Search Battery Slide down to reveal Swipe left or right to switch between home screens. Dock Home Volume Up Volume Down Recent apps Back Touch Screen Basics Tap the screen once to activate or open something. Touch and hold to move an item by dragging. *In many apps touch and hold can offer more options. -
Page 7: Section 2: Initial Setup
Turn on To start your tablet, press and hold the power key for 2 seconds. The Ematic logo indicates that the tablet is loading. Once the screen loads, choose your language and connect to your Wi-Fi network. You will then be... -
Page 8: Setting Up Your Google Account
Setting up your Google Account Sign in using the email address and password from your Google Account. If you don’t have one yet, create one. An email address that you use for any of the following counts as a Google Account: When you sign in with a Google Account, all your email, contacts, Calendar events, and other data as- sociated with that account are automatically synced... -
Page 9: Section 3: Your Home Screen
Your Home Screen Icons shortcuts, widgets, and folders you like. see the main home screen panel. This panel is typically centered; you can access additional panels on either right. Battery Level: The white battery level indicator will decrease and change to red as the battery is drained. -
Page 10: Adding Icons
Adding Icons Within the All Apps menu, choose an app or swipe right to choose a widget. Tap and hold desired app or widget for about 2 seconds until the Home screen appears. Slide it wherever you want and let go. Moving Icons (To move between Home screens, slide toward the edge of the screen. -
Page 11: Sleep Mode
Sleep Mode To save battery, you should put your tablet in sleep mode by turning off the LCD display. To do this, press the power key and immediately release it. Do it again to bring up the lock screen. Swipe down from the top of your Home Screen to view your Quick Settings. -
Page 12: Change The Wallpaper
priority level by app, and see what apps have access to Change the Wallpaper home screen. A list of options appears. Wallpapers: Choose from thumbnails of default images folder on your tablet Gallery: Choose a wallpaper from your personal gallery Live Wallpapers: Choose from a scrolling list of animated wallpapers Photos: Choose a wallpaper from your personal photos... -
Page 13: Section 4: Network Connection
Network Connection Wi-Fi can only be used when it connects with a Wi-Fi Access Point (AP) or a free unsecured Wi-Fi hotspot. Turn on Wi-Fi Within the All Apps tap on Wi-Fi. menu, tap Settings. range. Switch the button at the top to on and scan for networks. -
Page 14: Adding A Wi-Fi Network
Adding a Wi-Fi Network Users may also add a Wi-Fi network by pressing the Menu icon in the top right corner. Select Add network. Add the network information to connect. Forget a Wi-Fi Network In the Wi-Fi settings screen, tap the name of the net- work. -
Page 15: Section 5: Connecting To A Computer
Connect to your computer by USB. The device driver will install. Choose open folder to view EGD078 (E:) removable disk. EGQ178 (E:) You will now be able to drag and your computer onto your tablet EGQ178 (E:) just as you would drive. -
Page 16: Mac
First, install the Android File Transfer application for choose download now. Install the application. The Android File Transfer application will launch... -
Page 17: Section 6: Using The Keyboard
Using the Keyboard Entering text Enter text using the onscreen keyboard. In most apps it will open automatically. In others, open the keyboard by touching where you want to type. *Depending on what you are doing, some of the keys appears when you are searching or browsing the net. -
Page 18: Gesture Typing
Keyboard C: Enter Insert smileys Back button at the bottom of the screen. Gesture Typing after each word. The keyboard will anticipate and predict the next word in your sentence. -
Page 19: Basic Editing
Basic Editing Move the insertion point: Touch where you want to type. The cursor will blink in the new position and a blue tab will appear below it. Drag the tab to move the cursor. The nearest word will be highlighted and blue tabs with appear. -
Page 20: Section 7: Exploring Apps
Exploring Apps Open up some Apps to better familiarize yourself with your new tablet. Tap the Clock app to access your alarm clock, timer, or stopwatch. Clock Timer Stopwatch Alarm Night Mode/ Clock Settings Tap to change Time Zone Tap the camera app to take pictures and videos to share with your friends and family. -
Page 21: Included Apps
Included Apps Browser: Browse the web Calculator: Basic calculator functions Calendar: Keep track of your schedule and set reminders Camera: Take photos and record videos Chrome™: Browse the web with Google Chrome. Clock: Set the time and alarms Contacts: Manage your contacts Downloads: Manage your downloads Drive Email: Sync your email accounts... - Page 22 Gmail: Fast, searchable email from Google Google: Stay up to date with Google Now cards Google Settings: Edit your Google Account settings Google+™: Stay connected and share life as it happens with Google+ Hangouts™: One-on-one and group conversa- tions with photos, emoji, and video calls for free. : Type documents, make spreadsheets and presentations Maps™: Find directions and locations...
-
Page 23: Uninstalling Apps
Play Store: Shop for music, books, magazines, movies, TV shows, games and apps Pogoplug: Connect to the internet to access and Settings: Adjust settings on your tablet Sound Recorder: Record audio using the built-in microphone VideoPlayer: Video and image gallery Voice Search: Search the web by speaking instead of typing YouTube: Stream your favorite videos on the web... -
Page 24: Section 8: Google Accounts
Tap Uninstall Google Accounts Why use a Google Account? Google Accounts let you organize and access your personal information from any computer or mobile device. Sync & Back-up: Whether you draft an email, add a contact, or add an event to your calendar, your work continuously gets backed up and synchronizes with any computer with the same Google Account. -
Page 25: Add A Google Account
Add a Google Account Tap Settings. Under Personal, tap Accounts. Tap Add account. Tap what kind of account you want to add and sign in. Remove a Google Account Tap Settings Under Personal, tap Accounts. Tap on the type of account that you want to remove. -
Page 26: Google Play
Tap the account that you want to remove. Tap Menu icon. Tap Remove account. Google Play Google Play brings together all of your favorite content in one place. Access mov- ies, TV shows, music, books, magazines, apps, and more when you sign in with your Google Account. -
Page 27: Google Play Recommendations
Purchase music, games, books, magazines, movies, TV shows, and apps on the Google Play Store app Play Store With Google Play, shop the world’s largest eBookstore now with over 5 million books- available on web, tablet, and phone. Play Books With Google Play Newsstand, discover more of the news and magazines you love with a newsstand made for you. -
Page 28: Section 9: Google Now
expect before you leave for work, or how your favor- ite sports team is doing. To dismiss a card from the Google Now screen, swipe it away. The card will return the next time it’s relevant, which may be hours or days from now. You can turn Google Now cards on or off at any time. - Page 29 Google Now: These settings allow you to turn Google Now On or Off. It will also take you through a brief introduction to Google Now and you will be given the chance to opt in. From the settings screen you can also change the priority of cards and also sound settings for Voice settings: Voice settings control different aspects of speech input and output.
- Page 30 Voice Actions After installing the Google Search app you can use Voice Actions to get directions, send messages, and perform a number of other common tasks. To initiate a Voice Action you can: Home Screen Next, speak the Voice Action you want to use. Here are some typical examples: “Set alarm for 8:30 a.m”...
-
Page 31: Section 10: Voice Actions
Voice Commands To initiate a Voice Action touch the Microphone icon *Voice Actions will only be available after down- loading the Google Search app. Some handy voice commands are: Followed By Examples [Words you want “bike shoes” to search for] “Map of”... -
Page 32: Section 11: Tablet Settings
Tablet Settings Wi-Fi: Turn Wi-Fi on to see available networks and connect. Bluetooth: Turn on Bluetooth to sync to another device. Display: Adjust brightness, change your wallpaper, turn on/off screen rotation, sleep settings, and font size. alarm sounds. Battery: Provides battery usage data. Screenshots: Display or hide the screenshot button in the status bar. -
Page 33: Extending Battery Life
Tips & Tricks Extending Battery Life Reducing the Brightness of your screen can help extend your battery life. In Settings, tap Display. Tap Brightness level. Use the slider to adjust the brightness. Then tap OK. Use a Quick Screen Timeout. In Settings tap Display. -
Page 34: Reset/Restore
Reset/Restore Reset Device Reset the device by pressing the power button for 6-10 sec- onds. Factory Restore in the settings app. Then select Factory data reset to restore factory settings. This will erase all data on the tablet. Troubleshooting Cannot turn on the tablet. Check the tablet’s power level. -
Page 35: Customer Support
Customer Support Visit ematic.us/support for customer support regarding your device. online. You will be provided a ticket number regarding your issue which you can refer to when contacting us further. -
Page 36: Limitations Of Liability Statement
You agree that you have sole responsibility for adequate protection and backup of data and/or equipment used in connection with the product and software and will not make a claim of any nature against Ematic for lost data, inac- and subsidiary entities, successors, assigns, partners, managers, members, employees, ties, losses, demands, actions, causes of action, claims, costs and expenses (including, without limitation, reasonable attorneys’... - Page 37 FCC Caution: Any changes or modifications not expressly approved by the party responsible for compliance could void the user's authority to operate this equipment. NOTE: This equipment has been tested and found to comply with the limits for a Class B digital device, pursuant to Part 15 of the FCC Rules.